Using the Expeditions Panel
The expedition panel allows you to create a route through the galaxy, with waypoints, from a defined time and date to an end date.
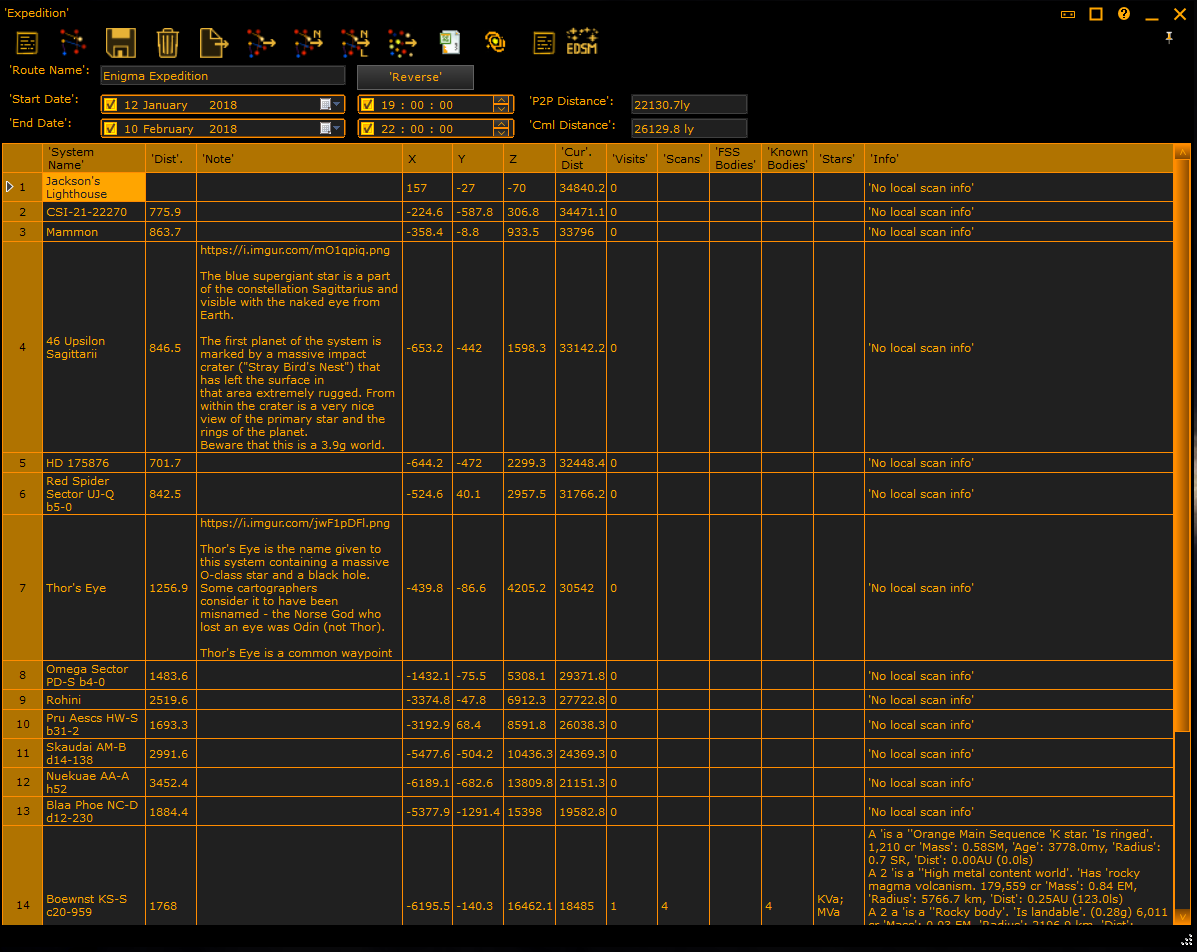
The expedition lists the systems in order.
Then you can enter systems manually into the System Name Column. As you enter them, it will show the distance between known systems.
Note that systems from the history grid can be exported to this grid by right clicking and then Add to | Expedition.

Right clicking on an entry in the grid allows you copy, paste, insert and remove row entries. Using this you can re-order the route.

You can reorder the systems by left clicking on a row header, and then drag up/down to move that row to the place you selected. Release the left button to reorder.
The buttons along the top allow you to configure the expedition panel, from the left:
-
Select route - load a saved route in
-
New expedition - clear the route
-
Save expedition - save to the name given in the route name box.
-
Delete expedition - delete the selected expedition
-
Import File - import either a CSV file of system names, a text file, or a JSON file.
- CSV Column A is used for the system name. All other columns ignored.
- Text file just consists of system names new line separated
- JSON imports - see the export JSON for the format
-
Import route from route panel
-
Import a Nav Route
-
Import the latest Nav Route
-
Import systems from EDSM or the systems database
-
Export the route to a file, either CSV or JSON file.
-
Show the expedition on the 3D Map.
-
Select the information known about the system. Various options are listed to show the same information as found in the surveyor
-
EDSM - Use EDSM to obtain information about a system.