Setup Local Development Environment
This page is may help developers to work with dcm4che libraries / dcm4chee archive code locally on their systems. The local development environment allows you to work on your archive application, testing it as you go on your own system.
You will need to have the following installed or configured, and know at least the basics of using them, before proceeding :
- Java Open JDK
- Maven
- IDE : Required if you want to work / debug / test dcm4che libraries and archive application locally on your system. You may use any IDE that suit your needs.
- Git : Required for cloning / pulling latest code of dcm4che libraries and archive application from github
-
Build
masterbranch of dcm4che 3 Library - only necessary to build unreleased version, which is not (yet) available in the Maven repository:> $git clone https://github.com/dcm4che/dcm4che.git > $cd dcm4che > $mvn clean install -
If there are subsequent changes to the library code, you just need to
> $cd dcm4che > $git pull > $mvn clean install -
Build
masterbranch of dcm4chee Language Repository - necessary to build language resources used by User Interface of the archive :> $git clone https://github.com/dcm4che/dcm4chee-arc-lang.git > $cd dcm4chee-arc-lang > $mvn clean install -
If there are subsequent changes to the language repository, you just need to
> $cd dcm4chee-arc-lang > $git pull > $mvn clean install -
Build
masterbranch of dcm4chee archive :> $git clone https://github.com/dcm4che/dcm4chee-arc-light.git > $cd dcm4chee-arc-light > $mvn clean > $mvn install -
If there are subsequent changes to the archive code, you just need to
  > $cd dcm4chee-arc-light
  > $git pull
  > $mvn clean
  > $mvn install
Note : By default, building the archive as specified above, builds it for Postgres DB psql and builds an unsecured
version of the archive.
-
To build the archive for a specific database (supported by the archive code) :
> $mvn install -D db={db2|firebird|h2|mysql|oracle|psql|sqlserver}f.e. to build archive with Oracle DB backend
> $mvn install -D db=oracle -
To build the archive with a secured WEB UI (with default Postgres DB
psql) :> $mvn install -D secure=uiOR to build archive with specific database (supported by the archive code) and secured Web UI
> $mvn install -D db={db2|firebird|h2|mysql|oracle|psql|sqlserver} -D secure=uif.e. to build archive with Oracle DB backend and secured Web UI
> $mvn install -D db=oracle -D secure=ui -
To build the archive with a secured WEB UI and secured RESTful services (with default Postgres DB
psql) :> $mvn install -D secure=allOR to build archive with specific database (supported by the archive code) and secured Web UI as well as secured RESTful services
> $mvn install -D db={db2|firebird|h2|mysql|oracle|psql|sqlserver} -D secure=allf.e. to build archive with Oracle DB backend and secured Web UI as well as secured RESTful services
> $mvn install -D db=oracle -D secure=all
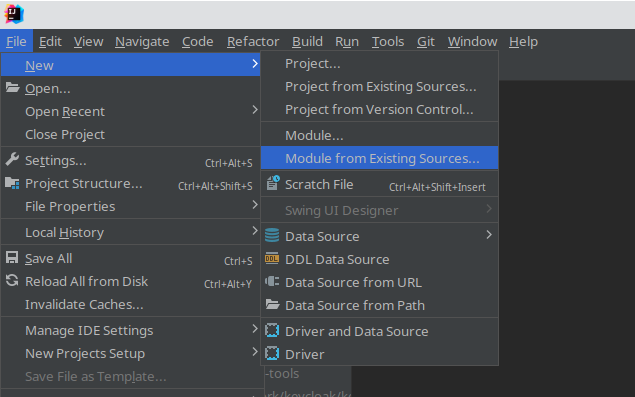
This step is optional and may be required for developers who want to work / debug / test the archive application locally on their system.
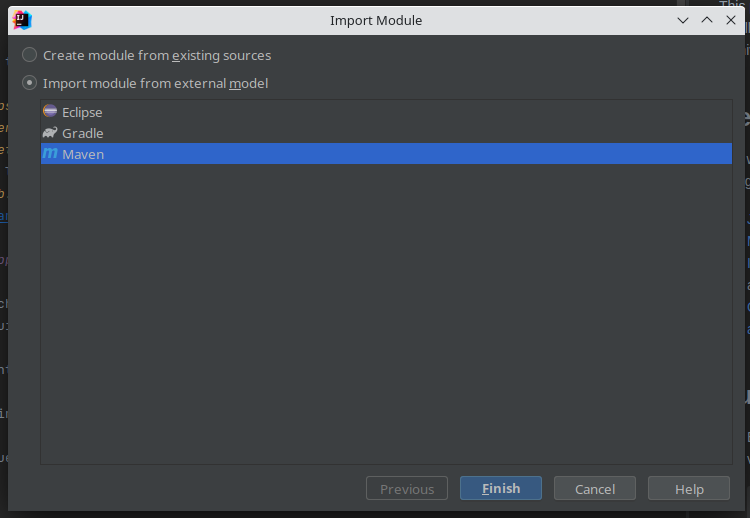
Once you have downloaded and setup your IDE, just import the dcm4che libraries and dcm4chee archive application you cloned in above steps into your IDE.
Below screenshots are taken w.r.t. IntelliJ IDEA and are for reference purposes only. How you import the modules in your respective IDE will differ based on the IDE you have installed.
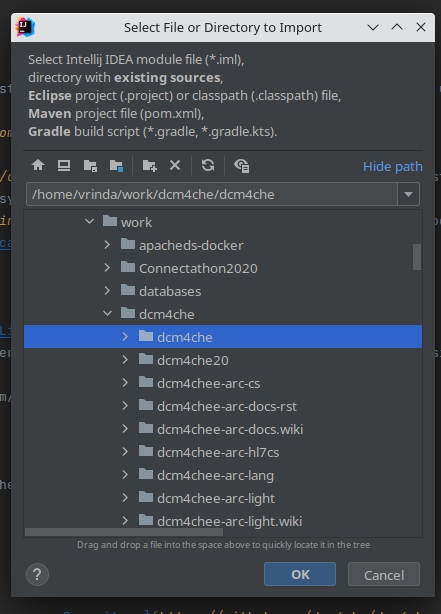
Repeat the above steps for dcm4chee archive application to import the dcm4chee-arc-light cloned on your system into the IDE.
Once you have built the libraries and archive application as shown in Building archive application, you can proceed with deploying your archive in Wildfly following either :
-
Running on Docker : With dockerized startup, the deployed archive by default is the released version indicated in the startup of archive container. To override this with your locally built archive application :
- Stop the
arccontainer - Remove the mapped out
-
/var/local/dcm4chee-arc/wildfly/deployments/dcm4chee-arc-ear-5.x.x-{db}-{secure}.earand /var/local/dcm4chee-arc/wildfly/deployments/dcm4chee-arc-ui2-5.x.x-{secure}.war
-
- Copy your locally built
dcm4chee-arc-ear-5.x.x-{db}-{secure}.earanddcm4chee-arc-ui2-5.x.x-{secure}.warinto/var/local/dcm4chee-arc/wildfly/deployments/ - Start the
arccontainer
Note :
- Replace
x.xwith your current built version number f.e.5.31.0 -
{db}by default would bepsql, else replace with the DB backend you used for installing / building your archive application. - Likewise
{secure}is applicable only if you have installed / built secured (UI / REST) versions of the archive.
- Stop the
As developers or anyone interested in understanding how the archive works, you may want to debug a specific service or functionality / feature of the archive. As the archive is vast and has several REST APIs as well as features one can work with, choose to debug and understand one service or feature at a time.
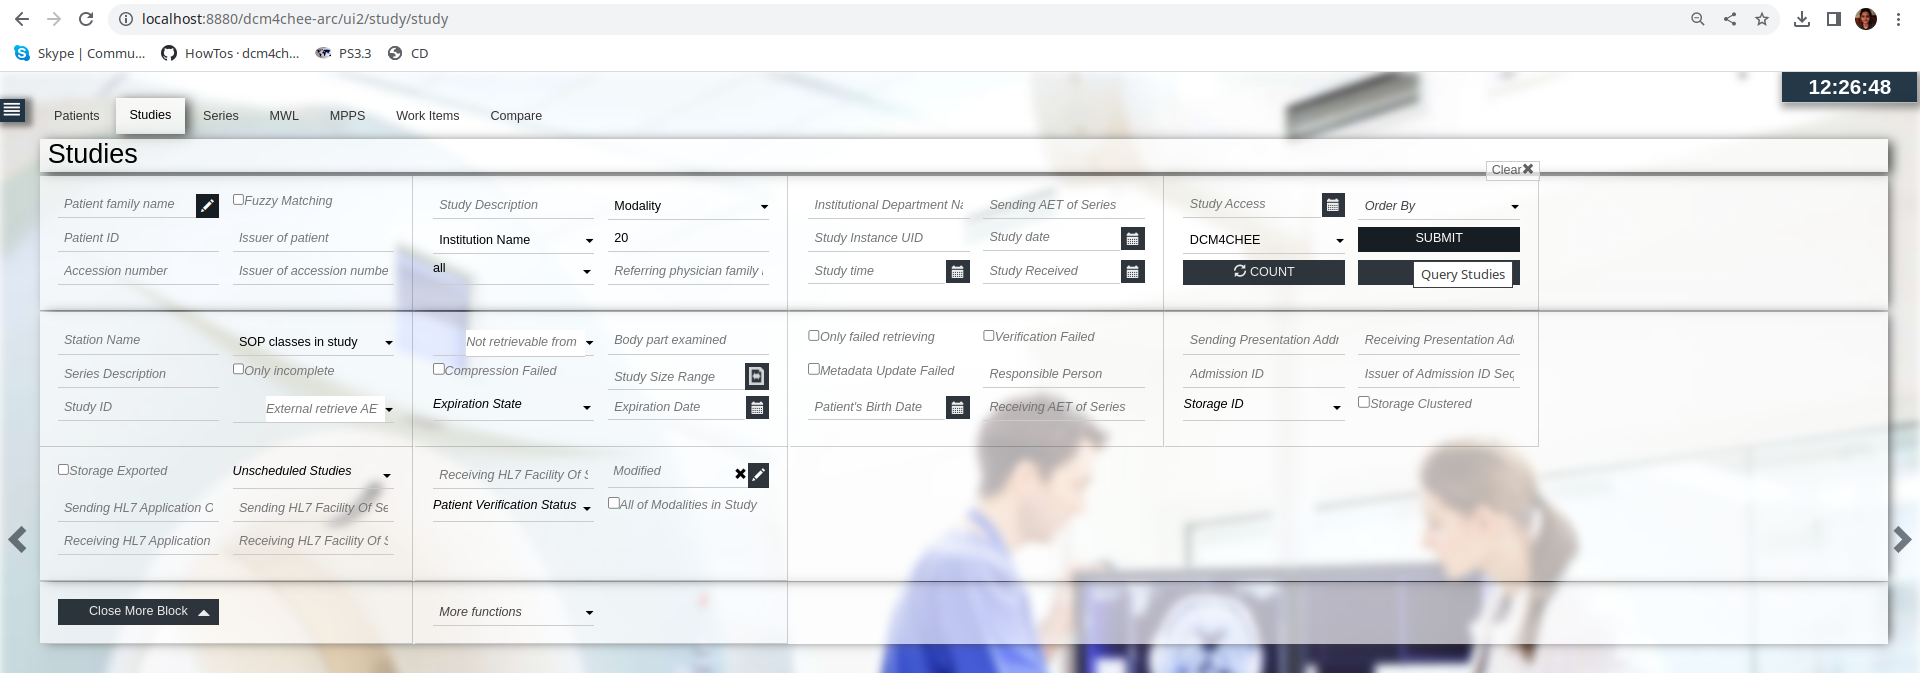
As an example, once your archive is up and running, and you access the archive's user interface at
http[s]://<host>:<port>/dcm4chee-arc/ui2 leading to the Navigation page - Studies tab, the most commonly used
REST service is Search for Studies
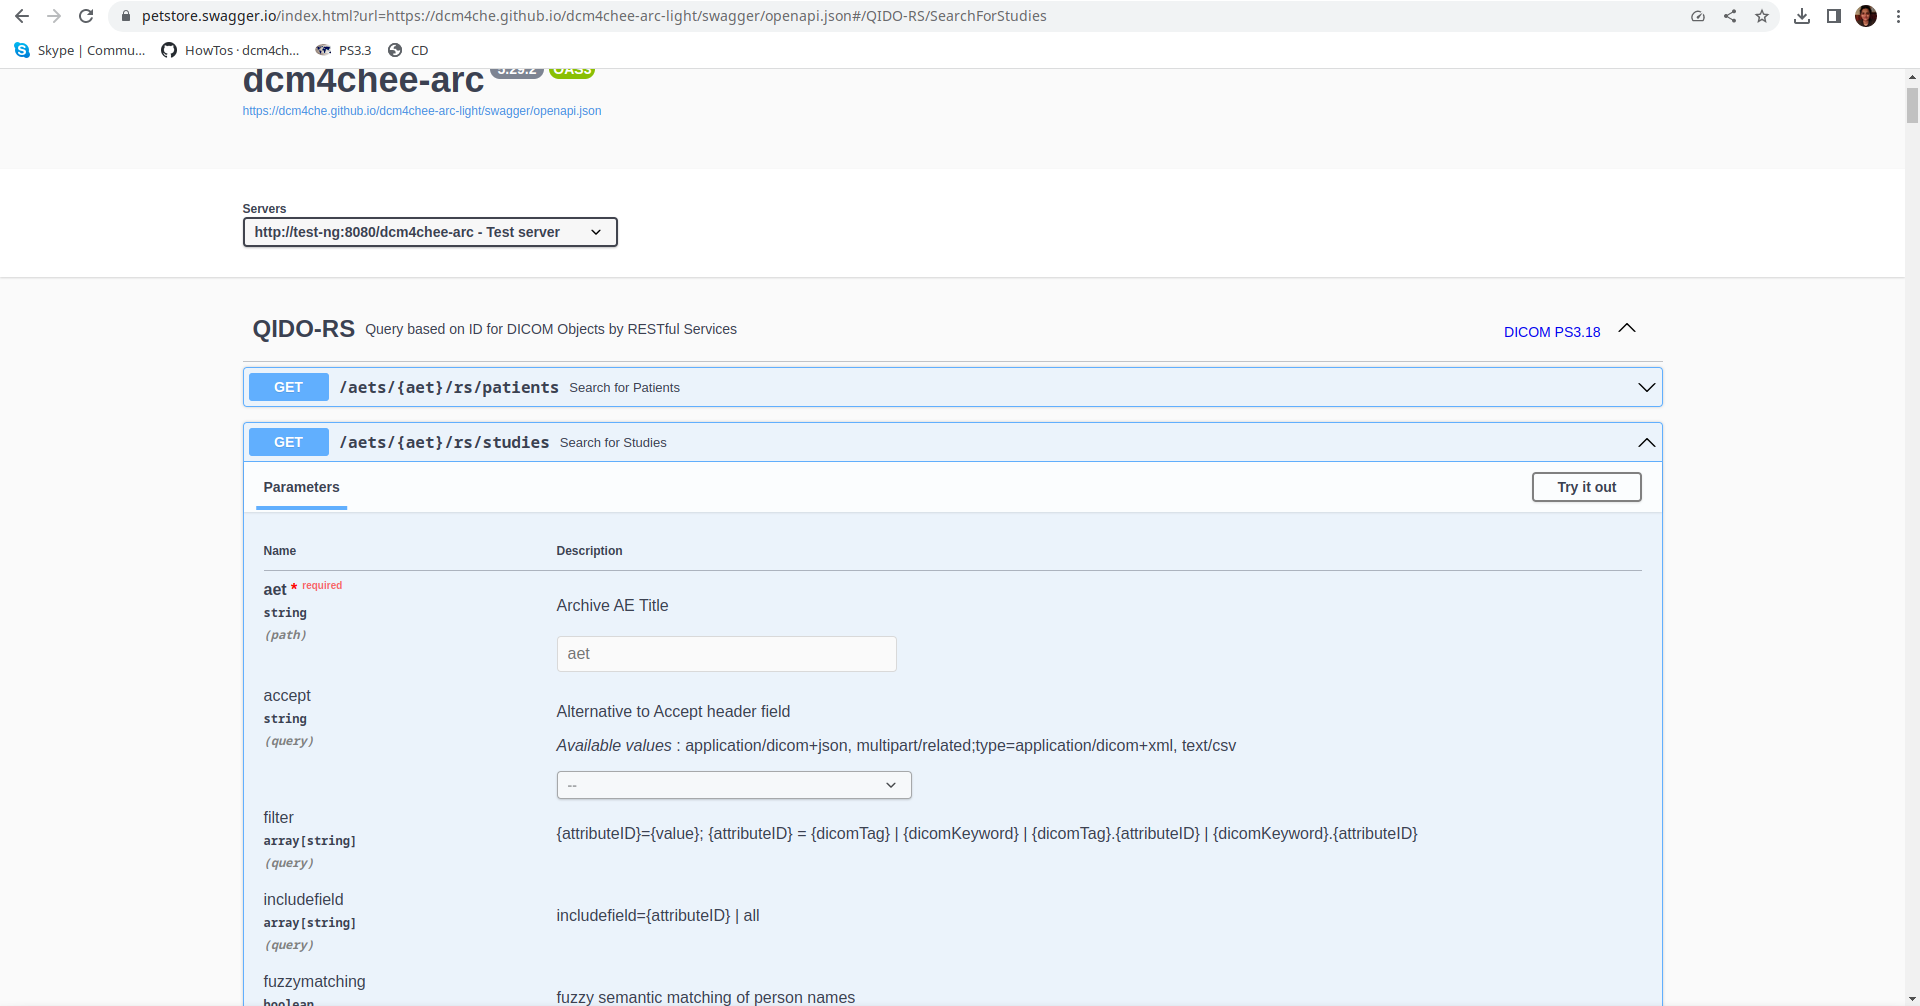
which gets invoked on hitting the SUBMIT button.
To debug any REST APIs,
you can always look at the Wildfly server log ($Wildfly_Home/standalone/log/server.log) where the invoked REST service
is logged by the Java class where its processing starts, f.e. in above case for Search for Studies
12:36:00,324 INFO [org.dcm4chee.arc.qido.QidoRS] (default task-7) Process GET /dcm4chee-arc/aets/DCM4CHEE/rs/studies?limit=21&includefield=all&offset=0 from null@127.0.0.1
You can now set a debug point in QidoRS class - searchForStudies present in the imported dcm4chee-arc-light in your IDE and debug the functionality from thereon.