Tutorial: Set up the IDE
Assuming you have a relational database, this tutorial describes how to set up your IDE to access the data via Speedment. Depending on your choice of IDE, please refer to the corresponding section. For an even quicker project setup, please refer to the Quick Start which shows you how to set up a Speedment powered Java project by copy-pasting and run a single line to your command line.
Following the specific instructions for your IDE, you will start the Speedment UI for your new project. You are then set to start exploring the power of Speedment. The recommended next step is the step 2 of the Get started with the UI tutorial. (Step one of that tutorial is a less verbose version of the page you have just read.)
This guide explains the steps of creating a new Speedment project in IntelliJ IDEA.
-
Go to File → New → Project...
-
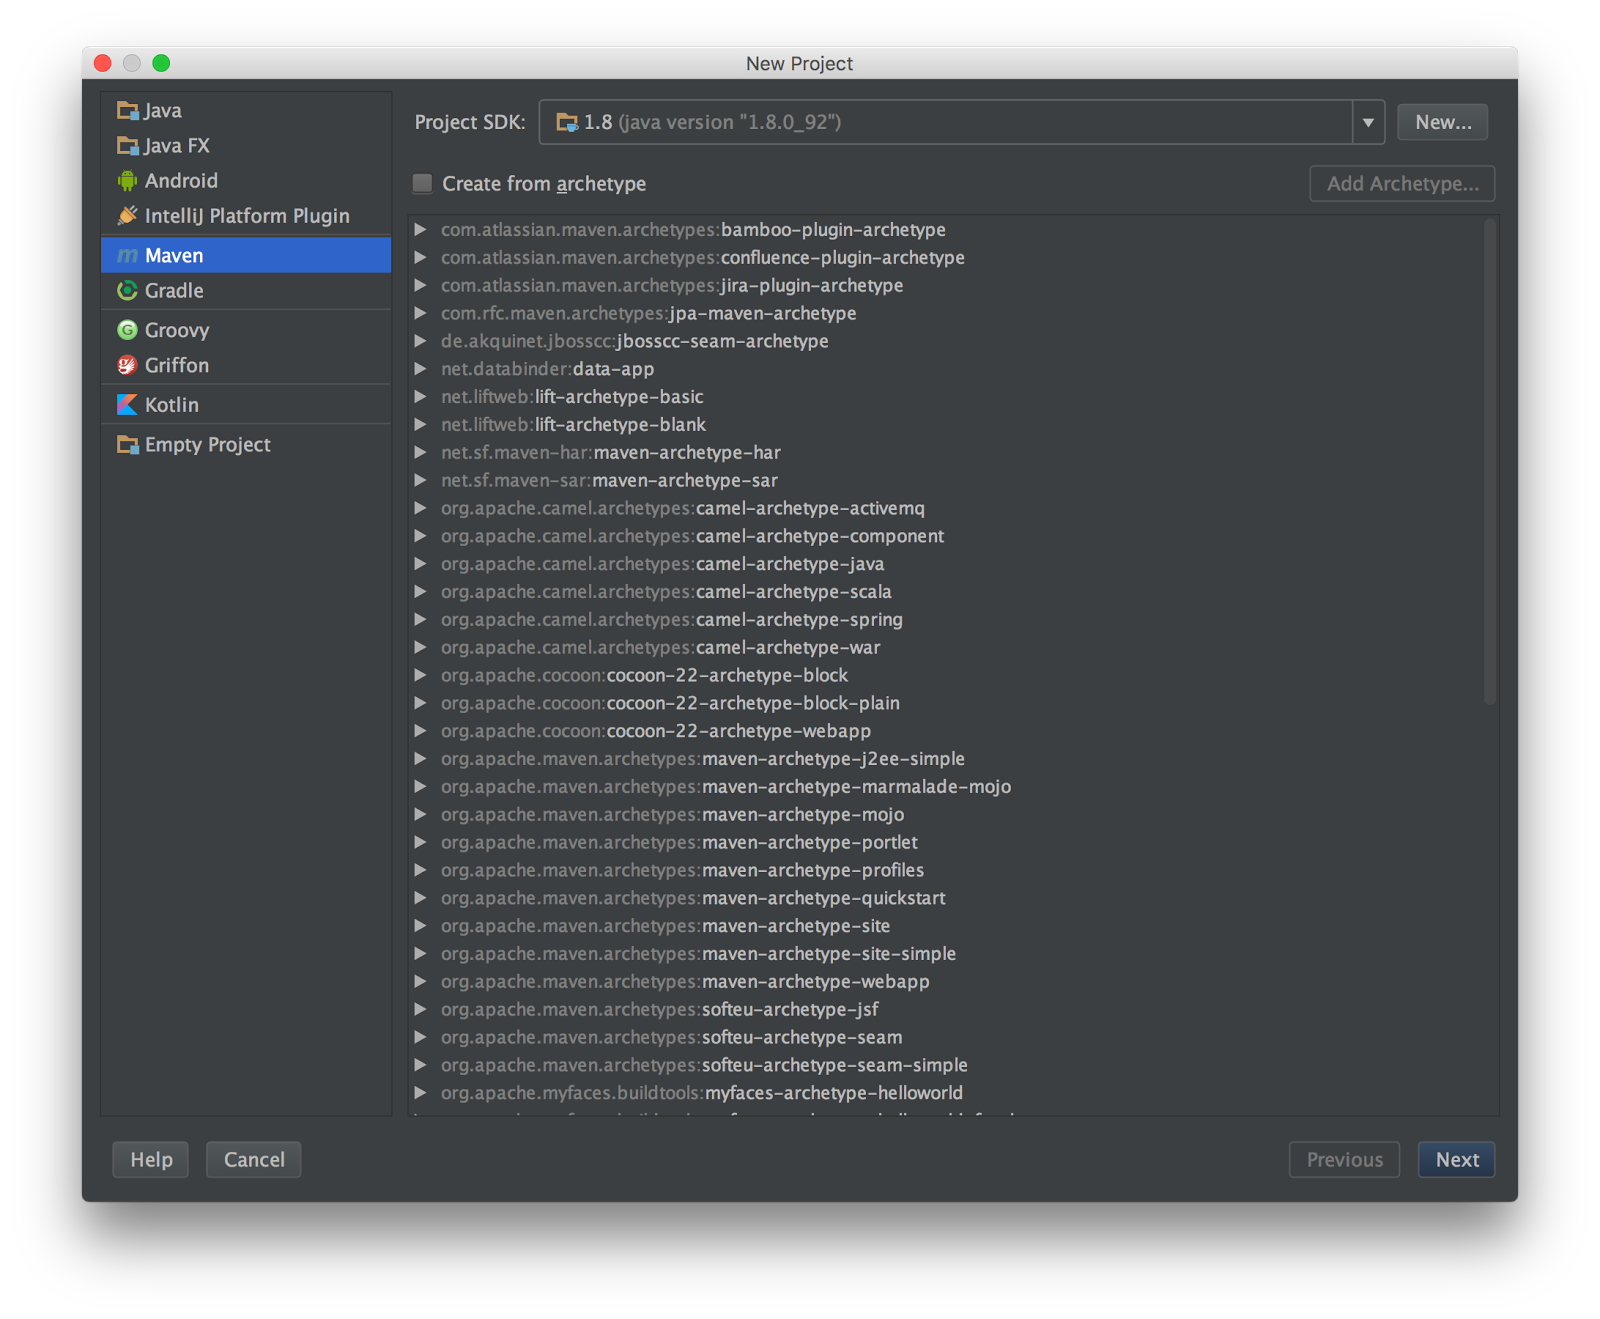
Make sure you are under the Maven tab, make sure that the Project SDK is 1.8 and that the Create from archetype-checkbox is unchecked. Click the Next button.
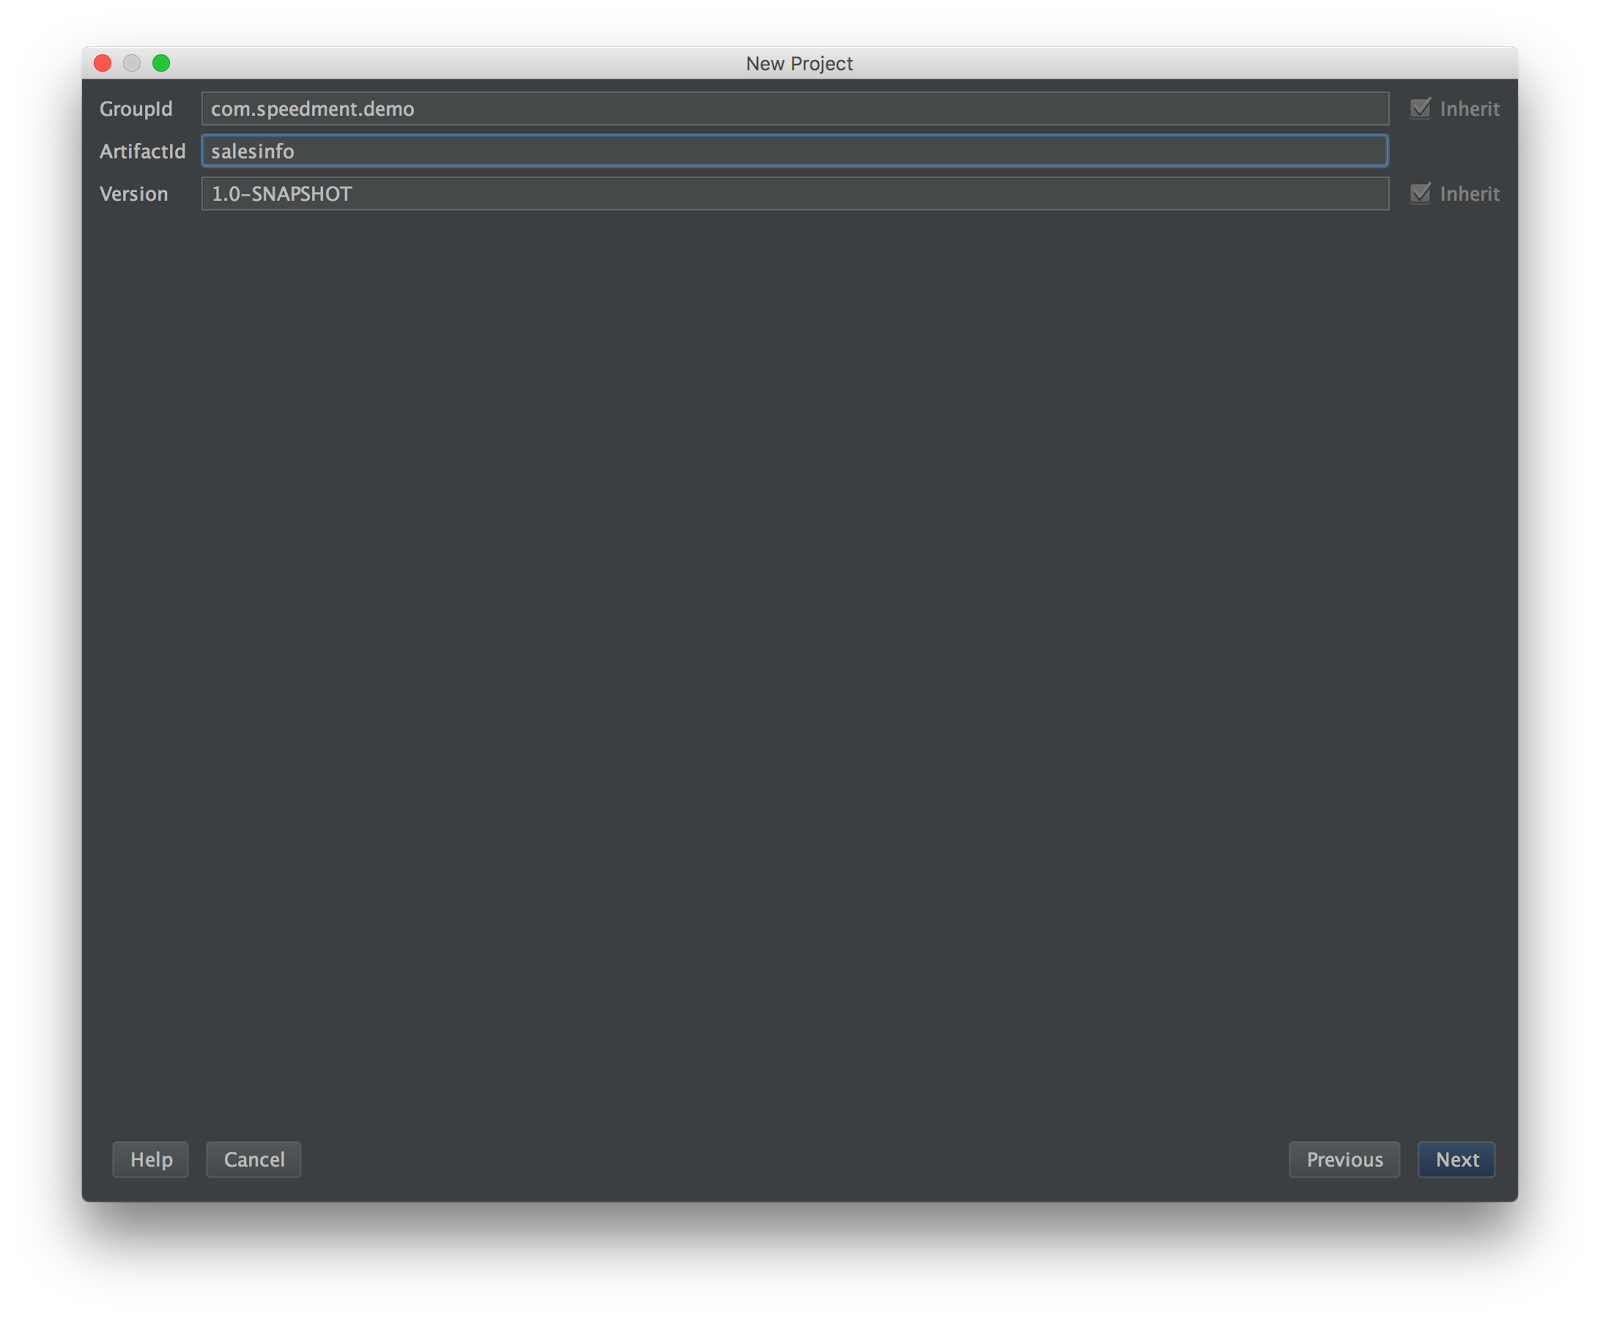
- Enter a GroupId, ArtifactId and Version for the new project. Any values can be used.
When you have entered the properties, click Next.
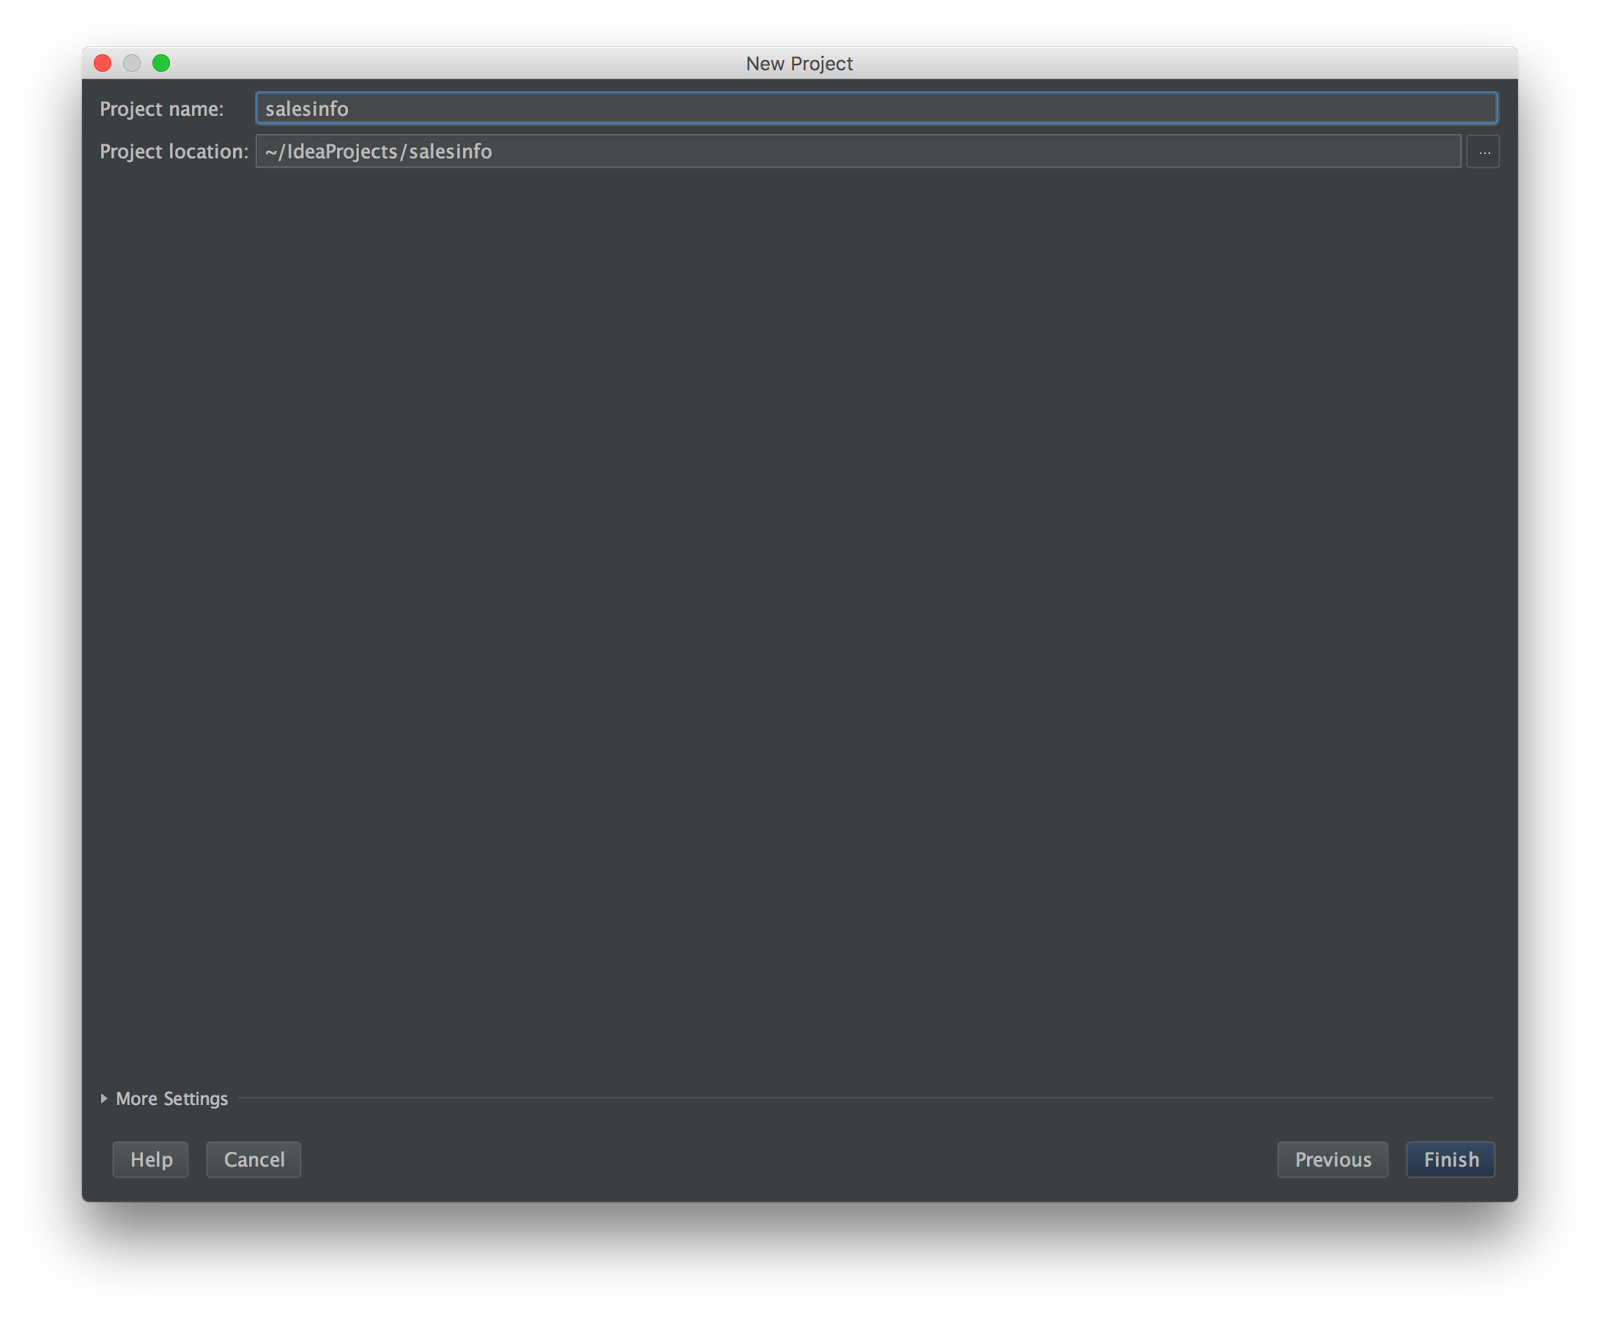
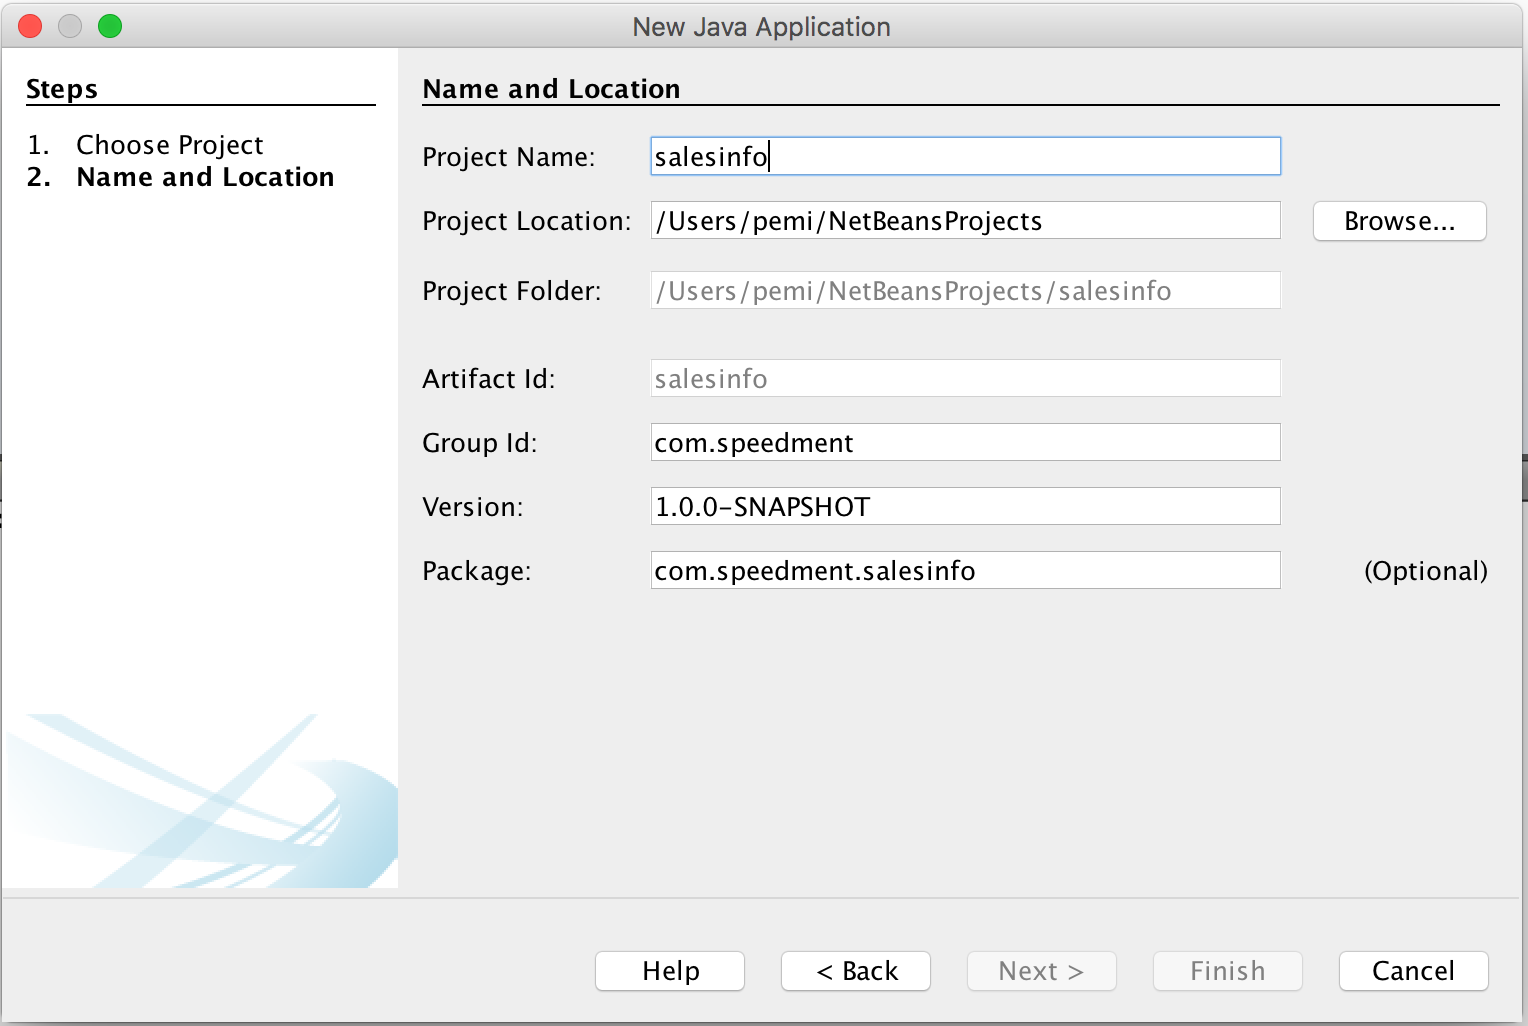
- Enter a Project name and Project location. Any values can be used. Click Finish.
- You will now return to the workspace of IntelliJ IDEA. Expand the newly created project by clicking the arrow on the left side of the project name.
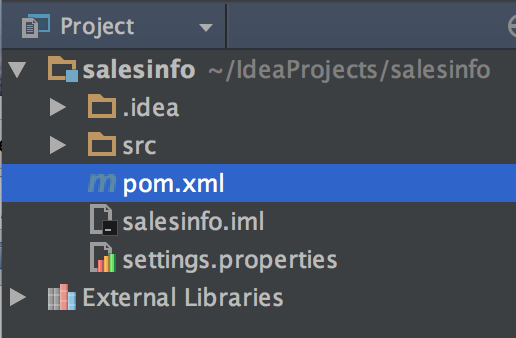
- Double-click the file named "pom.xml" and copy-paste the following to the contents of that file.
<?xml version="1.0" encoding="UTF-8"?>
<project xmlns="http://maven.apache.org/POM/4.0.0"
       xmlns:xsi="http://www.w3.org/2001/XMLSchema-instance"
       xsi:schemaLocation="http://maven.apache.org/POM/4.0.0 http://maven.apache.org/xsd/maven-4.0.0.xsd">
  <modelVersion>4.0.0</modelVersion>

  <groupId>com.company</groupId>
  <artifactId>speedment-test</artifactId>
  <version>1.0.0-SNAPSHOT</version>

  <properties>
      <maven.compiler.source>1.8</maven.compiler.source>
      <maven.compiler.target>1.8</maven.compiler.target>
  </properties>

  <build>
      <plugins>
          <plugin>
              <groupId>com.speedment</groupId>
              <artifactId>speedment-maven-plugin</artifactId>
              <version>3.2.10</version>
          </plugin>
      </plugins>
  </build>

  <dependencies>
      <dependency>
          <groupId>com.speedment</groupId>
          <artifactId>runtime</artifactId>
          <version>3.2.10</version>
          <type>pom</type>
      </dependency>
      <dependency>
          <groupId>mysql</groupId>
          <artifactId>mysql-connector-java</artifactId>
          <version>Z5.1.46</version>
          <scope>runtime</scope>
      </dependency>
  </dependencies>
</project>
As perhaps evident from the <dependencies> this assumes a MySQL database. Please replace the <dependencies> to refer to another database if needed as follows.
PostgreSQL
  <dependency>
      <groupId>org.postgresql</groupId>
      <artifactId>postgresql</artifactId>
      <version>42.2.8</version>
      <scope>runtime</scope>
  </properties>
MariaDB
  <dependency>
      <groupId>org.mariadb.jdbc</groupId>
      <artifactId>mariadb-java-client</artifactId>
      <version>2.4.4</version>
      <scope>runtime</scope>
</dependency>- Reimport the edited pom.xml file in case Idea is not configured to do so automatically.
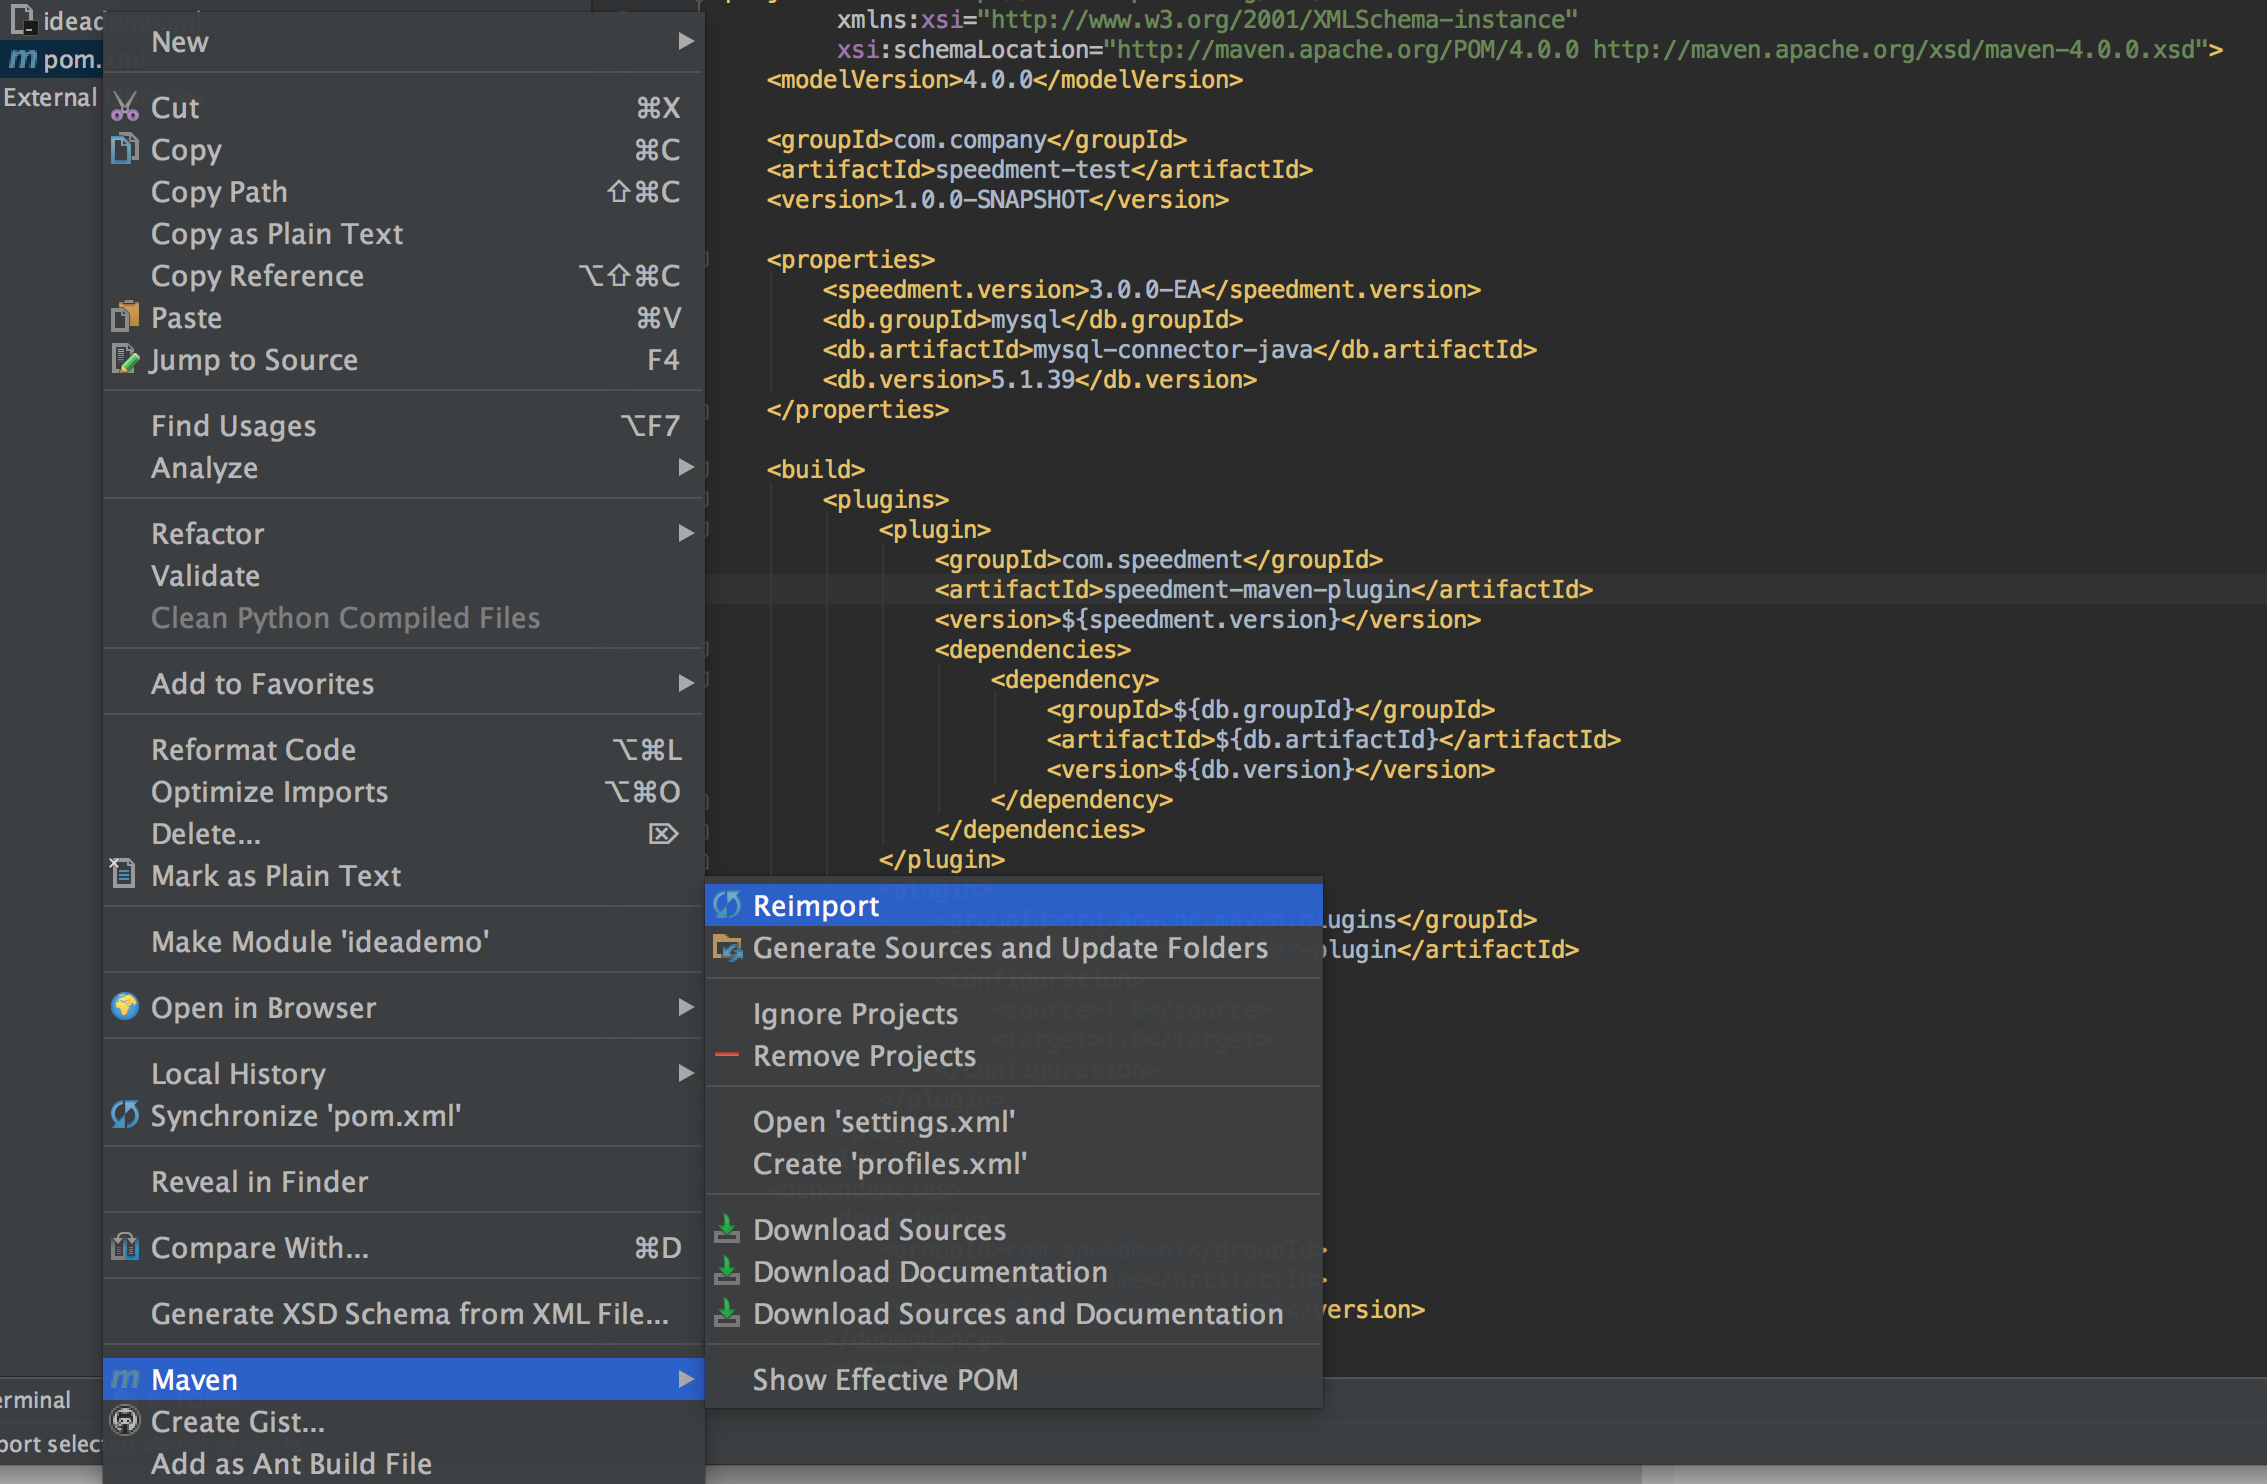
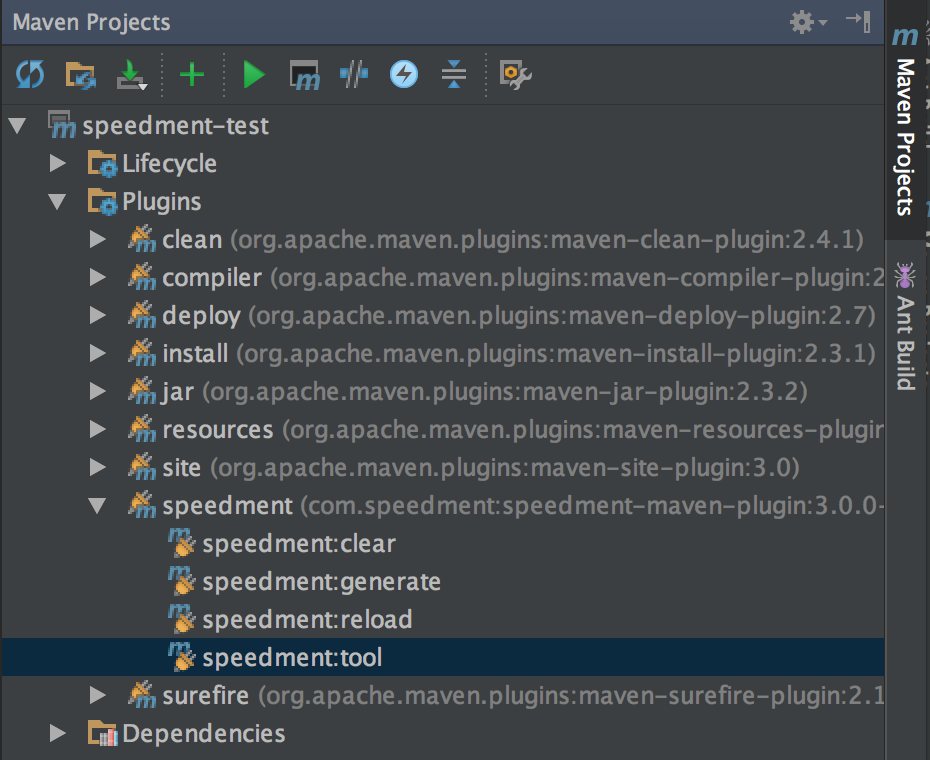
- Run the speedment:tool maven goal to start up the Speedment UI tool.
This guide explains the steps of creating a new Speedment project in NetBeans IDE.
- The first step of creating a new Ext Speeder project in Netbeans is to press the New Project... button in the toolbar.
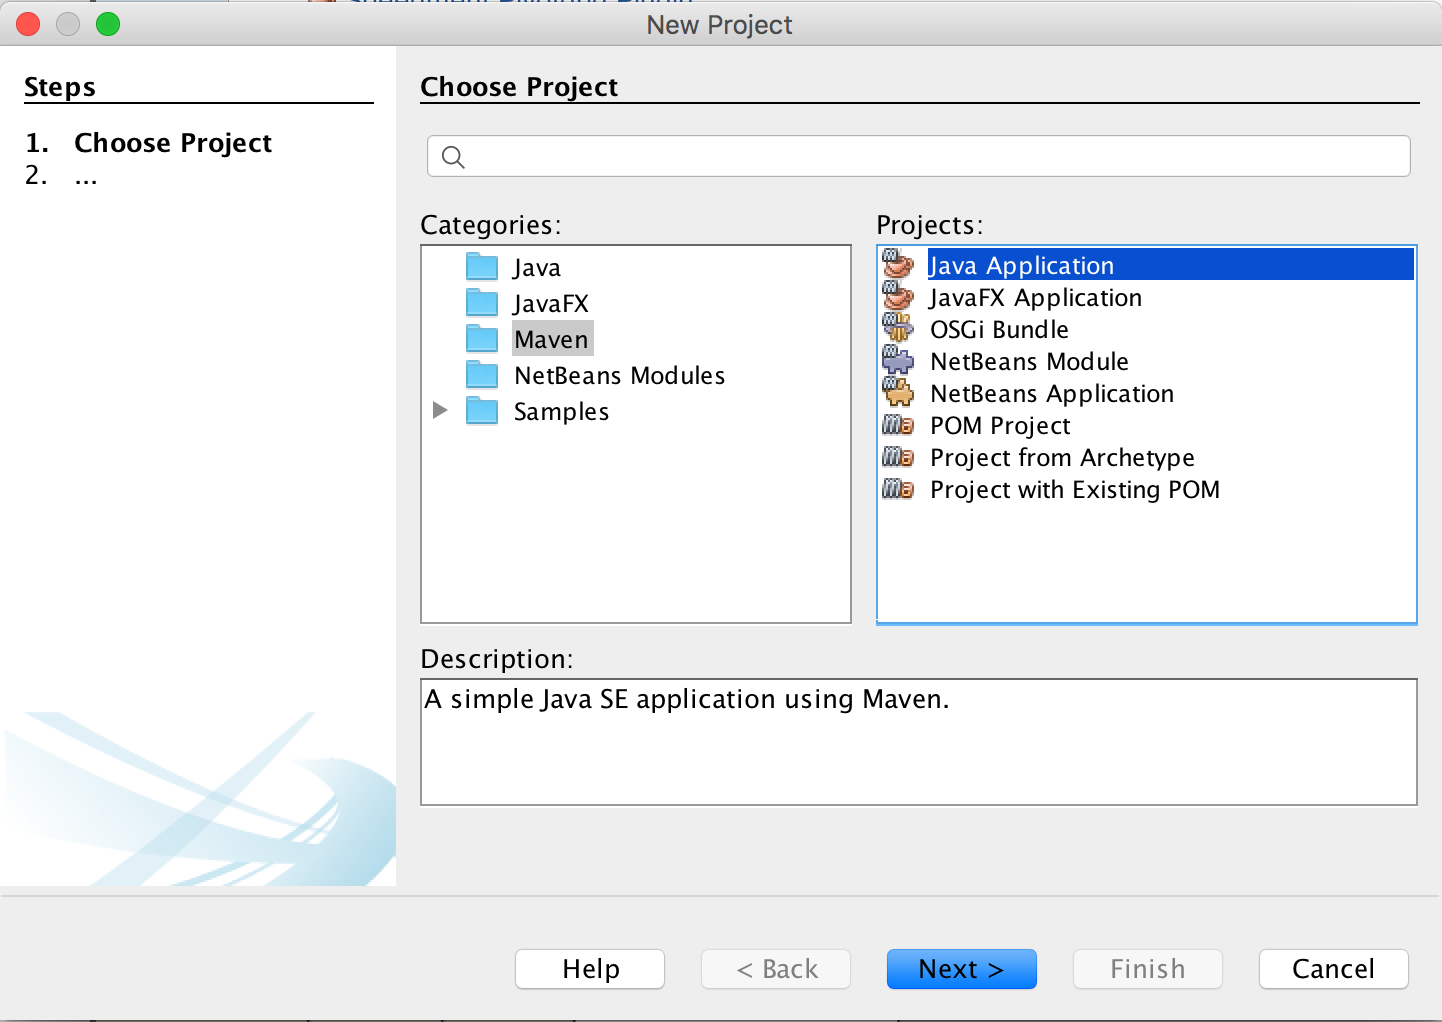
- This will open a guide for creating a new project. Speedment is made for the Maven build tool, so go to the Maven category and select Java Application. Press Next.
- Select a Project Name and perhaps set other properties for the new server application. Any values can be used. Press Finish.
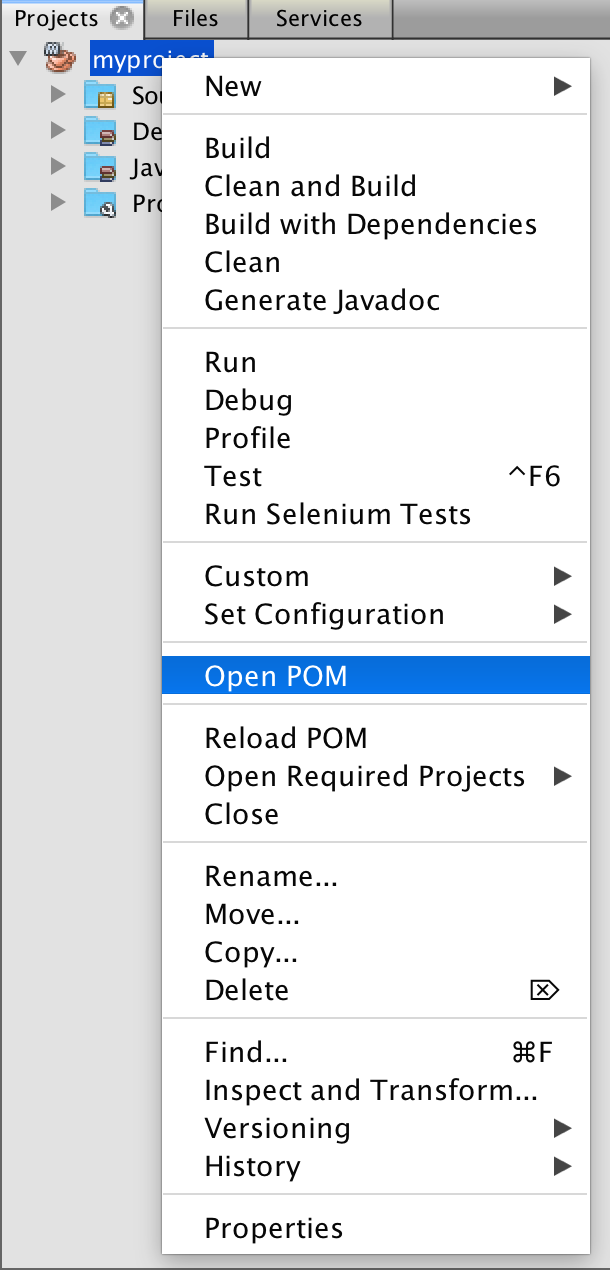
- The new project is created. Right-click on the new project and select Open POM.
- Replace the pom.xml file contents with the following.
<?xml version="1.0" encoding="UTF-8"?>
<project xmlns="http://maven.apache.org/POM/4.0.0"
         xmlns:xsi="http://www.w3.org/2001/XMLSchema-instance"
         xsi:schemaLocation="http://maven.apache.org/POM/4.0.0 http://maven.apache.org/xsd/maven-4.0.0.xsd">
    <modelVersion>4.0.0</modelVersion>

    <groupId>com.company</groupId>
    <artifactId>speedment-test</artifactId>
    <version>1.0.0-SNAPSHOT</version>

    <properties>
        <maven.compiler.source>1.8</maven.compiler.source>
        <maven.compiler.target>1.8</maven.compiler.target>
    </properties>

    <build>
        <plugins>
            <plugin>
                <groupId>com.speedment</groupId>
                <artifactId>speedment-maven-plugin</artifactId>
                <version>3.2.10</version>
            </plugin>
        </plugins>
    </build>

    <dependencies>
        <dependency>
            <groupId>com.speedment</groupId>
            <artifactId>runtime</artifactId>
            <version>3.2.10</version>
            <type>pom</type>
        </dependency>
        <dependency>
            <groupId>mysql</groupId>
            <artifactId>mysql-connector-java</artifactId>
            <version>Z5.1.46</version>
            <scope>runtime</scope>
        </dependency>
    </dependencies>
</project>
As perhaps evident from the <dependencies> this assumes a MySQL database. Please replace the <dependencies> to refer to another database if needed as follows.
PostgreSQL
    <dependency>
        <groupId>org.postgresql</groupId>
        <artifactId>postgresql</artifactId>
        <version>42.2.8</version>
        <scope>runtime</scope>
    </properties>
MariaDB
    <dependency>
        <groupId>org.mariadb.jdbc</groupId>
        <artifactId>mariadb-java-client</artifactId>
        <version>2.4.4</version>
        <scope>runtime</scope>
</dependency>-
Select the new project in the Projects tree. Right-click on the project and select Clean and Build… Netbeans will now download all the Ext Speeder components.
-
A new goal named “speedment tool” will appear in the Navigator panel.
netbeans6 Tip: If the Navigator component is not visible, it can be opened from the menu bar by pressing Window → Navigator or by pressing Ctrl+7 on the keyboard. If it is showing but does not contain anything, it means that the project root node is not selected in the Projects component.
- Double click on speedment tool to launch the Speedment UI.
This guide explains the steps of creating a new Ext Speeder project in Eclipse.
-
Open up a new Eclipse Workspace where the Ext Speeder project is to be located.
-
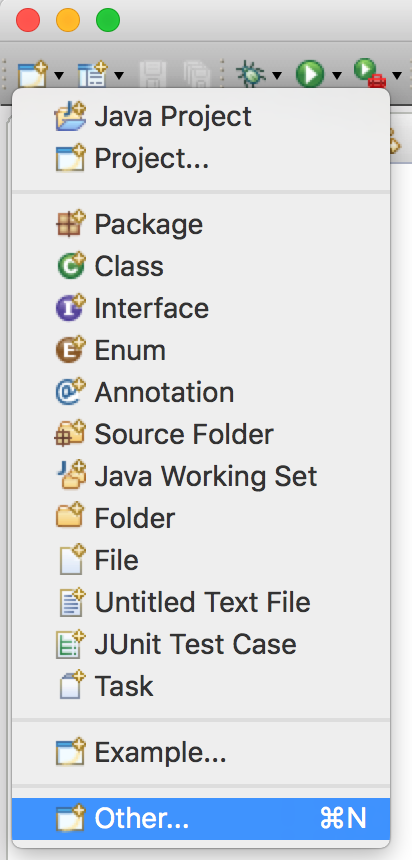
Go to the Create Project button in the toolbar, press the small arrow-down icon next to it and select Other….
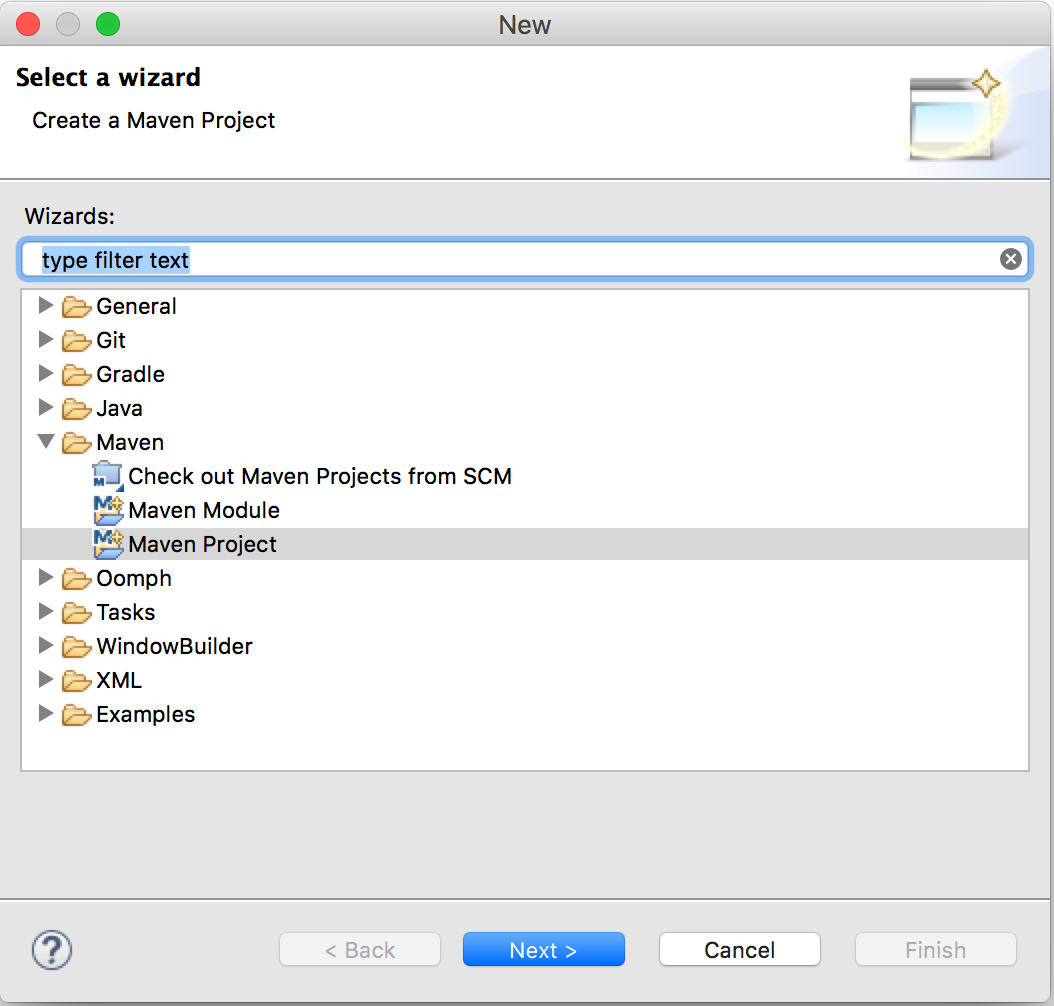
- Select the Maven Project Wizard. Click Next.
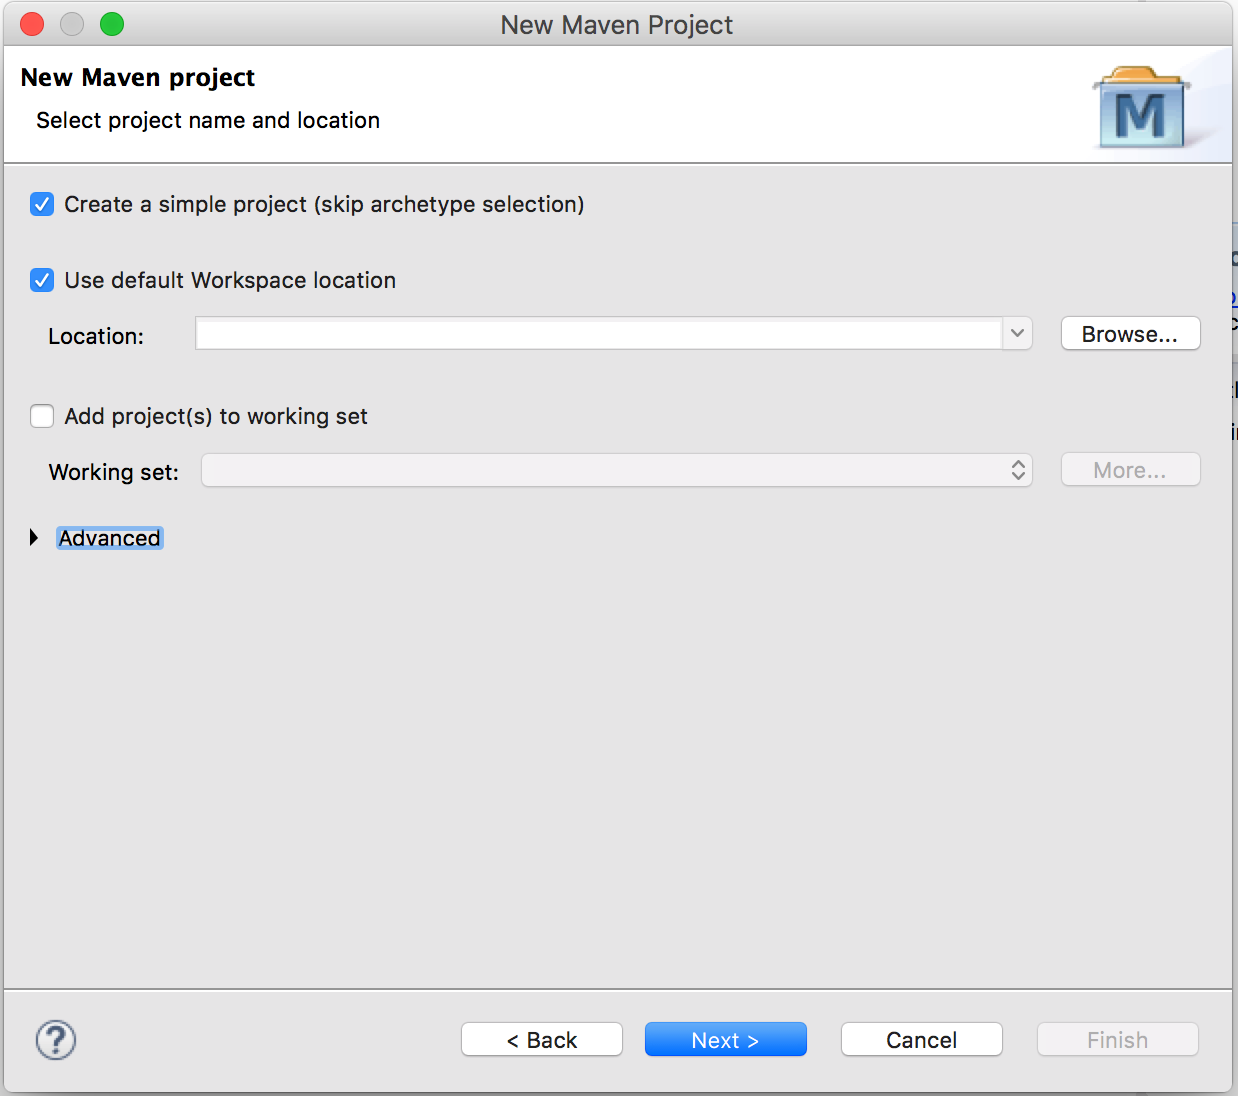
- Make sure that the checkbox “Create a simple project…” is checked. Click Next.
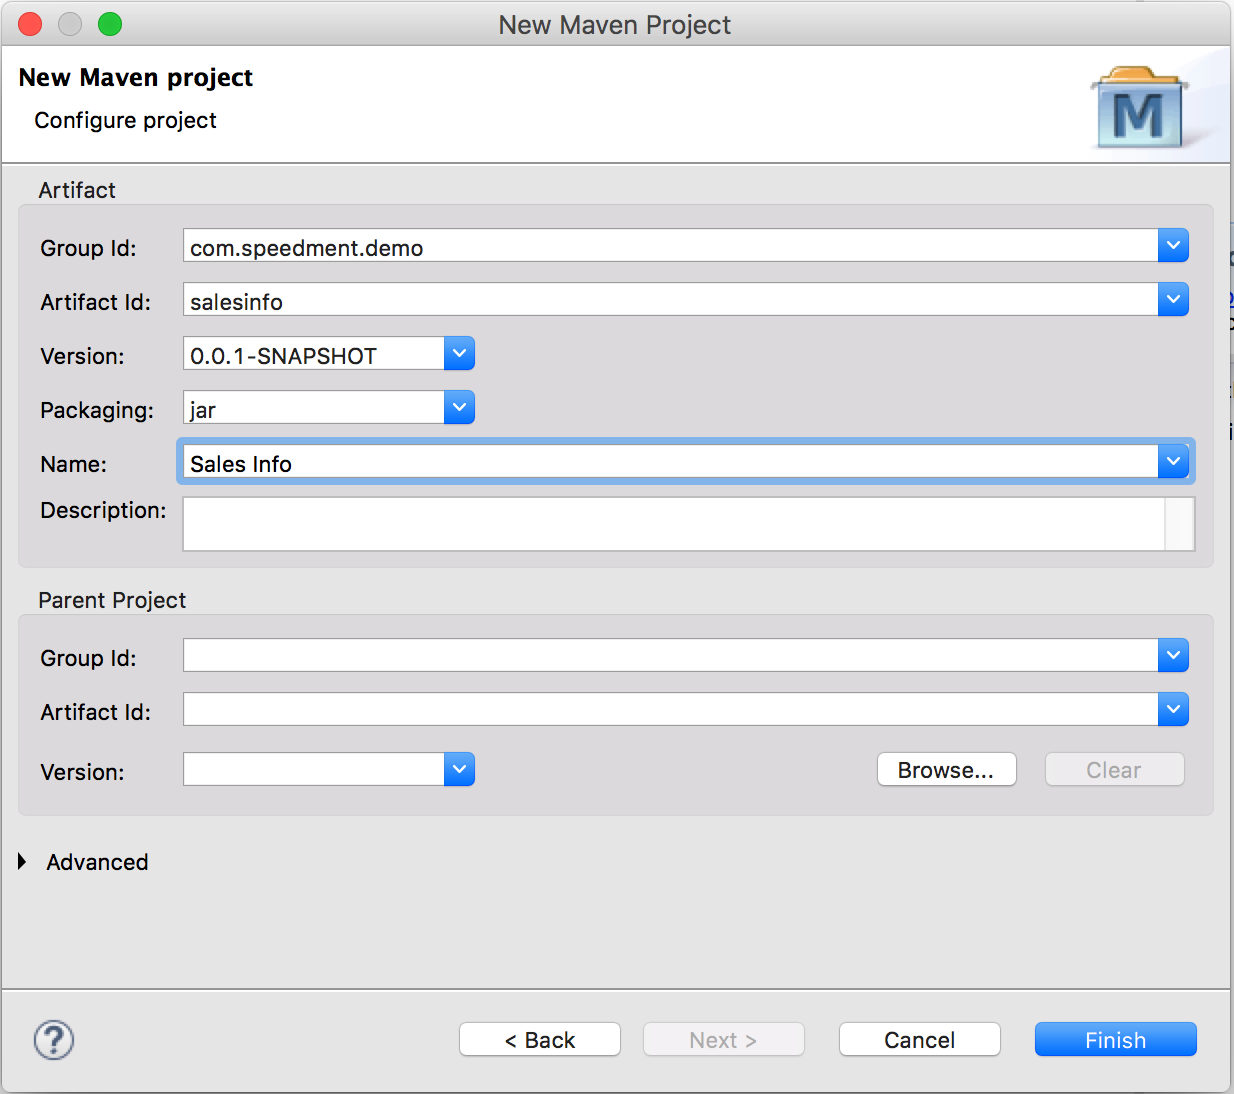
- Fill in the data for your project. Any values can be used. Click Finish.
- The project is created. Expand the project and double-click the file named “pom.xml”. Select the tab “pom.xml” in the lower portion of the editor and add replace the contents of the “pom.xml” file with the following.
<?xml version="1.0" encoding="UTF-8"?>
<project xmlns="http://maven.apache.org/POM/4.0.0"
         xmlns:xsi="http://www.w3.org/2001/XMLSchema-instance"
         xsi:schemaLocation="http://maven.apache.org/POM/4.0.0 http://maven.apache.org/xsd/maven-4.0.0.xsd">
    <modelVersion>4.0.0</modelVersion>

    <groupId>com.company</groupId>
    <artifactId>speedment-test</artifactId>
    <version>1.0.0-SNAPSHOT</version>

    <properties>
        <maven.compiler.source>1.8</maven.compiler.source>
        <maven.compiler.target>1.8</maven.compiler.target>
    </properties>

    <build>
        <plugins>
            <plugin>
                <groupId>com.speedment</groupId>
                <artifactId>speedment-maven-plugin</artifactId>
                <version>3.2.10</version>
            </plugin>
        </plugins>
    </build>

    <dependencies>
        <dependency>
            <groupId>com.speedment</groupId>
            <artifactId>runtime</artifactId>
            <version>3.2.10</version>
            <type>pom</type>
        </dependency>
        <dependency>
            <groupId>mysql</groupId>
            <artifactId>mysql-connector-java</artifactId>
            <version>Z5.1.46</version>
            <scope>runtime</scope>
        </dependency>
    </dependencies>
</project>
As perhaps evident from the <dependencies> this assumes a MySQL database. Please replace the <dependencies> to refer to another database if needed as follows.
PostgreSQL
  <dependency>
      <groupId>org.postgresql</groupId>
      <artifactId>postgresql</artifactId>
      <version>42.2.8</version>
      <scope>runtime</scope>
  </properties>
MariaDB
  <dependency>
      <groupId>org.mariadb.jdbc</groupId>
      <artifactId>mariadb-java-client</artifactId>
      <version>2.4.4</version>
      <scope>runtime</scope>
</dependency>- Speedment is designed to run as a Maven Goal inside the IDE, but Eclipse does not have a list of executable goals like other IDEs have. Instead, an action for running the tool must be created manually.
-
The first time the Speedment Tool is used, press the small arrow to the right of the Run icon in the Eclipse toolbar and select Run As → Maven Build or press Alt+Shift+X, M on the keyboard.
-
Enter a Name: for the goal that can be recognized to be the Speedment Tool, like “speedment-tool”.
-
Enter a Base directory: for the goal to run in. The easiest way of doing this is to press the Browse Workspace… button and select the root node there.
-
Enter “speedment:tool” as the Goals: to run.
-
Click Apply to save the action. To run the tool immediately, press Run.
-
To run the “speedment:tool”-goal again, simply press the arrow-down icon beside the Run button in the toolbar and select the new action. This will relaunch the Ext Speeder tool.