Tutorial: Creating a Speedment Project in Eclipse
In this tutorial we will use an Archetype to get a new Speedment Maven Project up and running on the Eclipse IDE. We will be using Eclipse Mars (with Maven support) for this guide, but the steps should be similar in earlier versions of the development tool as well.
Open up a new Eclipse Workspace where you want to put your Speedment project.
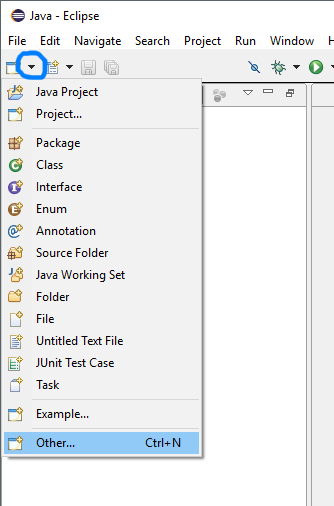
Go to the "Create Project" button in the toolbar, press the small arrow-down icon next to it and select "Other". You can also press "Ctrl+N" on your keyboard.
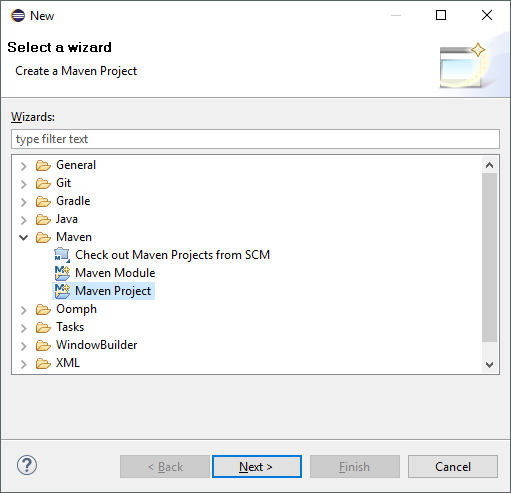
In the Wizard, find the "Maven" folder and select "Maven Project". If you are missing this folder, you are missing the Maven plugin for Eclipse and will need to go back and install that. Press "Next >".

Make sure that the "Create a simple project" option is unchecked before proceeding. If it is checked, you will not be able to specify the template to use for your application and will have to add the speedment dependency and maven plugin manually. Press "Next >".
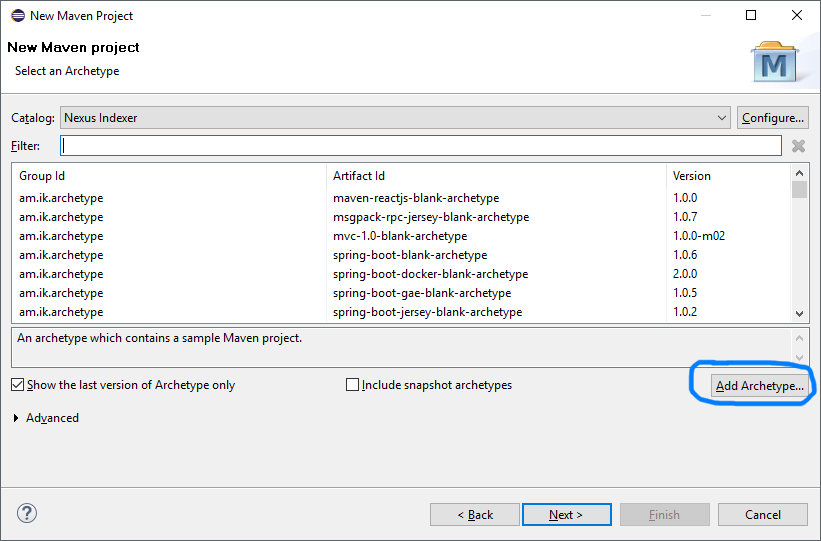
The first time you use the Speedment archetype you might have to add it to your local catalog. To do this, press the "Add Archetype..." button.
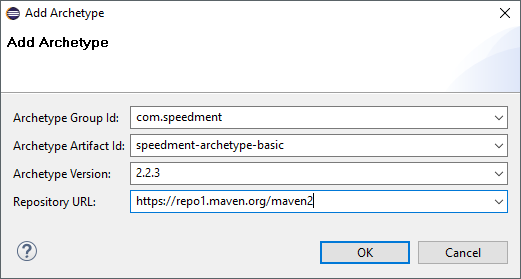
In the dialog that opens, enter the following details:
| Property | Value |
|---|---|
| Archetype Group Id: | com.speedment |
| Archetype Artifact Id: | speedment-archetype-basic |
| Archetype Version: | (Latest Version) |
| Repository URL: | https://repo1.maven.org/maven2 |
You can find the latest version released at the Maven Central Repository site.
When you have filled in the details, press "Ok".
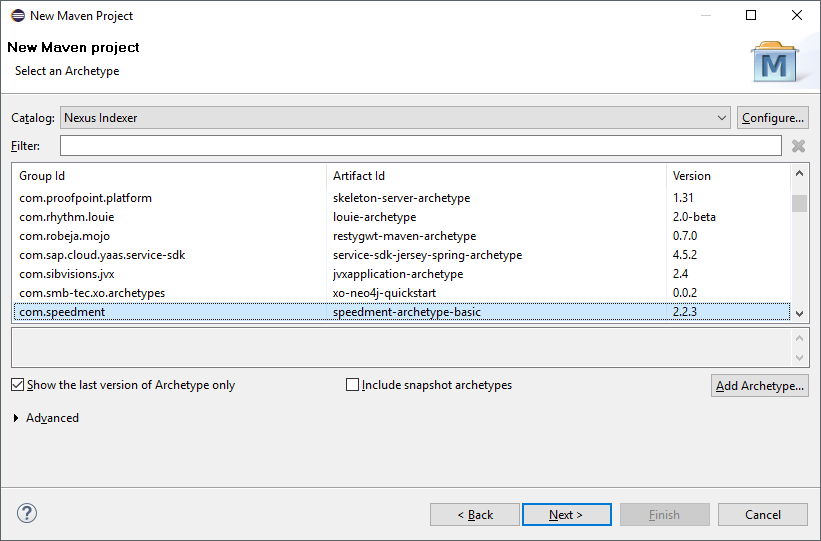
It might take a while for the Speedment Archetype to appear if the Maven Central Repository has not yet been indexed. You should find the speedment-archetype-basic in the list if you use the filter. If not, try and restart Eclipse to let it update its indexes.
Select "speedment-archetype-basic" and press "Next >".

Enter a Group Id and an Artifact id for you own app. In this example we named it "awesome-app" and used "com.company" as a group id. When you have done this, press "Finish".
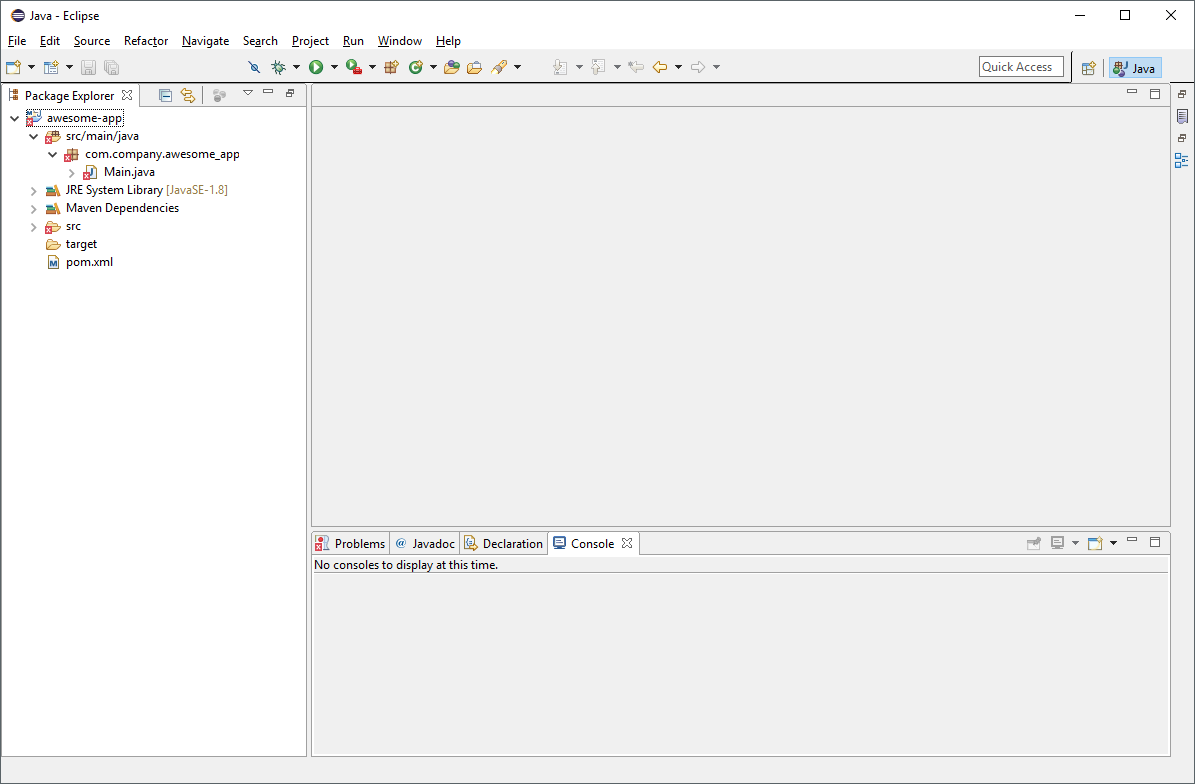
The new speedment project has now been created!
To start generating code from your database you will need to launch the Speedment UI. The process of doing this is a bit different in Eclipse than in NetBeans or IntelliJ. Since there are no list in the IDE over available maven goals, we will need to run the gui goal manually.
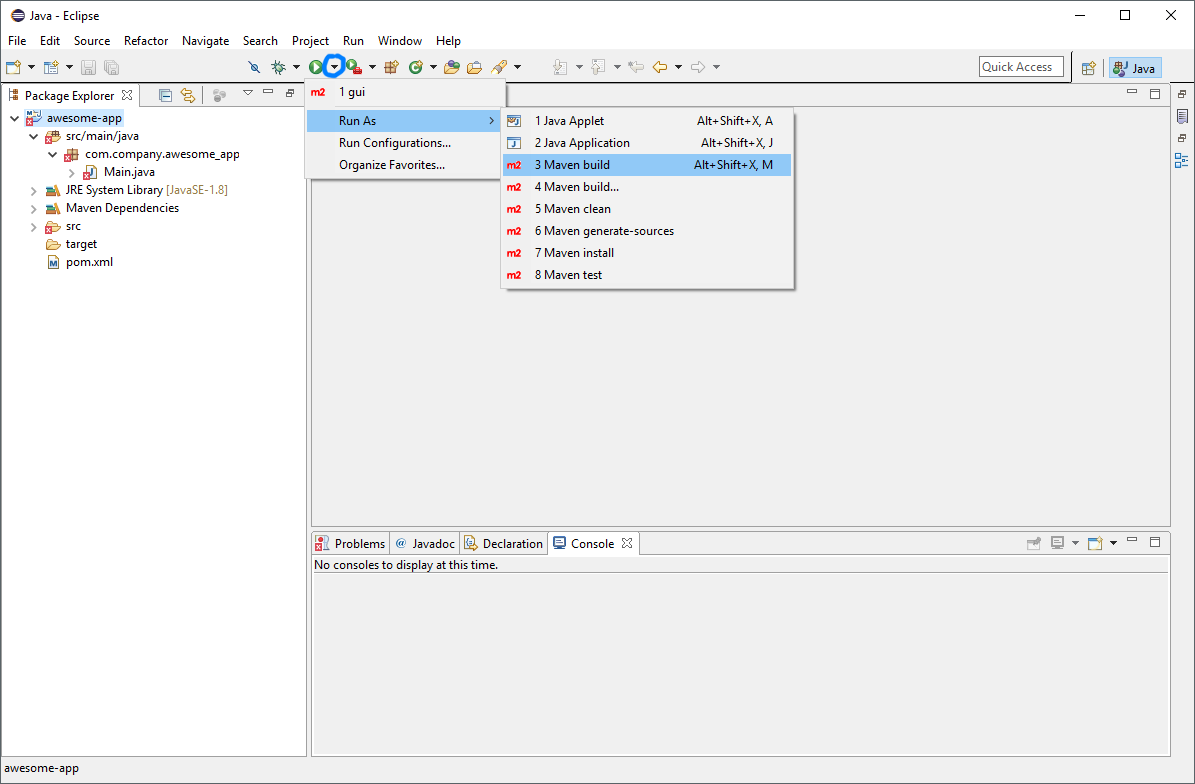
When running the Speedment GUI Maven Goal for the first time, press the small arrow to the right of the "Run" icon in the toolbar and select "Run As" -> "3 Maven Build" or press "Alt+Shift+X, M" on the keyboard.
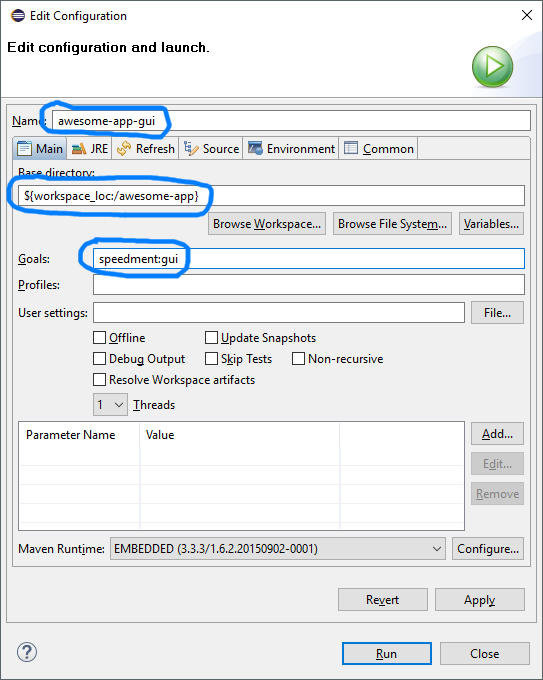
Enter a "Name:" for the goal that you will recognize to be the Speedment GUI, in this case "awesome-app-gui". Enter a "Base directory:" for the goal to run in. The easiest way of doing this is to press the "Browse Workspace..." button and select the root node there. The third thing you need to change is to enter "speedment:gui" as the "Goals:" to run.
When you have done this, press "Apply" to save your settings and then you can press "Run" to launch the Speedment user interface.
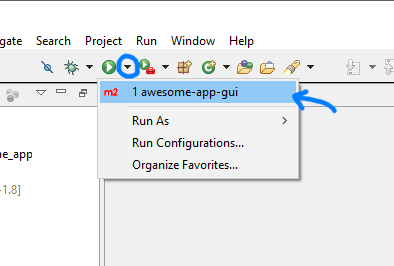
When you want to run the speedment:gui-goal again, you can simply press the arrow-down icon beside the "Run" button in the toolbar and select the goal you just created. This will relaunch the UI.
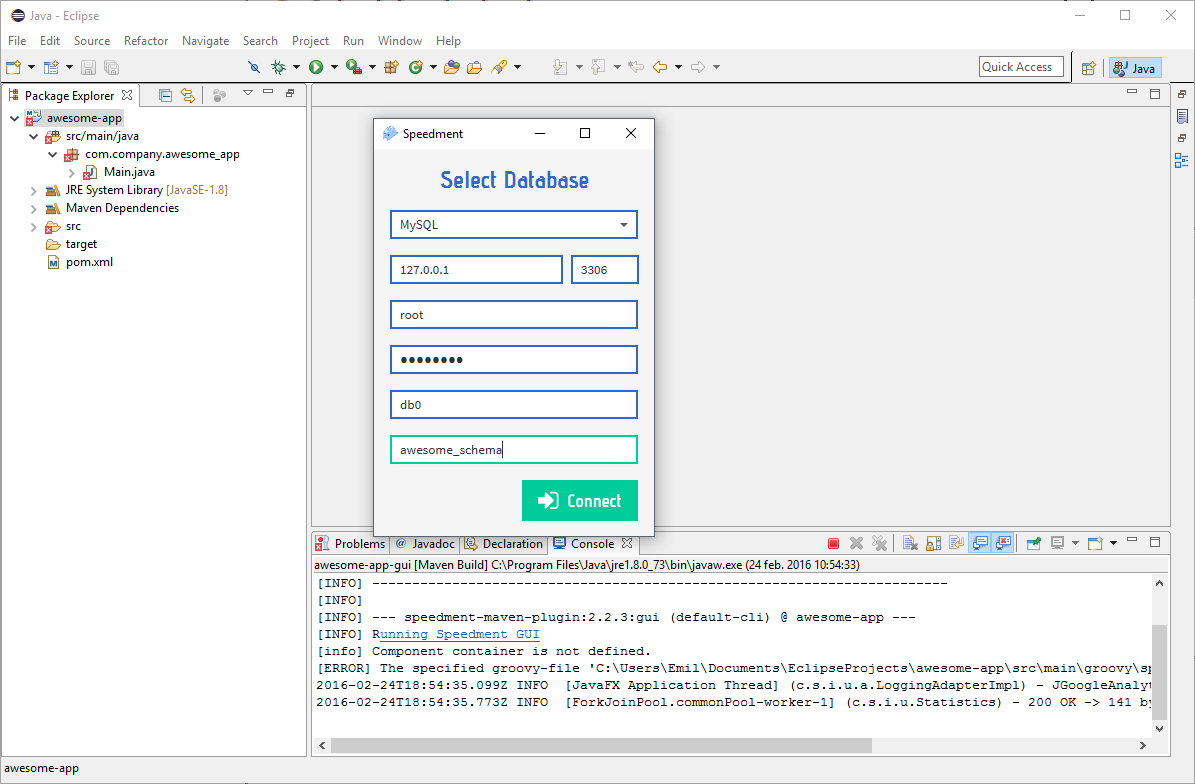
When the User Interface launches, simply follow the steps explained in this separate tutorial to begin generating your custom database code!
Good luck!