Tunnel all exit node traffic through a singular vpn connection

This guide assumes that you have read and understood the readme.md, downloaded the official images and do every step exactly the way it is described. Misconduct will lead to inability to connect and to potential reflashing. The default settings of the official images as well as the router of the skyminer are using the 192.168.0.0/24 subnet. The proposed settings in this guide do not work with the FamilyShield DNS of openDNS, only with their regular servers!
The current implementation of Skywire only allows users to provide a service by running an exit node. Since we are aware of the potential legal implications of this we already suggested certain measurements to the community, this guide will cover the setup of a VPN connection using openVPN, to tunnel the exit node traffic of all nodes through a singular VPN connection. This way you don't have to get a paid VPN service since you will only use 1 device and it simplifies the setup tremendously. This guide will use protonvpn.com as a free VPN service, you are free to choose any other VPN provider that makes .ovpn files available to use with openVPN.
If you're not using the official images you might have to change certain steps in the guide and adapt them to your personal setup.
- official images
- openVPN
- .ovpn file from your vpn provider
This setup will guide you to setup the openVPN server on your manager pi since you have to change the port forwarding rules established in the networking guide if you choose to use a secondary pi.
The following steps are being done, assuming the IP of the skyminer in the home network is 10.0.0.31 if yours is at a different IP just replace it accordingly.
First, log in to the manager pi via SSH (use Putty if you're on windows):
ssh root@10.0.0.31
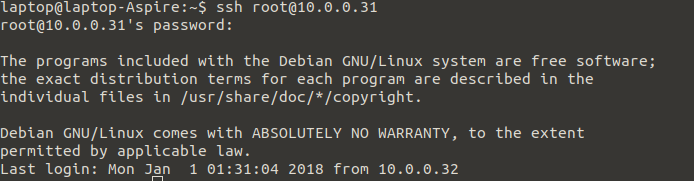
The password is either samos, skywire, skybian or if you already changed it via passwd command, of course, a different one.
The following steps might only be necessary on the official images.
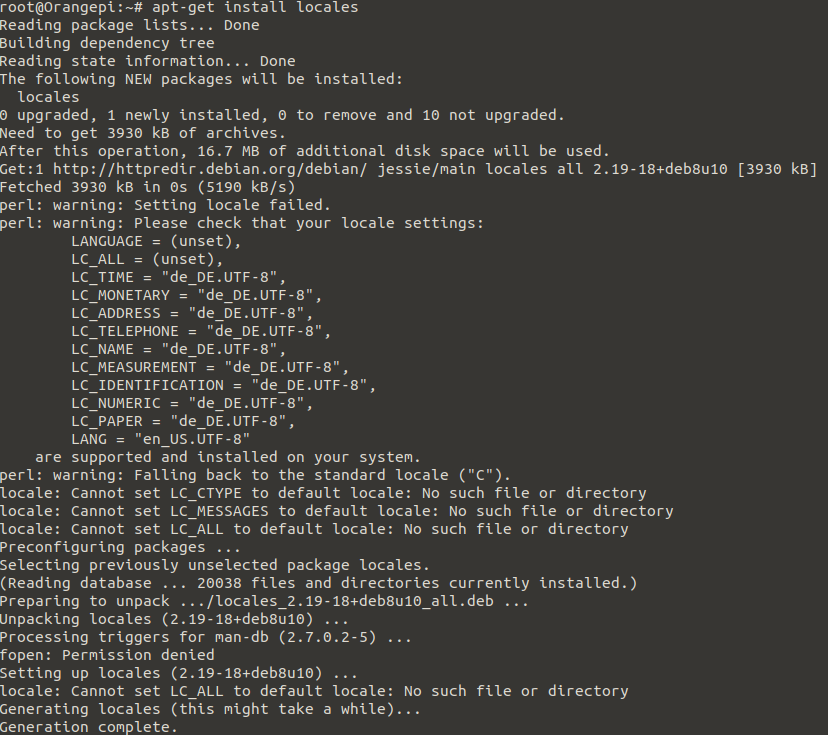
First, we need to install locales, you will encounter certain perl error messages that we will fix right afterward.
Execute:
apt-get install locales
Next, generate locales for your language (replace xx_XX.UTF-8 with your country code):
locale-gen en_US.UTF-8

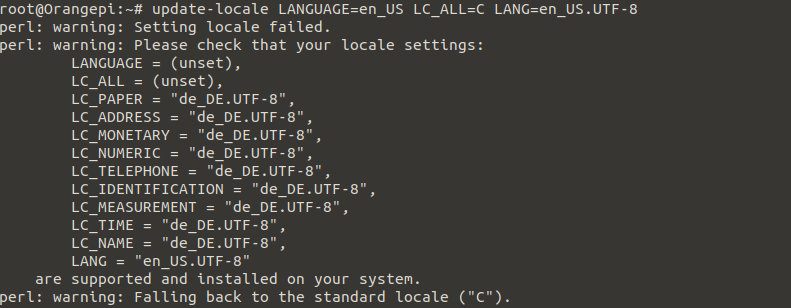
Update locale to fix perl error messages from above, don't get confused - the error messages will be displayed once again.
update-locale LANGUAGE=en_US LC_ALL=C LANG=en_US.UTF-8
Check configuration via
locale -a

As you can see some errors are still remaining, to fix this reboot the pi. Afterward login again via SSH ssh root@10.0.0.31.
Test if the changes were saved via
locale -a

The following two commands might take a couple minutes to finish.
Update via apt-get update and upgrade via apt-get upgrade -y.
We need to adjust the system clock on the official images. Execute
apt-get install ntp -y
Next edit /etc/ntp.conf via
nano /etc/ntp.conf
You will need to add a line after this section:
# pool.ntp.org maps to about 1000 low-stratum NTP servers.  Your server will
# pick a different set every time it starts up.  Please consider joining the
# pool: <http://www.pool.ntp.org/join.html>
server 0.debian.pool.ntp.org iburst
server 1.debian.pool.ntp.org iburst
server 2.debian.pool.ntp.org iburst
server 3.debian.pool.ntp.org iburst
add 'server XX.debian.pool.ntp.org iburst', where XX is to be replaced with your country code.
It should look like this:
# pool.ntp.org maps to about 1000 low-stratum NTP servers.  Your server will
# pick a different set every time it starts up.  Please consider joining the
# pool: <http://www.pool.ntp.org/join.html>
server 0.debian.pool.ntp.org iburst
server 1.debian.pool.ntp.org iburst
server 2.debian.pool.ntp.org iburst
server 3.debian.pool.ntp.org iburst
server 4.XX.pool.ntp.org iburst
Next we need to edit /etc/adjtime via nano /etc/adjtime, default looks like this:

Change UTC to LOCAL and safe changes via ctrl+x and yes.

Get openVPN by executing apt-get install openvpn -y.
ProtonVPN only provides the config files if you're logged into your account, if you choose to use a different provider and are able to get the files without logging in you can just download the config files via
cd ~
wget download_ip_of_config_files
IF you choose to use protonVPN then you need to do the following:
Sign up here for protonVPN service, if you already have a mail account you can use that for the login.
Once you're logged you will look at this, you need to change to the 'Download' section:
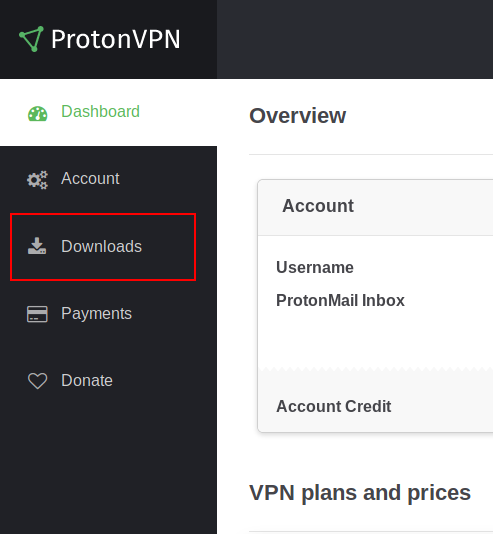
Settings are 1) Linux 2) TCP 3) Server configs:
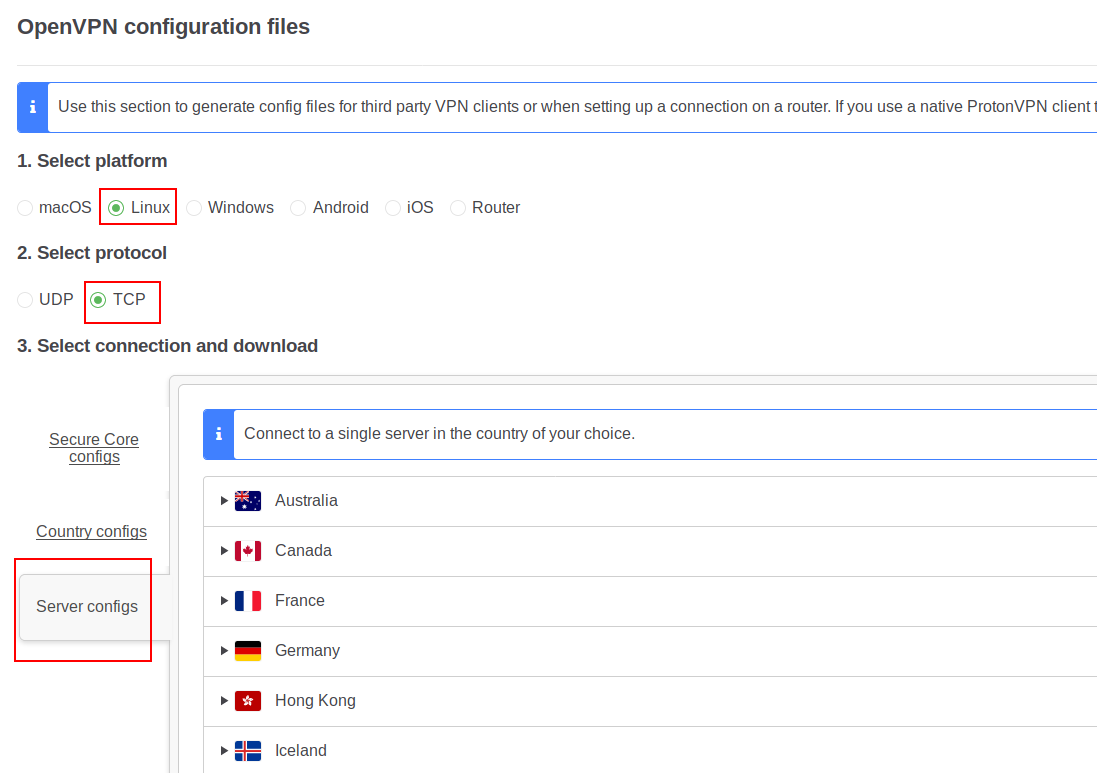
You can download all configuration files (not recommended), or download a specific one. Either way, have to choose the server you'd like to use for your VPN service, this guide will use a server located in the USA. The free tier of protonVPN only provides a small subset of countries/servers, you'd have to upgrade to get access to more servers/more functionality in general. Same applies to most other free VPN services out there.
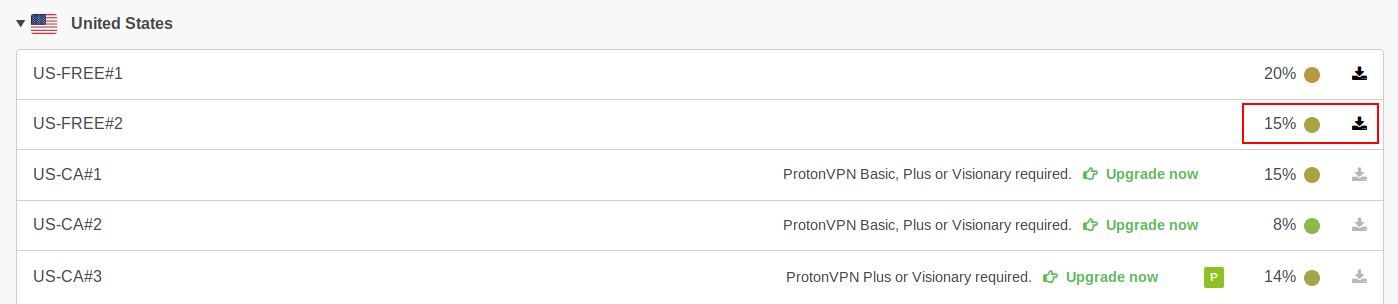
Download the config file for the server with the lower workload:
Open a second terminal window and transfer the files onto the manager pi:
scp /home/laptop/Downloads/us-free-02.protonvpn.com.tcp443.ovpn root@10.0.0.31:/etc/openvpn
You're going to be prompted to enter the password of the manager pi.
The result should look like this:

Now rename the previously transferred file via
mv /etc/openvpn/us-free-02.protonvpn.com.tcp443.ovpn /etc/openvpn/us-free-02.protonvpn.com.tcp443.conf
Check if your changes were successful via
cd /etc/openvpn
ls
The output should look like this:

Open the file via
nano /etc/openvpn/us-free-02.protonvpn.com.tcp443.conf
You need to change auth-user-pass to auth-user-pass /etc/openvpn/auth.txt
and change
script-security 2
up /etc/openvpn/update-resolv-conf
down /etc/openvpn/update-resolv-conf
to
script-security 2
setenv PATH /usr/local/sbin:/usr/local/bin:/usr/sbin:/usr/bin:/sbin:/bin
up /etc/openvpn/update-resolv-conf
down /etc/openvpn/update-resolv-conf
down-pre
route 10.0.0.0 255.255.255.0 net_gateway
route 10.0.0.0 255.255.255.0 net_gateway enables users with 10.0.0.0/24 to access the manager as if it wasn't connected to the VPN. If your home network is different than that you need to change the line accordingly.
Save the file with ctrl+x and yes.
To enable autostart without manually typing in your account name and password, we need to create a file called auth.txt. It is linked from the .conf by this line auth-user-pass /etc/openvpn/auth.txt. To do this we need your account details, you can obtain them from the web interface.
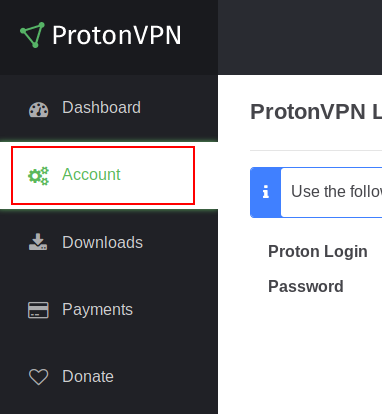
First, you need to change to the 'Account' section.
As you can see there is a default generated username and a password. Feel free to change the username if you like.
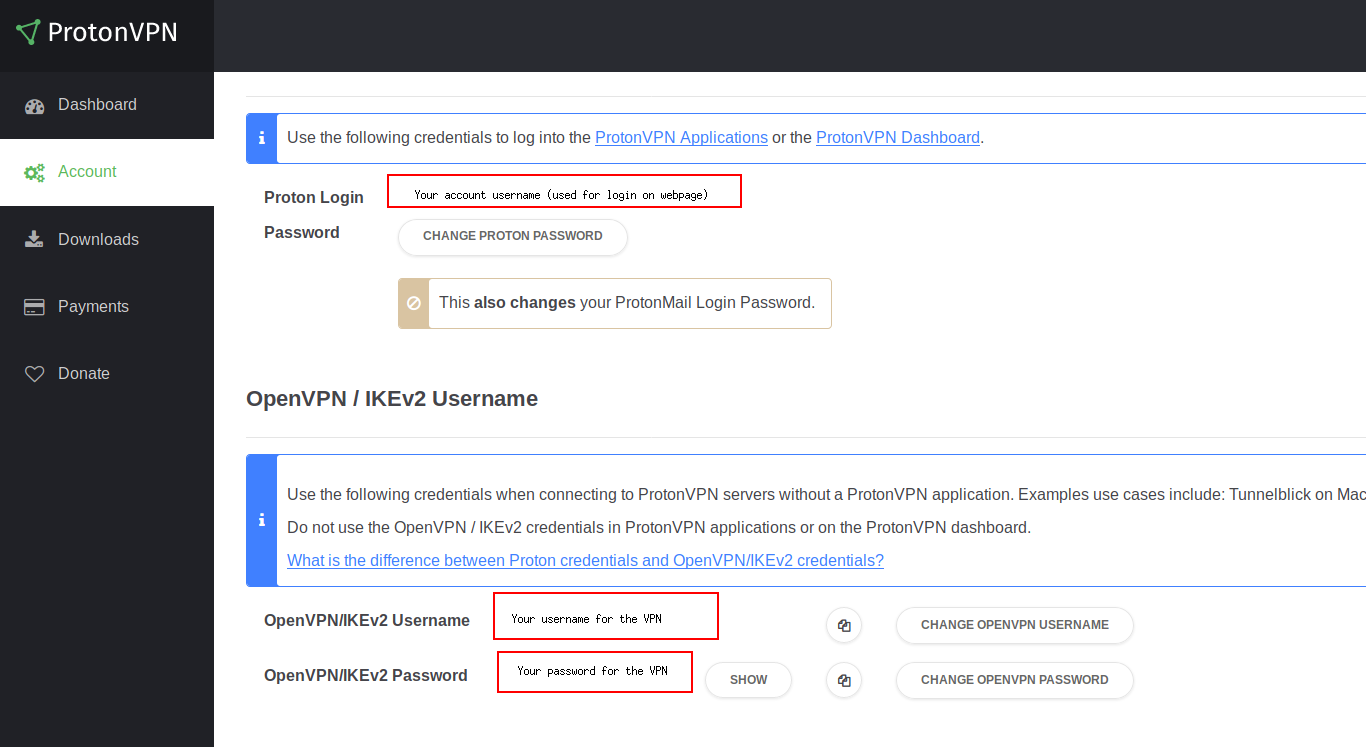
You need the data from the two lower rectangles, 'Your username for the VPN' and 'Your password for the VPN'.
To create the authentication file execute:
nano /etc/openvpn/auth.txt
then on the first line add your username and on the second add your password. Example if your username would be testuser and your password would be testpassword it should look like this:

Obviously, you need to add your individual username and password instead. Save the file with ctrl+x and yes.
Open crontab via
EDITOR=nano crontab -e
and add this line to the end of the file
@reboot openvpn --config /etc/openvpn/us-free-02.protonvpn.com.tcp443.conf
save with ctrl+x and yes as usual. The file should look like this before saving:
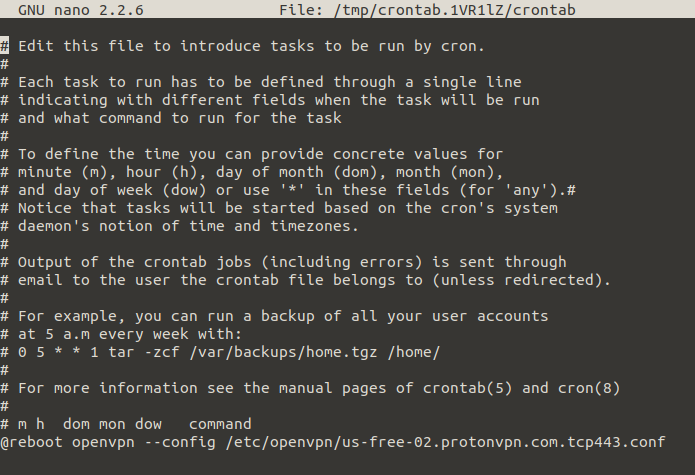
and successful changes are confirmed if you can see this output in the terminal
crontab: installing new crontab
We should establish some basic firewall rules, to do this please create a file via
cd ~
nano firewall.sh
The following script is prepared if your home network is at 10.0.0.0/24. If it differs from that, please change the line Local_Network=10.0.0.0/24 to whatever subnet you'd like to use to access the manager.
If you don't change the Local_Network to your specific home network you will lose access to the manager pi and you have to restore the files by inserting the sd card in your computer (Linux is necessary) or by reflashing! Do not execute firewall.sh before changing it to fit your needs, seek guidance if you're uncertain what to do and do not proceed any further
If you haven't changed the DNS server of your system to the OpenDNS servers please do so using this guide, but make sure to not use the FamilyShield DNS servers, since they do not work with protonVPN. Alternatively you could change 'VPN_DNS="208.67.222.222 208.67.220.220"' to 'VPN_DNS="IP.OF.DNS.SERVER"' where you'd need to replace 'IP.OF.DNS.SERVER' to the one you'd like to use. *
#!/bin/bash
#
# Originally written by William Dickson
#
# http://security.blogoverflow.com/2011/08/base-rulesets-in-iptables/
#

# My Private Class C Network, your network may be different.
Home_Network=192.168.0.0/24
Local_Network=10.0.0.0/24

# My VPN providers DNS servers.
VPN_DNS="208.67.222.222 208.67.220.220"

# Flush previous rules, delete chains and reset counters
iptables -F
iptables -X
iptables -t nat -F
iptables -t nat -X
iptables -t mangle -F
iptables -t mangle -X
iptables -P INPUT ACCEPT
iptables -P FORWARD ACCEPT
iptables -P OUTPUT ACCEPT

# Set default policies
iptables -P INPUT DROP
iptables -P FORWARD DROP
iptables -P OUTPUT ACCEPT

# Create two user-defined chains that we will use to
# open ports in the firewall.
iptables -N TCP
iptables -N UDP

# SSH Open Port.
iptables -A TCP -s $Home_Network -p tcp --dport 22 -j ACCEPT
iptables -A TCP -s $Local_Network -p tcp --dport 22 -j ACCEPT

#Enable pi's to access the manager
iptables -A TCP -s $Home_Network -p tcp --dport 5998 -j ACCEPT

#Enable access to manager webinterface
iptables -A TCP -s $Home_Network -p tcp --dport 8000 -j ACCEPT
iptables -A TCP -s $Local_Network -p tcp --dport 8000 -j ACCEPT

#Enable access to skywire socks5 proxy
iptables -A TCP -s $Home_Network -p tcp --dport 9443 -j ACCEPT
iptables -A TCP -s $Local_Network -p tcp --dport 9443 -j ACCEPT

# Open ports if you're running a DNS cache server on the same device.
# iptables -A UDP -s $Home_Network -p udp --dport 53 -j ACCEPT
# iptables -A TCP -s $Home_Network -p tcp --dport 53 -j ACCEPT

# ntopng web interface
iptables -A TCP -s $Home_Network -p tcp --dport 3000 -j ACCEPT
iptables -A TCP -s $Local_Network -p tcp --dport 3000 -j ACCEPT

# Zeroconfig mdns port
iptables -A UDP -p udp -m udp --dport 5353 -j ACCEPT

# NTP Open Port.
iptables -A UDP -p udp --dport 123 -j ACCEPT

# Create two user-defined chains for the forward rules.
iptables -N fw-interfaces
iptables -N fw-open

# Create user-defined rules for the fw-interface chain.
iptables -A fw-interfaces -i eth0 -o tun+ -s $Home_Network -j ACCEPT
iptables -A fw-interfaces -i eth0 -o tun+ -s $Local_Network -j ACCEPT

# Allow anything on the local link.
iptables -A INPUT -i lo -j ACCEPT

# Input chain and user defined chains (UDP and TCP) for open ports.
iptables -A INPUT -m state --state ESTABLISHED,RELATED -j ACCEPT
iptables -A INPUT -m state --state INVALID -j DROP
iptables -A INPUT -p icmp --icmp-type 8 -m state --state NEW -j ACCEPT
iptables -A INPUT -p udp -m state --state NEW -j UDP
iptables -A INPUT -p tcp --syn -m state --state NEW -j TCP
iptables -A INPUT -p udp -j REJECT --reject-with icmp-port-unreachable
iptables -A INPUT -p tcp -j REJECT --reject-with tcp-rst
iptables -A INPUT -j REJECT --reject-with icmp-proto-unreachable

# Forwarding rules and user defined chain.
iptables -A FORWARD -m state --state ESTABLISHED,RELATED -j ACCEPT
iptables -A FORWARD -j fw-interfaces
iptables -A FORWARD -j fw-open
iptables -A FORWARD -j REJECT --reject-with icmp-host-unreach

# Change the address of an incoming packet from the gateway to a LAN machine.
# Packet forwarding to allow me to share Linux ISO’s on bittorrent.
#
# iptables -t nat -A PREROUTING -i tun+ -p tcp --dport 47367 -j DNAT --to 192.168.1.15
# iptables -t nat -A PREROUTING -i tun+ -p udp --dport 47367 -j DNAT --to 192.168.1.15
# iptables -A fw-open -d 192.168.1.15 -p tcp --dport 47367 -j ACCEPT

# Re-routes all internal DNS requests to external VPN’s DNS servers.
# Stops DNS Leaks.
#
# If you are running your own DNS caching nameserver, you can of course change
# the IP address to point to that.

for dns in $VPN_DNS
do
iptables -t nat -A PREROUTING -i eth0 -p tcp --dport 53 -j DNAT --to $dns
iptables -t nat -A PREROUTING -i eth0 -p udp --dport 53 -j DNAT --to $dns
done

# In the POSTROUTING chain of the NAT table, map the tun+ interface outgoing
# pack IP address, cease examining rules and let the header be modified.
iptables -t nat -A POSTROUTING -s $Home_Network -o tun+ -j MASQUERADE

# Log INPUT AND FORWARDING errors.
iptables -A INPUT -m limit --limit 10/m --limit-burst 7 -j LOG --log-prefix '[FW INPUT]: '
iptables -A FORWARD -m limit --limit 10/m --limit-burst 7 -j LOG --log-prefix '[FW FORWARD]: '
This script accepts traffic from the 192.168.0.0/24 subnet and tunnels the traffic through the VPN connection. Basic security is added, if the VPN connection drops or is not established to begin with no traffic will be tunneled and your nodes won't be connected to the discovery server, meaning no your uptime won't be counted and you'll get no rewards.
Next, we need to make 'firewall.sh' executable via
chmod 744 firewall.sh
Run the script via
./firewall.sh
The output is
iptables: No chain/target/match by that name.
iptables: No chain/target/match by that name.
caused by the last two lines of the script which will take of logging since there is nothing to log as of now.
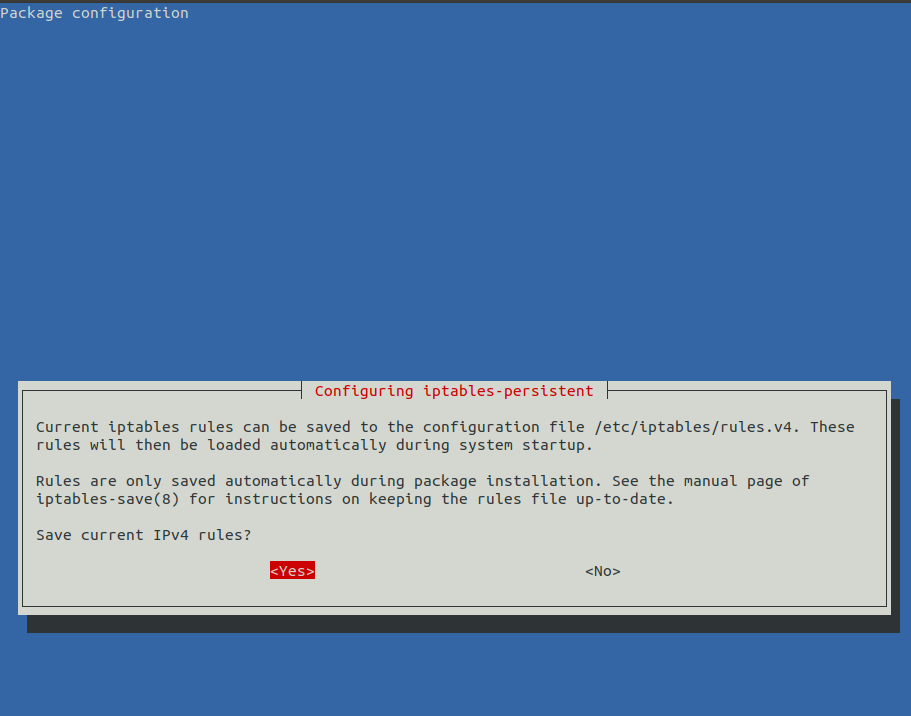
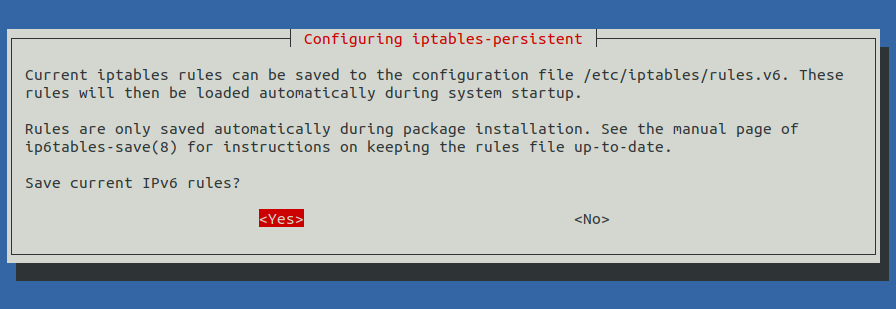
Now we need to install another application to make the recently established firewall rules persistent. Execute
apt-get install iptables-persistent -y
You will need to confirm to save the current setup for IPv4 and IPv6.
Once that is done we need to apply the rules at startup. To accomplish this execute
systemctl enable netfilter-persistent
Only applicable if you want to change the firewall script again to make changes
First, edit firewall.sh and save your changes. Then execute
service netfilter-persistent save to apply the changes.
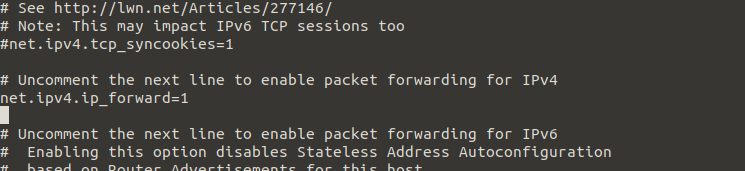
We need to edit the sysctl.conf file. To do this type nano /etc/sysctl.conf.
You should look at this:
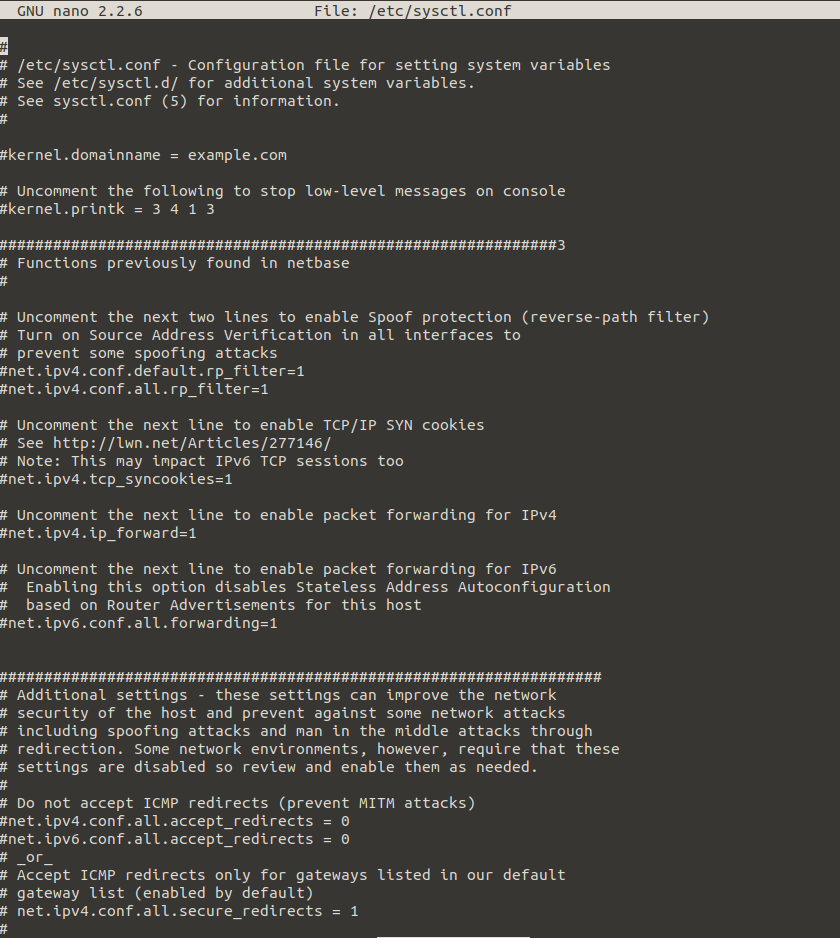
We only need to uncomment (remove '#') #net.ipv4.ip_forward=1. The section should look like this:
Save as usual and make the changes permanent via sysctl --load which results in:

That's it, we are done. If you want to run your VPN just reboot your pi and it will autostart and use the VPN. Go here for validating if it is working.
Now that the manager pi is using the VPN for its internet connection we need to make changes in the other pi's so that they'll use the same connection as the pi, i.e. tunnel their traffic through the manager pi. First connect via SSH to the manager pi, as it acts as a gateway to the subnet of the skyminer router:
ssh root@10.0.0.31
Then connect via SSH to the first pi:
ssh root@192.168.0.3
We need to edit only one file per pi:
nano /etc/network/interfaces.d/eth0 or nano /etc/skybian.conf
Change gateway 192.168.0.1 to gateway 192.168.0.2.
Then save via ctrl+x and yes.
Exit the SSH connection by typing exit and proceed with the next pi (192.168.0.4). You have to do this for all pi's, i.e. 192.168.0.3-9.
You can check if the VPN connection is working by opening a terminal on the pi you want to check. Then type
curl https://ipinfo.io/ip
this will return the public IP address of your VPN service.
Compare it by opening a terminal on a device that is not tunneled through VPN. You can obtain its public IP either by running the same command or by requesting it from google etc. If the two addresses differ then your traffic is getting tunneled through the VPN service