Skywire Manager Web Interface

The Skywire software provides a user interface (UI) to enable simple management of the deployed Skywire nodes. This article explains the currently available web interfaces
Please note that user interface V1 is outdated and only available by either reverting the software to a previous version or by using the prepared images. You are highly encouraged to update your software to use the latest version thus providing you the latest user interface V2. Please refer to the 'next steps' subsection in the installation guide how to update your software if you used the prepared images.
This section covers the currenlty available manager web interfaces and their usage.
Open a new browser tab and visit 192.168.0.2:8000. The Skywire manager web interface will appear:
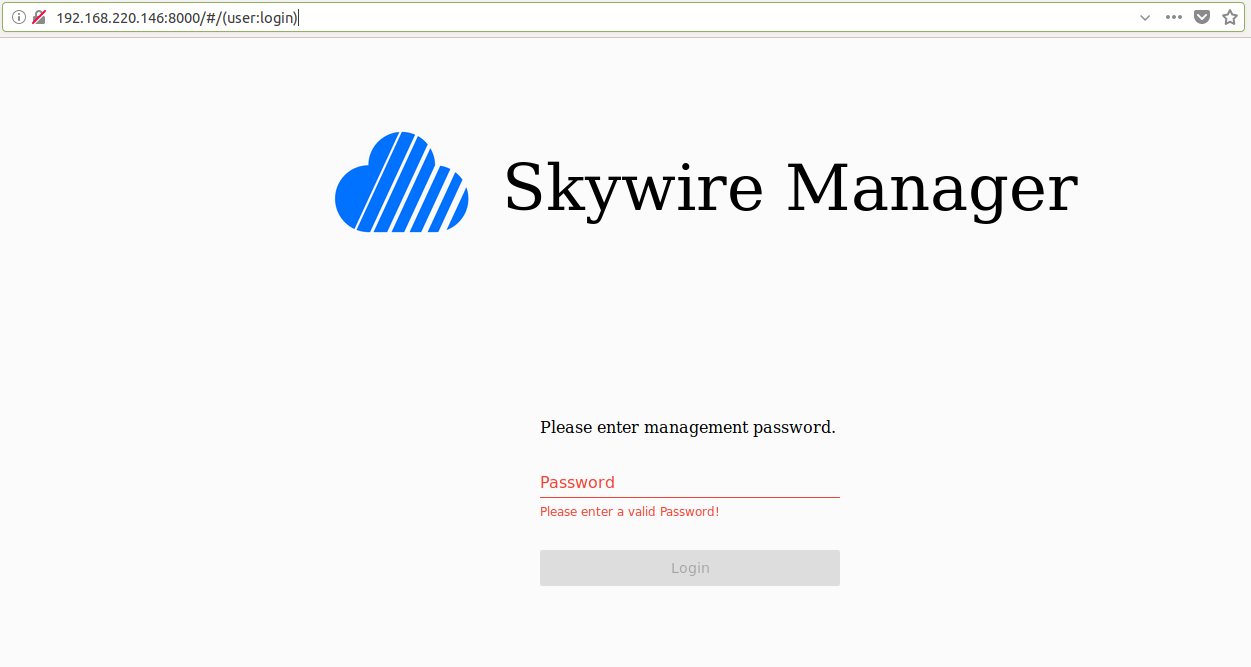
Login with the password 1234, you are forced to change it immediately and re-login afterward. A successful installation should look like this:
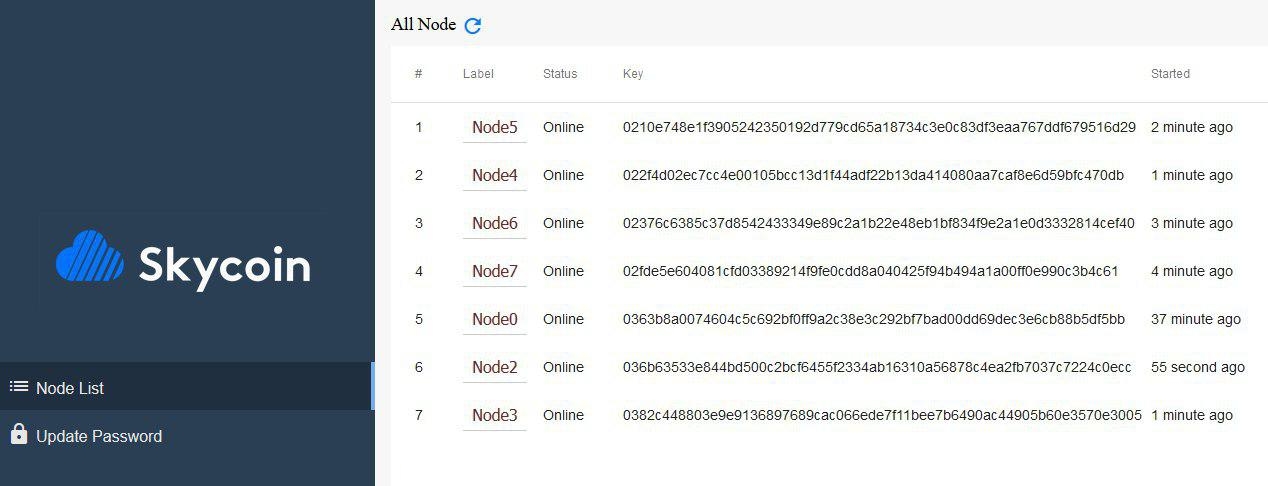
Note: keep in mind 1 node is missing due to the fact that your laptop is connected. You are advised to follow the networking guide to fix this. In this example node1 was unplugged from the Skyminer router, node0 represents the manager node.
If you click on the 64-character key of the node, it should look like the following:
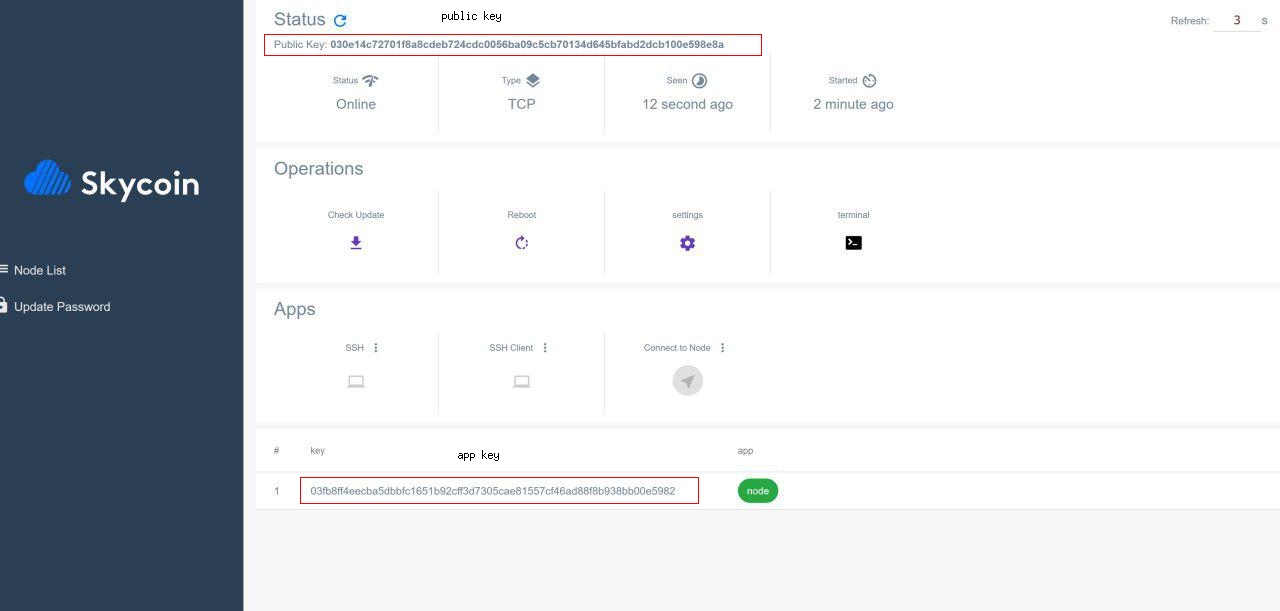
The red rectangles mark the public key and the app key of the node app of your node.
You should verify for all nodes that they are connected to the correct discovery server. By clicking on settings you should look at this screen with a green checkmark next to it.
Additional to that you should look for your keys on the discovery website to be sure that your uptime is being counted. Check out this guide to get further instructions on how to stay online.
If everything looks good you can label them by their IP addresses using this method. Adding a label to the list can be accomplished by simply clicking on it and entering the label content with your keyboard.
Next steps:
- Continue with updating Debian 8 to 9 by performing these instructions.
- Next, you can upgrade your images to include the new manager user interface by executing the one time upgrade script.
This section covers the new manager UI. The prepared images right now do not include this UI by default. You may use the provided upgrade script to upgrade your prepared images to the latest software version of Skywire.
Open a new browser tab and visit 192.168.0.2:8000. The Skywire manager web interface will appear:

Login with the password 1234, you are forced to change it immediately and re-login afterward. A successful installation should look like this:
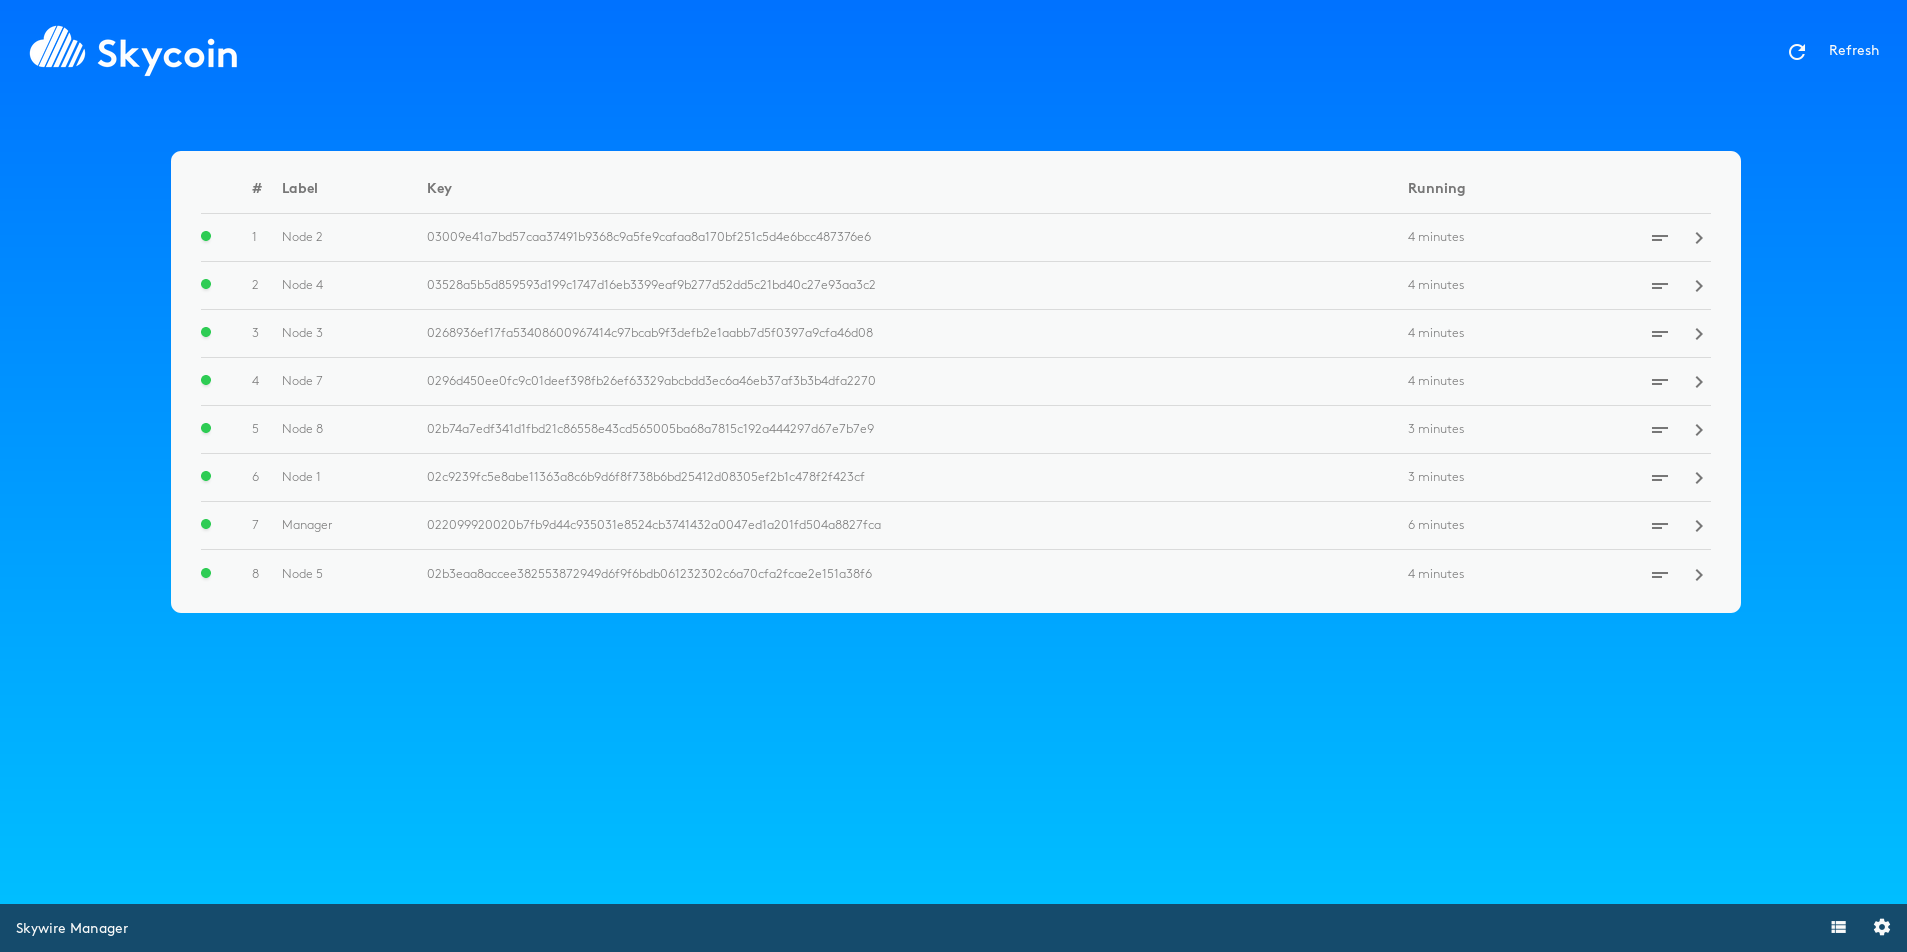
Note: keep in mind 1 node is missing due to the fact that your laptop is connected. You are advised to follow the networking guide to fix this. In this example node1 was unplugged from the Skyminer router, node0 represents the manager node.
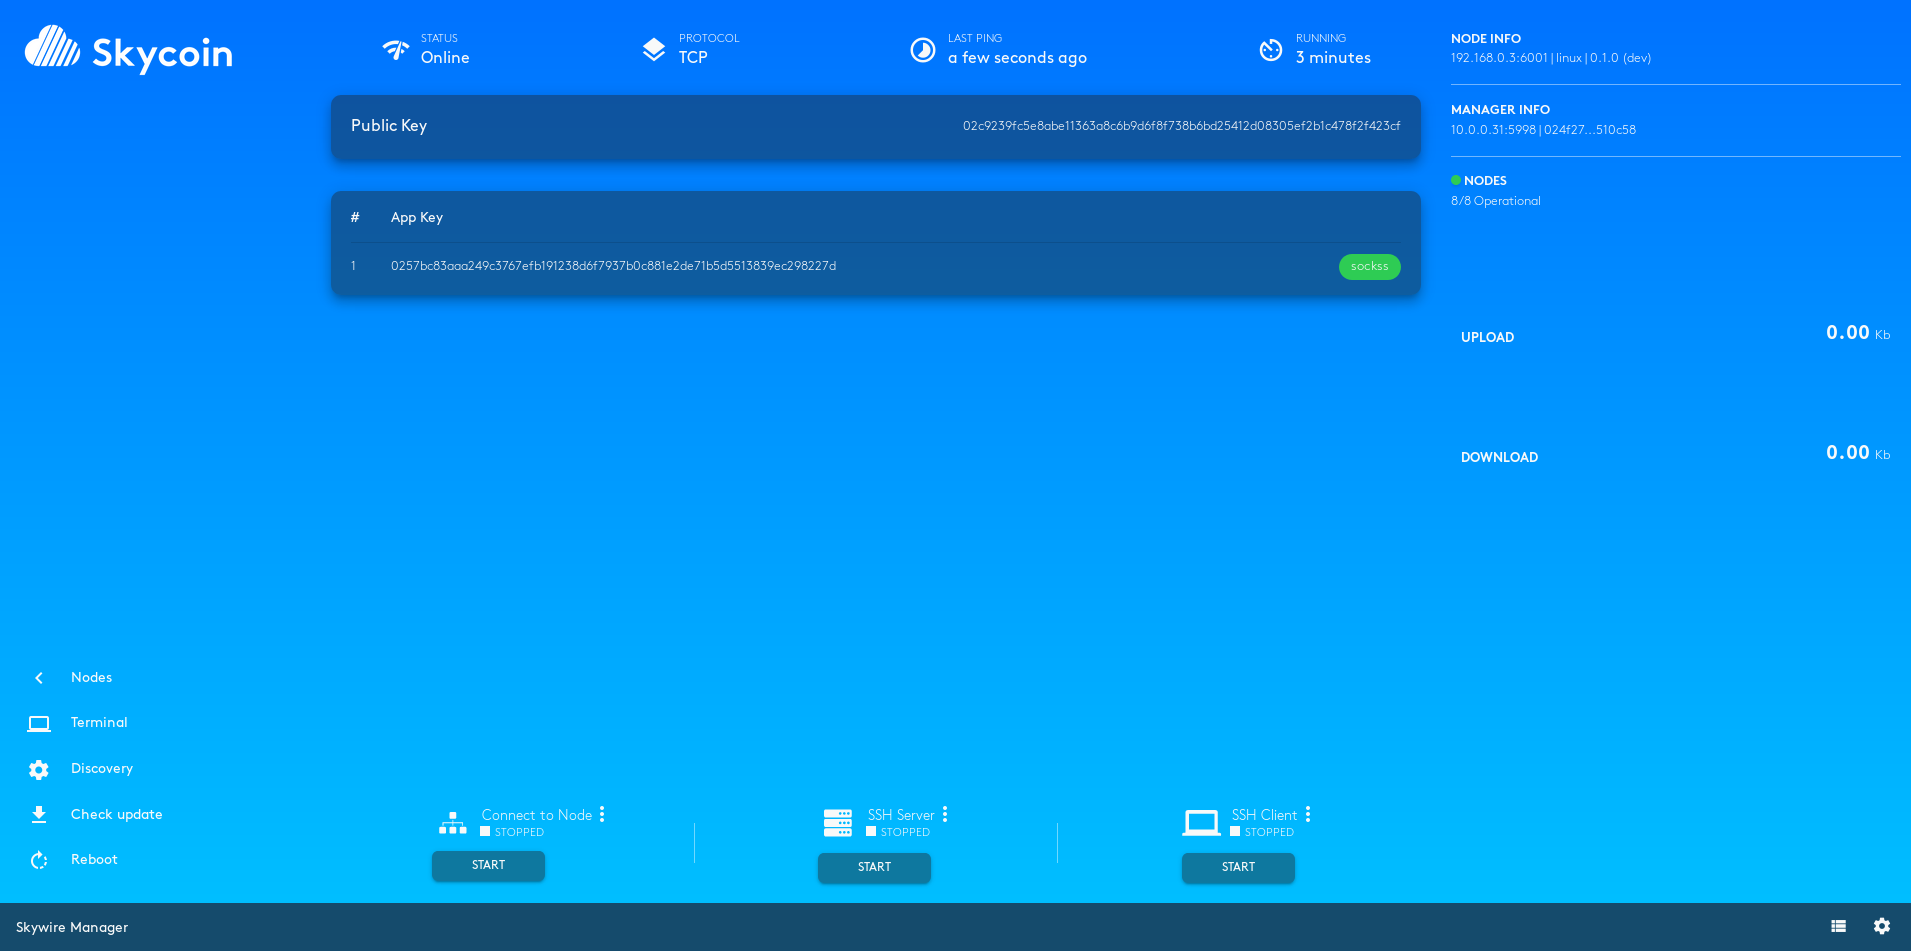
If you click on the 64-character key of the node, it should look like the following:
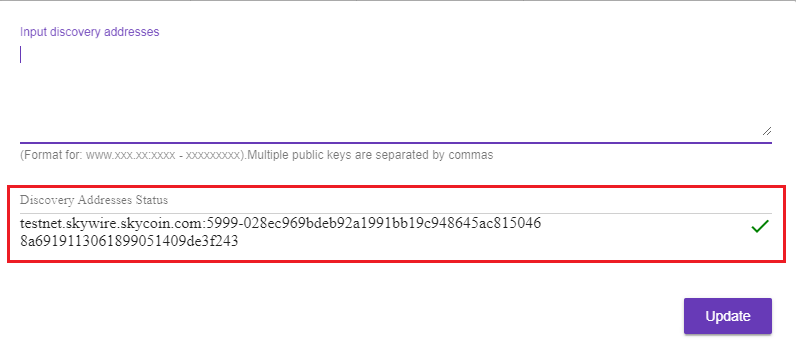
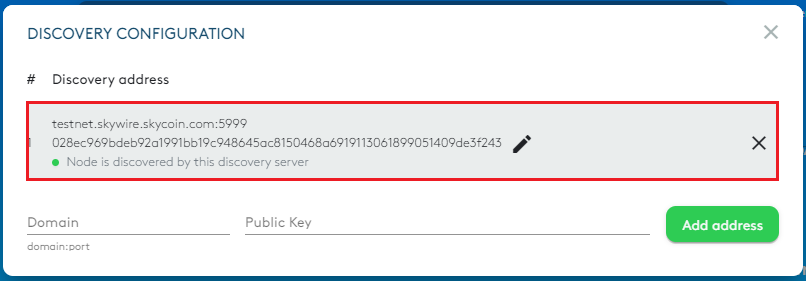
You should verify for all nodes that they are connected to the correct discovery server. By clicking on Discovery you should look at this screen with the following discovery server address
testnet.skywire.skycoin.com:5999-028ec969bdeb92a1991bb19c948645ac8150468a6919113061899051409de3f243
Additional to that you should look for your keys on the discovery website to be sure that your uptime is being counted. Check out this guide to get further instructions on how to stay online.
If everything looks good you can label them by their IP addresses using this method. Adding a label to the list can be accomplished by simply clicking on it and entering the label content with your keyboard.