Setting Up Multiple Virtual Machines with Skywire VPN

The following guide was initially created by Alex (@alexskyfleet) and details the procedure of setting up multiple virtual machines (VM) to run Skywire nodes to make use of the Skywire VPN service. This type of setup is particularly important for an operation that requires coordinated internet use that cannot be traced back to a single source. So far, the procedure was tested using a Raspberry Pi 2 Model B running a manager node and virtual Xubuntu machines running individual skywire nodes. The virtual Xubuntu machines are running on top of Windows 7 and the Skywire VPN is configured to run through Mozilla Firefox.
The following software is required:
Setting Up the Virtual Machines
-
Launch VMware Workstation 14.
-
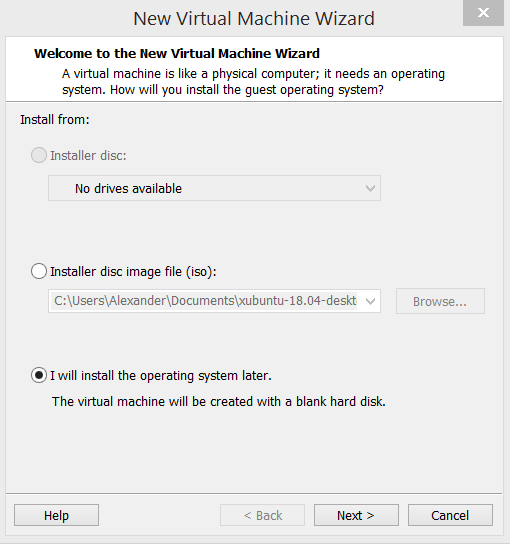
Create a new virtual machine and specify to “install the operating system later.”
-
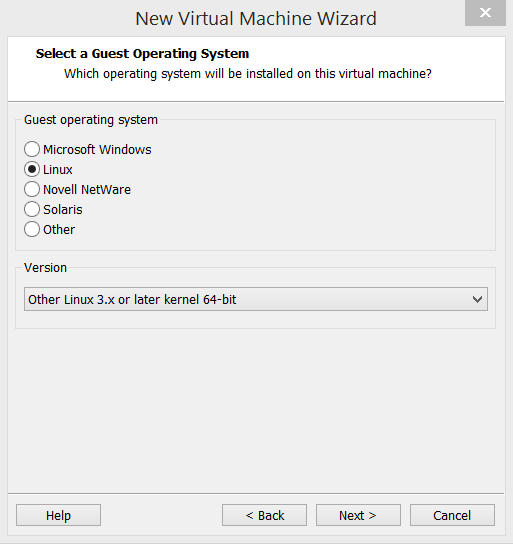
Specify the operating system as follows:
-
In the following menu, specify the disk capacity as 20 GB.
-
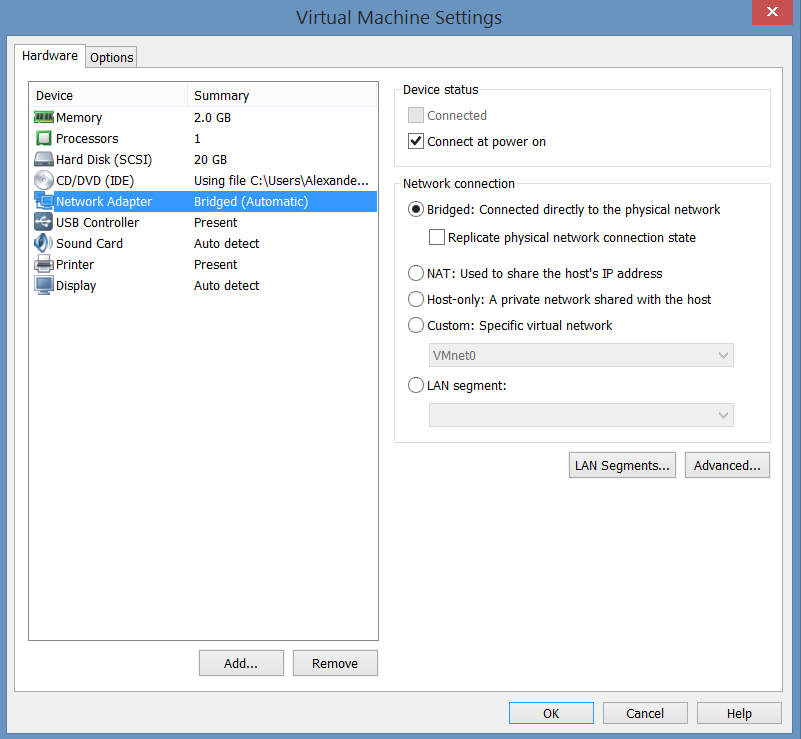
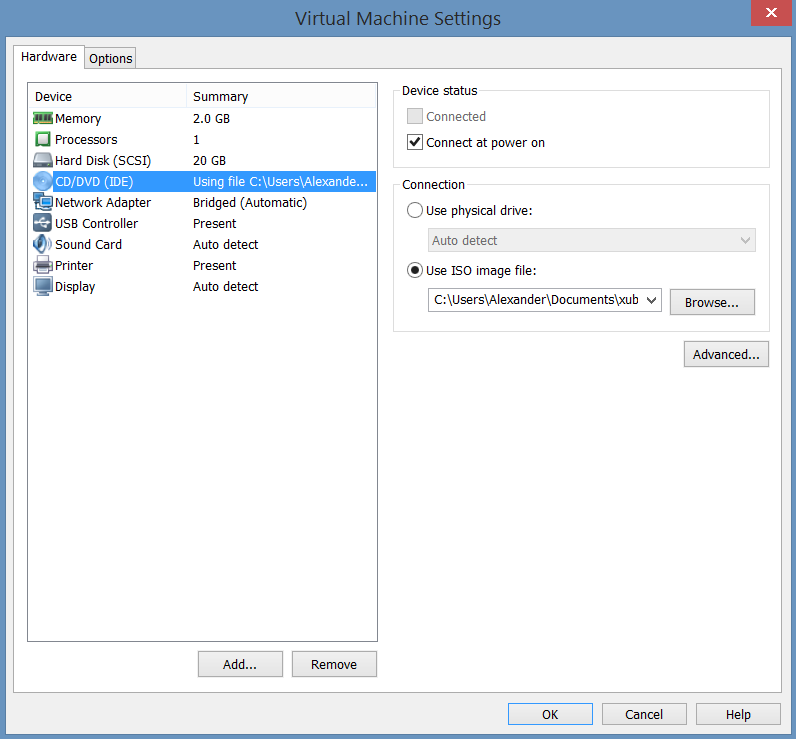
Once the VM is created, go to settings and specify the parameters as follows. To keep the installation process smooth make sure the RAM memory is 2048 MB (the RAM will be limited to 512 MB post-installation). Choose the Network Connection as “Bridged” and select the Xubuntu ISO as the “ISO image file” under CD/DVD:
-
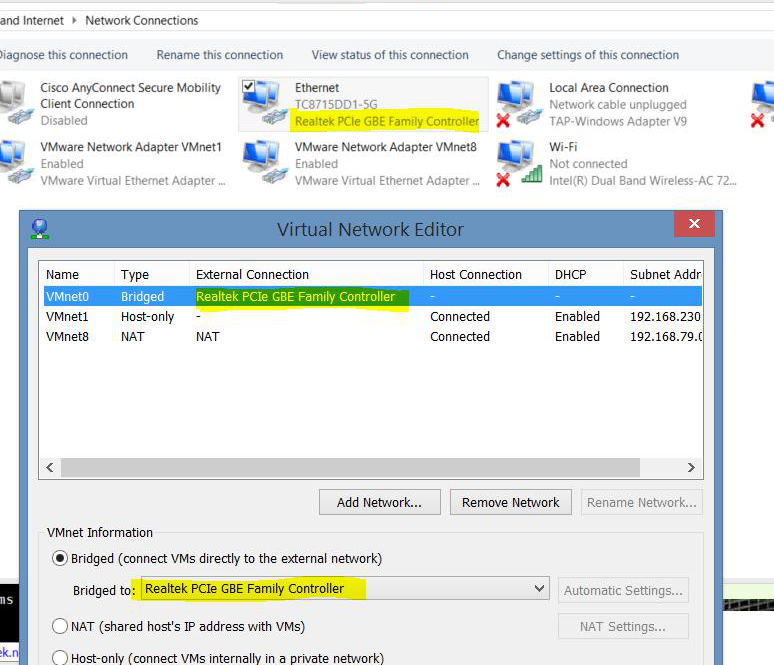
Navigate to
C:\Program Files (x86)\VMware\VMware Workstationand launchvmnetcfg.exeto pull up the Virtual Network Editor of the VMware software. -
Select “Change Settings” to change and view VMnet0 subnet.
-
Manually bridge the virtual machine adapter to the main connection of the host system.
-
Once the VM is configured, launch the virtual machine and follow the procedure to install Xubuntu.
-
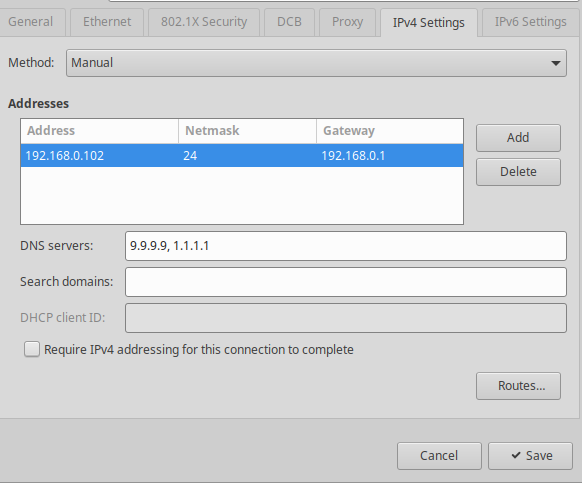
Once Xubuntu is installed, setup its static IP address as follows:
-
Go to Network Connections in the upper right hand corner.
-
Edit the connection “Wired Connection 1”
-
Go to IPv4 Settings and edit as follows (make sure the IP address is configured uniquely to each VM). Save the settings reboot the VM with
sudo reboot:
-
-
To access the VM remotely, run the following commands to enable SSH service:
sudo apt-get install openssh-serversudo service ssh start
Configuring Skywire VPN in the Virtual Machines
-
Follow the following guide on installing Go and Skywire in the VM. It may be easier to SSH into the VM from the host machine using MobaXterm or PuTTY so that code can be copy-pasted and executed immediately, rather than typed out manually. If there is no manager running, then launch a manager node in one of the virtual machines. Make sure to have the nodes automatically run at startup.
-
If the node does not run at startup, launch the Skywire node using the following command. The manager node is using IP address
192.168.0.101:cd $GOPATH/binnohup ./node -connect-manager -manager-address 192.168.0.101:5998 -manager-web 192.168.0.101:8000 -discovery-address testnet.skywire.skycoin.com:5999-028ec969bdeb92a1991bb19c948645ac8150468a6919113061899051409de3f243 -address :5000 -web-port :6001 > /dev/null 2>&1 & -
The node should now be launched. Go to the Skywire Manager in a web browser
192.168.0.101:8000and connect the new node to another node to configure the VPN. -
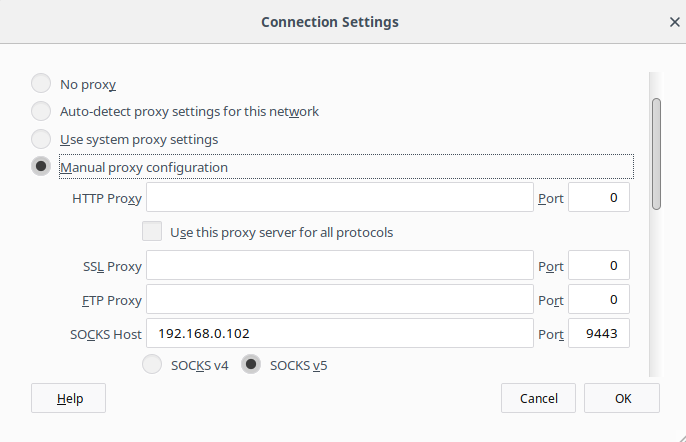
In the VM open the Web Browser (should be Mozilla Firefox by default) and go to
Settings -> Preferences -> General -> Network Settings -> Settings. -
Input the following configuration. Make sure the SOCKS host is the IP address of the Skywire node running in the VM.
-
Exit the VM and now configure the VM to use 512 MB RAM and optionally link up a shared folder in the “Options” tab for easy file sharing between the host.
-
Clone the Xubuntu VM as many times necessary and log into each one to assign a different IP address for each VM. It is recommended to use the following IPs:
- Manager:
192.168.0.101 - VM 1:
192.168.0.102 - VM 2:
192.168.0.103 - VM 3:
192.168.0.104 - VM 4:
192.168.0.105
If there is no manager node running, then change the IP address of VM 1 to
192.168.0.101and run a manager node using the following commands:cd $GOPATH/binnohup ./manager -web-dir ${GOPATH}/src/github.com/SkycoinProject/skywire/static/skywire-manager > /dev/null 2>&1 &sleep 3 - Manager:
-
Furthermore in each cloned Xubuntu VM run the following commands to generate a new key for each Skywire node.
cd /home/(USERNAME)/.skywirerm -r nodesudo rebootOnce the VM reboots and the skywire node application is executed, the node will have a new private key and it will show up in the Skywire Manager. If the node does not execute on startup, refer to step 2.
Afterword
Xubuntu is Linux based and open source, but if multiple VMs are being run on top of host machine that has minimal computational power and memory, Windows XP is a better performing OS for simple web browsing. During configuration of Skywire, keep in mind that the gateway host had the IP address 192.168.0.1. Different routers may have different IP addresses and the address may be a variation of 192.168.X.XXX. It also may be the case that an IP address is already taken when trying to configure a Skywire node. Make sure to ping the address before using it to make sure it is not being used.