09. How to add authentication authorization with Azure Active Directory
The implementation done here is based in this Azure sample provided by Microsoft for OpenId Connect and AAD. It has been modified to fit our needs, mainly for the container variables, and adapted for WebForms since the sample was based on MVC.
- Sign in to the Azure portal.
- On the top bar, click on your account and under the Directory list, choose the Active Directory tenant where you wish to register your application.

- Click on More Services in the left hand nav, and choose Azure Active Directory.
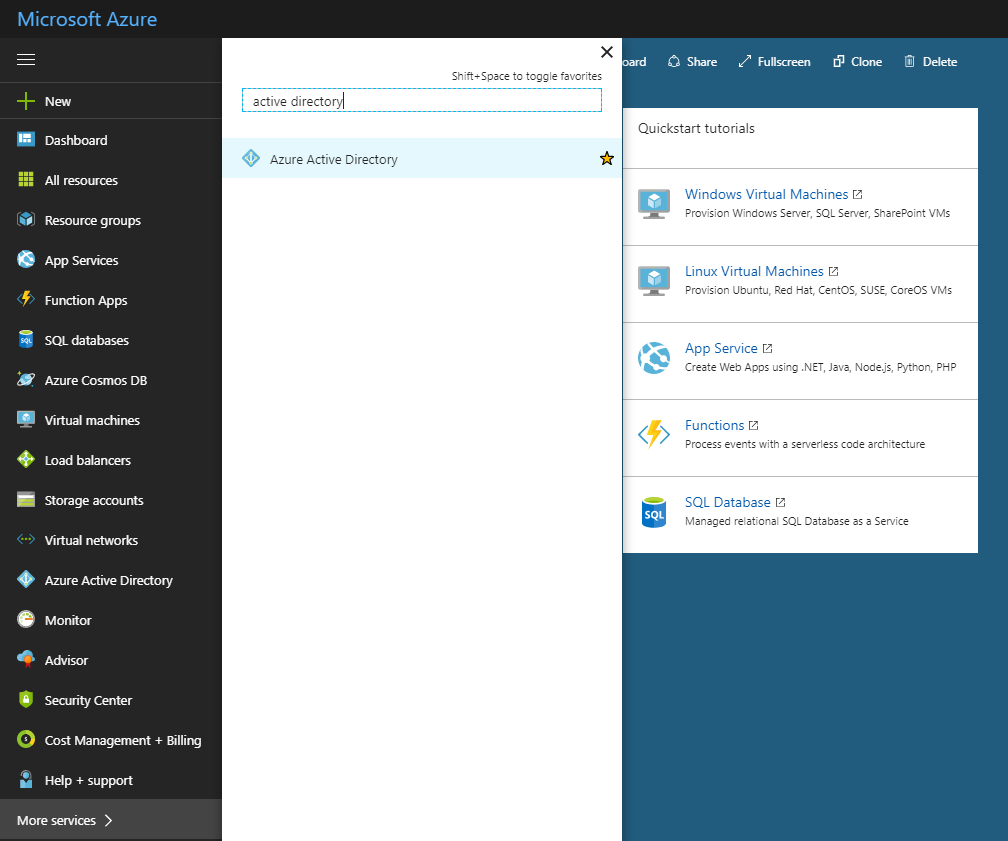
- Click on App registrations and choose Add.
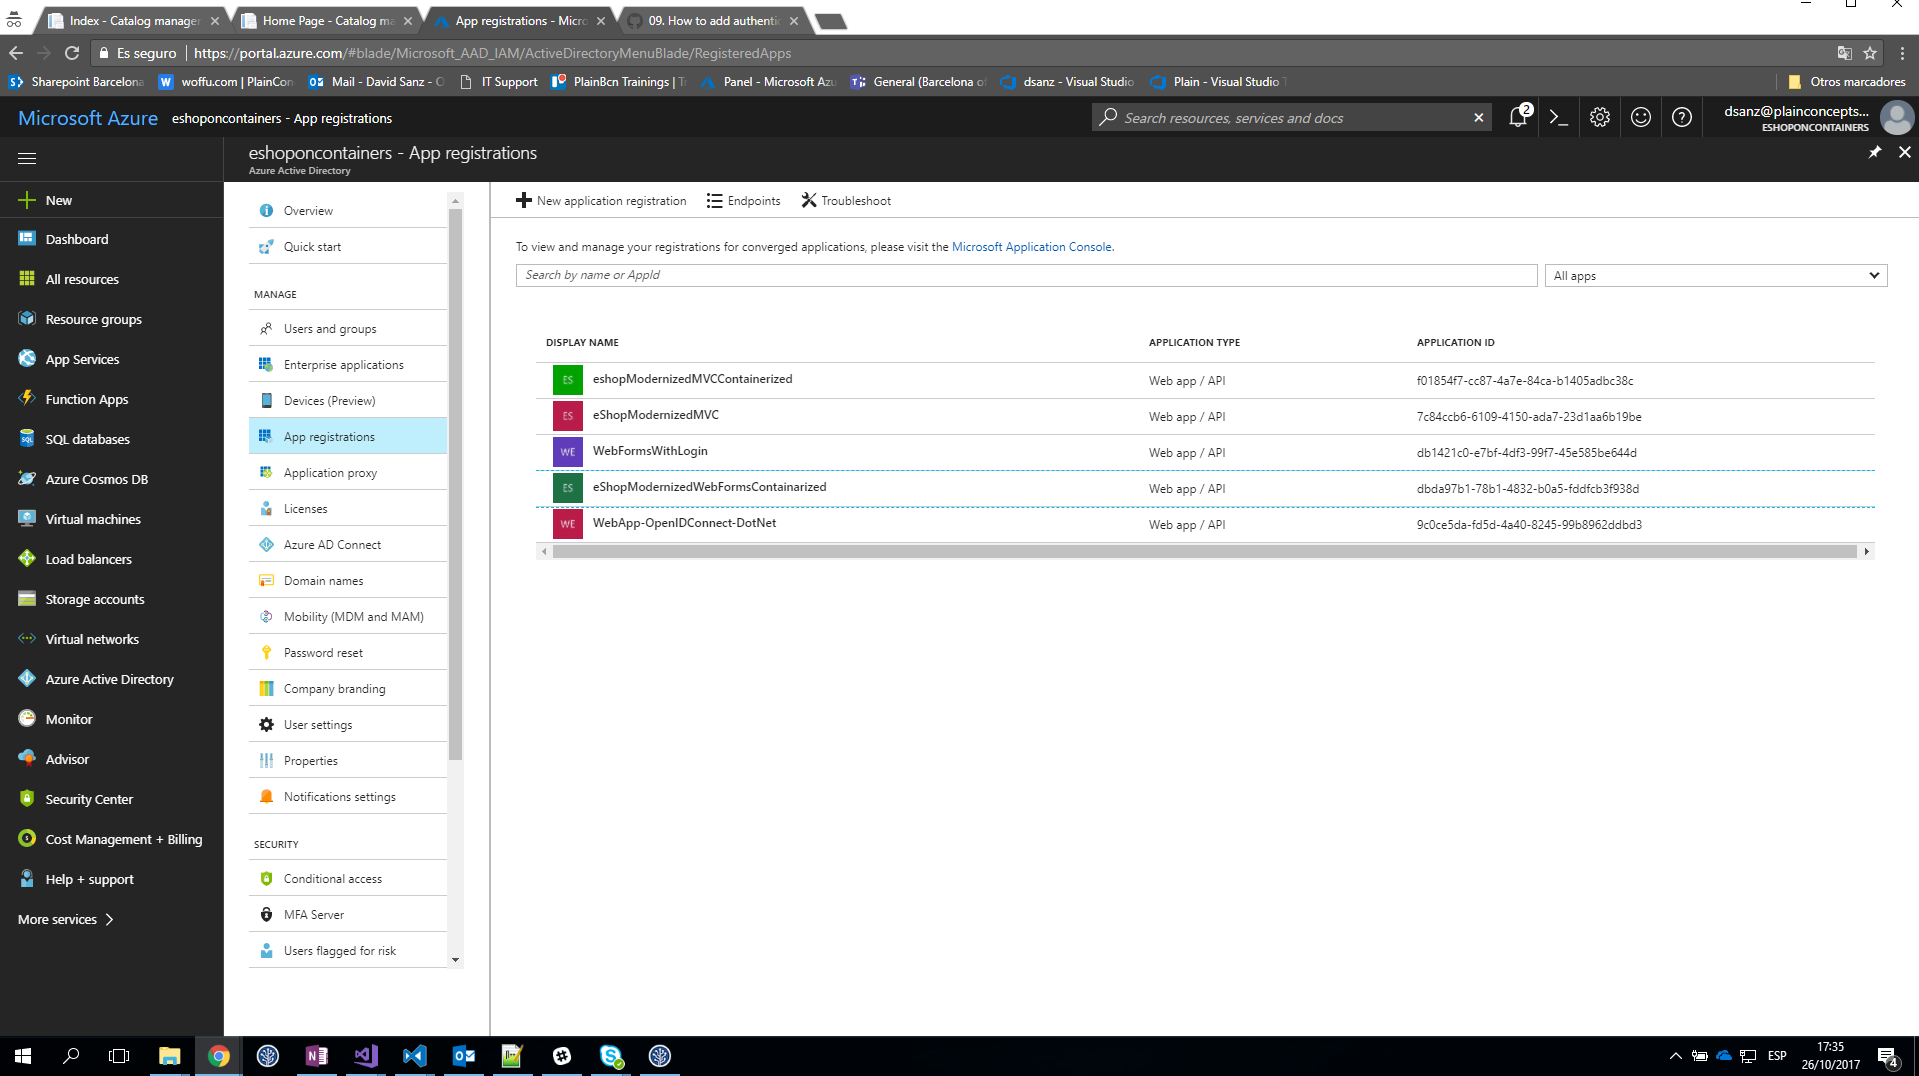
- Enter a friendly name for the application, for example 'eShopModernizedMVC' in our case and select 'Web Application and/or Web API' as the Application Type. For the sign-on URL, enter the base URL for the sample, which follows the schema by default
http://<IP of the Doker host>:<open port for the service>/. Since we have chosen for our modernizing MVC app the port 5115, the base URL ishttp://<your IP>:5115/. Click on Create to create the application. - While still in the Azure portal, choose your application, click on Settings and choose Properties.
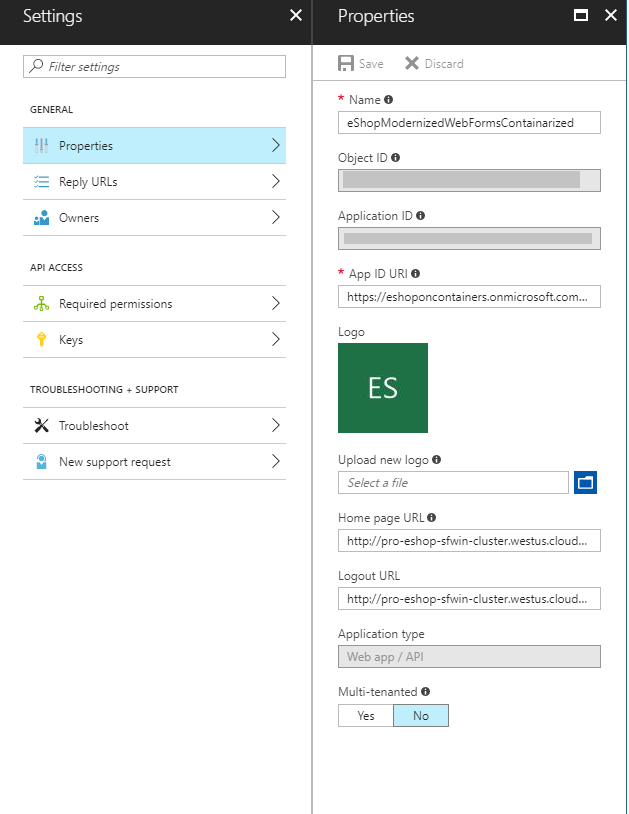
- Find the Application ID value and copy it to the clipboard. It will be used for the configuration of the application.
- In the same page, set the
logoutUrlproperty tohttps://<IP of the Docker host>:5115/Account/EndSession. This is the default single sign out URL for this sample. - For the App ID URI, it must have already the value
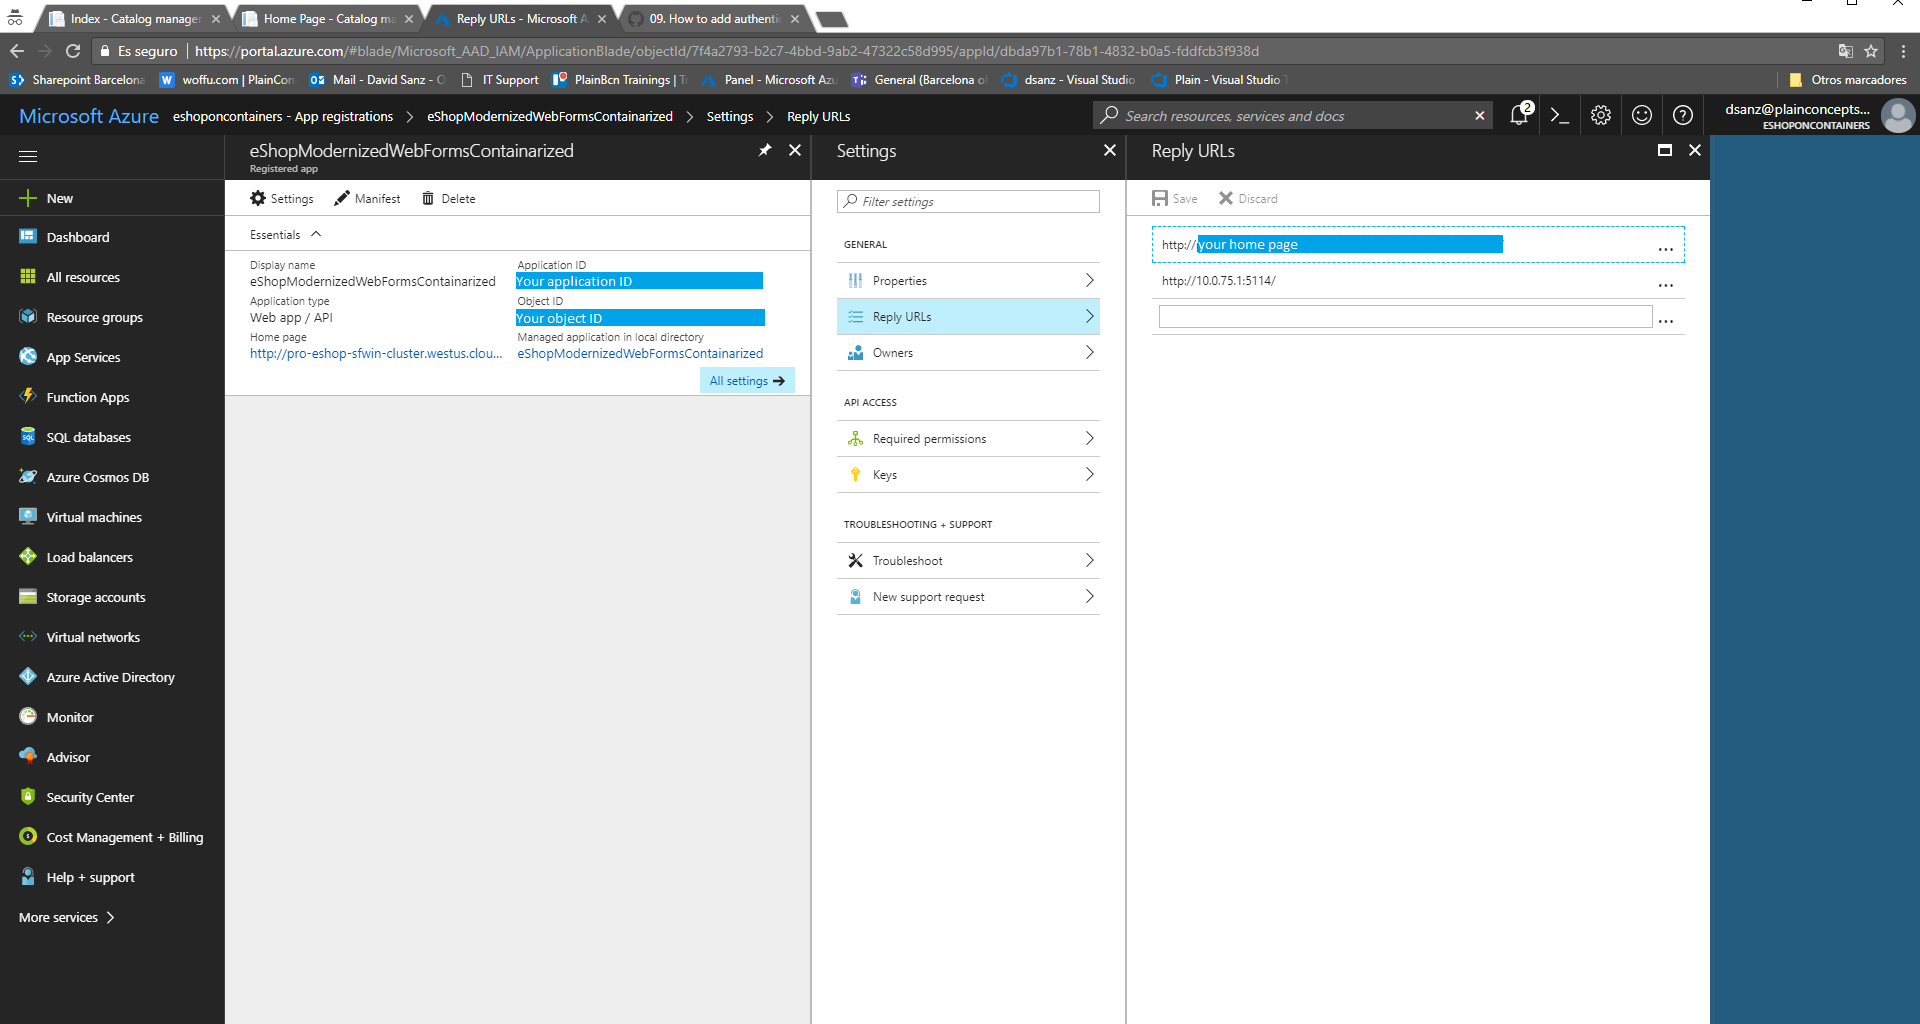
https://<your_tenant_name>/WebApp-OpenIDConnect-DotNet, but in case it is different just replace the<your_tenant_name>part with the name of your Azure AD tenant. The rest must remain the same. - The last point should be correct as well, but review under the Reply URLs section. There normally you must have the URLs where you will redirect from your application (the home page by default). Since you could have more than one in your application, you can add here more than one.
- In the project properties, go to Web properties, set the Project Url to be the SSL URL.
- Add the following ASP.Net OWIN middleware NuGets: Microsoft.IdentityModel.Protocol.Extensions(v1.0.2), System.IdentityModel.Tokens.Jwt(v4.0.2), Microsoft.Owin.Security.OpenIdConnect(v3.0.1), Microsoft.Owin.Security.Cookies(v3.0.1), Microsoft.Owin.Host.SystemWeb(v3.0.1). Note: please do not use newer versions of the packages because they contain disruptive changes which are not compatible with the older MVC and WebForms frameworks.
- In the
App_Startfolder, create a classStartup.Auth.cs. You will need to remove.App_Startfrom the namespace name. You can use the code from our project as it is. Please be aware that the class ispartial. In the copied class we have the next variables:
private static string clientId = CatalogConfiguration.AzureActiveDirectoryClientId;
private static string aadInstance = ConfigurationManager.AppSettings["ida:AADInstance"];
private static string tenant = CatalogConfiguration.AzureActiveDirectoryTenant;
private static string postLogoutRedirectUri = CatalogConfiguration.PostLogoutRedirectUri;
Take into account that in our project we are using the class CatalogConfiguration as a helper class to provide the configuration values. This helper class checks if there exists an environment variable for the requested parameter, and returns its value. Otherwise, the application setting value is returned. This follows the philosophy of the containers, where the values of the parameters are stored as environment variables. At the same time if the application is executed in a local IIS, not dockerized, the parameters will be taken from the Web.config as usual, so the application can still be tested without Docker. You can use our strategy or another one, but it is important to respect the priority of the environemnt variables when resolving in Docker environment.
- Right-click on the project, select Add and there select Class. In the search box enter "OWIN". "OWIN Startup class" will appear as a selection; select it, and name the class
Startup.cs. - In
Startup.cs, replace the code for theStartupclass with the code:
public partial class Startup
    {
        public void Configuration(IAppBuilder app)
        {
            ConfigureAuth(app);
        }
    }
If you compare this code with the one in eShopModernizedMVC, you will see that in our application we have a conditional clause.
public partial class Startup
    {
        if (CatalogConfiguration.UseAzureActiveDirectory)
        {
            ConfigureAuth(app);
        }
        else
        {
            app.Use<AuthenticationMiddleware>();
        }
    }
In this case we have added a mechanism to disable authentication by configuration. If the authentication is disabled by configuration (UseAzureActiveDirectory is false) we add one OWIN middleware that auto login automatically all the requests, avoiding a 401 unauthorized response. You can choose to add this option but it is not mandatory to securize. If you want this optional configuration, add the code and the AuthenticationMiddleware class found in the eShopModernizedMVC application to your project. In this middleware class you sill have to configure the claims that make your application to be authorized in case you have configured any.
- In the
Views-->Sharedfolder, create a new partial view_LoginPartial.cshtml. Replace the contents of the file with the contents of the file of same name from the sample. - In the
Views-->Sharedfolder, add to_Layout.cshtmlthe@Html.Partial("_LoginPartial")line to make it visible in the main view, just as in our sample. - Create a new empty controller called
AccountController. Replace the implementation with the contents of the file of same name from the sample. - If you want the user to be required to sign-in before they can see any page of the app, then in the
HomeController, decorate theHomeControllerclass with the[Authorize]attribute. If you leave this out, as in our example, the user will be able to see the home page of the app without having to sign-in first, and can click the sign-in link on that page to get signed in. In our example we have securized only the actions that modifies the catalog (Create, Edit an Delete products). We have achieved this by adding the[Authorize]attribute to the actions instead to the whole class. For instance here we add the attribute to theEditaction from theCatalogController:
[Authorize]
public ActionResult Edit(int? id)
{
    ....
}- In
web.config, in<appSettings>, create keys for the AAD:
<add key="UseAzureActiveDirectory" value="false"/>
<add key="ida:ClientId" value="[Enter client ID as obtained from Azure Portal, e.g. 82692da5-a86f-44c9-9d53-2f88d52b478b]" />
<add key="ida:Tenant" value="[Enter tenant name, e.g. contoso.onmicrosoft.com]" />
<add key="ida:AADInstance" value="https://login.microsoftonline.com/{0}" />
<add key="PostLogoutRedirectUri" value="https://localhost:44321/" />
Please note that the key UseAzureActiveDirectory is optional, as explained in the step 5
- In
docker-compose.override.ymlunder theenvironmentfor our service, in our example theeshop.modernized.mvc, add the created new variables for AAD:
- UseAzureActiveDirectory=false
- AzureActiveDirectoryClientId=${AZURE_ACTIVE_DIRECTORY_CLIENT_ID}
- AzureActiveDirectoryTenant=${AZURE_ACTIVE_DIRECTORY_TENANT}
- PostLogoutRedirectUri=http://${ESHOP_EXTERNAL_DNS_NAME_OR_IP:-10.0.75.1}:5115/
We have not added the ida:AADInstance key to the Docker variables because this value will be fixed to https://login.microsoftonline.com/{0} and thus it is not needed as variable.
- Add the variables to the .env file. This file is used by docker-compose to make possible to change the variables when running a new container. Otherwise the key vlaues would be the ones fixed when the image was created (the values in the docker-compose file).
AZURE_ACTIVE_DIRECTORY_CLIENT_ID=<YourAzureActiveDirectoryClientId>
AZURE_ACTIVE_DIRECTORY_TENANT=<YourAzureActiveDirectoryTenant>
You can run the application and will connect to AAD to login.
You can follow the same steps as for the MVC application, in the previous section, except for the UI and the controllers. The steps 6, 7, 8, and 9 are different. You have to do instead the next steps:
- Add the login control to your Site.Master class. Copy the asp:LoginView control from the eShopModernizedWebForms Site.Master page. In the Site.Master.cs copy the methods Unnamed_LoggingOut() and Login_Click(). If you have chosen to add the variable to make optional the login, add as well the content of Page_load().
- For any page that you want to securize (for instance the Create page) you have to add the code that ensures that the request is authenticated. This is automatic for MVC with the
[Authorize]attribute. In Webforms we can do it manually in the Page_load(). See Create.aspx.cs in the Catalog folder of eShopModernizedWebForms application:
// Send an OpenID Connect sign-in request.
if (!Request.IsAuthenticated)
{
    Context.GetOwinContext().Authentication.Challenge(new AuthenticationProperties { RedirectUri = "/" }, OpenIdConnectAuthenticationDefaults.AuthenticationType);
}- In case you want to have optional login by configuration, as in MVC you can add the OwinMiddleware class AuthenticationMiddleware found in the eShopModernizedWebForms application to your own project, adding to the Invoke method the specific claims required for your authentication.
Once we have the application registered in the proper AAD, and the code implemented, we can add our users. To create a new user you can follow this steps in the Azure portal:
- Enter to the Azure Active Directory in your Azure Portal (steps 1 to 3 from the first section of this entry)
- Click to Users and groups in the left pane.
- Click to All users and there you can click to New user
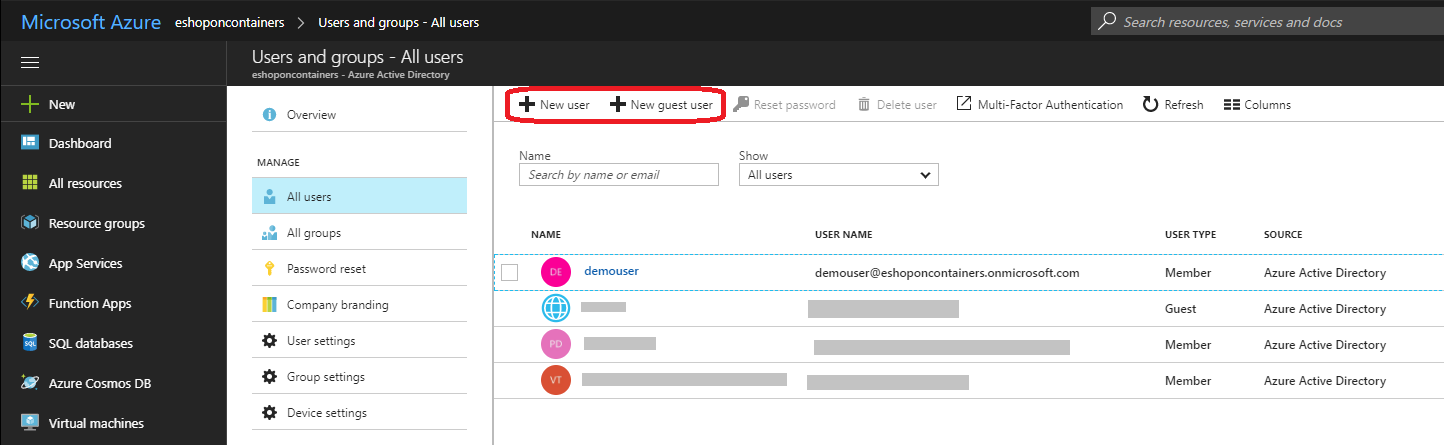
- In the form fill the required data for the new user. Have in mind that the user name must contain one existing and valid directory. In our case for instance is eshoponcontainers.onmicrosoft.com, the domain of our tenant.
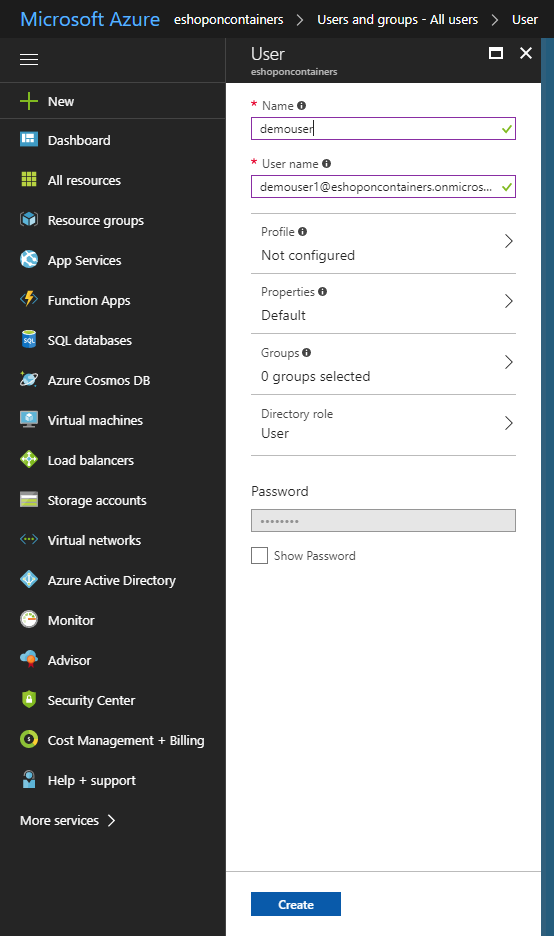
- Once we click to create, the user is created

From this point we go back to our applciation and we can login with the new user:
