openSUSE SLEs Installation
Wiki ▸ Installation ▸ EGroupware openSUSE/SLEs Installation
This installation instruction is based on openSUSE 42. If you wish to install EGroupware on other environments please select relevant instruction from the below list.
 Debian Debian |
 CentOS/RedHat CentOS/RedHat |
 Ubuntu Ubuntu |
For any Linux distribution the installation steps has to be done as user root and with root rights in a terminal session.
IMPORTANT: EGroupware installation consists of two versions; EPL Version and Community Version. Technically, the only installation difference between EPL and Community version is their repository URLs. Please make sure you will follow relevant difference parts of your desired version.
Are you an expert admin? then follow the Express Instruction below, otherwise please follow step-by-step installation.
| Express Instruction |
|---|
1- vi /etc/zypp/repos.d/egroupware-epl.repo Add the following lines: #EGroupware EPL repository[egroupware-epl]name=EGroupware EPL (openSUSE VERSION)type=rpm-mdbaseurl = https://USERNAME:PASSWORD@download.egroupware.org/repos/stylite-epl/openSUSE_Leap_42.2/gpgkey = https://USERNAME:PASSWORD@download.egroupware.org/repos/stylite-epl/openSUSE_Leap_42.2/repodata/repomd.xml.keygpgcheck=1enabled=1autorefresh=1
|
2- zypper update
|
3- zypper install egroupware-eplfollow the installation instruction |
4- less /root/egroupware-epl.log
|
| 5- Congratulations!!! You may login to your EGroupware instance |
You can quickly install EGroupware by following below steps:
Add EGroupware repository into source lists in order to fetch EGroupware's packages.
vi /etc/zypp/repos.d/egroupware-epl.repo
For EPL Version:
#EGroupware EPL repository
baseurl = https://USERNAME:PASSWORD@download.egroupware.org/repos/stylite-epl/DISTRO_NAME/
Example:
#EGroupware EPL repository
baseurl =  https://peter:secret@download.egroupware.org/repos/stylite-epl/SLE_15/
OR
For Community Version:
#EGroupware Community repository
baseurl = https://download.egroupware.org/repositories/server:/eGroupWare/DISTRO_NAME/ ./
Example:
#EGroupware Community repository
baseurl = https://download.opensuse.org/repositories/server:/eGroupWare/SLE_15/
Replace the following variables used in above urls with your own values: USERNAME:PASSWORD are your given credentials for EPL version.
DISTRO_NAME: Means the version of distribution you're install EGroupware on it. You can find out the right version name from following list:
| DISTRO_NAME | ||||
| openSUSE_Leap_15.1 | openSUSE_Leap_15.2 | openSUSE_Leap_42.3 | openSUSE_Leap_42.2 | openSUSE_Leap_42.1 |
| SLE_15 | SLE_12 |
*** if you are not sure what distribution you're running, simply execute the following command:
cat /etc/os-release
After adding EGroupware's repository into repos list, we need to update to fetch packages.
zypper refresh
Now it's time to install egroupware-epl packages. Depends on the webserver you would like to use with EGroupware, you may install a webserver among the egroupware-epl packages, by default Apache will be installed.
zypper install mariadb egroupware-epl
e.g. for nginx installation:
zypper install nginx php7-fpm mariadb egroupware-epl
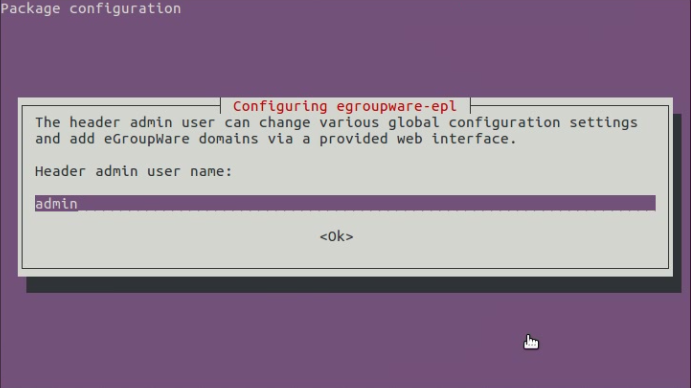
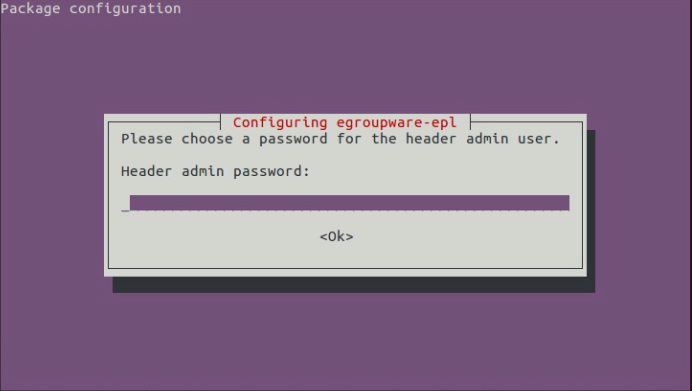
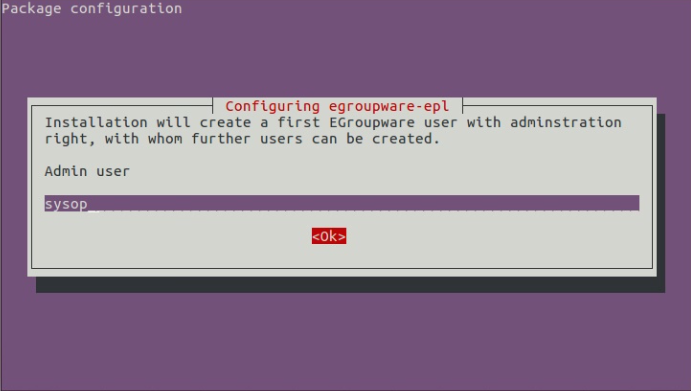
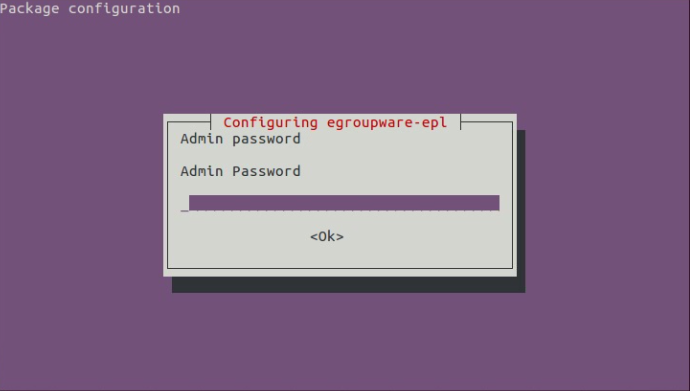
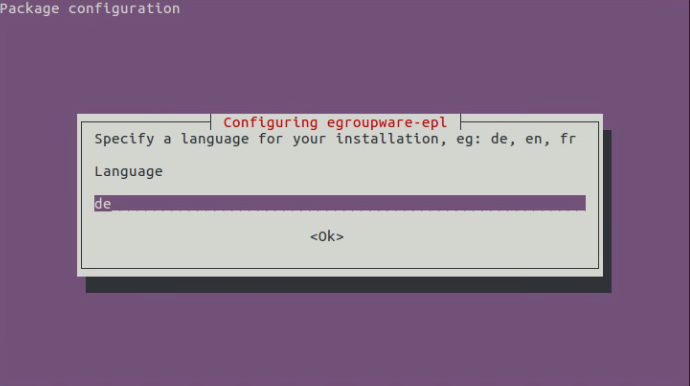
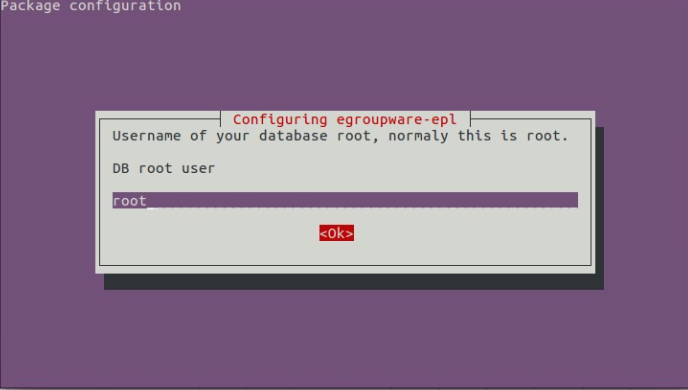
follow the installation instruction as shown in following figures:
In the following instructions whenever you leave a password field empty, a randomized password gets generated which you can get access to it via egroupware-epl.log file after installation is completed.
 |
 |
 |
 |
 |
 |
You may check egroupware-epl.log file in order to check if everything went well during the installation plus you can get access to your egroupware credentials.
less /root/egroupware-epl.log
from this moment on you may get logged in to your EGroupware instance via the mentioned url in egroupware-epl.log. Although, before doing that we highly do recommend to take couple of more steps to adjust couple of settings for PHP and MyQL in order to get the best performance.
Congratulations!!!
_back to Top
| Language: |  |
- General information
- Distribution specific instructions
- Update recommendations and troubleshooting
- Tuning EGroupware for higher number of users
- Docker-compose installation: Linux, Windows, Mac, Synology, QNAP
- Configure IMAP push
- IMAP Push Notifications for Dovecot 2.2+
- Using EGroupware Mail server with ActiveDirectory
CTI / Computer Telephone Integration
Using SmallPART with a LMS (Moodle, OpenOLAT, ...)
Synchronisation between Untis / Webuntis and EGroupware
Development