Rocket.Chat Integration
Wiki ▸ Rocket.Chat Integration
Rocket.Chat needs to be installed and configured.
For it's configuration it is necessary to know under which domain name EGroupware and Rocket.Chat are running.
Therefore you should install EGroupware first, add your certificate or use eg. Certbot to get one, BEFORE you attempt to install Rocket.Chat.
If you use a MariaDB/MySQL on the host (default for 19.1) you need to make sure that user root can connect without a password, eg. by creating a /root/.my.cnf file with the following content:
[client]
password = secret
Install with the following command:
apt update
HTTP_HOST=example.org apt install egroupware-rocketchat
Replace example.org with your full qualified domain name, and apt with yum or zypper, depending on your distribution.
That will not only install Rocket.Chat, but also configure it to authenticate via OAuth against EGroupware.
If you missed to specify the correct domain when you installed Rocket.Chat, you can always run the installation again - losing your chat data of cause - by running the following command:
HTTP_HOST=egw.my-new-domain.org /etc/egroupware-rocketchat/install-rocketchat.sh
The following steps show the configuration process in detail.
After installation is finished, you may want to look into some administration details e.g. to configure non-EGroupware accounts, configure Rocket.Chat to forget user session on window close (if browser is used with different EGroupware users) or to switch video-chat (Jitsi) off for GDPR reasons.
| Installation steps |
|---|
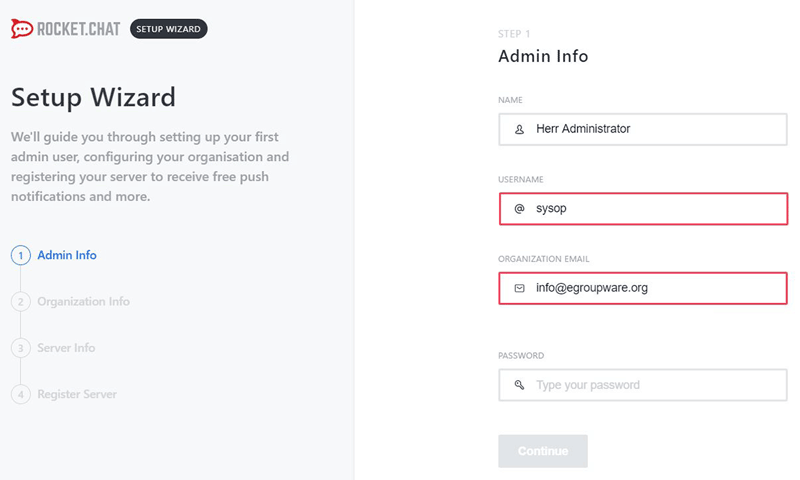
| (1) Admin Info- Configuring Admin username |
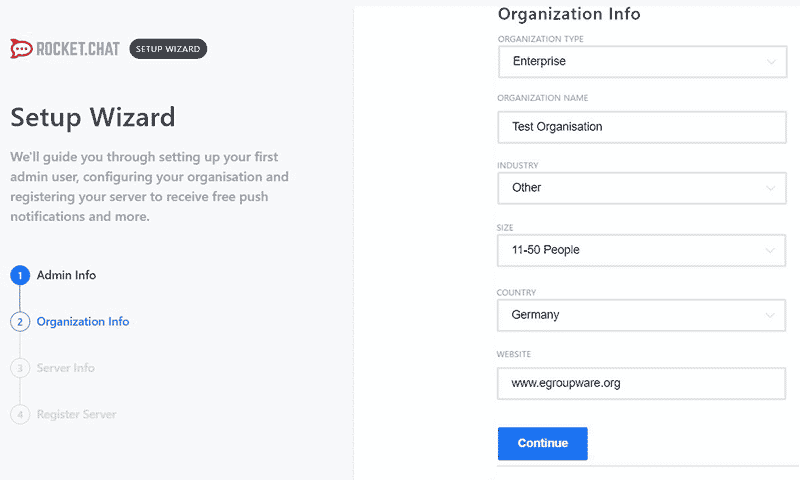
| (2) Organization Info- Configuring Organizational data |
| (3) Server Info- Setting site name, language and server type |
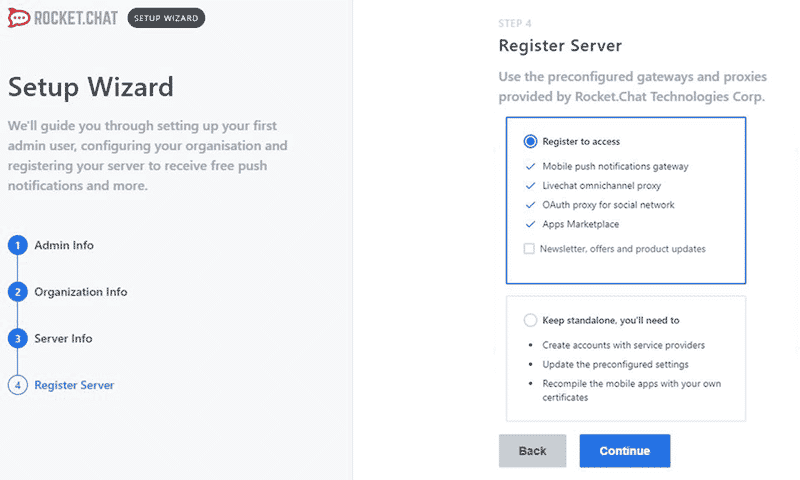
| (4) Register Server- Selecting type of Server |
Following steps are only necessary, if you did not specify your domain-name with HTTP_HOST environment variable
| Only for on-premise installations |
|---|
| (5) Create OpenID Client- Create OpenID-Identifier and secret via Admin->OpenID |
| (6) Custom OAuth- Configuring Custom OAuth on Rocketchat server |
| (7) General settings- Enable send and receive for iframe integration |
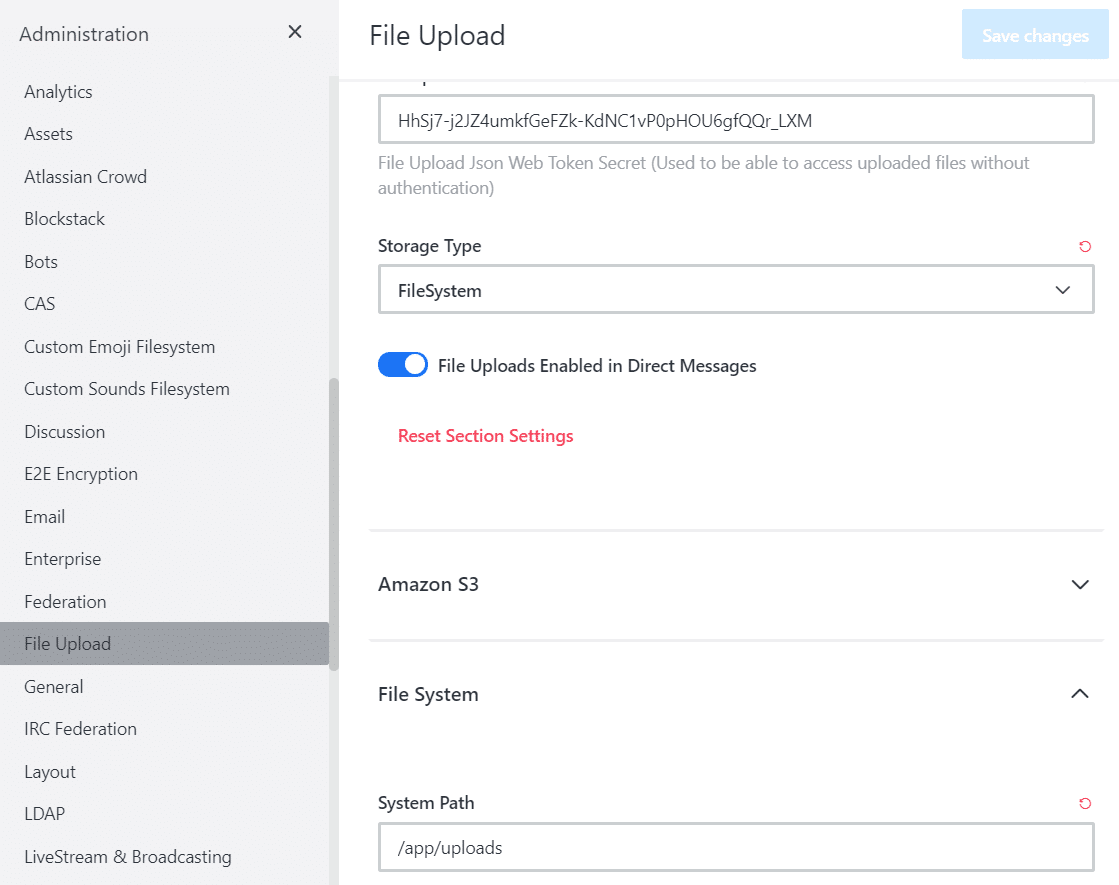
| (8) File Upload- Change Storage type to FileSystem and configure the system Path |
The setup wizard can be reached via the address of your Rocket.Chat. So for example:
https://domain.tld/home/
Or more simply click on the link icon in Admin/Applications/Rocket.Chat/Site Configuration.
You need to provide a valid EGroupware username (recommended your user) to configure the first administrator of Rocket.Chat. That administrator can add additional EGroupware users as Rocket.Chat admins. Additionally you should insert a valid email address, which is used for the registration process of Rocket.Chat.
Organization information is just some data which gets reported to Rocket.Chat via registration but its not used in EGroupware Rocket.Chat itself.
Here you can configure the site name is displayed in external Rocket.Chat clients. It's quite useful when using more than one Rocket.Chat.
It makes sense to choose a meaningful name to identify the chat server!
Please choose a language which is common for the majority of your users. The language can be changed later on MyAccount for each user.

You need to decide, if you like to register your Rocket.Chat to get push notifications for smartphones. In that case all inserted information of the configuration gets sent to Rocket.Chat!
EGroupware does not provide a push-service for notifications on smartphones, but you can use Rocket.Chat cloud services. Please take GDPR into account for your decision.
If you don't need push notifications, you can skip registration and click on keep standalone.
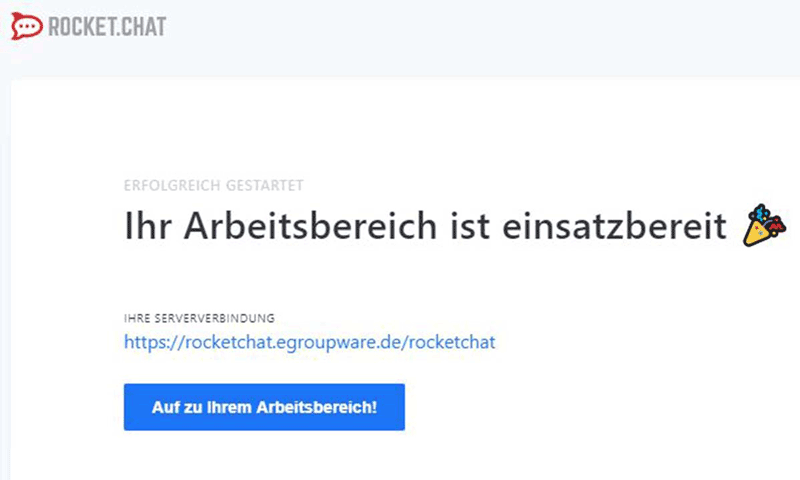
Rocket.Chat is successfully installed, you can now configure additional parameters e.g. switch video-chat off or add non-Egroupware user.
The following steps are only necessary, if you installed Rocket.Chat without specifying the domain via HTTP_HOST environment variable!
You need to create a Client-Identifier and secret via Admin -> OpenID / OAuth2 server -> Clients.
Please insert a name for your Client-Identifier e.g. EGroupware Rocket.Chat and an Identifier - recommended Rocket.Chat
This Client-Identifier needs to be inserted in the next step where you add the custum OAuth server in EGroupware.
The secret should be a random string (recommended minimum 12 chars), which is used and inserted in the custom Oauth server configuration together with the Client-Identifier in the next step!
The Redirect URI needs to match your servername e.g. testbox.egroupware.org in my case. Using https is recommended, but only if secure connection is correctly configured! For Allowed grants you need to choose: Authorization Code, Refresh Token and Implicit.

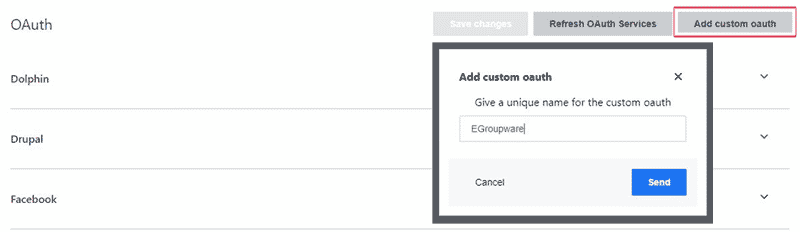
Please go back to Rocket.Chat into Administration -> OAuth and click on Add Custom OAuth. Give it a name eg. EGroupware.
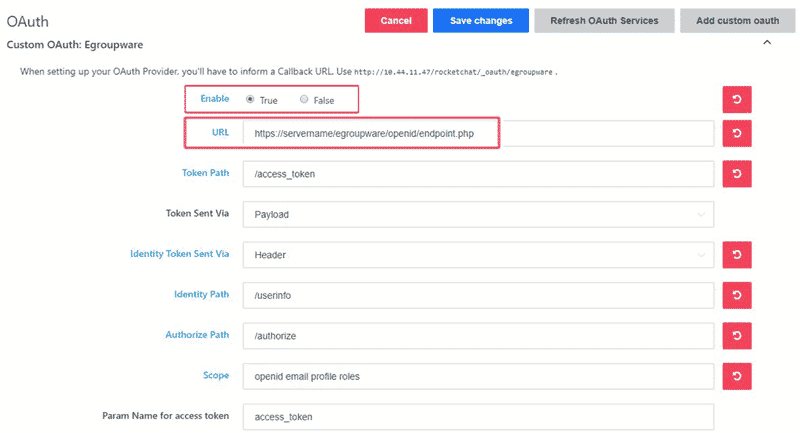
At the top of the page the custom OAuth server EGroupware is added and you need to insert several values. Please check all red marked rows where you need to insert your data. These listed values in the screenshot are just a few important values, but all need to be inserted correctly!
URL: http(s)://servername/egroupware/openid/endpoint.php Servername needs to be matched with your servername or IP-address.
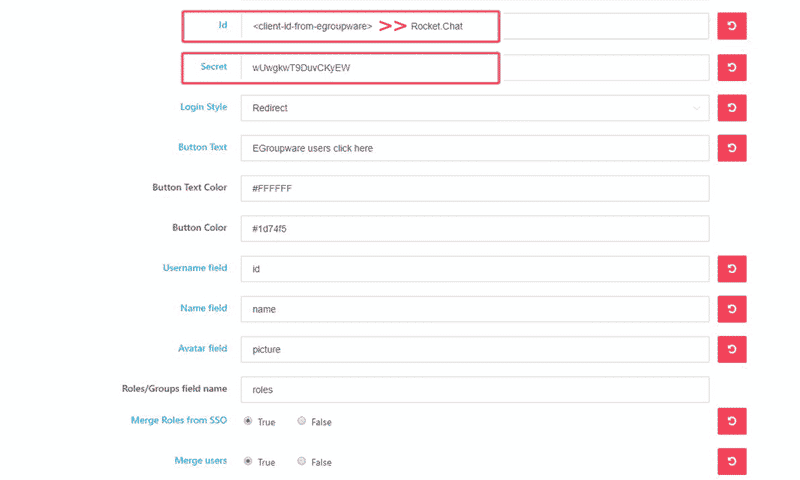
Id needs to be the Client-Identifier you previously configured for the OpenID Client! Similar is valid for the secret.
If you can't remember the secret you chose previously, you may re-generate and save the secret in the EGroupware OpenID client.
See also previous tab Create OpenID client
Please check also our technical documentation page on Github: https://github.com/EGroupware/openid
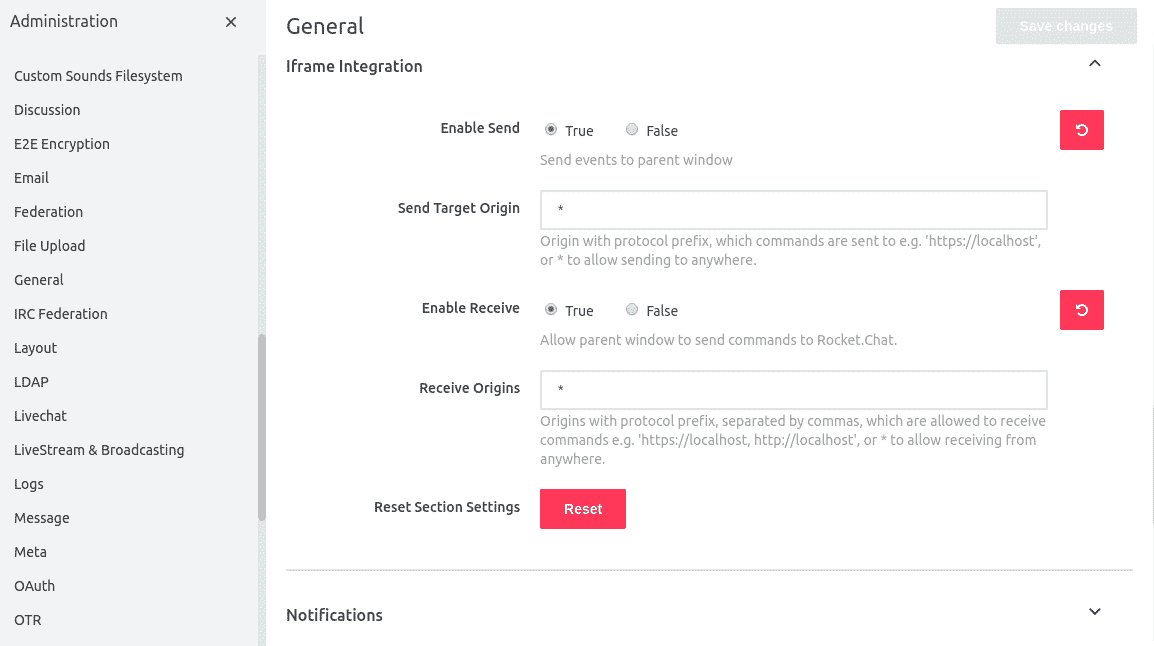
Please go back to Rocket.Chat into Administration -> General and click on Iframe integration. Both send and receive need to be enabled in order to get iframe integrated features within EGroupware working: e.g. login / logout to Rocket.Chat automatically as soon as the user logs in or out in EGroupware.
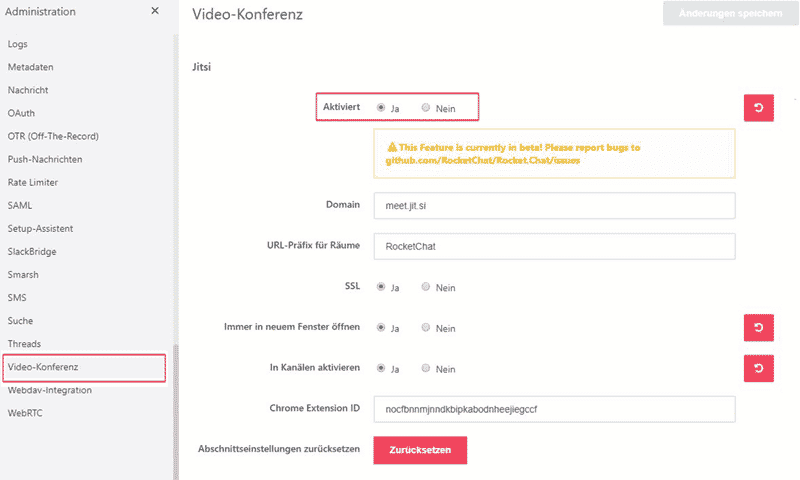
You need to decide whether to allow video-chats and screen-sharing or not for GDPR reasons.
EGroupware does not provide a Jitsi-server for video-chats, therefore the Jitsi-server configured by default is a public server from the open source project Jitsi Meet. Please take GDPR into account for your decision, we have not found neither any declaration of data protection on their website nor where the servers are located.
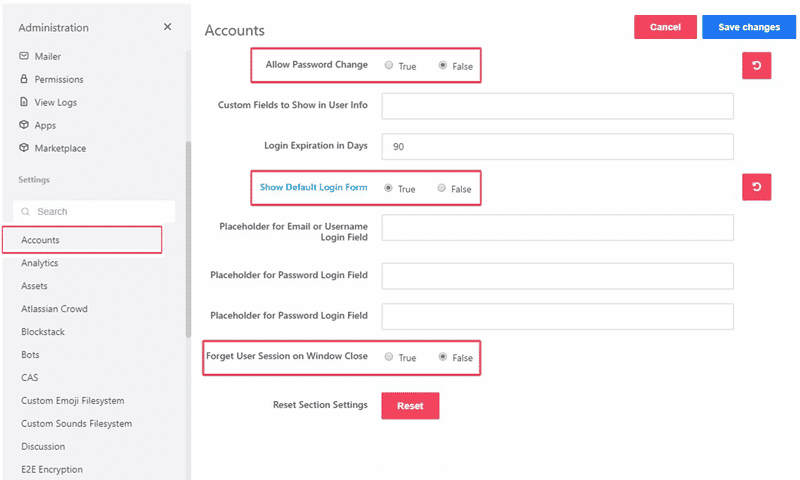
If you would like to allow non-EGroupware users to take part in your Rocket.Chat you can enable in Account Settings to show the Default Login Form.
By default we only show: EGroupware users click here and not username and password fields for external users! EGroupware users should always use the provided click here link!
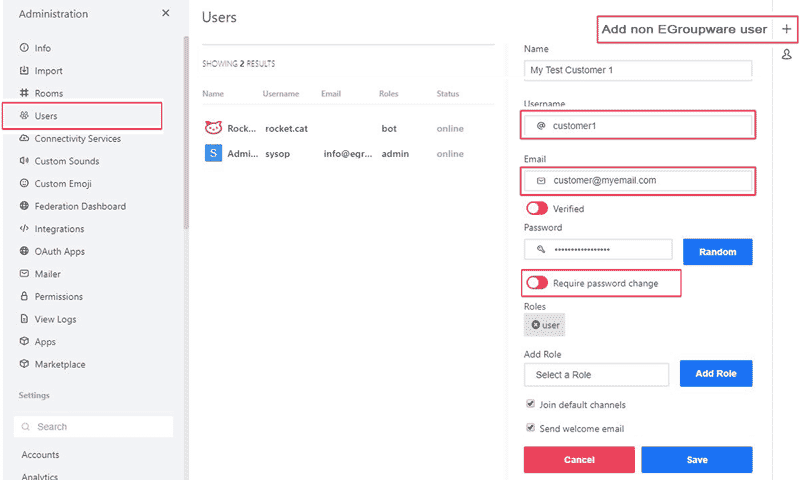
Next step is to create the non-users manually in administration users. You need to specify username and password. depending on the settings to allow password change or not, please allow or deny that the user can change the password which is switched off by default.
the password change in rocket.chat will not change the user password of egroupware!
Finally, an email will be sent containing the login details for Rocket.Chat to the configured email address during the setup.
Here we can enable file uploads and configuring max file size, valid media types and more. Storage type should be set to FileSystem.
back to Top
| Language: |  |
- General information
- Distribution specific instructions
- Update recommendations and troubleshooting
- Tuning EGroupware for higher number of users
- Docker-compose installation: Linux, Windows, Mac, Synology, QNAP
- Configure IMAP push
- IMAP Push Notifications for Dovecot 2.2+
- Using EGroupware Mail server with ActiveDirectory
CTI / Computer Telephone Integration
Using SmallPART with a LMS (Moodle, OpenOLAT, ...)
Synchronisation between Untis / Webuntis and EGroupware
Development