Title Graphics for Non Artists
Ever wanted a title Graphic for your game? Something cool, and polished, and amazing? Only to realize you can't do it a pixel at a time?! YOU ARE NOT ALONE!
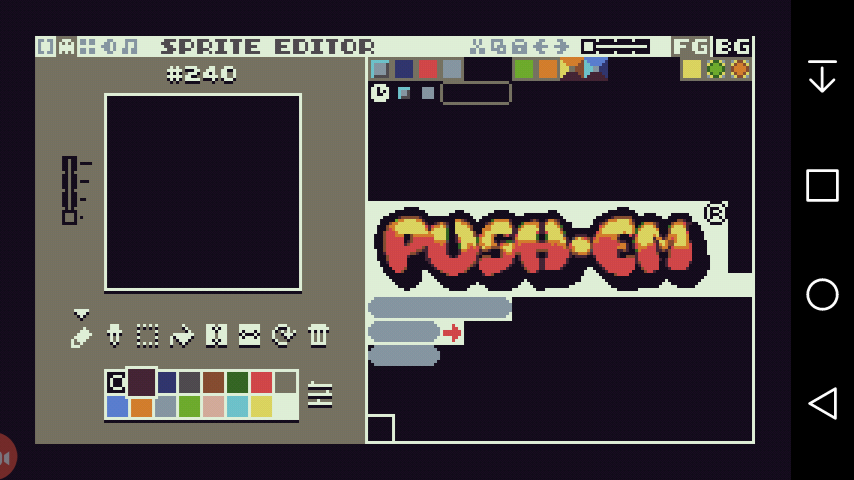
This is the kind of graphic we'll end up with:

You can play push-em here: https://tic80.com/play?cart=251
For this tutorial (I'm using android) you'll need: 8-bit Photo Lap (free app) Image Converter (free app) a hi-res graphic
I did a quick google "free graphic generator" and found a ton of websites to great web graphics, or small business logos. I used https://cooltext.com

Here's the logo I decided on.

Load the image into 8-bit Photo Lab and go crazy making it look exactly like you want! make sure to set the resolution to 128 width max...otherwise it'll never fit on TIC-80's sprite sheet. Also remember that when it's imported, TIC will convert the colors to the closest equivelant in the palette.
Save the image, and it'll be a .png at 1660 pixels wide!! That's like a million times bigger than the size we need!!

load the image into Image Converter and hit next, it'll ask for the size percentage for the output. if you used 8-bit Lab then just use 7% to get 127 pixels wide. otherwise do the following math to get the percentage you need:
take the hi-res image width: hi-res-width take the desired image width: final-width
final-width X 100 / hi-res-width = required-percentage
for my image that would be:
128 X 100 / 1660 = 7.7108433735
ditch the decimal to end up with 7%

Now we have something like this...it looks 8-bit and will fit on a sprite sheet. The next step is importing it. If you haven't drawn any sprites yet then just load your cart, and type:
>import sprites
navigate to your image and import it. It's now on your sprite sheet.
but what if you've already got sprites?!
load a new cart:
>new
import your image:
>import sprites
save as a temp:
>save temp
go into the cart and look at the sprite sheet.

cut a piece of the image to the clipboard...
save temp cart...
load your game cart...
go to you're sprite sheet and paste the chunk...
save your game cart...
load the temp cart...
repeat until the entire graphic is copied to your game cart.
 .
.
Now you have a great looking tile graphic to include in your menu screen!!
If you have questions, or requests for further tutorials that email me at bearknucklesketching@gmail.com