Setting Up A Library Project
An library project is a development project that holds shared source code and resources. Other application projects can reference the library project and, at build time, include its compiled sources in their build files. Multiple application projects can reference the same library project and any single application project can reference multiple library projects.
Core provides mechanism to configure your library projects:
- In the Package Explorer, right-click the library project and select Properties.
- In the Properties window, select the Android properties group at left and locate the Library properties at right.
- Select the is Library check box and click Apply.
- Click OK to close the properties window.
![] (https://raw.github.com/Siminov/core/docs/github/v2.0/library_setup.android.png)
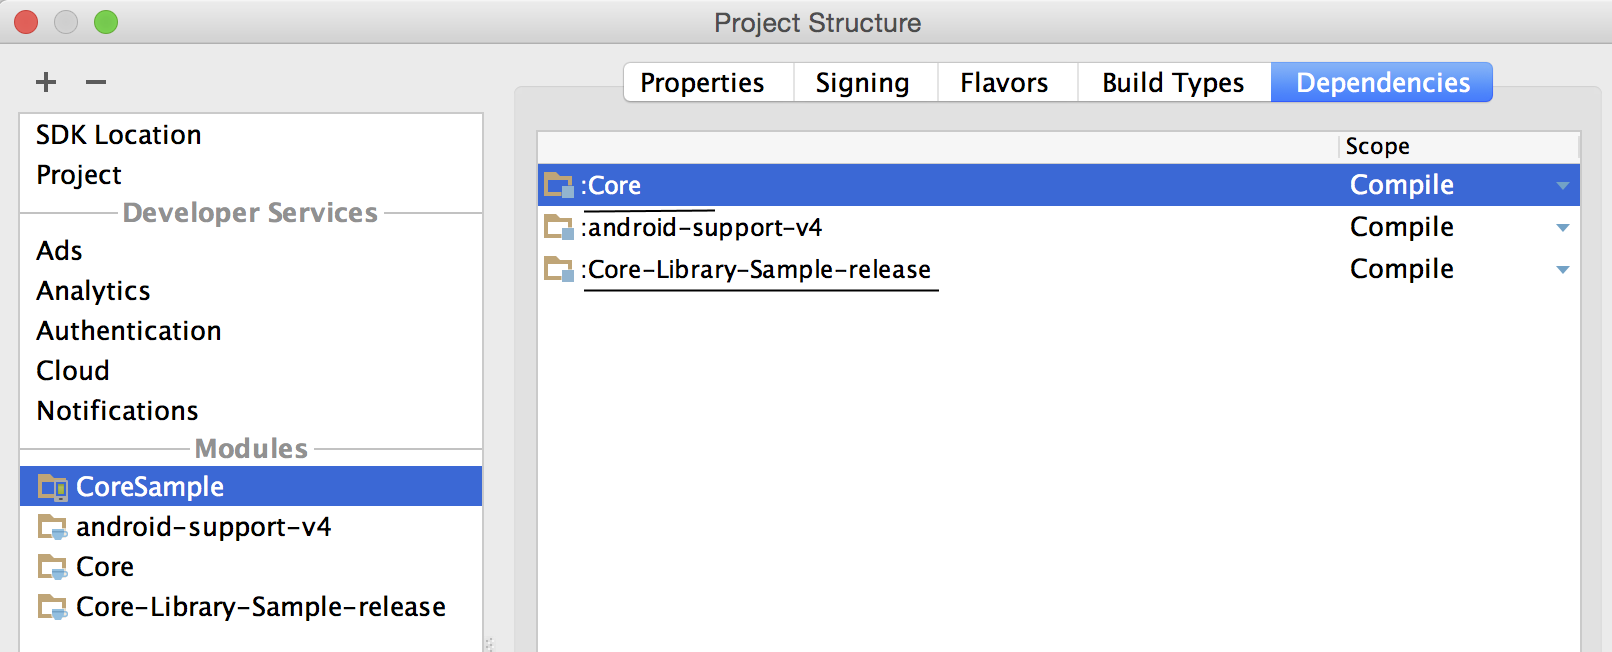
- In Xcode, create a Cocoa Touch Static Library project.
- The new library project comes with a couple of template source files. You can delete these, and choose to “Move to Trash”.
![] (https://raw.github.com/Siminov/core/docs/github/v2.0/library_setup.ios.png "")
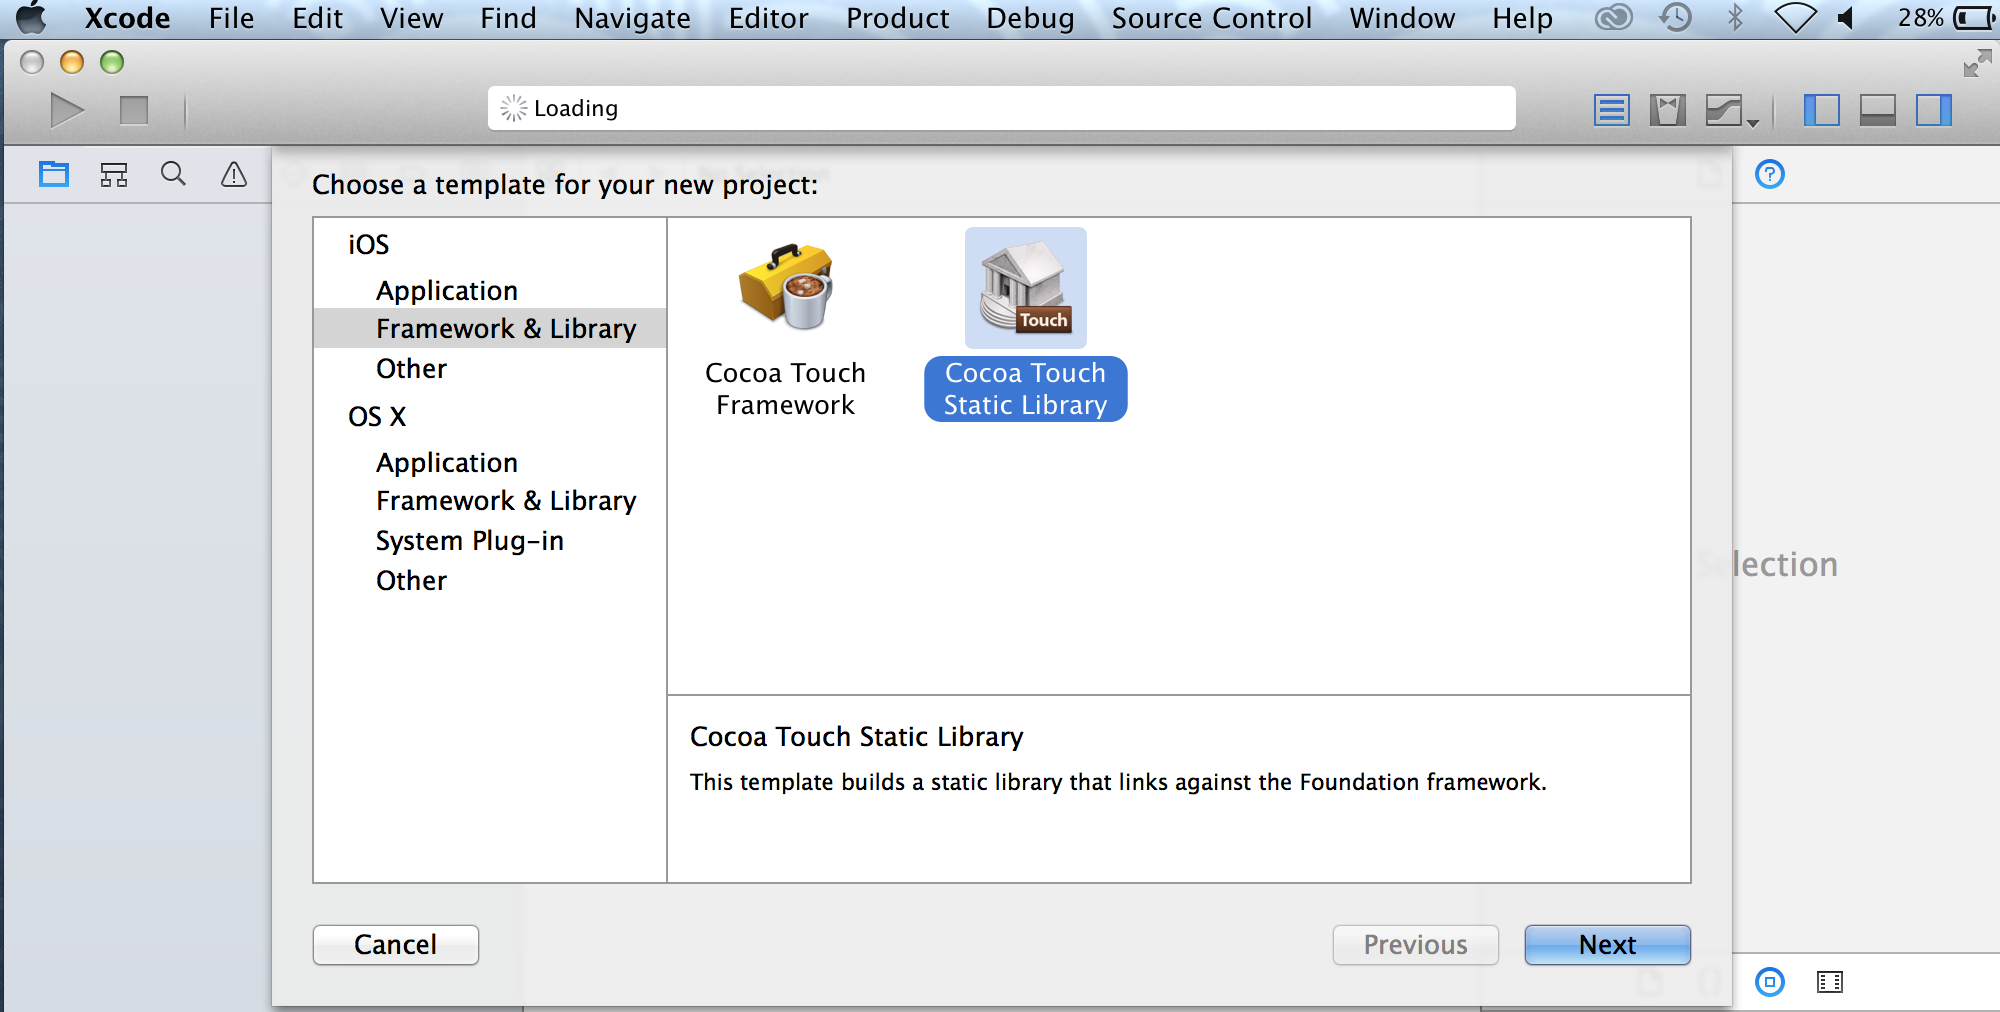
- On the File menu, select New Project to open the New Project dialog box.
- In the list of Windows project types, select Class Library, and then type the library name in the Name box.
Note: Always specify the name of a new project when you create it. Doing this sets the root namespace, assembly name, and project name, and also makes sure that the default class will be in the correct namespace.
- In Solution Explorer, right-click library project and then click Properties.
Note: Notice that the Default namespace box contains the same library project name. The root namespace is used to qualify the names of class in the assembly.
- In Solution Explorer, right-click your library project, click Add, and then click Class. The Add New Item dialog box is displayed.