Virtual Machine Installation
This installation method is currently supported on all the operating system supported by Virtual Box (Windows, MacOS X, Linux/Unix) and strongly recommended for Windows user that could have been experienced some issues with docker in the past.
To start you will need to download and install Virtual Box in your computer and download as well the VM image from NetPyNE-UI VM images (pick the latest version). Once downloaded the image you can proceed to unzip this since we will need the image file, e.g. "netpyne_ui_version_0_3.vdi", further down in this procedure.
Please note the recommendation below: Docker for Windows uses Microsoft Hyper-V for virtualization, and Hyper-V is not compatible with Oracle VirtualBox. Therefore, you cannot run the two solutions simultaneously. If you already tried to use Docker for windows and you are now ending up here after the docker installation you need to disable the Hyper-V to make VirtualBox works again. To do so you have to uncheck Hyper-V in
Control Panel -> Programs -> Programs and Features -> Turn Windows features on or off.
Images below.


After a reboot, VirtualBox should be able to run again.
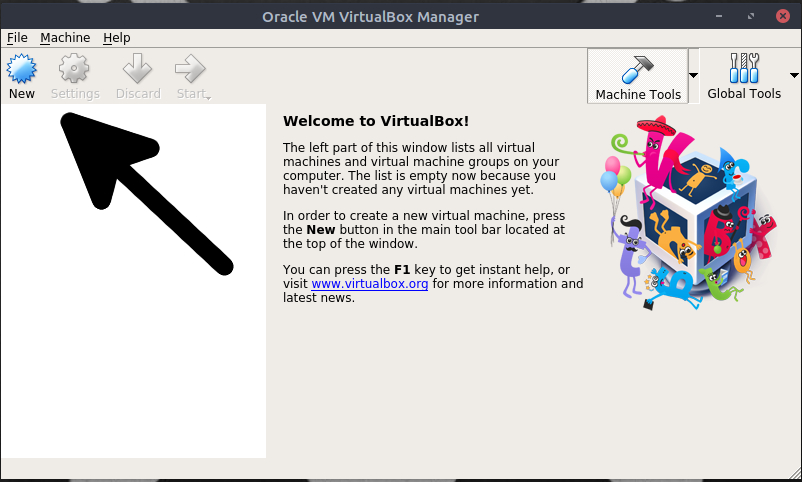
Assuming the installation of Virtual Box has been completed, open Virtual Box and start creating a new image as per screenshot below.
Once the box "Create Virtual Machine" has been opened we can use the following parameters to create our virtual machine and when ready we can click on "Next >".
- Name: netpyne-ui (this is arbitrary and you can choose the name you prefer).
- Type: Linux
- Version: Ubuntu (64-bit).

In the next box we have to allocate the amount of memory we want to allocate exclusively for the virtual machine. We strongly recommend to allocate at least 3GB of memory for the virtual machine, if possible 4GB would it be far better since some simulations like gui_tut2.py will definitely need more memory to be imported and executed.

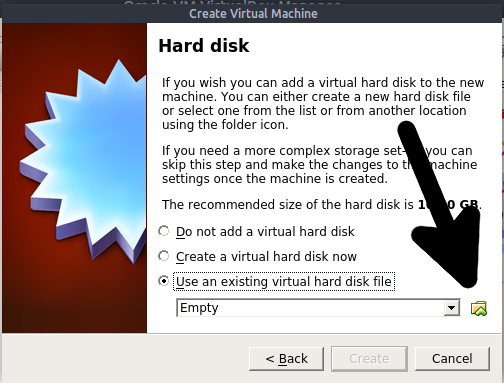
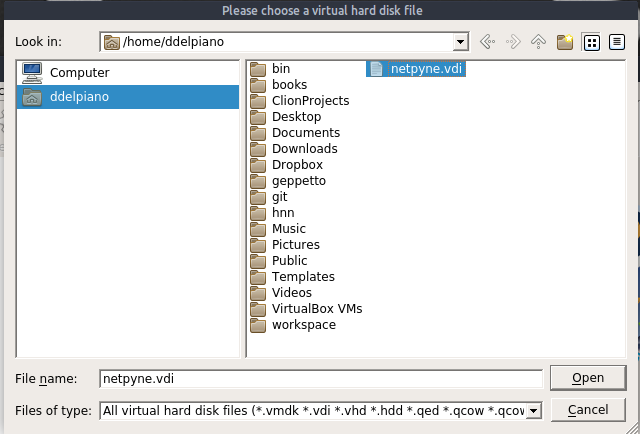
The Next box will let us decide whether we want to create a brand new image or use an image already created. At this point you can pick the file netpyne.vdi from the zip archive downloaded and extracted previously. In the choice box menu pick the voice "Use an existing virtual hard disk file" and then click on the folder icon to select the file netpyne.vdi.
Once the image has been selected we are ready to launch and use our virtual machine, so we can proceed clicking "Start".

In few seconds we should be in front of our Ubuntu MAte login page, you can use the credentials below.
- Username: testuser
- Password: testuser
Quick tip, I would recommend to set the display with the resolution that better fits with your monitor, as per image below.

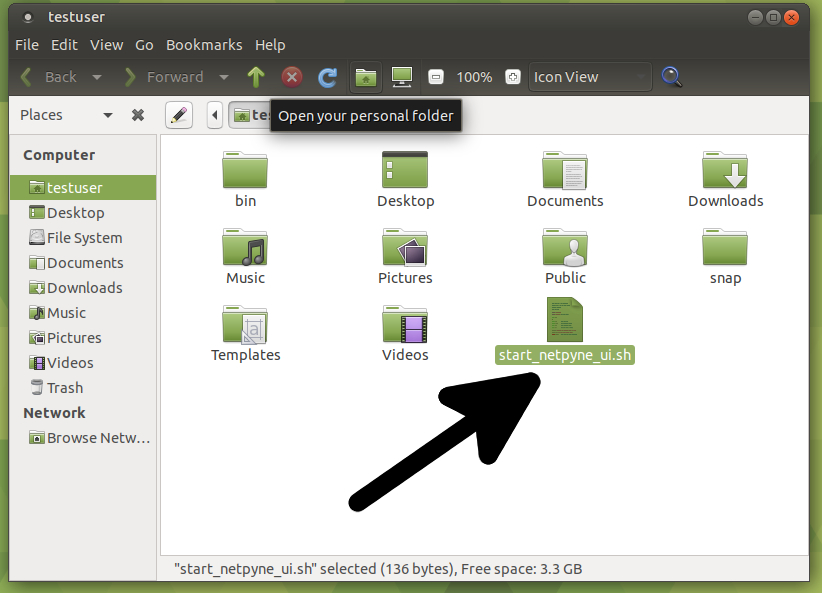
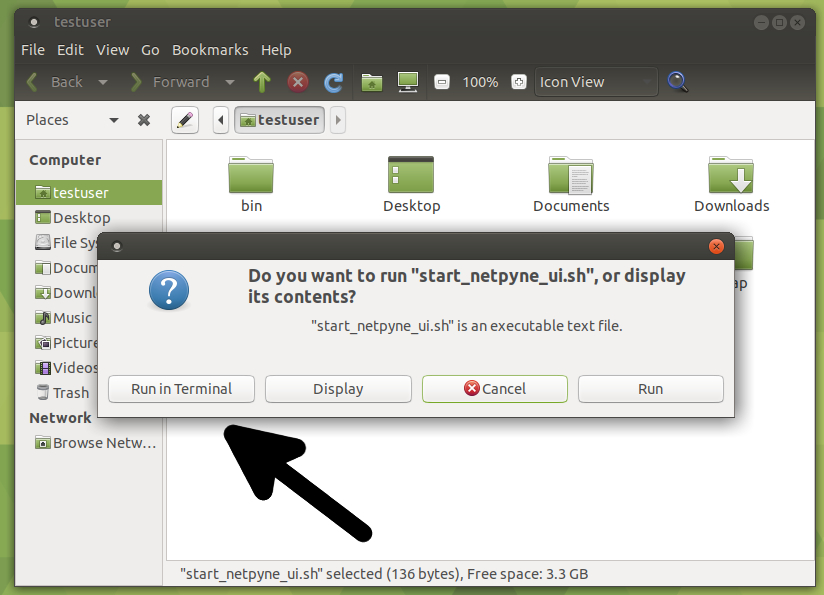
Good, if you arrived until this point we are now ready to use NetPyNE-UI. You can follow this procedure either using the terminal or the graphic interface, I will continue to use the UI in my case. First of all open the folder on the desktop called "testuser's Home".

Now click on the bash script called "start_netpyne-ui.sh" and then click on "Run in Terminal".
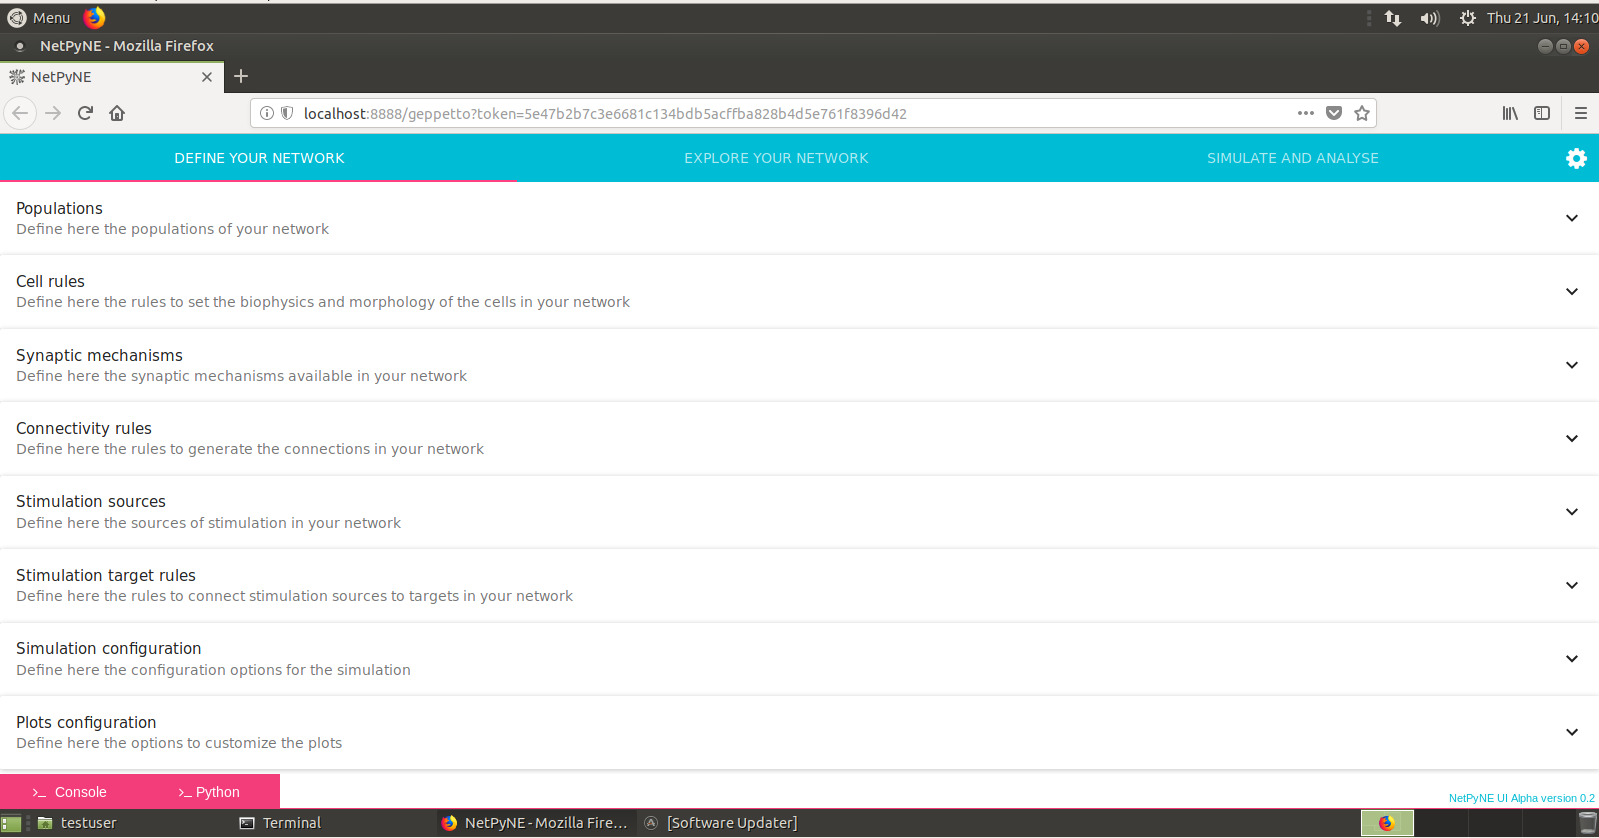
Great, now you should see the browser firefox opening with the NetPyNE-UI ready to be used.
In order to stop NetPyNE-UI use the other script called "stop_netpyne-ui.sh" and then click on "Run in Terminal".


Thanks!