You've just gotten DF1 in your hands and wondering what you can do with it? There are tons of things you can do.
Here's a highlevel overview of the features:
- Fully realized device that's open source!
- Accelerometer capable of 2/4/8g acceleration detection in both 8 or 14 bit resolution
- Motion detection such as tap, shake, freefall.
- Easily replaceable battery
- Idle battery life >1 year. Active use battery life 2-3 months.
- Antenna range : 150 - 250ft line of sight (subject to effects from surroundings)
- Upgradeable firmware over the air
- RGB LED
- FCC Certified
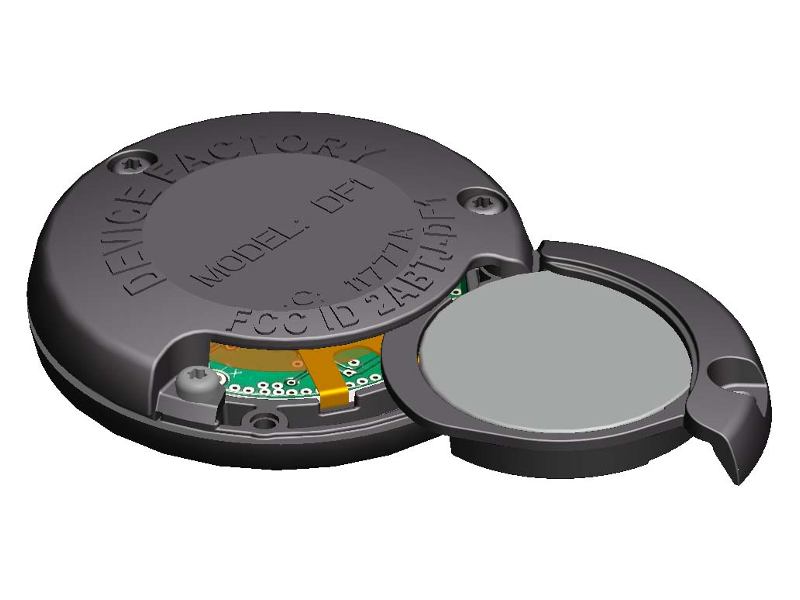
- High-quality injection molded ABS plastic enclosure
First, a bit of glossary:
| Term | Description |
|---|---|
| BLE | Bluetooth Low Energy, otherwise known as Bluetooth Smart, Smart Ready. |
| Central | Device associated with scanning and discovering other BLE devices. |
| Peripheral | Device that is discoverable - it advertises and serves data. |
| Services | A unit representing logical grouping of Characteristics. |
| Characteristics | Data generating "slots". Think of them as drawers from which you can retrieve values. |
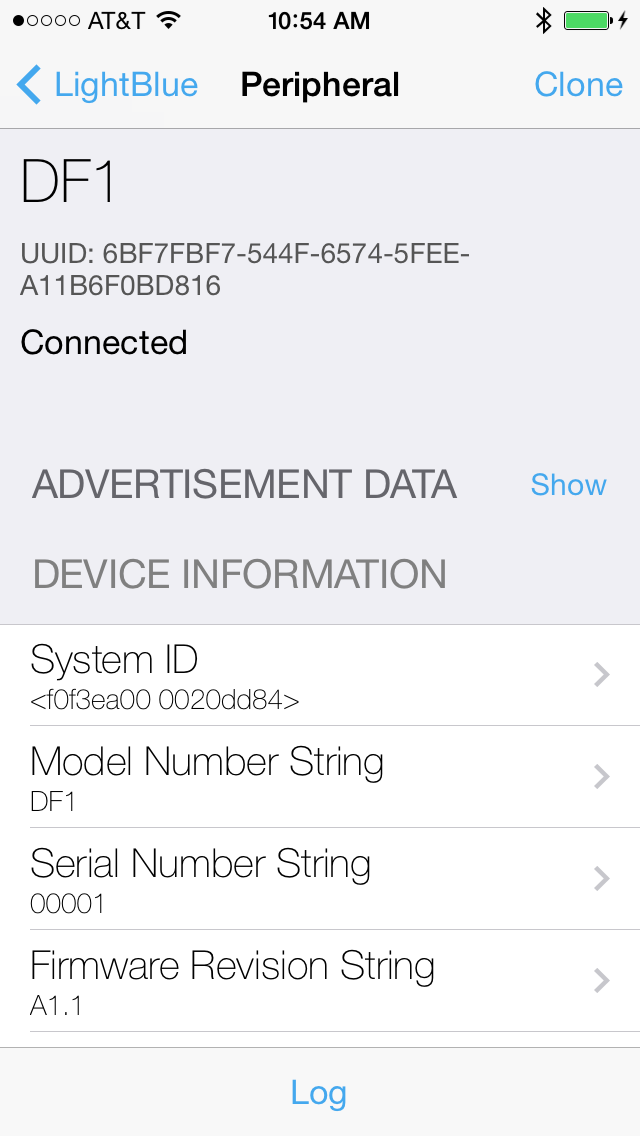
Let's first discover the device using an iPhone / iPod. There are various BLE apps on the appstore that can easily discover any BLE capable peripherals.
Cool, if you don't need to go through the basic steps, please refer to our iOS doc. You can dive straight into using our iOS library for DF1, and skip the rest of the tutorial.
For this tutorial, let's try using LightBlue app. And no, we are not affliated with the company behind LightBlue App. It happens to be one of the better BLE browsing apps out there.
Most of the BLE browser apps will first discover the device and allow you to select it. Once the device is selected, the capabilities of the device is presented in the following object hierarchy:
>
>  Device --->  Service1  --->  Characteristic1  --->  Read/Write
>                               Characteristic2  --->  Read/Notification
>                               ...
>               Service2  --->  Characteristic1  --->  Read/Notification
>                               ...
>                ...
When you "scan" for the devices, our DF1 should show up. Select DF1 from the list. LightBlue will also allow you to browse the services under DF1. For each service, list of characteristics are also displayed liked so:
You'll notice that these services exist in DF1:
| Service | Description |
|---|---|
| Device Information Service | Contains the device name, firmware, hardware versions. |
| Battery Service | Allows notification of battery levels. |
| Acceleration Service (UUID: AA10) | Various "nobs and buttons" to configure the features of the accelerometer. The accelerometer we are using is the top-of-the-line low g accelerometer from Freescale: MMA8451Q. |
| Test Service (UUID: AA60) | Allows toggle of LED's |
| OAD Service (custom) | Only used for over-air-update. |
For fun, let's try to toggle the RGB LED inside of DF1. For this, you will need to:
- Find the Test Service
0xAA60 - Under that service, find Test Config Characteristic
0xAA62 - Write hex value
01into that characteristic
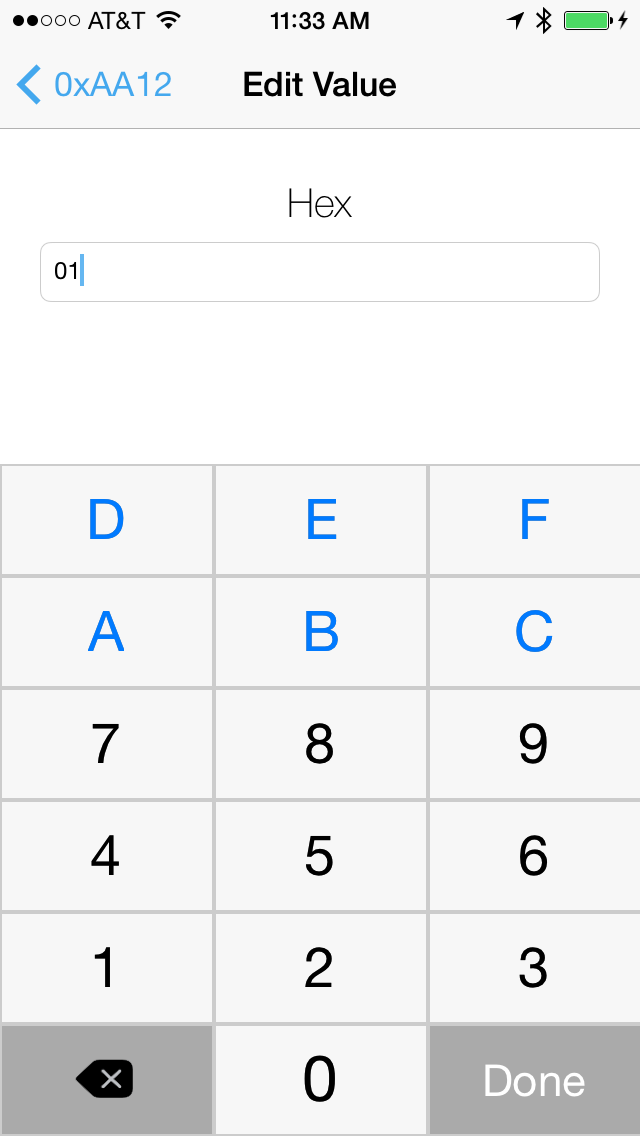
The screenshot should look like the following. Scroll to the section where it says "write value".
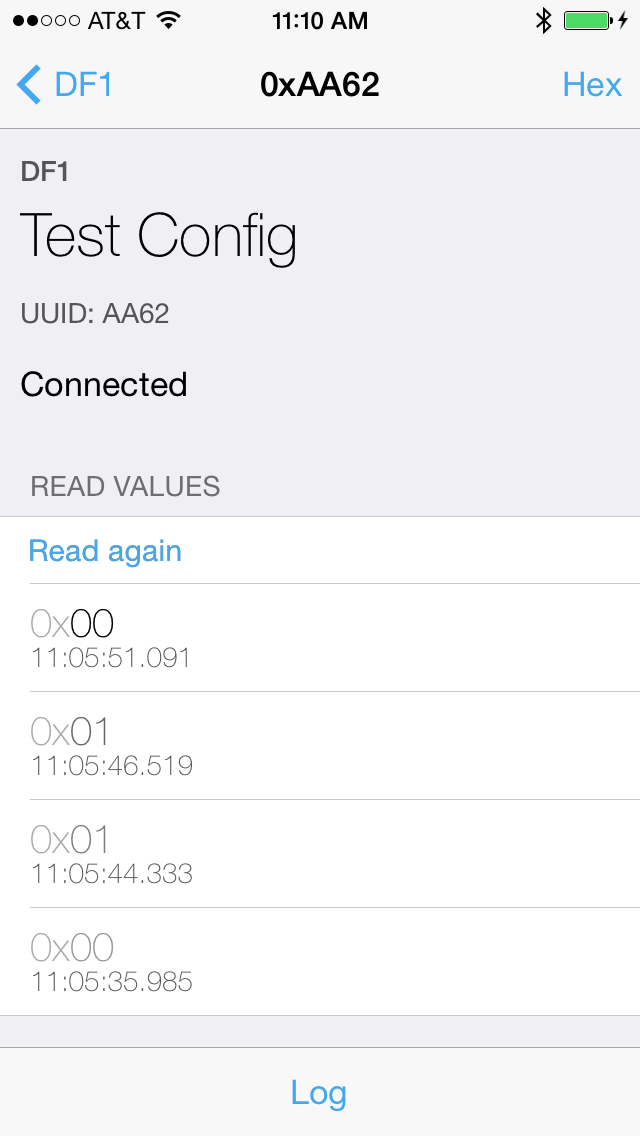
Enter 01 as the hexvalue. You'll see the red LED light up!
Enter 02 next. You'll see the green LED.
Enter 04 afterwards. Finally, the blue LED will light up.
Lastly, enter 00 to turn off the LED.
Now let's try something a LOT more interesting. We are going to try to stream x,y,z 8bit acceleration values off of DF1!
- Find the Accelerometer Service
0xAA10: it's the service with largest number of characteristics
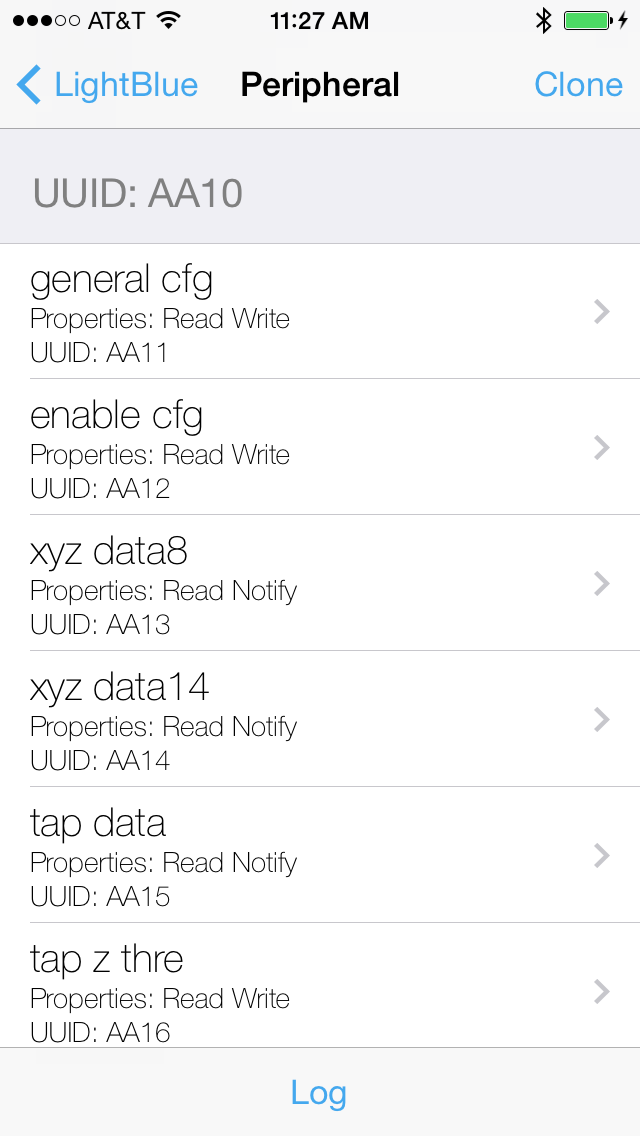
- The second on the list is Enable Cfg Characteristic
0xAA12. Select that and you'll see the following screen.
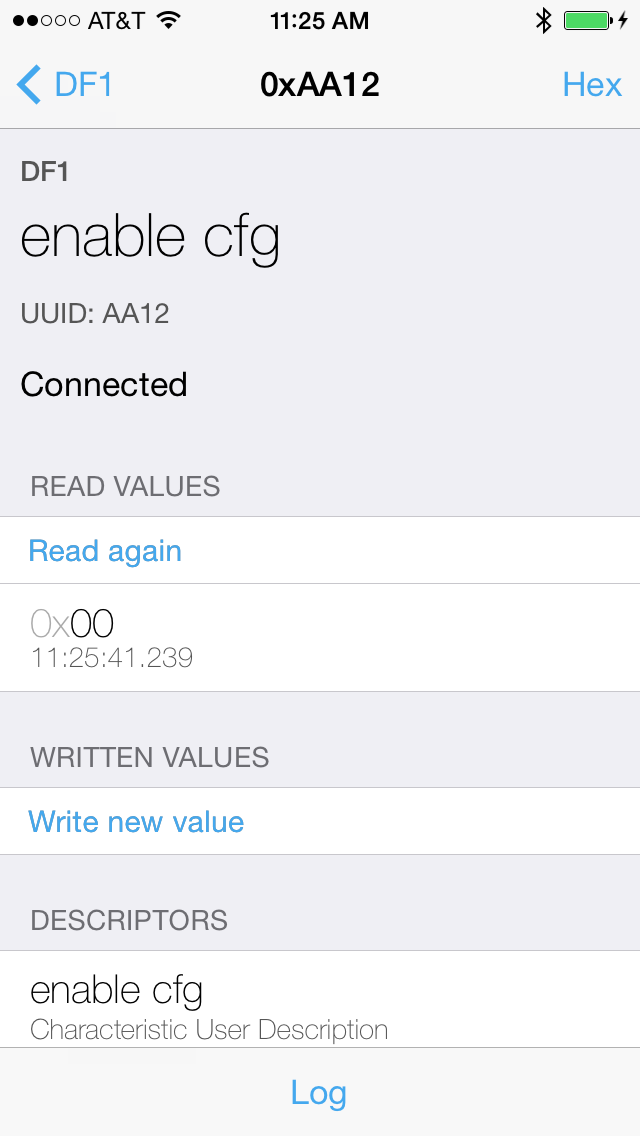
- Write hexvalue
01into the Enable Cfg Characteristic.
If successful, the green LED will toggle briefly, and then blue LED will toggle approximately every 5 seconds to indicate that the accelerometer is turned on.
- Locate XYZ Data Cfg
0xAA13.
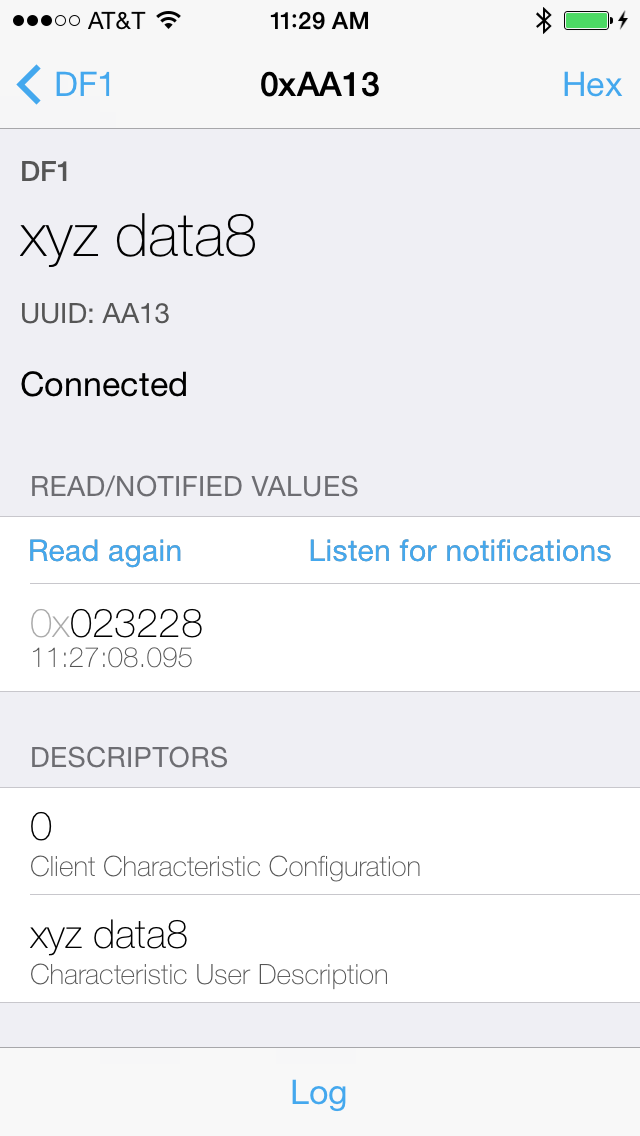
- Hit "Listen for notifications" button. You'll notice the hex values getting pumped into the app.
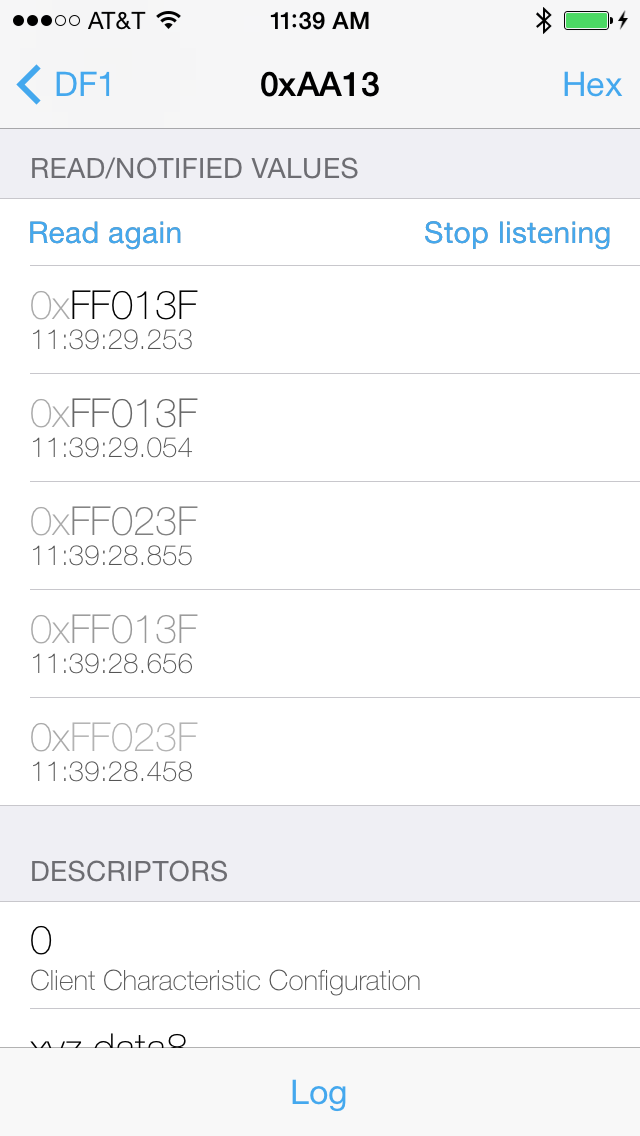
You'll notice that the data looks like:
0xFF013F -> x: 0xFF y: 0x01 z: 0x3F
These are hex values representing 3 bytes, 1 byte per axis. Thus, you are seeing unsigned 1 byte integer for x, y, z packed into a single data notification.
These simple python lines show what these 3 bytes contain. More on this in later tutorial...
In [11]: import struct

In [13]: xyz = struct.unpack('<bbb', '\xFF\x01\x3F')  # 'b' means signed byte

In [14]: print [i/64. for i in xyz]
[-0.015625, 0.015625, 0.984375]
Hopefully this tutorial gave you a little taste of what DF1 packs under that Oreo cookie shaped enclosure. The possibilities are numerous! In subsequent tutorials, we will explore other topics such as: