Get Started
The goal of this tutorial is to present NeoEMF through a simple example.
You can download a zipped version of the project here, or import it in your Eclipse workspace using the File → New → Example → NeoEMF → NeoEMF Tutorial Project menu.
In this tutorial you will create a persistent EMF resource using the Neo4j database as a backend. To do so, you will define a simple Ecore model, create instances of this model and then store these instances in the persistent EMF resource.
This tutorial is designed for the Eclipse Modeling Framework (EMF) users with a need to handle large-scale models in Java programs.
This tutorial will bring at intermediate level of expertise, where you will be able to use the Neo4j graph database to store EMF models. From this level, you can take yourself at higher level of expertise, understanding how to use NeoEMF with different databases.
Before proceeding with this tutorial you should have a good understanding of EMF. If you need more information about EMF, please follow the tutorial available here.
A basic understanding of Eclipse IDE is also required because the examples have been compiled using Eclipse IDE.
There is no need to understand Neo4j not graph databases to follow this tutorial. However, a basic understanding of Neo4j may help you to manipulate your models directly from the database.
NeoEMF is available as an Eclipse plugin. Install it by choosing Help → Install New Software…. You will need to add the following software site:
https://atlanmod.github.io/NeoEMF/releases/latest/plugin/
Select and install all items.
Emfatic will be used as a text editor to create a simple Ecore model. It is also available as an Eclipse plugin. Install it by choosing Help → Install New Software…. You will also need to add the following software site:
http://download.eclipse.org/emfatic/update
Select and install all items.
Now create a new EMF project by choosing File → New → Project… from the main menu. The dialog offers a couple of different project types. Select Empty EMF Project from the category Eclipse Modeling Framework and continue via Next.
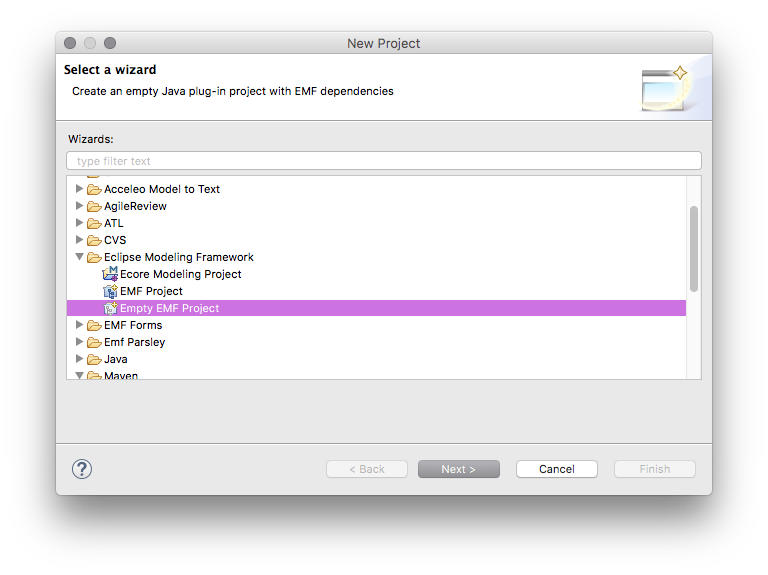
Feel free to use any name for your project ("NeoEMF Tutorial" would be great), and finish the wizard.
To create and save an EMF resource, you first need an ECore Model. There are several ways to create an Ecore Model, here we use EMFatic, a textual syntax for ECore models.
From the main menu, choose File→ New → Other… and select Emfatic file from the category Example EMF Creation Wizard. Name your file "graph.emf".
Edit your file to create a simple model specifying a simple graph structure, containing Edges and Vertices, and described below:
@namespace(uri="http://atlanmod.neoemf.tutorial", prefix="graph")
package graph;

class Graph {
  val Vertice[*] vertices;
  val Edge[*] edges;
}

class Vertice {
  attr String label;
}

class Edge {
  ref Vertice from;
  ref Vertice to;
}
An alternative textual syntax to create an Ecore Model is OclInEcore, which is quite similar to EMFatic.
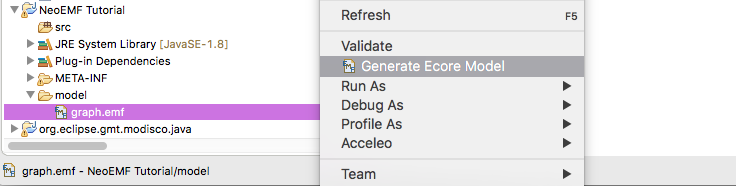
Once the Emfatic file is ready, you need to generate a .ecore file. From the contextual menu (right-click on the graph.emf file), choose Generate Ecore Model.
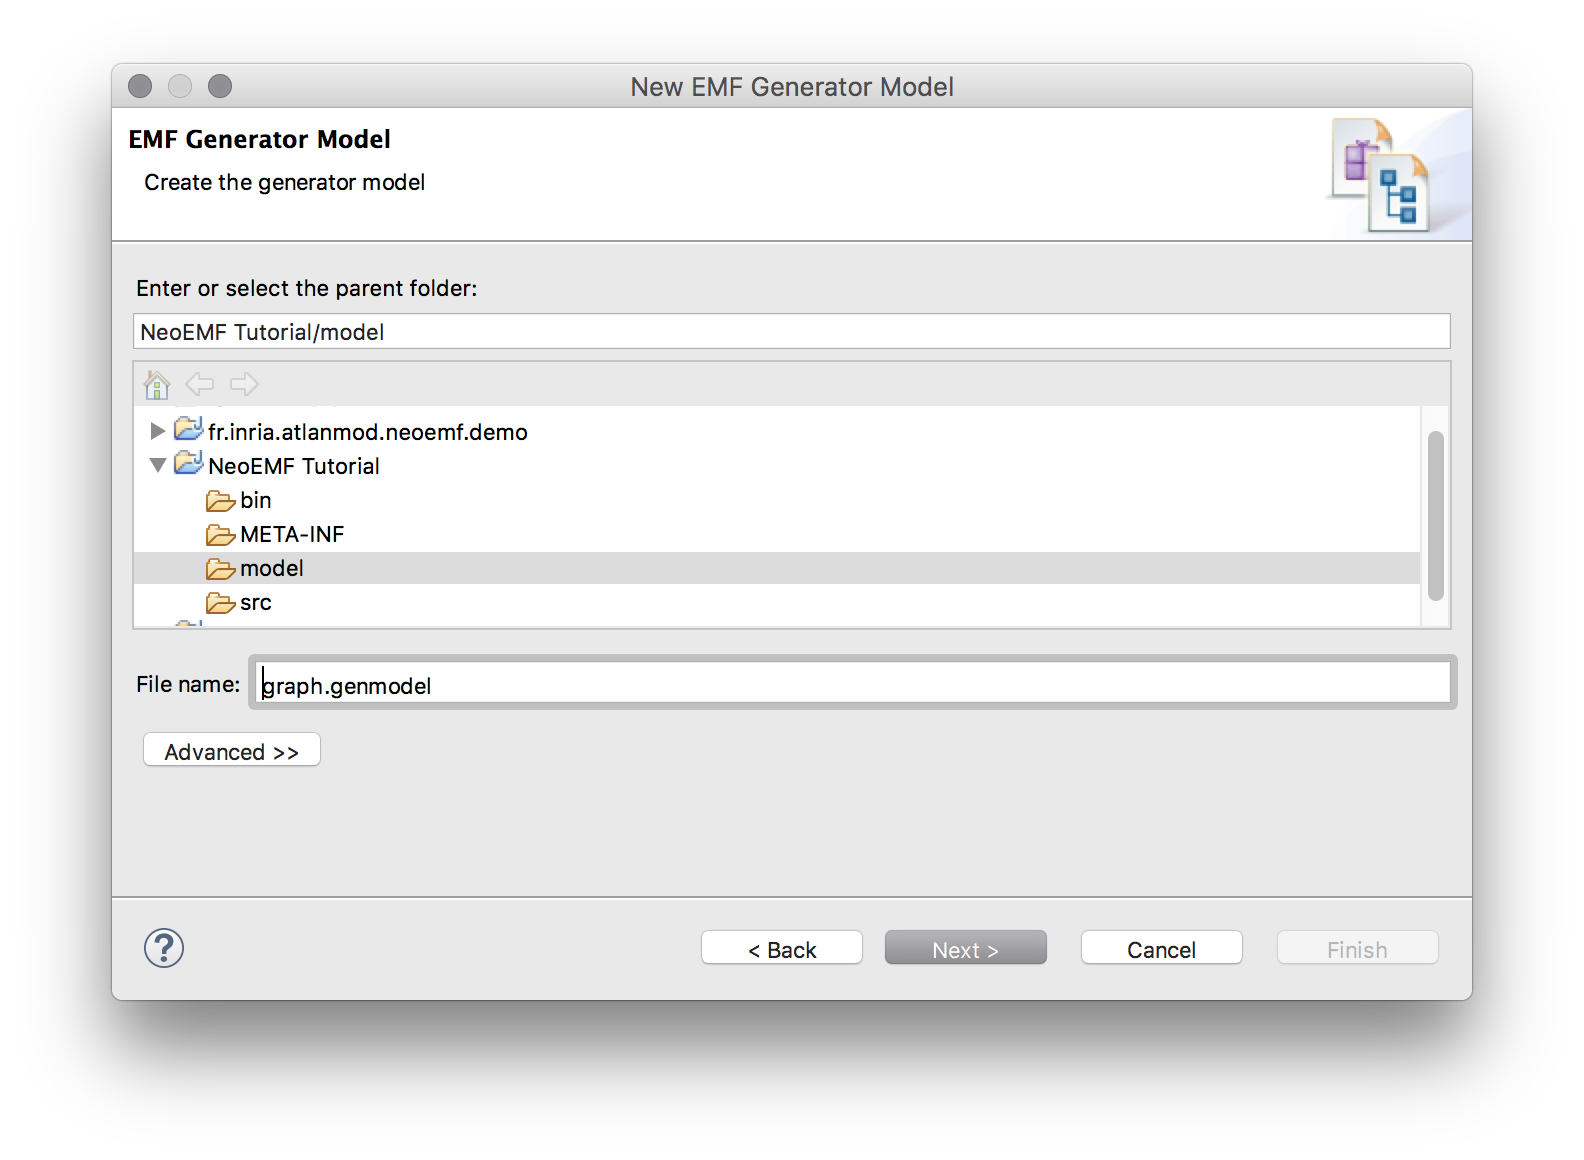
Now create a new EMF Generator Model by choosing File → New → Other… from the main menu. The dialog offers a couple of different wizards. Select EMF Generator Model from the category Eclipse Modeling Framework and continue via Next.
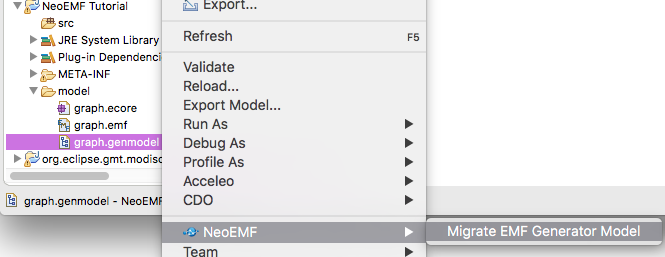
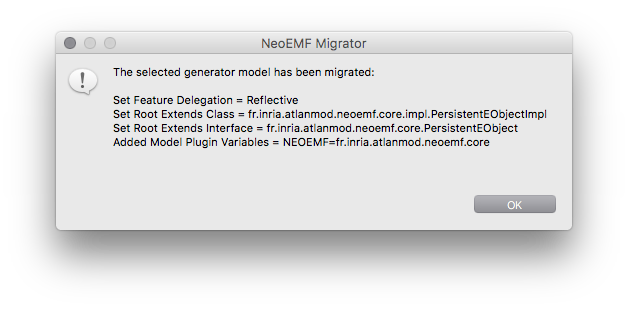
After generating the graph.genmodel file, you need to migrate it to NeoEMF.
From the contextual menu, choose NeoEMF → Migrate EMF Generator Model.
The migration will modify several properties in the graph.genmodel file.
Basically, it will set the root Class and the root Interface of EMF Classes and Interfaces to use the NeoEMF persistent implementations.
After generating the graph.genmodel file, you will be able to generate the Java underlying code for this model.
Select Generate Model Code from the Project Explorer contextual menu (right-click the graph.genmodel file)
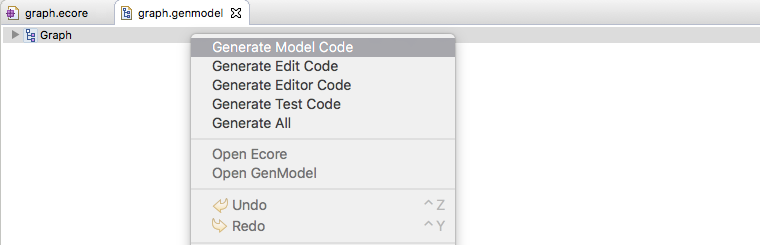
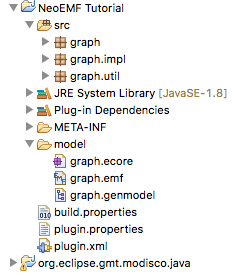
The generation will add three new packages to your project. If you are familiar with the EMF generated code, you can browse the generated code to observe the differences between the default generated code and the NeoEMF one.
Once the Ecore model is ready, we can create instances of this model and store them in a NeoEMF persistent resource.
Creating a resource
Creating a resource in NeoEMF is similar to standard EMF. Write down the following line to create a resource named "models/myGraph.graphdb" in your current Eclipse project.
NOTE:
The following example concerns a Blueprints backend.
Because all backends work in the same way, you can replace BlueprintsTinkerConfig and BlueprintsUri by the module-specific implementations of Config and UriBuilder related to the backend you want to use. For now, it can be MapDb*** or BerkeleyDB***.
URI uri = new BlueprintsUriFactory().createLocalUri("models/myGraph.graphdb");

ResourceSet resourceSet = new ResourceSetImpl();
Resource resource = resourceSet .createResource(uri);

ImmutableConfig config = new BlueprintsTinkerConfig();
Populating the resource
Now, write a simple code to create instances of the Graph model and to save the resource:
GraphFactory factory = GraphFactory.eINSTANCE;
Graph graph = factory.createGraph();

for (int i = 0; i < 100; i++) {
  Vertice v1 = factory.createVertice();
  v1.setLabel("Vertice " + i + "a");
  Vertice v2 = factory.createVertice();
  v2.setLabel("Vertice " + i + "b");
  Edge e = factory.createEdge();
  e.setFrom(v1);
  e.setTo(v2);
  graph.getEdges().add(e);
  graph.getVertices().add(v1);
  graph.getVertices().add(v2);
}

resource.getContents().add(graph);

resource.save(config.asMap());
resource.unload();
Reading the resource
resource.load(config.asMap());

Graph graph = (Graph) resource.getContents().get(0);
for (Edge each : graph.getEdges()) {
  System.out.println(each.getFrom().getLabel() + "--->" + each.getTo().getLabel());
}

resource.unload();In this tutorial, you have learned how to create a persistent EMF resource with NeoEMF and how to store this resource in a Neo4j database. All backends are identical in usage, the only thing that changes is the configuration and the URI definition, used to identify the module.