Debug SSC with PySSC Linux CodeLiteIDE
I got this to work on CodeLite IDE as well! CodeLite only offers C++ compiling and debugging, so the Python code will have to run on another IDE. If you download Anaconda, you will have access to the Spyder IDE for Python. You could also use Visual Studio Code which works with Linux.
Much of these steps are mirrored in the other tutorial using the Eclipse IDE here. I will replicate the steps here for running this in CodeLite and Spyder.
First, follow the build instructions for Linux found through this link. Ultimately, there will be separate directories for LK, WEX, SSC, and SAM. These will be housed in a parent directory, which is referred to as sam_dev. Some additional comments on the Linux instructions:
-
Make sure you always build the Debug version of things
-
2.4 : the complete path I used was
../sam_dev/wxWidgets-3.1.1/lib/wx-3.1.1 -
3.0 : After entering the
cmakecommand in the terminal forgoogletest, runmake -j4Afterwards, I found four gtest library files under
../sam_dev/googletest/build/lib. If you built the Debug version, they should look likelibgtest<d>.a(without<and>). I copied and pasted all four files into../sam_dev/googletestand../sam_dev/googletest/googletest. This seemed to have fixed some linker errors when building the gtest files inSSClater. -
5.1 In this step, create the build folder as
../sam_dev/build. Make sure you have the CMakeLists.txt set up for bundling the four projects as a single project. Then, runcmakefor the specific generator for the Eclipse IDE:mkdir buildcd buildcmake -G "CodeLite - Unix Makefiles" -DCMAKE_BUILD_TYPE:STRING=Debug -DCMAKE_SYSTEM_VERSION=10.0 ..make -j4An optional flag to use in the third line above would be
-DSAM_SKIP_TESTS=trueif having trouble with thegtestlinker errors.
After following all the Linux build steps, there will be separate folders for each individual project under the ../sam_dev/build directory. Most important are the ssc and sam folders. Some notes before moving on:
-
Within the
../sam_dev/build/samfolder there will be a binary version of the SAM Desktop that will be used to auto-generatepython3scripts using PySSC. -
Within the
../sam_dev/build/sscfolder there will be anssclibrary calledlibssc<d>.so(the Debug version, without the<and>). Thepython3scripts will manually be changed to call this file. -
Within the parent directory
../sam_devthere will be a.cprojectand.projectfile, used as the workspace for the Eclipse IDE.
Once sam is successfully built, we want to run it to auto-generate PySSC scripts. However, a bash script wasn't automatically generated to run SAM in my case (if it was created on your system, feel free to skip to the next step).
-
Make sure the
SAMbinary file is located at the following address (noting that this is a Debug version):../sam_dev/build/sam/deploy/linux_64/SAM<d>.bin -
Open a new terminal in the build directory:
../sam_dev/build -
Create an empty bash script (feel free to name it however is most convenient) and open it in a text editor as follows:
cd samtouch sam_bashgedit sam_bash -
In the file, add:
#!/bin/shcd <path_to_sam_dev>/build/sam/deployexport LD_LIBRARY_PATH=$LD_LIBRARY_PATH:<path_to_sam_dev>/build/sam/deploy/linux_64exec <path_to_sam_dev>/build/sam/deploy/linux_64/SAMd.binSave and close the file. For disambiguation, the full path I
cd'd into on the second line was/home/gabrielsoto/Documents/sam_dev/build/sam/deploy(I also callsam_devsomething else in my file system).Note I am missing something in the bash script that calls GTKTheme as follows:
export GTK2_RC_FILES=<path_to_sam_dev>/build/sam/deploy/linux_64/GtkTheme/gtk-2.0/gtkrc**It doesn't affect the ability to run
SAMbut still worth noting. TheGtkThemesubfolder was not created upon finishing the build. -
Add the proper permissions to run the bash script and open SAM Desktop:
chmod +x sam_bash./sam_bash
In SAM Desktop,
-
Select Start a new project > Concentrating Solar Power > Power Tower Molten Salt > Power Purchase Agreement > Single Owner
In the top toolbar, there should be an untitled project tab.
-
(Optional) In the drop down menu of the untitled tab, select Rename to rename the project.
-
In the drop down menu of the project, select Generate Code > Python 3.
-
Choose a folder to place the generated scripts, weather files, etc. I put them in the following directory
../sam_dev/build/ssc/samscriptsthough the naming and location are probably unimportant.
There should be two
.pyfiles in this folder: one named after the project and one namedPySSC.py. The former contains the main code. -
Open both files in either a text editor or Python IDE.
-
In the
<project_name>.pyfile, make the following changes:-
add
import osbefore declaring the main code. -
add the following code to display the process ID (used later to attach Python process to C++ actions)
pid = os.getpid()print('PID = '.pid) -
make sure all resource files have the correct address
-
-
In the
PySSC.pyfile, make the following changes:-
remove all the
if-elsestatements and change theself.pdlldeclaration to the following code, remembering to change the<path_to_sam_dev>portion to the correct address:def __init__(self):`self.pdll = CDLL('<path_to_sam_dev>/build/ssc/ssc/libsscd.so')` -
change all calls to a
doublefunction tofloat(the former doesn't exist in Python)
-
The CodeLite IDE can be used to run/debug C++ files. You can download CodeLite at this link.
-
Open the CodeLite desktop app.
-
Run the Setup Wizard (automatic or go to Help > Run Setup Wizard)
- Scan for a compiler and make sure you have GCC somewhere in there (in
/usr/bin, there might be multiple versions but that's ok)
- Scan for a compiler and make sure you have GCC somewhere in there (in
-
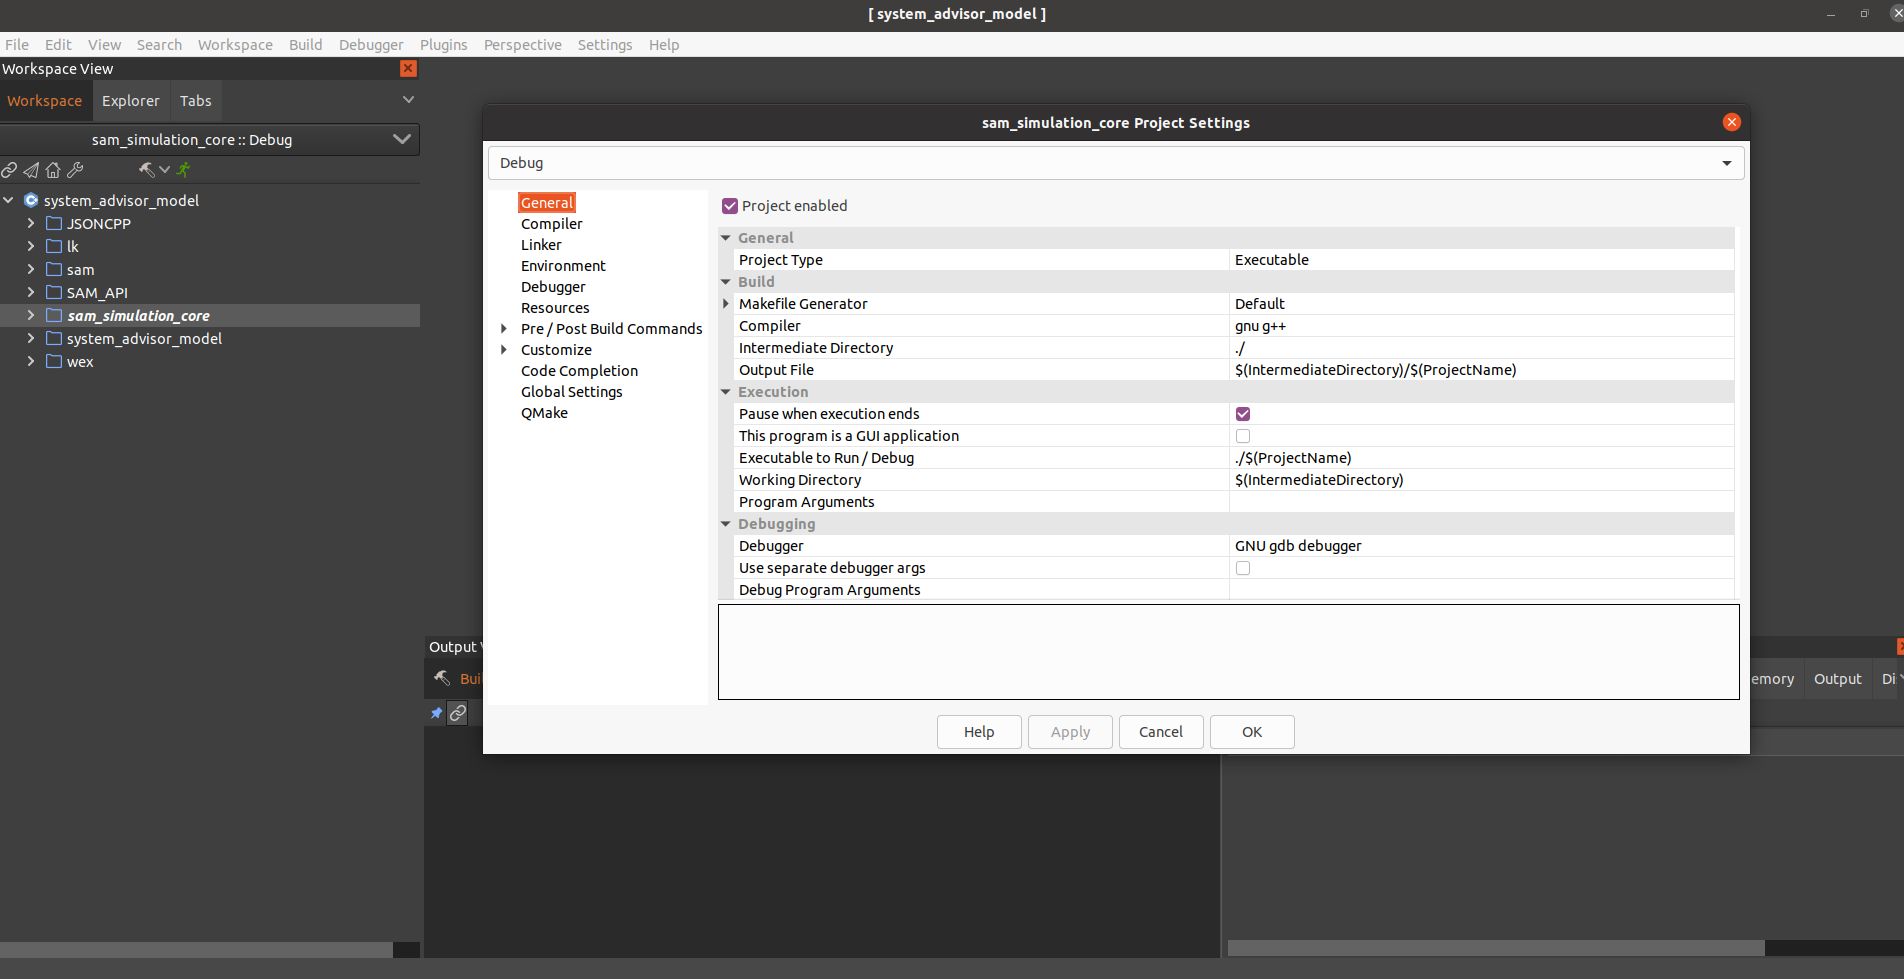
Open the SAM workspace found at
../sam_dev/build/system_advisor_model.workspaceand configure the project-
Double click the project folder titled
sam_simulation_coreto make it the active project -
Right-click the project and click Settings
-
The default settings work pretty well, here is a screenshot of them just in case they're different
-
We can now run and debug Python scripts through a separate Python IDE that call the libsscd.so share object file, triggering CodeLite to open in debug mode once we set up the appropriate breakpoints.
-
There might be some permissions problems when using "Attach to Process." In an open terminal, enter
echo 0 | sudo tee /proc/sys/kernel/yama/ptrace_scopeto temporarily grant permissions. You can permanently fix this by changing the contents of that file, but that scares me.
-
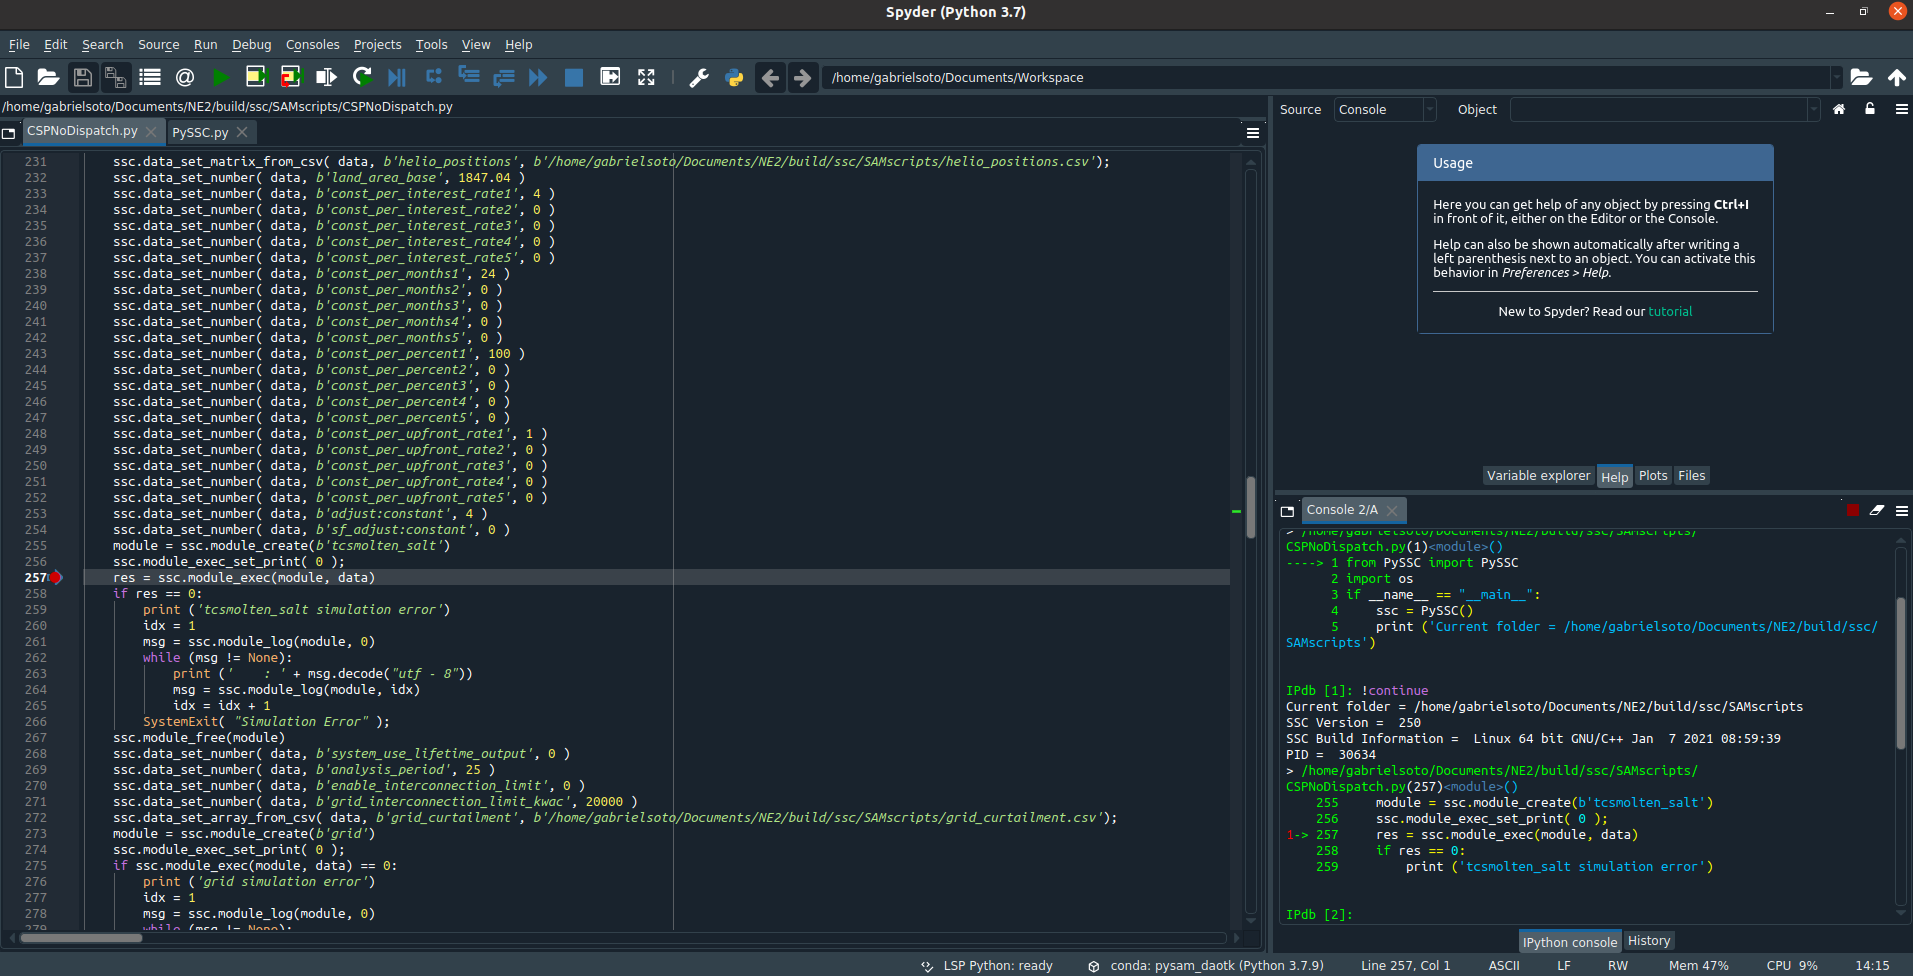
Open Spyder (or your favorite Python IDE). If you have Anaconda, you can install and open Spyder in a terminal through
conda install spyderspyder -
In the Python IDE, open the
<project_name>.pyfile and set a breakpoint around Line 257, wheressc.module_exec(module,data)is called. -
In CodeLite, open the appropriate
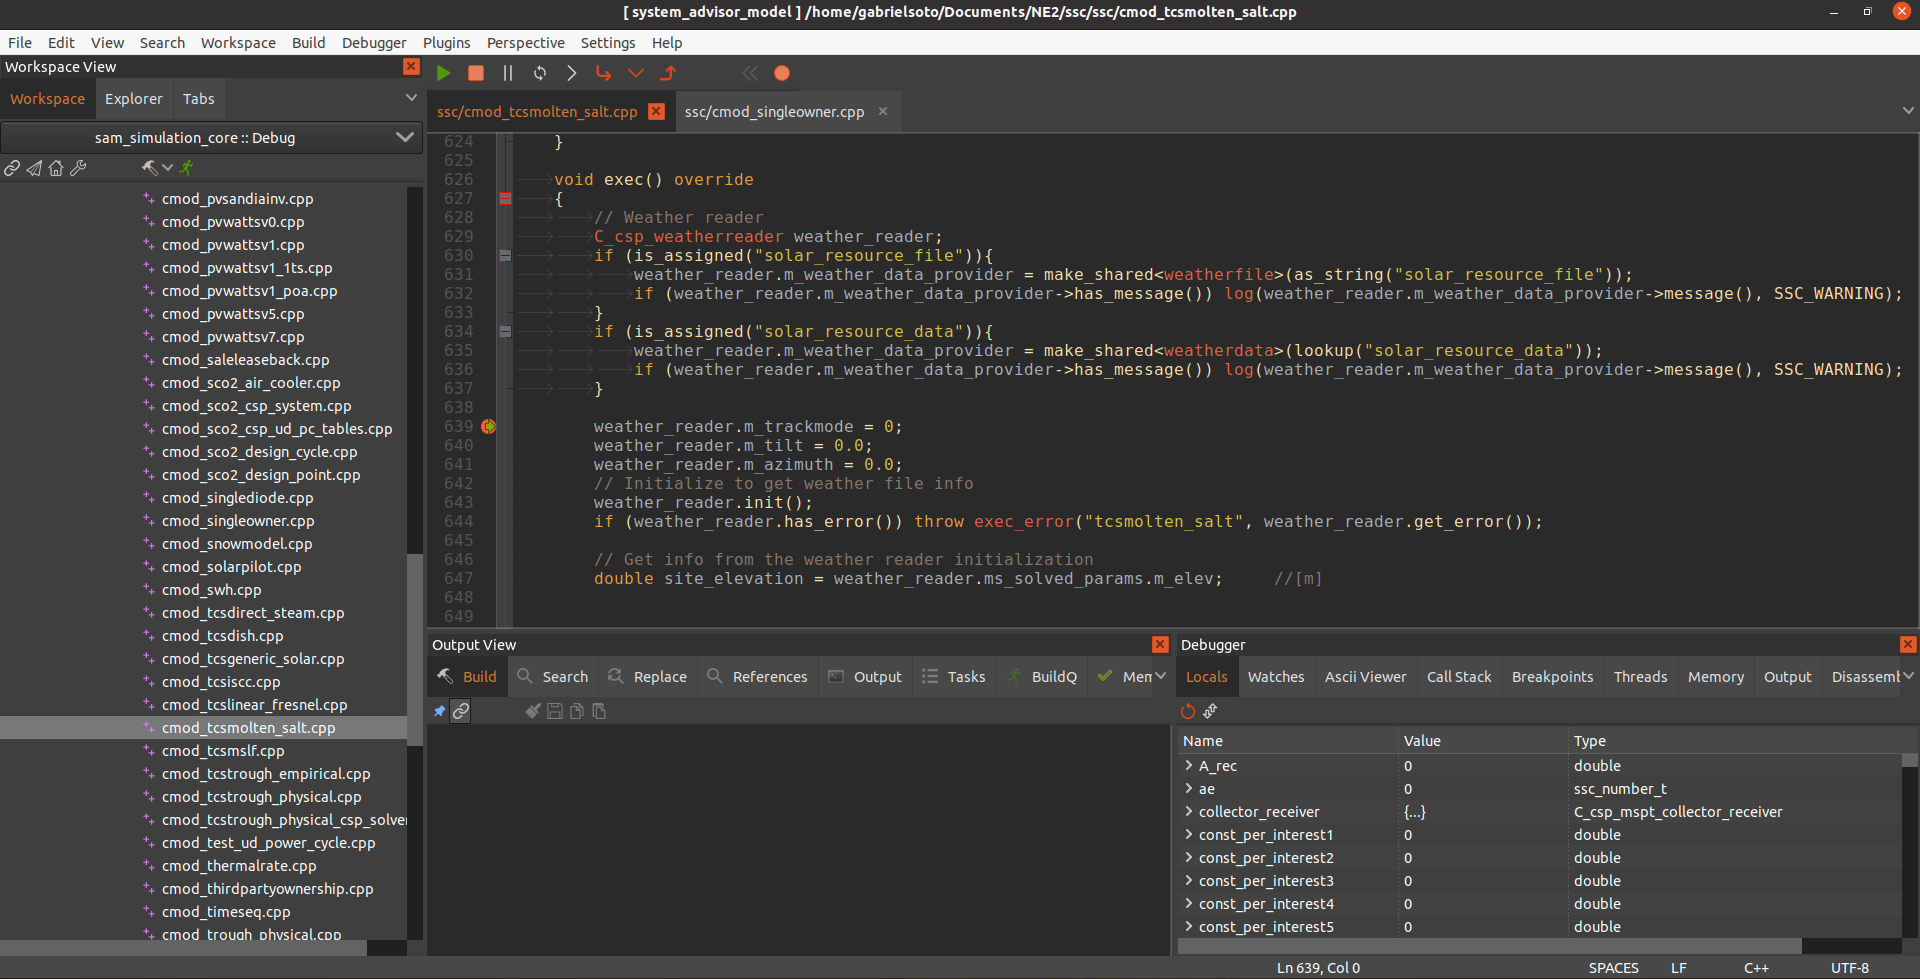
cmodC++ file. In this particular case it is thecmod_tcsmolten_salt.cppfile-
The correct file is found in Workspace View at
system_advisor_model>sam_simulation_core>src>ssc>ssc>cmod_tcsmolten_salt.cpp -
Set a breakpoint after Line 626, in the scope of
void exec( ) override { }
-
-
Begin Python debugging session
-
In Spyder, press the Debug File button or
CTRL+F5 -
The breakpoint in the
<project_name>.pyfile should catch, pausing in the Console tab as shown (note the printed PID)
-
-
Begin C++ debugging session
-
Go to Debugger > Attach to Process
-
An Attach to Process window should pop up. Enter the Python PID noted previously and click Attach
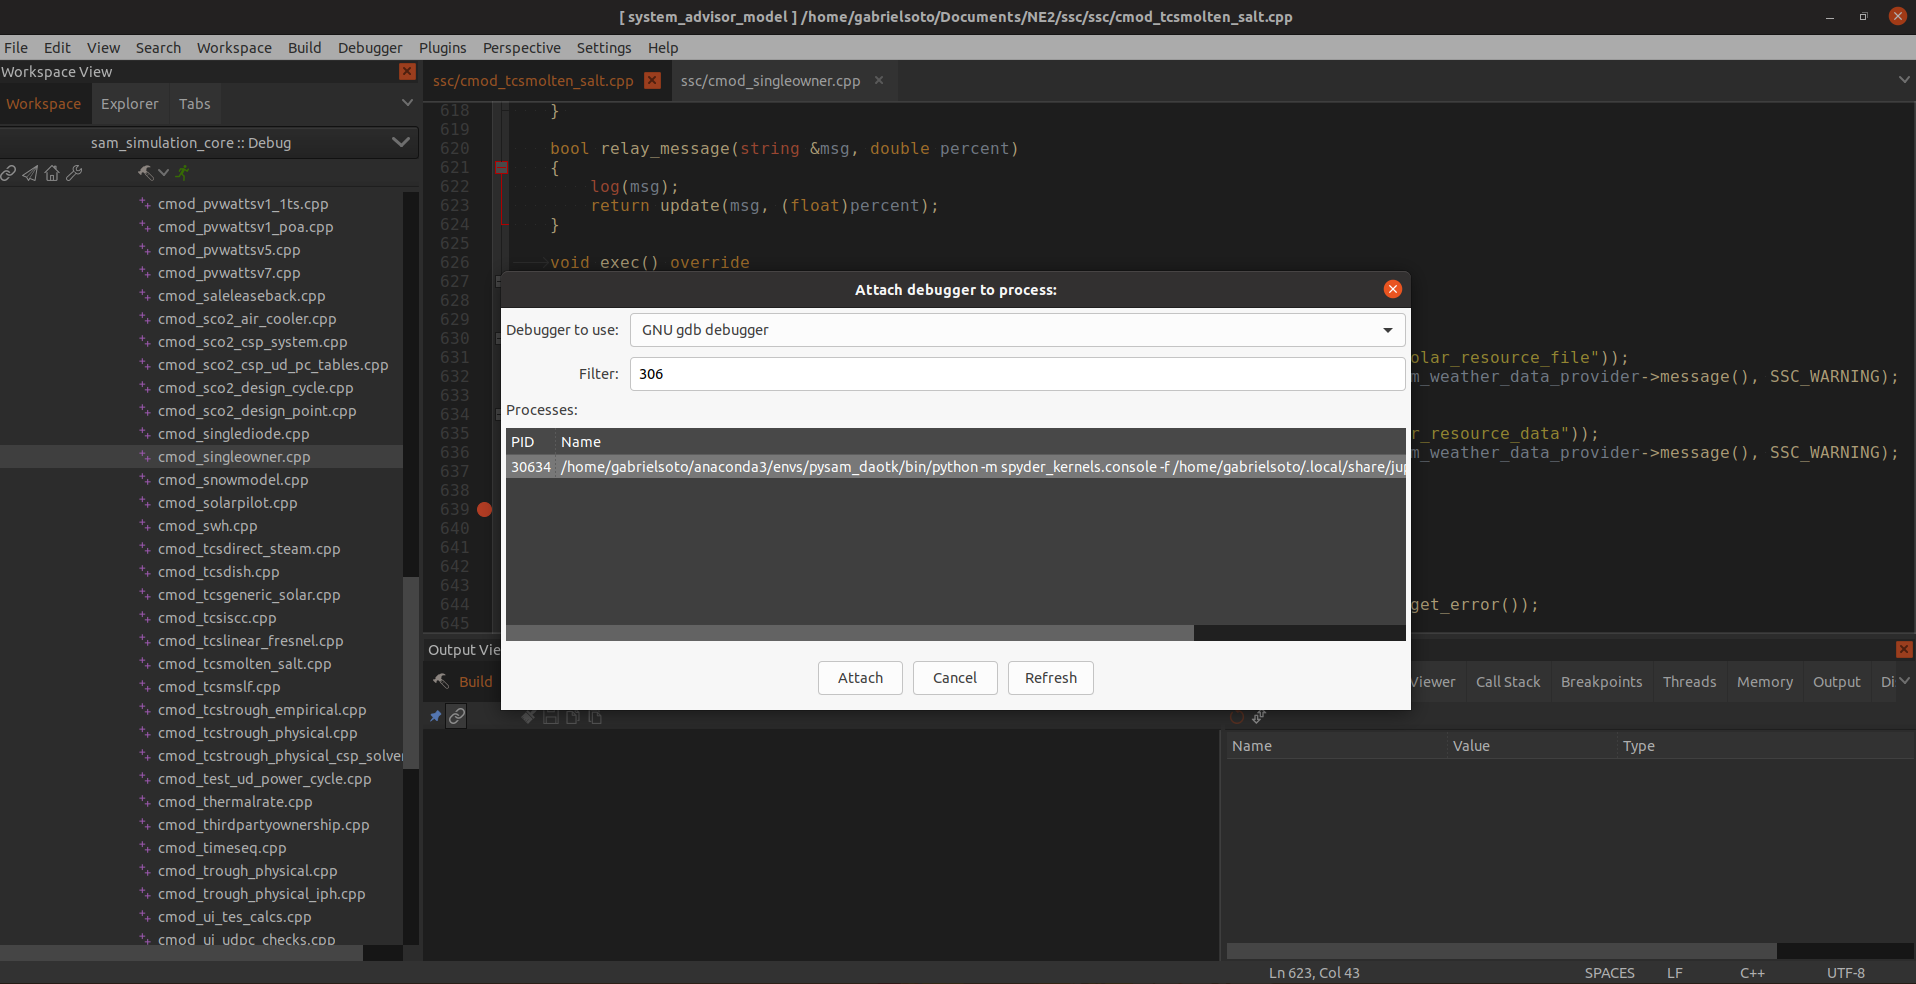
- Press the green Play button underneath the toolbar as shown

-
-
Go back to Python IDE and continue the debugger by pressing
CTRL+F12 -
CodeLite IDE should pop up and catch on the breakpoint you previously set!