Author: Tobit Flatscher (2023)
![]()
This repository contains a Dockerfile and all the documentation required for setting up and launching a Velodyne 3D lidar such as the VLP-16 or VLP-32 with the Robot Operating System ROS 2. I have tested this with both VLP-16 and VLP-32 lidars.
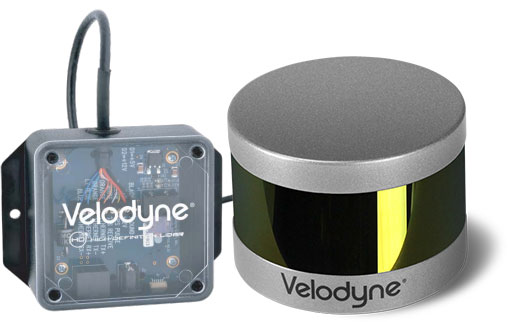
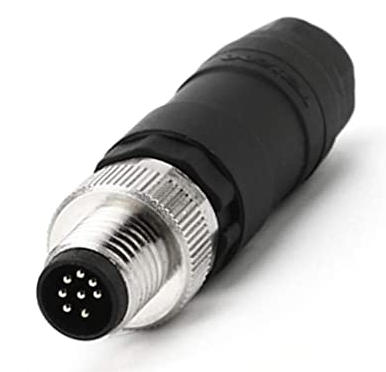
The Velodyne lidars are common in two different versions, with an interface box or with an 8-pin M12 connector (M12MP-A) only. The ones with interface boxes are generally quite expensive on the second-hand market while the ones with M12 connector often go comparably cheap.
 |
 |
|---|---|
| Velodyne VLP-16 with interface box | Male 8-pin M12 connector |
The interface box already comes with an overcurrent protection and gives you access to an Ethernet port as well as a power connector. For the 8-pin power connector on the other hand you will have to create your own cable. This can though be done with comparably little effort (without cutting the cable). In case you bought one without the interface box have a look at the cabling guide in this repository for information on making your own cable.
The set-up is similar to the Velodyne VLP-16 and the HDL-32E lidar in ROS. As a first step we will have to find out which network interface our lidar is connected to. For this launch the following command
$ for d in /sys/class/net/*; do echo "$(basename ${d}): $(cat $d/{carrier,operstate} | tr '\n' ' ')"; doneThis will output a list of the available interfaces as well as their connection status:
br-af62670dc1bb: 0 down
br-eabc8a210172: 0 down
docker0: 0 down
eno1: 0 down
lo: 1 unknown
wlx9ca2f491591b: 1 up
Now plug-in the lidar and the corresponding network interface (should start in en* due to the network interface naming convention) should change to up when launching the same command again:
br-af62670dc1bb: 0 down
br-eabc8a210172: 0 down
docker0: 0 down
eno1: 1 up
lo: 1 unknown
wlx9ca2f491591b: 1 up
This network interfaces corresponds to the device with the MAC-address
$ cat /sys/class/net/eno1/address
AB:12:c3:45:67:8a
Now you can follow the ROS guide to configure your IP address on the host computer for the corresponding network interface (or alternatively follow the Ubuntu Net Manual) where the configuration is performed via the graphic menu or continue with the following paragraph that performs the same set-up through the command line. Be sure to replace eno1 with your network interface in the commands below!
Let us check the available connections with nmcli:
$ nmcli connection showLet's create a new connection, assigning us the IP address 192.168.1.100. Feel free to replace 100 with any number between 1 and 254 apart from the one the Velodyne is configured to (201 by default).
$ nmcli connection add con-name velodyne-con ifname eno1 type ethernet ip4 192.168.1.100/24Now let's inspect the connection with:
$ nmcli connection show velodyne-conLet's bring up the connection with the following command:
$ nmcli connection up id velodyne-conLet's show the IP address of our device:
$ ip address show dev eno1Temporarily configure yourself an IP address in the 192.168.3.X range:
$ sudo ip addr add 192.168.3.100 dev eno1Set up a temporary route to the Velodyne. In case a different address was configured for the Velodyne replace the address below by its address.
$ sudo route add 192.168.1.201 dev eno1$ ip route show dev eno1Now you should be able to open the webpage http://192.168.1.201 and change the configuration for your Velodyne if desired/needed.

Inside your Dockerfile make sure to use the network_mode host option:
network_mode: "host"Allow the container to display contents on your host machine by typing
$ xhost +local:rootThen build the Docker container with
$ docker compose -f docker-compose-gui.yml buildor directly with the devcontainer in Visual Studio Code. For Nvidia graphic cards the file docker-compose-gui-nvidia.yml in combination with the nvidia-container-runtime has to be used instead.
After it is done building, connect the Velodyne lidar, start the container
$ docker compose -f docker-compose-gui.yml upand launch the corresponding Velodyne Pointcloud launch file. E.g. for the VLP-16:
$ source /opt/ros/humble/setup.bash
$ ros2 launch velodyne velodyne-all-nodes-VLP16-launch.py
Make sure that the nodes have started correctly with
$ ros2 node listand check if the topics are published correctly with
$ ros2 topic listin combination with
$ ros2 topic info <topic_name>Finally visualize the points with Rviz by launching
$ ros2 run rviz2 rviz2 -f velodynein another terminal and display the pointcloud published by the Velodyne.
