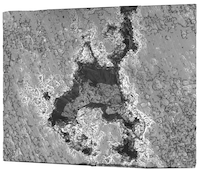
Cybervision is a 3D reconstruction software for Scanning Electron Microscope images.
The tool needs two images of an object taken from slighly different angles. Cybervision can match those images and use the parallax effect to determine the object's 3D shape.
More information is available in the Wiki.
Download a release distribution from releases.
Run cybervision:
cybervision [--scale=<scale>] [--focal-length=<focal-length>] [--mode=<cpu|gpu>] [--interpolation=<none|delaunay>] [--min-angle-cos=<cos-value>] [--projection=<parallel|perspective>] [--mesh=<plain|vertex-colors|texture-coordinates>] [--no-bundle-adjustment] <img1> <img2> [<imgn>] <output>--scale=<scale> is an optional argument to specify a depth scale, for example --scale=-10.0.
--focal-length=<focal-length> is an optional argument to specify a custom focal length for images with perspective projection, for example, --focal-length=26;
this should be the image's focal length in 35mm equivalent.
If not specified, EXIF metadata will be used.
--mode=<cpu|gpu|gpu-low-power> is an optional argument to specify a depth scale, for example --mode=cpu or --mode=gpu
Results might be slightly different between modes because the implementation is not completely identical.
gpu-low-power will prefer a low-power GPU (like an integrated one) and will reduce the batch size to prevent errors (at the cost of reduced performance).
--interpolation=<none|delaunay> is an optional argument to specify an interpolation mode, for example --interpolation=none or --interpolation=delaunay.
none means that interpolation is disabled, delaunay uses Delaunay triangulation.
--min-angle-cos=<cos-value> is an optional argument to specify the minimum cos value between a polygon normal and the camera forward vector, for example --min-angle-cos=0.1.
Increasing this ensures that steep slopes will be discarded; setting this to 0.0 will keep all polygons and produce an "extruded" look.
If not specified, will use the default 0.1 value.
--projection=<parallel|perspective> is an optional argument to specify a projection mode, for example --projection=parallel or --projection=perspective.
parallel projection should be used for images from a scanning electron microscope, perspective should be used for photos from a regular camera.
--mesh=<plain|vertex-colors|texture-coordinates> is an optional argument to specify how to output OBJ and PLY meshes mode, for example --mesh=vertex-colors or --mesh=texture-coordinates.
plain (the default option) outputs the mesh without any color or texture, vertex-colors outputs the mesh with colors assigned to every vertex, and texture-coordinates will add texture coordinates.
--no-bundle-adjustment disables bundle adjustment when reconstructing images with perspective projection.
Adding this flag can significantly reduce processing time, at the cost of producing incorrect data.
<img1> and <img2> are input filenames for image 1 and 2; supported formats are jpg, tif and png.
Although experimental, it's also possible to specify more than one image when using perspective projection.
<output> is the output filename:
- If the filename ends with
.obj, this will save a 3D Wavefront OBJ file. - If the filename ends with
.ply, this will save a 3D PLY binary file. - If the filename ends with
.png, this will save a PNG depth map file. - If the filename ends with
.jpg, this will save a JPEG depth map file.
Cybervision was tested to support CPU-only and GPU-accelerated processing on:
- Apple Macbook Air M1 (2020)
- Apple Macbook Pro M1 Max (2021)
- Windows 11, i7-11800H, Geforce RTX 3070 (mobile)
- Fedora CoreOS 37, Celeron N3350 (digital signage appliance)
- Oracle Linux 9, Ampere A1 (Oracle Cloud)
Images up to 4032x3024 should work well, larger images might cause increased memory usage or cause GPU timeouts.
To run Cybervision in Linux, you will need the Vulkan runtime library.
It's called libvulkan.so.1 and the package is typically called something like vulkan, vulkan-loader, libvulkan or libvulkan1.
In Windows and macOS, no additional libraries are required. Windows on ARM64 is untested, but should work if the OpenCL and OpenGL Compatibility Pack is installed.
Cybervision was rewritten in Rust.
Originally, it was a full all-in-one tool built based on Qt and using a different approach. For more details about the C++ version, see Releases. The source code is available in the branch_qt_sift branch.
The Rust rewrite focuses on the primary goal - generating a 3D surface from an image stereopair; anything else (like a UI) can be added separately.
- Using a much simpler model, while collecting a lot more detail
- Removed potential liabilities such as
- Patented algorithms (SIFT, although it's likely to expire soon)
- Unmaintained libraries (siftfast)
- LGPL licensed code (siftfast, Qt)
- Legacy or non-portable APIs and standards (OpenCL, OpenMP, SSE)
- C++ template code that crashed Qt Creator's clang
Cybervision uses CMake and should work on Linux, macOS and Windows.
To build it, install Rust and run cargo build --release.

