Pynecone은 Web App을 Build 하고 배포하기 위한 오픈 소스 풀스택 Python 프레임워크입니다.

2022년 11월, Nikhil Rao와 Alek Petuskey 두 사람에 의해 발표되었으며 이전에 Web 개발 경험이 없더라도 Python 개발자라면 매우 쉽게 대화형 Web App을 만들 수 있도록 하는 것을 목표로 하고 있습니다. 현재는 60개 이상 빌트인 Component를 갖고 있으며 계속해서 추가를 하는 중입니다.
프런트엔드는 React를 기반으로 구축되며 전체 프로젝트는 Next.js 애플리케이션으로 컴파일됩니다. Component는 Chakra UI 라이브러리를 이용하여 지원합니다.
Pynecone을 이용하려면 다음과 같은 환경구성이 필요합니다.
- Python 3.7+
- NodeJS 12.22.0+
pynecone 패키지 설치는 pip 또는 conda 명령어를 이용하여 설치할 수 있습니다.
pip install pynecone그리고 Node.js가 설치되어 있어야 합니다. Node.js 사이트로 이동하여 다운로드 후 설치를 진행합니다.
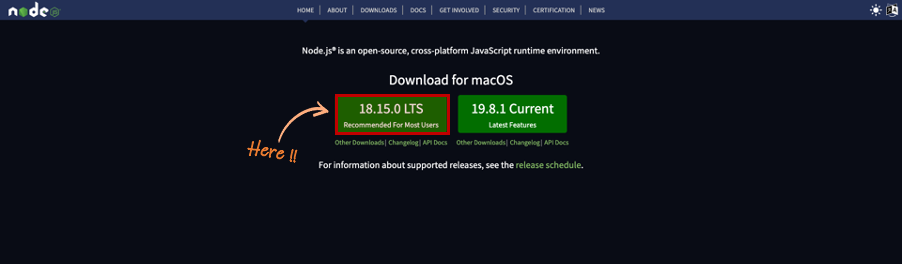
설치는 매우 간단합니다. 절차에 따라 진행하시면 됩니다.

pynecone을 설치하면 pc command 도구도 설치됩니다. 설치에 성공했는지 테스트해 보도록 하겠습니다. (저는 프로젝트명을 'getting_started_with_pynecone'이라고 했습니다.)
$ mkdir getting_started_with_pynecone
$ cd getting_started_with_pynecone
$ ~/getting_started_with_pynecone/ pc init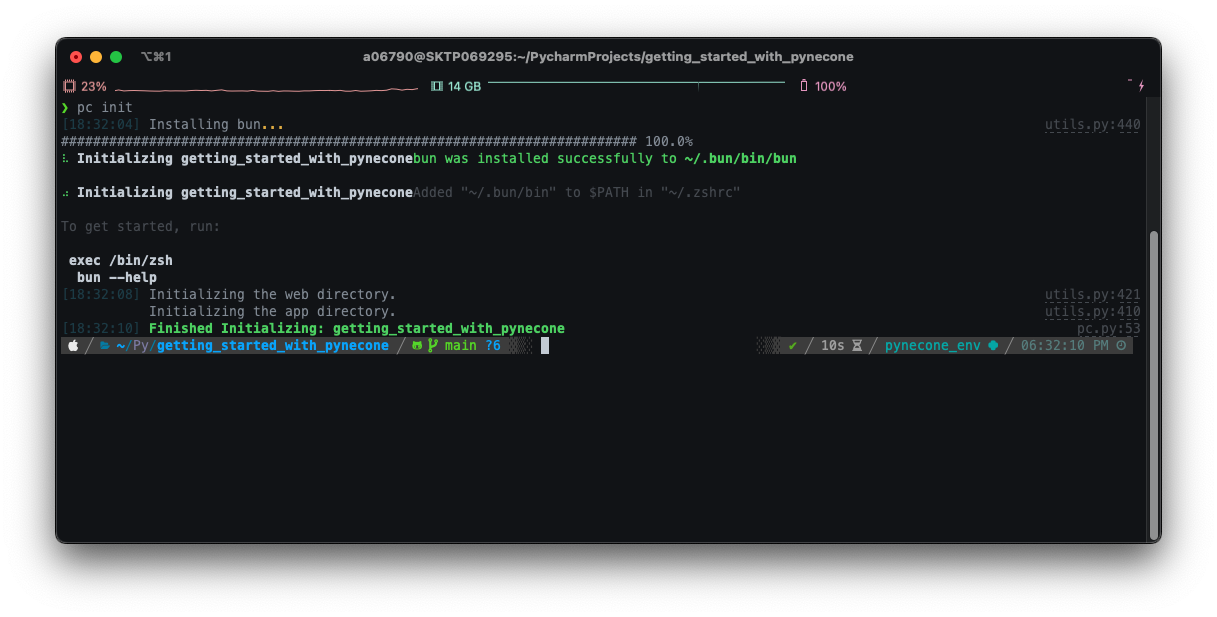
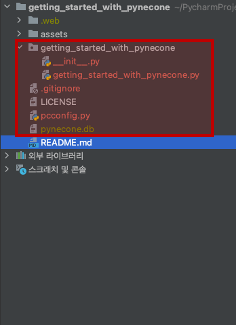
pc init 명령어를 수행하면 초기화가 진행되고 아래와 같이 파일들이 생성됩니다.
app을 실행해 보도록 하겠습니다.
$ pc run이 명령을 처음 실행하면 자동으로 bun을 다운로드하여 설치합니다.

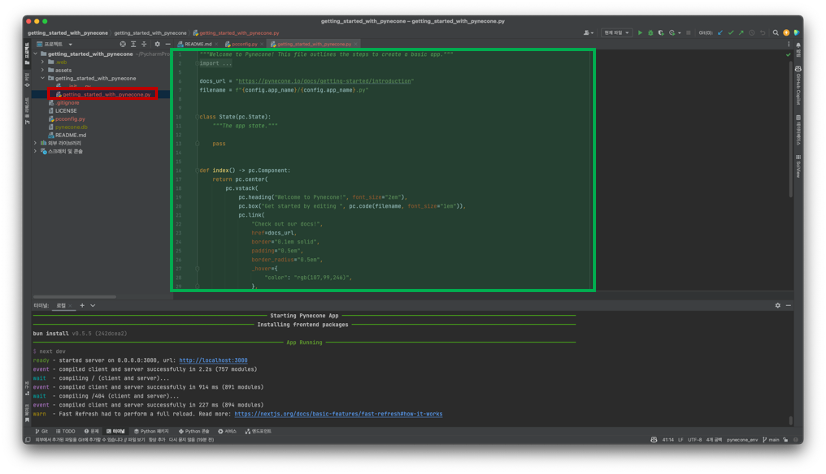
ready와 compiled client and server successfully event가 정상적으로 출력되었다면 모든 준비가 끝난 것입니다.
특별히 바꾼 것이 없다면 http://localhost:3000에서 app이 표시됩니다. 브라우저 주소창에 http://localhost:3000를 입력하여 페이지를 이동하면 수행결과를 확인하실 수 있습니다.
--port 옵션를 이용하여 다른 port에서 app을 실행할 수 있습니다.

Pynecone 웰컴 페이지가 만들어졌습니다.
--loglevel 옵션을 설정하여 app을 debug 할 수 있습니다.
$ pc run --loglevel debug간단히 code 수정 후 재수행 해보겠습니다. my_app_name/my_app_name.py 파일을 수정합니다. (저는 getting_started_with_pynecone/getting_started_with_pynecone.py 파일입니다.)
pynecone은 개발 모드에서 실행할 때 fast refresh 기능이 내장되어 있습니다. 에서 소스 코드를 수정하고 코드를 저장하면 브라우저에서 즉시 변경 사항을 확인할 수 있습니다.
"""Welcome to Pynecone! This file outlines the steps to create a basic app."""
from pcconfig import config

import pynecone as pc

docs_url = "https://yunwoong.tistory.com/"
filename = f"{config.app_name}/{config.app_name}.py"


class State(pc.State):
    """The app state."""
    pass


def index() -> pc.Component:
    return pc.center(
        pc.vstack(
            pc.heading("Welcome to Home!", font_size="2em"),
            pc.box("I am very excited and looking forward to using pynecone."),
            pc.link(
                "Go to my blog!",
                href=docs_url,
                border="0.1em solid",
                padding="0.5em",
                border_radius="0.5em",
                _hover={
                    "color": "rgb(107,99,246)",
                },
            ),
            spacing="1.5em",
            font_size="2em",
        ),
        padding_top="10%",
    )


# Add state and page to the app.
app = pc.App(state=State)
app.add_page(index)
app.compile()
수행이 된 상태에서 code를 변경하니 몇초 뒤에 Web App에도 반영이 됩니다. 매우 간단한 과정으로 Web App을 만들고 Build 할 수 있습니다.
Pynecone에는 다양한 예제를 소개하고 있습니다. 그중 Dall-E와 ChatGPT 예제를 소개합니다.
물론 Pynecone이 CSS나 HTML, Javascript, React를 대체할 것이라는 생각이 되지는 않습니다. 하지만 프런트엔드를 경험하지 않은 백엔드 개발자가 UI를 포함하여 간단히 만들어 볼 때에는 매우 유용한 것 같습니다. 백엔드는 FastAPI와 SQLAlchemy로 구축되어 있고 매우 간단한 Shell 명령어로 세팅, 빌드, 배포, 디버깅까지 손쉽게 해 볼 수 있기 때문이죠. 개발자에 생산적인 프레임워크임은 틀림없는 것 같습니다. 현재는 제약사항이나 제한적인 기능이 있지만 공개된 지 이제 몇 개월밖에 되지 않았고 지속적으로 Relaese 하고 있으니 관심을 두고 지켜볼만한 것 같습니다.