📢 Use this project, contribute to it or open issues to help evolve it using Store Discussion.
Starting June 1st 2023, this application will no longer be maintained by VTEX.
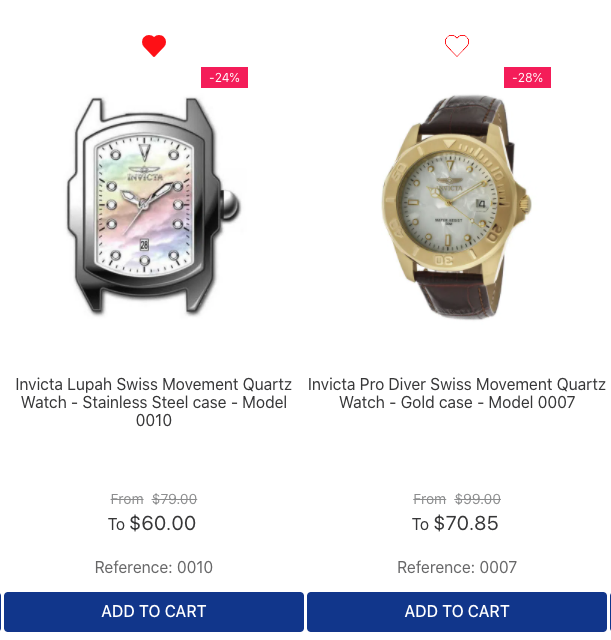
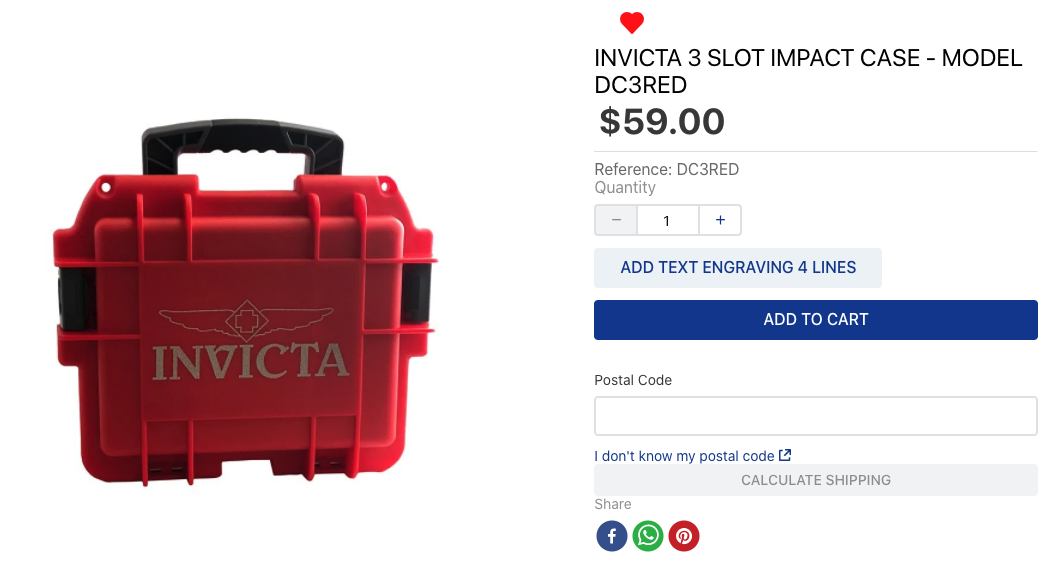
Designed for B2C stores, the Wishlist app adds a heart icon to digital shelves and product details pages, allowing users to add their desired products to a wishlist.
Example of heart icons on a shelf.
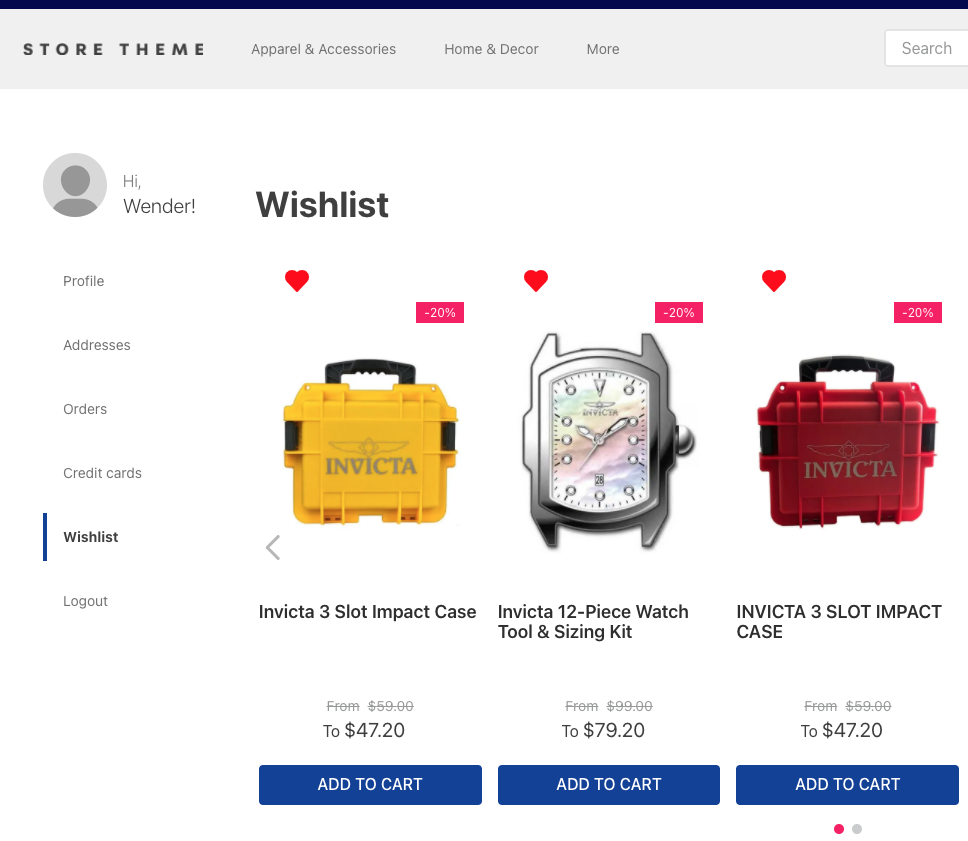
In addition, it generates a brand-new route called /wishlist under the My Account menu, creating a page with the items users added to the wishlist.
- Install the Wishlist app in the desired VTEX account by running
vtex install vtex.wish-listin your terminal. - Open your Store Theme app directory in the code editor.
- Add the Wishlist app to your theme's
manifest.jsonfile inside peerDependencies as shown below:
 "peerDependencies": {
+  "vtex.wish-list": "1.x"
 }
ℹ️ The Wishlist app can export two theme blocks when added as a dependency:
add-to-list-btnandlist-context.wishlist. These are responsible for adding the heart icon to other theme blocks and providing product data to build the/wishlist, which is also shared with the My Account page.
- Add the
add-to-list-btnblock in thestore.producttemplate's children block list. For example:
{
  "store.product": {
    "children": [
      "product-name",
      "product-reviews",
+      "add-to-list-btn"
    ]
},- Declare the
add-to-list-btnblock as a child of theproduct-summary.shelfblocks in your theme. For example:
  "product-summary.shelf": {
    "children": [
+     "add-to-list-btn",
      "product-summary-name",
      "product-rating-inline",
      "product-summary-price",
      "add-to-cart-button"
    ]
  }
ℹ️ The new route called
/wishlist, which creates the Wishlist custom page containing the products added to the wishlist, already has a default template and is rendered under the My Account menu. No further action is required. However, you can customize the Wishlist page by overwriting the template. To do so, you have to create a brand new one as you wish. See more details in the Advanced configurations section below.
The Wishlist app architecture allows you to customize the /wishlist page using other blocks. Currently, its default implementation is as follows:
store.wishlist interface for the route /wishlist and my-account-page.wishlist-page along with my-account-link.wishlist-link for the Wishlist section under My Account.
wishlist.jsonc
{
  "my-account-link.wishlist-link": {
    "props": {
      "label": "My Wishlist"
    }
  },
  "my-account-page.wishlist-page": {
    "props": {
      "title": "Wishlist"
    },
    "children": ["list-context.wishlist"]
  },
  "store.wishlist": {
    "blocks": ["flex-layout.row#top", "list-context.wishlist"]
  },
  "flex-layout.row#top": {
    "children": ["flex-layout.col#title"]
  },
  "flex-layout.col#title": {
    "children": ["rich-text#title"],
    "props": {
      "blockClass": "titleWishlist",
      "preventVerticalStretch": true
    }
  },
  "rich-text#title": {
    "props": {
      "text": "### Wishlist"
    }
  },
  "list-context.wishlist": {
    "blocks": ["product-summary.shelf#wishlist"],
    "children": ["slider-layout#wishlist"]
  },
  "product-summary.shelf#wishlist": {
    "children": [
      "add-to-list-btn",
      "product-summary-image",
      "product-summary-name",
      "product-summary-space",
      "product-summary-price",
      "add-to-cart-button"
    ]
  },
  "slider-layout#wishlist": {
    "props": {
      "itemsPerPage": {
        "desktop": 5,
        "tablet": 3,
        "phone": 1
      },
      "showNavigationArrows": "desktopOnly",
      "showPaginationDots": "always",
      "infinite": false,
      "fullWidth": true,
      "blockClass": "shelf"
    }
  }
}
Add the plugins.json file to your theme's /store/ folder. This will add the Wishlist to My Account.
plugins.json
{
  "my-account-pages > my-account-page": "my-account-page.wishlist-page",
  "my-account-menu > my-account-link": "my-account-link.wishlist-link"
}
By "default implementation" we mean that, by installing the Wishlist app in your store, you're using the json above behind the scenes to build the new page template (/wishlist), as shown in the third image displayed above.
Therefore, to customize the /wishlist page configuration, you need to:
- Create a
wishlist.jsoncfile understore/blocks. - Create a
plugins.jsonfile understore/. - Copy the code above, paste it in the new file, and change it as you wish.
- Deploy your changes.
If you want to configure the layout without the slider-layout dependency, you can use the list-context-renderer to wrap the product-summary.shelf. Learn more here.
| Prop name | Type | Description | Default value |
|---|---|---|---|
label |
string |
Changes the section menu label on the My Account page | Wishlist |
There are a couple of URLs to read, search and change data for the app:
To read the schema of the Wishlist app:
curl --request GET \
     --url 'https://{{accountName}}.vtexcommercestable.com.br/api/dataentities/wishlist/schemas/wishlist' \
     --header 'VtexIdClientAutCookie: {authToken}' \
To GET all the wishlist data:
curl --request GET \
     --url 'https://{environment}--{accountName}.myvtex.com/_v/wishlist/export-lists' \
     --header 'VtexIdClientAutCookie: {authToken}' \
To search for a wishlist by user email:
curl --request GET \
     --url 'https://{{accountName}}.vtexcommercestable.com.br/api/dataentities/wishlist/search?' \
     --header 'VtexIdClientAutCookie: {authToken}' \
To PATCH a wishlist to Master Data:
curl --request PATCH \
     --url 'https://{{accountName}}.vtexcommercestable.com.br/api/dataentities/wishlist/documents' \
     --header 'VtexIdClientAutCookie: {authToken}' \
     --data '
        [
            "Email",
            "Name",
            .
            .
            .
            "IsPublic",
        ]
     '
To DELETE a wishlist from Master Data:
curl --request DELETE \
     --url 'https://{{accountName}}.vtexcommercestable.com.br/api/dataentities/wishlist/documents/{documentId}' \
     --header 'VtexIdClientAutCookie: {authToken}' \
To change the link of the toast message:
{
  "add-to-list-btn#myButton": {
    "props": {
      "toastURL": "/wishlist"
    }
  }
}| Prop name | Type | Description | Default value |
|---|---|---|---|
toastURL |
string |
Changes the link of the toast message | /account/#wishlist' |
To show a custom view if no product has been added to the wishlist:
{
  "list-context.wishlist": {
+    "blocks": ["wishlist-empty-list", "product-summary.shelf#wishlist"],
    "children": ["slider-layout#wishlist"],
    "props": {
      "showViewEmptyList": true
    }
  },
  "wishlist-empty-list": {
    "children": [
      "rich-text#description"
    ]
  },
  "rich-text#description": {
    "props": {
      "text": "### There are no products",
      "textAlignment": "CENTER",
      "textPosition": "CENTER",
      "font": "t-heading-2"
    }
  },
}| Prop name | Type | Description | Default value |
|---|---|---|---|
showViewEmptyList |
boolean |
Shows a custom view if no product has been added to the wishlist | false |
To apply CSS customizations to this and other blocks, follow the instructions in Using CSS handles for store customization.
| CSS handles |
|---|
columnText |
columnThumb |
linkText |
linkThumb |
listItemsContainer |
listName |
listTab |
productDescription |
productItemRow |
productTitle |
thumb |
wishlistContainer |
wishlistIcon |
wishlistIconContainer |
emptyMessage |
This app can be used in a Personal Identifiable Information (PII) compliant account. In this case, shopperId is the Profile ID.
Note: If you are changing type of the account from regular to PII, you must replace the email values with profile ID values in the WishList data entity!
Thanks goes to these wonderful people:
This project follows the all-contributors specification. Contributions of any kind are welcome!