Personal landing page
- 🏎️ Next.js - Fast by default, with config optimized for performance
- 💅 Tailwind CSS - A utility-first CSS framework for rapid UI development
- ✨ ESlint and Prettier - For clean, consistent, and error-free code
- 🛠️ Extremely strict TypeScript - With
ts-resetlibrary for ultimate type safety - 📊 Bundle analyzer plugin - Keep an eye on your bundle size
- 🧪 Jest and React Testing Library - For rock-solid unit and integration tests
- 🎭 Playwright - Write end-to-end tests like a pro
- 📕 Storybook - Create, test, and showcase your components
- 🌬️ Smoke Testing and Acceptance Tests - For confidence in your deployments
- 📝 Conventional commits git hook - Keep your commit history neat and tidy
- 🔍 Observability - Open Telemetry integration for seamless monitoring
- 🎯 Absolute imports - No more spaghetti imports
- ⚕️ Health checks - Kubernetes-compatible for robust deployments
- 🤖 Renovate BOT - Auto-updating dependencies, so you can focus on coding
- 🩹 Patch-package - Fix external dependencies without losing your mind
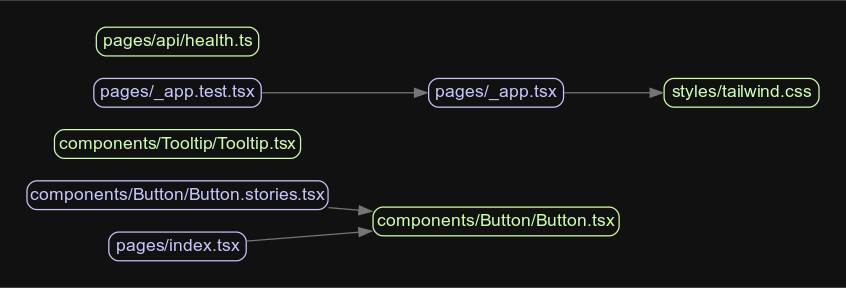
- 📈 Components coupling and cohesion graph - A tool for managing component relationships
- 🚀 GitHub Actions - Pre-configured actions for smooth workflows, including Bundle Size and performance stats
- 🤖🧠 Automated ChatGPT Code Reviews - Stay on the cutting edge with AI-powered code reviews!
- 🚢 Semantic Release - for automatic changelog
- 💻 T3 Env - Manage your environment variables with ease
- 📚 Features
- Table of Contents
- 🎯 Getting Started
- 🚀 Deployment
- 📃 Scripts Overview
- 🔗 Coupling Graph
- 🤖 ChatGPT Code Review
- 💻 Environment Variables handling
- Fork & clone repository:
git clone https://github.com/vresch/showcase.git- Install the dependencies:
yarn install --frozen-lockfile- Run the development server:
yarn dev-
Open http://localhost:3000 with your browser to see the result.
-
This project uses a git hook to enforce conventional commits. To install the git hook, run the following command in the root directory of the project:
brew install pre-commit
pre-commit install -t commit-msgEasily deploy your Next.js app with Vercel by clicking the button below:
The following scripts are available in the package.json:
dev: Starts the development server with colorized outputbuild: Builds the app for productionstart: Starts the production serverlint: Lints the code using ESLintlint:fix: Automatically fixes linting errorsprettier: Checks the code for proper formattingprettier:fix: Automatically fixes formatting issuesanalyze: Analyzes the bundle sizes for Client, Server and Edge environmentsstorybook: Starts the Storybook serverbuild-storybook: Builds the Storybook for deploymenttest: Runs unit and integration testse2e:headless: Runs end-to-end tests in headless modee2e:ui: Runs end-to-end tests with UIformat: Formats the code with Prettierpostinstall: Applies patches to external dependenciespreinstall: Ensures the project is installed with Yarncoupling-graph: Generates a coupling and cohesion graph for the components
The coupling-graph script is a useful tool that helps visualize the coupling and connections between your project's internal modules. It's built using the Madge library. To generate the graph, simply run the following command:
yarn coupling-graphThis will create a graph.svg file, which contains a graphical representation of the connections between your components. You can open the file with any SVG-compatible viewer.
This boilerplate comes with various testing setups to ensure your application's reliability and robustness.
- Unit and integration tests: Run Jest tests using
yarn test - End-to-end tests (headless mode): Run Playwright tests in headless mode with
yarn e2e:headless - End-to-end tests (UI mode): Run Playwright tests with UI using
yarn e2e:ui
To use ChatGPT Code Review, add an OPENAI_API_KEY environment variable with an appropriate key from the OpenAI platform.
T3 Env is a library that provides environmental variables checking at build time, type validation and transforming. It ensures that your application is using the correct environment variables and their values are of the expected type. You’ll never again struggle with runtime errors caused by incorrect environment variable usage.
Config file is located at env.mjs. Simply set your client and server variables and import env from any file in your project.
export const env = createEnv({
  server: {
    // Server variables
    SECRET_KEY: z.string(),
  },
  client: {
    // Client variables
    API_URL: z.string().url(),
  },
  runtimeEnv: {
    // Assign runtime variables
    SECRET_KEY: process.env.SECRET_KEY,
    API_URL: process.env.NEXT_PUBLIC_API_URL,
  },
})
If the required environment variables are not set, you'll get an error message:
❌ Invalid environment variables: { SECRET_KEY: [ 'Required' ] }