![]()
The VLINGO XOOM Designer to guide you in rapid delivery of low-code to pro-code Reactive, Event-Driven Microservices and Applications using DDD and other approaches.
Docs: https://docs.vlingo.io/xoom-designer

A common reality of unfamiliarity exists for many developers when they try to develop either Reactive applications and services, or to implement DDD properly, or both. Many give up on using concepts and paradigms that are proven to be a strong foundation for building modern applications and systems that are robust, modularized, scalable, and that use modern architectures. These developers tend to fall back to familiar approaches, frameworks, and tools that have rarely worked out well in the long run.
The VLINGO XOOM platform SDK was created to help developers who face such challenges to confidently move forward and modernize their architectures, designs, and implementations. One platform component that greatly accelerates developer modernization efforts is the VLINGO XOOM Designer. It supports visual model definition, REST API, persistence, and container definitions, followed by project generation that is automatically built. Your applications and services can be running within minutes. With an instantly executable service experience, developers are in a position to quick implement custom business logic within the pre-generated model. This is a great way to learn Reactive architecture and coupled with DDD tactical modeling that are powered by an Actor-based ecosystem.
The next section show you how to run and use the VLINGO XOOM Designer in your local environment. Let's get started!
The quickest way to start XOOM Designer is to run it on Docker. Taking advantage of the docker-compose file created by the VLINGO XOOM team, you can initialize Designer simply using the following commands:
 $ curl -L -O https://raw.githubusercontent.com/vlingo/xoom-designer/master/docker-compose.yml
 $ docker-compose pull
 $ docker-compose up -d
Then, XOOM Designer can be accessed at http://localhost:19090/context. Likewise, XOOM Schemata will be also initialized and can be accessed at http://localhost:9019. Learn more about the XOOM Designer/Schemata integration here.
The installation process is short. Before you start, just check if you have these tools already installed:
- Java 8+
- Maven 3.x.x
Download the xoom-designer compressed distribution file via curl:
zipfile:curl -L -O https://github.com/vlingo/xoom-designer/releases/latest/download/designer.ziptarfile:curl -L -O https://github.com/vlingo/xoom-designer/releases/latest/download/designer.tar
Extract the file content, then set an environment variable named VLINGO_XOOM_DESIGNER_HOME indicating the absolute path of the uncompressed folder; that is, the installation folder. Using a *nix shell, such as bash, do this:
 $ VLINGO_XOOM_DESIGNER_HOME=[installation-path]
 $ export VLINGO_XOOM_DESIGNER_HOME
On Windows you can use the System Properties > Advanced > Environment Variables... to set the property permanently. For a one-time setting before running the design tool you can use the command line:
C:\> set VLINGO_XOOM_DESIGNER_HOME=[installation-path]
Additionally, on *nix systems, it is necessary to set read and execute access on executable script, placed under the root folder, as following:
$ chmod 755 xoom
Ensure it's all set by verifying the xoom-designer version:
 $ ./xoom -version
 1.6.0
You can get the latest snapshot build of the XOOM Designer from GitHub Actions on the most recent daily build link. It's not obvious how to reach it, but it is also not difficult. Here is the best way to get there:
- Navigate to GitHub Actions for XOOM Designer
- On that page, the most recent scheduled build (the build number will be higher than this example) is listed. Click on that link:
        Build
        Build #306: Scheduled
- On the specific build page there are two artifacts listed:
        JARs
        designer
- Click the link that says designer and it will start a download
- Follow the above Installaiton steps
To build your own Designer from daily snapshots, see the note for developers.
mvn clean package -Pfrontend -Pnative-image./target/xoom-designer designerMore details GraalVM
If developing on the xoom-designer project, the VLINGO_XOOM_DESIGNER_HOME must be set a bit differently. It should point to an inner folder under the cloned repository. Using a *nix shell, such as bash, do this:
$ VLINGO_XOOM_DESIGNER_HOME=[git-clone-path]/dist/designer
$ export VLINGO_XOOM_DESIGNER_HOME
On Windows you can use the System Properties > Advanced > Environment Variables... to set the property permanently. For a one-time setting before running the design tool you can use the command line:
C:\> set VLINGO_XOOM_DESIGNER_HOME=[git-clone-path]\dist\designer
After making changes, from the root project directory build and run the designer. On *nix do this:
$ mvn clean package -P frontend
...
$ java -jar target/xoom-designer-1.11.2-SNAPSHOT.jar
On Windows, do this:
C:\[git-clone-path]> mvn clean package -P frontend
...
C:\[git-clone-path]> java -jar target\xoom-designer-1.11.2-SNAPSHOT.jar
We look forward to your VLINGO XOOM contribution!
In addition to the command-line interface (see below), xoom-designer provides a web/graphical user interface for a rapid application generation. Simply open a terminal window and run the Designer.
$ ./xoom designer
Following this your preferred browser will open with a wizard-fashioned screen, consisting of five steps.
Context Step
The first step defines the project artifact and service packaging.

Currently Maven build is supported. You may easily convert the generated project build to Gradle by using the Gradle conversion version task.
Model - Aggregate Step
The second step is used to design feature-based slices through the architecture. The vital parts of three architecture responsibilities are defined by means of a domain model focus. By first visually defining each domain model aggregate/entity type, its events emitted by each of its command message handlers and the REST API at the frontend, may be correspondingly specified.

In a single form, define the model aggregate/entity type, state, events, and REST API for :
- Aggregates and State: protocol name; message handler methods; state attributes/properties; emitted events
- Domain Events: name; attributes/properties
- REST Resources: HTTP method; URI path and path parameters; aggregate message handler method to which the resource dispatches
Following each aggregate definition, add it to the model and see it in the design view.

Track each architectural slice, including REST API, aggregate, and emitted events, on the Model - Aggregate design view. It shows an interesting angle of your model through a design-level Event Storming perspective.
Model - Persistence Step
The third step is used to define the persistence, and if CQRS is in used, both command and query models.
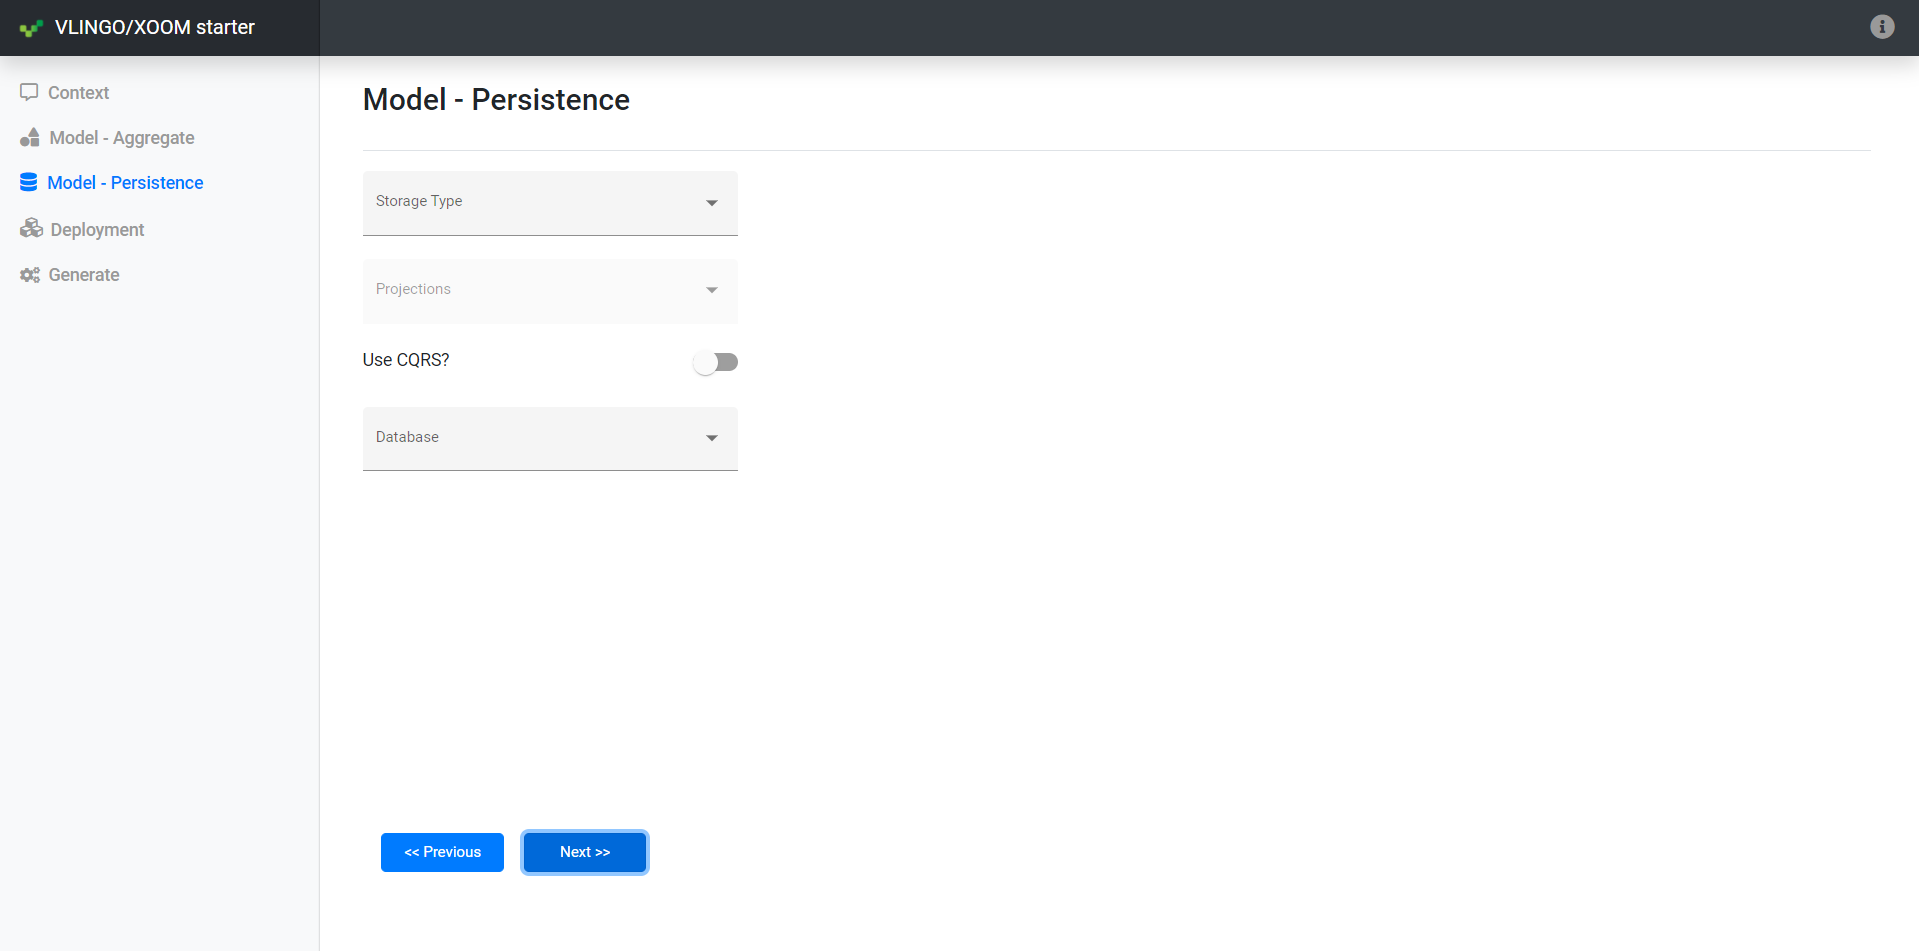
This step displays persistence preferences. Configuration selections include the storage type, CQRS usage, specific database mechanisms, and when applicable, how events are projected to the query model.
Deployment Step
The fourth step defines the deployment container types.

The project generator provides default packaging, such as Java JAR, but may also include containerization files facilitating Docker and Kubernetes deployment. Using the Deployment Step, choose among deployment types as needed.
Generation Step
The fifth and final step defines project component types, and generates the project.

Enter the project parent folder. In addition, select whether VLINGO XOOM annotations and auto-dispatch are preferred, or not. Click Finish to generate the defined service project.
Once the five definition steps are completed and the service project is generated, take full advantage of the power of the VLINGO XOOM acceleration components. Use the VLINGO XOOM platform SDK omprehensive documentation and its live and collaborative community that supports developers on their journey. Now, go have fun!
xoom-designer provides cool shortcuts for interacting with Docker, from the project root folder, as follows:
| Command | Description | Options |
|---|---|---|
| xoom docker status | Shows the container status. | N/A |
| xoom docker package | Builds / update the Docker image from the application current state. | tag: relate a tag to the current image build. If not informed, the default value is latest. Example: xoom docker package --tag 1.0 |
| xoom docker push | Publishes the image into the configured docker repository. | tag: relate the local tag to the remote tag. If not informed, the default value is latest:latest, following the pattern local-tag:remote-tag. Example: xoom docker push --tag 1.0:latest |
| xoom k8s push | Apply the manifest file(s) placed under deployment/k8s on Kubernetes. | N/A |
| xoom gloo init | Install the Gloo Gateway API generating an upstream for each running service on Kubernetes. | N/A |
| xoom gloo suspend | Uninstall the Gloo Gateway API. | N/A |
| xoom gloo route | Create routes, on Gloo Gateway API, for endpoints declared in xoom-turbo.properties | In xoom-turbo.properties , define the options described below:
gloo.upstream: a Gloo upstream name for the app's service running on K8s. Example: gloo.upstream = default-myxoomapp-8080 gloo.resource.[resource-name]: an endpoint for an application resource identified by resource-name. Example: gloo.resource.balance = v1/balance gloo.gateway.[resource-name]: a gateway route corresponding to a mapped endpoint identified by resource-name. Example: gloo.gateway.balance= balance Note that, for each resource, a pair of gloo.resource / gloo.gateway has to be informed for properly creating a route in the Gloo Gateway API. |
Our team really appreciates collaboration, not only because it boosts VLINGO to greater value, but also for the fact that the more viewpoints we have the more competent and mature the VLINGO community will become. If you want to be a catalyst for moving the platform forward, take a tour of our development guide.
Copyright © 2012-2023 VLINGO LABS. All rights reserved.
This Source Code Form is subject to the terms of the Mozilla Public License, v. 2.0. If a copy of the MPL was not distributed with this file, You can obtain one at https://mozilla.org/MPL/2.0/.