This is proof of concept project making a bridge between DataDog metrics and Minecraft. It allows you to view some custom DataDog dashboards within Minecraft. They show the real stuff.
Current features:
- display any metric, as long as you can formulate what you want as a query that returns a row of data
- skin them the way you want, change color, size, position
- customizable through YAML files, describe your Dashboard in a file, feed the program with it and voilà, you have a new dashboards
- support multiple dashboards, each dashboard can obviously show several graphs
- support alert buttons (they turn red when everything is on fire !)
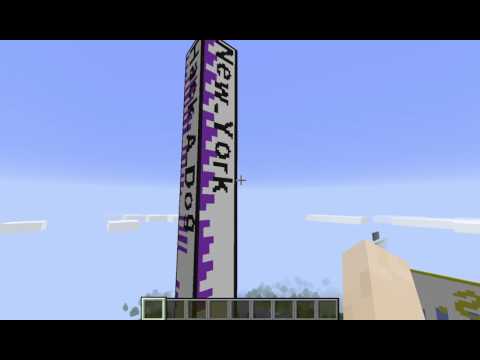
- primitive labeling of graphs, the top corner can show a few cubic letters to remind you what this item is
- no dirty artefacts left after you're done with it, programs cleans up all the blocks it did put in the first place
- you can freely move around and play minecraft as you wish, only there are a few blocks dedicated to you total awareness of what's going on in your systems
- graphs are updated on-the-fly, continuously, several times per minute
- ...
Caveats:
- requires a dedicated Minecraft server, one hosted by you, and patched. This should not be a show stopper, but setting this up can be tricky
- yes, the genuine DataDog web UI is faster than this hack
- not production ready, no packaging, and lacks heavy testing
As root:
apt-get install python3 idle3 python3-pip # yes, Python 3, version 2.7 won't work
apt-get install openjdk-8-jre             # JDK >= 7
apt-get install git wget
export PYMINECRAFT=$HOME/.pyminecraft     # choose a user-writable folder
install -d $PYMINECRAFT/build             # create the folder
cd $PYMINECRAFT/build                     # go to the right place
git config --global --unset core.autocrlf # need this! you can switch it off after
# now get the latest BuildTools.jar, think of this as a Makefile on steroids
wget https://hub.spigotmc.org/jenkins/job/BuildTools/lastSuccessfulBuild/artifact/target/BuildTools.jar
java -jar BuildTools.jar --rev 1.10.2     # replace 1.10.2 by *YOUR* Minecraft version
cp craftbukkit*jar $PYMINECRAFT/
cp spigot*jar $PYMINECRAFT/
cat <<EOF > $PYMINECRAFT/start.sh
#!/bin/sh

java -Xms512M -Xmx1024M -XX:MaxPermSize=128M -jar ./spigot-1.10.2.jar
EOF
chmod a+x $PYMINECRAFT/start.sh
cd $PYMINECRAFT
./start.sh
At this stage, server should start and ask for EULA agreement.
Edit the file eula.txt (has been created in your directory) and replace
eula=false by eula=true
Re-run it, now you should be able to connect on it with a standard Minecraft client,
using localhost as an address. Tip: to change the Minecraft version you're playing with,
change it in your profile (the first Minecraft screen, before you start the game) there's
a dropdown where you can decide to stick to a given version.
Stop the game, either stop on the prompt or CTRL-C.
This is a plugin that is REQUIRED for the Python API to work. It should be installed
in the plugins directory (typically /home/<user>/.pyminecraft/plugins.
https://dev.bukkit.org/bukkit-plugins/raspberryjuice
cd $PYMINECRAFT/build
wget https://dev.bukkit.org/media/files/917/56/raspberryjuice-1.8.jar
cp raspberryjuice*jar $PYMINECRAFT/plugins/
Also switch to creative mode:
sed -i "s/gamemode.*/gamemode=1/g" $PYMINECRAFT/server.properties                # creative mode by default
sed -i "s/force-gamemode.*/force-gamemode=true/g" $PYMINECRAFT/server.properties # force creative mode
cd $PYMINECRAFT/build
git clone https://github.com/py3minepi/py3minepi
Now, as root:
pip3 install ./py3minepi
Note: an old version, probably Python 2 compatible is available at: https://github.com/martinohanlon/mcpi
- start your server
- start a client, connect to localhost
From a Python (3!) prompt:
import mcpi.minecraft as minecraft
s=minecraft.Minecraft.create()
s.postToChat("hello world")
You might be interested by reading https://www.nostarch.com/programwithminecraft which is about how to learn programming with Python and Minecraft.
- Additionnally, this program uses
freetype-pyhttps://github.com/rougier/freetype-py which you can simply install bypip install freetype-py.
- Install the datadog python library https://github.com/DataDog/datadogpy
- You also need a DataDog account, along with an
APP_KEYand anAPI_KEY. Refer to http://docs.datadoghq.com/api/ for details
Once you are ready, the ./demo.sh shows an example of a possible launcher.
Basically:
python3 main.py <mydashboard.yml>
The program will expect elements such as the font to be in some precise path, so don't try to launch it from anywhere. For now.
Most of the configuration options are available in the YAML file.
Some environnment vars matter:
DATADOG_API_KEY: the API keyDATADOG_APP_KEY: the APP keyDATADOG_API_HOST: the API host (eg: https://app.datadoghq.com/ )DATADOG_DEMO_DATA: if set toTrue, the program won't query DataDog API and display random demo data instead instead of read-world data


- make it more interactive, so that the "player" can act on the graph, acknowledge alerts...
- implement a cute white and purple Puppy that shows up with a dashboard hanging on his neck (killer feature!)
- ...