NOTE : During this installation we will use WSL 1 not 2
Windows Subsystem for Linux - Wikipedia
- You should enable WSL from Turn Windows features on or off. You can check following instruction. Also your operating system should provide WSL requirements.
How to install Windows Subsystem for Linux (WSL) on Windows 10 | Windows Central
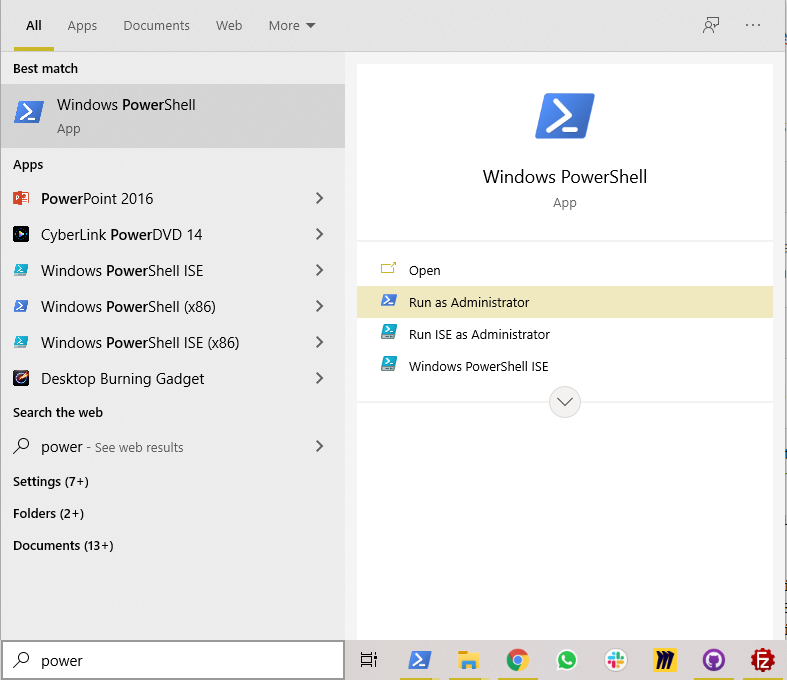
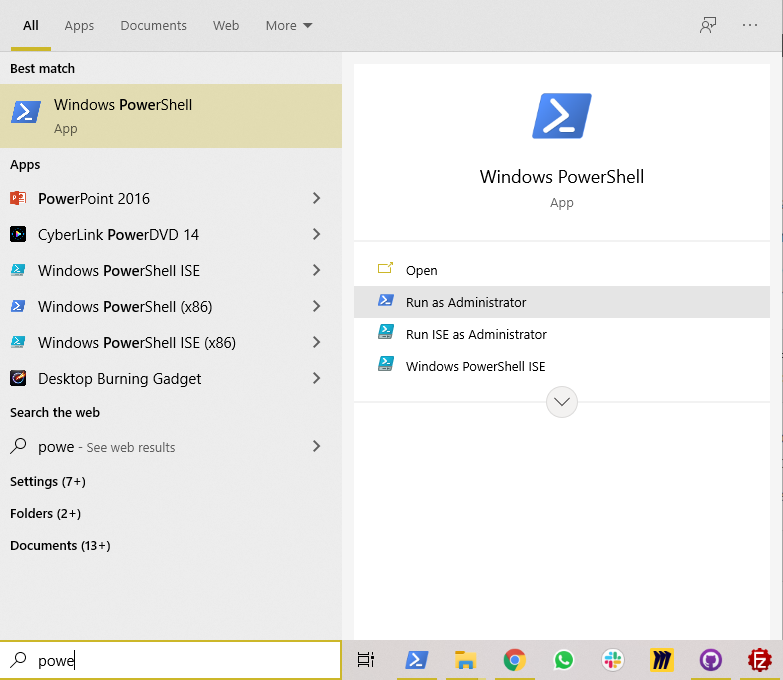
- Then open a powershell terminal with administrator privilege (Run as Administrator)
if you write wsl and command is not recognized that mean you didn't enabled WSL on your computer. Enable it then try again.
- Following command list downloaded distributions on your computer
wsl --list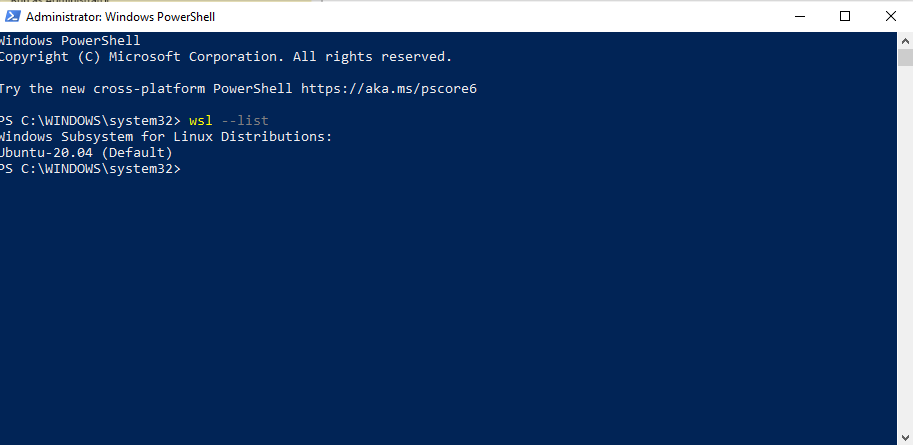
- If you use with online tag you can list all wsl distrubtions. You can select by name and install on your computer.
wsl --list --online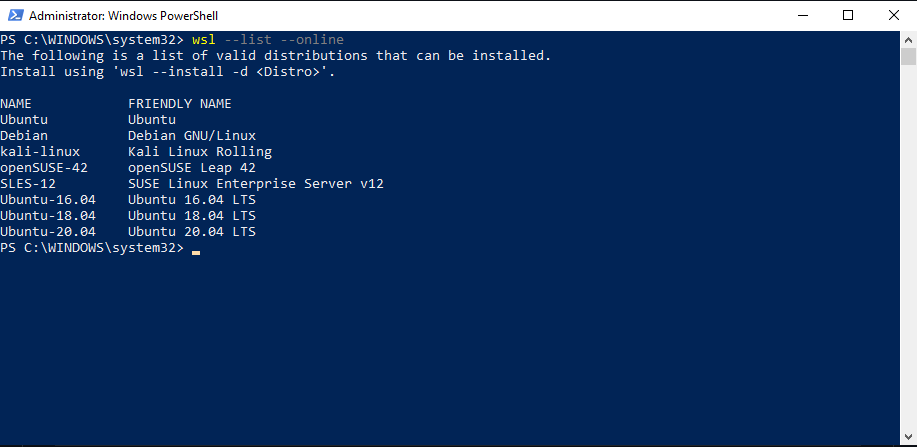
You should get output similar to following list.
if you get wsl --list --online command error. Probably you have WSL 2 you can set your environment to 1 with following command and close and open powershell again.
wsl --set-default-version 1if you have already installed application then you can use the following command for updating versions to 1, in this case you do not need.
wsl --set-version Ubuntu-20.04 1Ref: Setting up WSL Version 2 and the Ubuntu app | setup-guide
.
The following is a list of valid distributions that can be installed.
Install using 'wsl --install -d <Distro>'.

NAME            FRIENDLY NAME
Ubuntu          Ubuntu
Debian          Debian GNU/Linux
kali-linux      Kali Linux Rolling
openSUSE-42     openSUSE Leap 42
SLES-12         SUSE Linux Enterprise Server v12
Ubuntu-16.04    Ubuntu 16.04 LTS
Ubuntu-18.04    Ubuntu 18.04 LTS
Ubuntu-20.04 Ubuntu 20.04 LTSDuring this installation we will use Ubuntu 20.04 (you can use latest one) with --install parameter as follow
Installation Command-1
wsl --install -d Ubuntu-20.04Installation will open a terminal for Ubuntu and ask for user name and password.

do not forget username and password
if you forget password try following link
How To Reset Your Forgotten Linux Password in WSL – CloudSavvy IT
Please enter this required information for super user.
Some users when installed WSL and setup user name password there is keyboard setting and language issue I think. When user open WSL from powershell sudo commands not validate passwords.
This problem can be solved by closing ubuntu screen when asking password during installation, then WSL will open without asking password (This is not a good option but fast solution) other case you can use the following link to reset your password
How To Reset Your Forgotten Linux Password in WSL – CloudSavvy IT
also there is user management command that you need
How to Change Your User Account in Windows 10’s Ubuntu Bash Shell
When we enter wsl it will kept wsl environmet up and runnig state you can check state with following command
wsl -l -vYou should have the following output. State shows the running or stopped for your environment and Version show WSL or WSL2 environment 1 is for WSL and 2 is for WSL2 environment. its newer and its architecture different.
Windows PowerShell
Copyright (C) Microsoft Corporation. All rights reserved.

Try the new cross-platform PowerShell https://aka.ms/pscore6

PS C:\WINDOWS\system32> wsl -l -v
  NAME            STATE           VERSION
* Ubuntu-20.04    Running         1
PS C:\WINDOWS\system32>

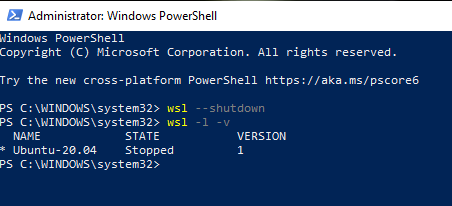
we can close wsl with --shutdown parameter. Close open terminal and open a new terminal then enter following command.
wsl --shutdownafter shutdown operation we should have the following output
Windows PowerShell
Copyright (C) Microsoft Corporation. All rights reserved.

Try the new cross-platform PowerShell https://aka.ms/pscore6

PS C:\WINDOWS\system32> wsl -l -v
  NAME            STATE           VERSION
* Ubuntu-20.04    Running         1
PS C:\WINDOWS\system32> wsl --shutdown
PS C:\WINDOWS\system32> wsl -l -v
  NAME            STATE           VERSION
* Ubuntu-20.04    Stopped         1
PS C:\WINDOWS\system32>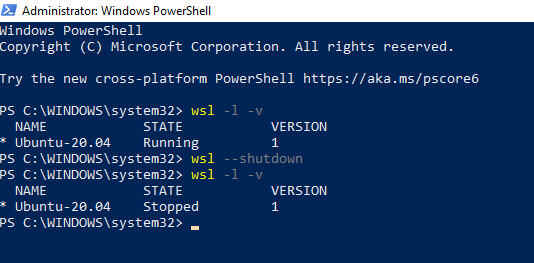
After this command you can close terminal.
If you want to uninstall wsl environment then you can use following command.
This operating can be required for resetting environment
wsl --unregister Ubuntu-20.04Untill this step you will have Ubuntu-20.04 installed WSL environment but it needs some updates.
Open a **powershell **terminal with admin privilege and write
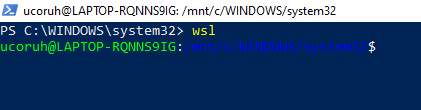
wsl 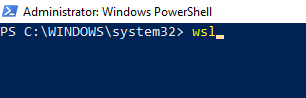
then you will enter WSL environment
On the terminal environment you can access the linux environment. Run following sequence and wait operations.
sudo means run this command with root privilege that mean admin privilege and for this reason it ask for root password for current user
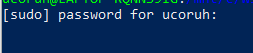
if you see password for specified user enter password
Install common tools
Installation Command-2
sudo apt-get install software-properties-common
Installation Command-3
sudo apt-get update && sudo apt-get upgrade
Install software
Installation Command-4
sudo apt-get install git zsh curl make build-essential
Installation Command-5
sudo apt-get install libssl-dev zlib1g-dev libbz2-dev libreadline-dev libsqlite3-dev wget llvm libncurses5-dev libncursesw5-dev xz-utils tk-dev libffi-dev liblzma-dev python-openssl imagemagick libmagickwand-dev
Update updatedb.conf
Add /mnt to PRUNEPATHS in /etc/updatedb.conf this avoid indexing windows files and mlocate installation not hanging on too long.
Open updatedb.conf file with nano text editor as follow
Installation Command-6 (File Editing Operation)
sudo nano /etc/updatedb.conf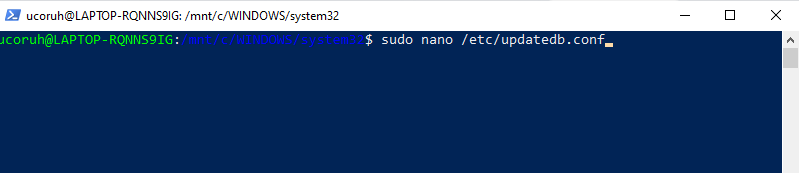
you will some file outputs as follow (following is updated and mnt/ is added)

PRUNE_BIND_MOUNTS="yes"
# PRUNENAMES=".git .bzr .hg .svn"
PRUNEPATHS="/tmp /var/spool /media /var/lib/os-prober /var/lib/ceph /home/.ecryptfs /var/lib/schroot /mnt"
PRUNEFS="NFS afs autofs binfmt_misc ceph cgroup cgroup2 cifs coda configfs curlftpfs debugfs devfs devpts devtmp>
Update PRUNEPATHS line end of line add before " character add mnt/
OLD LINE
PRUNEPATHS="/tmp /var/spool /media /var/lib/os-prober /var/lib/ceph /home/.ecryptfs /var/lib/schroot "NEW LINE
PRUNEPATHS="/tmp /var/spool /media /var/lib/os-prober /var/lib/ceph /home/.ecryptfs /var/lib/schroot /mnt"use CTRL+O for override then it will ask for write for filename press "Enter"

and then CTRL+X to exit
to validate insertion enter file again
sudo nano /etc/updatedb.confif you see mnt/ is added to end of PRUNEPATHS then press CTRL+X to exit
PRUNE_BIND_MOUNTS="yes"
# PRUNENAMES=".git .bzr .hg .svn"
PRUNEPATHS="/tmp /var/spool /media /var/lib/os-prober /var/lib/ceph /home/.ecryptfs /var/lib/schroot /mnt"
PRUNEFS="NFS afs autofs binfmt_misc ceph cgroup cgroup2 cifs coda configfs curlftpfs debugfs devfs devpts devtmp>
Install mlocate
what is mlocate - Gentoo Wiki
mlocate is a merging locate and database package. "Merging" means updatedb reuses the existing database to avoid re-reading most of the file system. This makes the database update faster and does not tax the system caches.[1] mlocate can index several file systems including network file systems for network shares. This package is essential when attempting to quickly find documents in a terminal
Installation Command-7
sudo apt-get install mlocate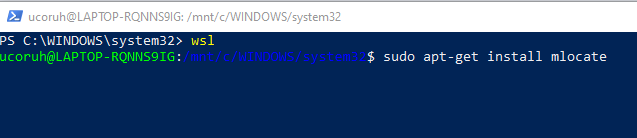
Installation Command-8
sudo updatedb
Install Tasksel
What is Tasksel tasksel - Debian Wiki
Tasksel package provides a simple interface for users who want to configure their system to perform a specific task. This program is used during the installation process, but users can also use tasksel at any time.
Installation Command-9
sudo apt install tasksel
Install Xubuntu desktop (INSTALL DESKTOP GUI for LINUX)
What is Xubuntu Chapter 1. What is Xubuntu?
Xubuntu comes with Xfce, which is a stable, light and configurable desktop environment.
Installation Command-10
sudo tasksel install xubuntu-desktop
Install xfce4 and select lightdm
Installation Command-11
sudo apt install xfce4
Setup Display Driver Parameter
After xfce4 installation you should add DISPLAY driver parameter to configuration file (Open file with following command)
Installation Command-12 - (File Editing Operation)
sudo nano /etc/bash.bashrc
you will see a script file as below

with using keys go down (end of file) - be carefull about where is the cursor.
End of this file add following line
export DISPLAY=:0end of file there should be export DISPLAY=:0 as below
# System-wide .bashrc file for interactive bash(1) shells.

# To enable the settings / commands in this file for login shells as well,
# this file has to be sourced in /etc/profile.

# If not running interactively, don't do anything
[ -z "$PS1" ] && return

# check the window size after each command and, if necessary,
# update the values of LINES and COLUMNS.
shopt -s checkwinsize

# set variable identifying the chroot you work in (used in the prompt below)
if [ -z "${debian_chroot:-}" ] && [ -r /etc/debian_chroot ]; then
    debian_chroot=$(cat /etc/debian_chroot)
fi

# set a fancy prompt (non-color, overwrite the one in /etc/profile)
# but only if not SUDOing and have SUDO_PS1 set; then assume smart user.
if ! [ -n "${SUDO_USER}" -a -n "${SUDO_PS1}" ]; then
  PS1='${debian_chroot:+($debian_chroot)}\u@\h:\w\$ '
fi

# Commented out, don't overwrite xterm -T "title" -n "icontitle" by default.
# If this is an xterm set the title to user@host:dir
#case "$TERM" in
#xterm*|rxvt*)
#    PROMPT_COMMAND='echo -ne "\033]0;${USER}@${HOSTNAME}: ${PWD}\007"'
#    ;;
#*)
#    ;;
#esac

# enable bash completion in interactive shells
#if ! shopt -oq posix; then
#  if [ -f /usr/share/bash-completion/bash_completion ]; then
#    . /usr/share/bash-completion/bash_completion
#  elif [ -f /etc/bash_completion ]; then
#    . /etc/bash_completion
#  fi
#fi

# sudo hint
if [ ! -e "$HOME/.sudo_as_admin_successful" ] && [ ! -e "$HOME/.hushlogin" ] ; then
    case " $(groups) " in *\ admin\ *|*\ sudo\ *)
    if [ -x /usr/bin/sudo ]; then
	cat <<-EOF
	To run a command as administrator (user "root"), use "sudo <command>".
	See "man sudo_root" for details.

	EOF
    fi
    esac
fi

# if the command-not-found package is installed, use it
if [ -x /usr/lib/command-not-found -o -x /usr/share/command-not-found/command-not-found ]; then
	function command_not_found_handle {
	        # check because c-n-f could've been removed in the meantime
                if [ -x /usr/lib/command-not-found ]; then
		   /usr/lib/command-not-found -- "$1"
                   return $?
                elif [ -x /usr/share/command-not-found/command-not-found ]; then
		   /usr/share/command-not-found/command-not-found -- "$1"
                   return $?
		else
		   printf "%s: command not found\n" "$1" >&2
		   return 127
		fi
	}
fi

export DISPLAY=:0
CTRL+O (save) + Enter and CTRL+X (close)
Open file again check insertion is correct with the following command again
sudo nano /etc/bash.bashrcfor copy-paste operations from nano text editor you can read the following topic
linux - Copy text from nano editor to shell - Stack Overflow
During this setup I also add this DISPLAY parameter to ~/.bashrc and ~/.zshrc files but I think this is not required.
Installation Command-12 - (File Editing Operation)
sudo nano ~/.bashrc
you will see a script file again end of this file add
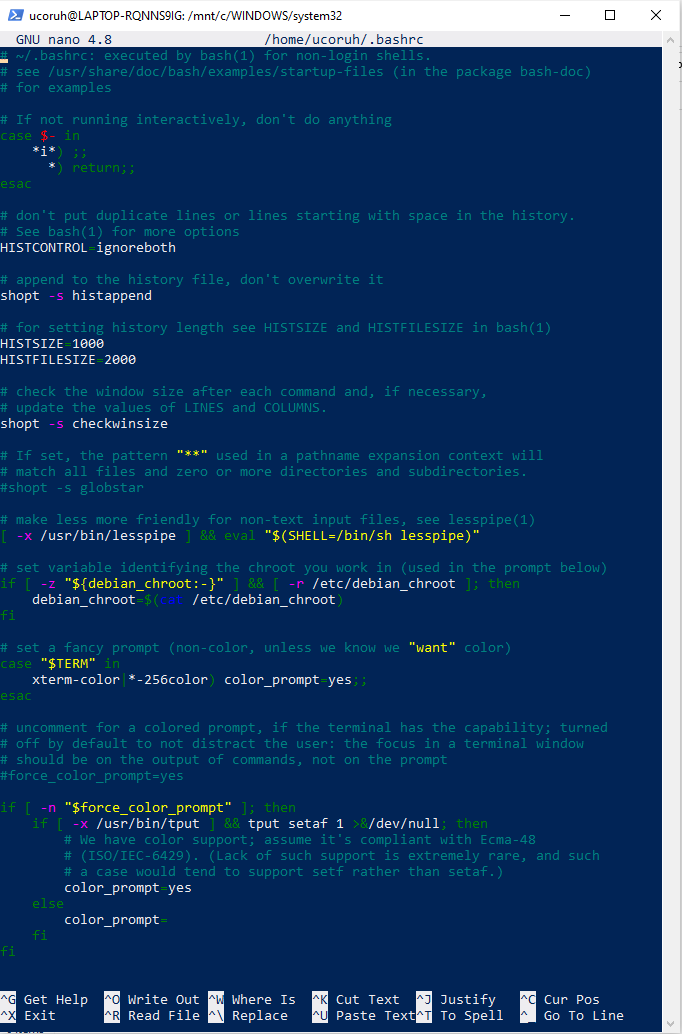
go down with keys to end of file and add
export DISPLAY=:0you should have the following file end of this operation.
# ~/.bashrc: executed by bash(1) for non-login shells.
# see /usr/share/doc/bash/examples/startup-files (in the package bash-doc)
# for examples

# If not running interactively, don't do anything
case $- in
    *i*) ;;
      *) return;;
esac

# don't put duplicate lines or lines starting with space in the history.
# See bash(1) for more options
HISTCONTROL=ignoreboth

# append to the history file, don't overwrite it
shopt -s histappend

# for setting history length see HISTSIZE and HISTFILESIZE in bash(1)
HISTSIZE=1000
HISTFILESIZE=2000

# check the window size after each command and, if necessary,
# update the values of LINES and COLUMNS.
shopt -s checkwinsize

# If set, the pattern "**" used in a pathname expansion context will
# match all files and zero or more directories and subdirectories.
#shopt -s globstar

# make less more friendly for non-text input files, see lesspipe(1)
[ -x /usr/bin/lesspipe ] && eval "$(SHELL=/bin/sh lesspipe)"

# set variable identifying the chroot you work in (used in the prompt below)
if [ -z "${debian_chroot:-}" ] && [ -r /etc/debian_chroot ]; then
    debian_chroot=$(cat /etc/debian_chroot)
fi

# set a fancy prompt (non-color, unless we know we "want" color)
case "$TERM" in
    xterm-color|*-256color) color_prompt=yes;;
esac

# uncomment for a colored prompt, if the terminal has the capability; turned
# off by default to not distract the user: the focus in a terminal window
# should be on the output of commands, not on the prompt
#force_color_prompt=yes

if [ -n "$force_color_prompt" ]; then
    if [ -x /usr/bin/tput ] && tput setaf 1 >&/dev/null; then
	# We have color support; assume it's compliant with Ecma-48
	# (ISO/IEC-6429). (Lack of such support is extremely rare, and such
	# a case would tend to support setf rather than setaf.)
	color_prompt=yes
    else
	color_prompt=
    fi
fi

if [ "$color_prompt" = yes ]; then
    PS1='${debian_chroot:+($debian_chroot)}\[\033[01;32m\]\u@\h\[\033[00m\]:\[\033[01;34m\]\w\[\033[00m\]\$ '
else
    PS1='${debian_chroot:+($debian_chroot)}\u@\h:\w\$ '
fi
unset color_prompt force_color_prompt

# If this is an xterm set the title to user@host:dir
case "$TERM" in
xterm*|rxvt*)
    PS1="\[\e]0;${debian_chroot:+($debian_chroot)}\u@\h: \w\a\]$PS1"
    ;;
*)
    ;;
esac

# enable color support of ls and also add handy aliases
if [ -x /usr/bin/dircolors ]; then
    test -r ~/.dircolors && eval "$(dircolors -b ~/.dircolors)" || eval "$(dircolors -b)"
    alias ls='ls --color=auto'
    #alias dir='dir --color=auto'
    #alias vdir='vdir --color=auto'

    alias grep='grep --color=auto'
    alias fgrep='fgrep --color=auto'
    alias egrep='egrep --color=auto'
fi

# colored GCC warnings and errors
#export GCC_COLORS='error=01;31:warning=01;35:note=01;36:caret=01;32:locus=01:quote=01'

# some more ls aliases
alias ll='ls -alF'
alias la='ls -A'
alias l='ls -CF'

# Add an "alert" alias for long running commands.  Use like so:
#   sleep 10; alert
alias alert='notify-send --urgency=low -i "$([ $? = 0 ] && echo terminal || echo error)" "$(history|tail -n1|sed -e '\''s/^\s*[0-9]\+\s*//;s/[;&|]\s*alert$//'\'')"'

# Alias definitions.
# You may want to put all your additions into a separate file like
# ~/.bash_aliases, instead of adding them here directly.
# See /usr/share/doc/bash-doc/examples in the bash-doc package.

if [ -f ~/.bash_aliases ]; then
    . ~/.bash_aliases
fi

# enable programmable completion features (you don't need to enable
# this, if it's already enabled in /etc/bash.bashrc and /etc/profile
# sources /etc/bash.bashrc).
if ! shopt -oq posix; then
  if [ -f /usr/share/bash-completion/bash_completion ]; then
    . /usr/share/bash-completion/bash_completion
  elif [ -f /etc/bash_completion ]; then
    . /etc/bash_completion
  fi
fi
export DISPLAY=:0
after this operation press CTRL+O (save) and CTRL+X (exit)
enter again the file and check insertion as same as other files
sudo nano ~/.bashrcif everything is ok then press CTRL+X to exit
Installation Command-13 - (File Editing Operation)
sudo nano ~/.zshrc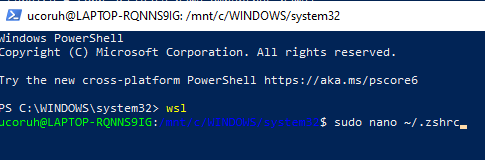
you will have empty file in this file add the following line and CTRL+O (save) CTRL+X (exit)
export DISPLAY=:0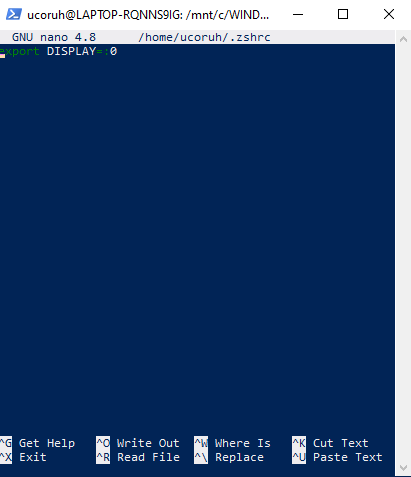
then open file again check insertion is correct
sudo nano ~/.zshrcif everything ok, then close file with CTRL+X (exit)
Install ns3 requirements
sudo apt update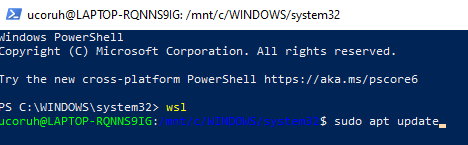
sudo apt install build-essential autoconf automake libxmu-dev python3-pygraphviz cvs mercurial bzr git cmake p7zip-full python3-matplotlib python-tk python3-dev qt5-qmake qt5-default gnuplot-x11 wireshark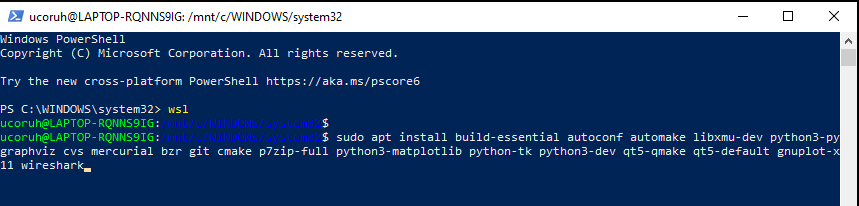
Close terminal, and open new powershell with admin privilege shutdown wsl environment. Also check status
wsl --shutdownwsl -l -v
Close terminal, we will start VcXsrv Windows X server installation for create desktop bridge between Windows and Linux.
Close all open terminal also,
Download setup from
VcXsrv Windows X Server download | SourceForge.net

https://sourceforge.net/projects/vcxsrv/files/latest/download
Install the setup
Open firewall and give permission
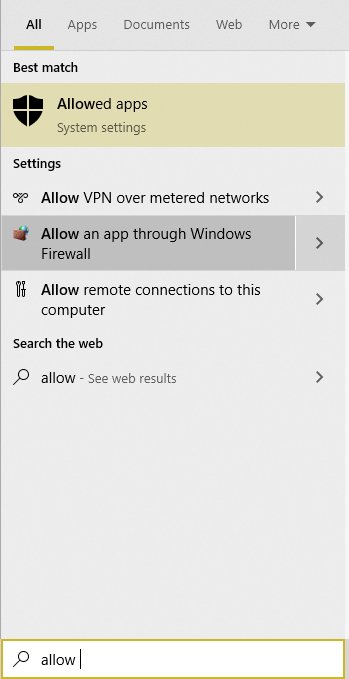
Select change settings
Find VcXsrv windows xserver and check private and public network permissions.

If VcXsrv windows xserver not exist in list, Select change settings and enable allow another app button, then browse for

select browse

goto installation directory
C:\Program Files\VcXsrv
select vcxsrv.exe and add to list. if its gives error that already add then find exe from list. That mean you already added this file.
Before running xlaunch be sure that you closed the wsl with --shutdown
You should run xlaunch first
then
You should open wsl with powershell by writing wsl, do not forget to run powershell as administrator privilege
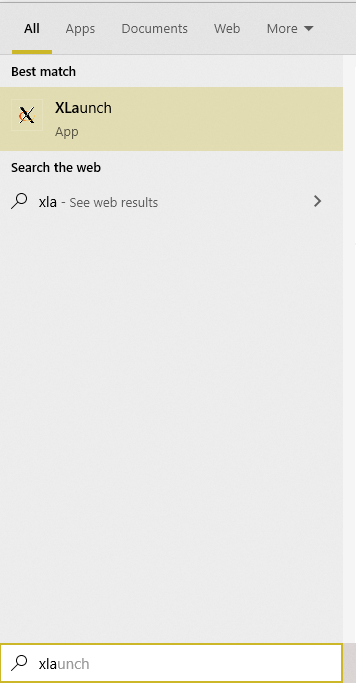
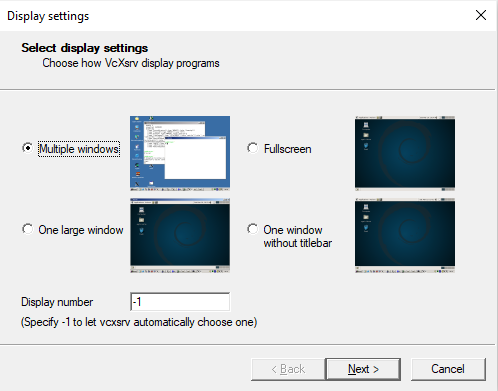
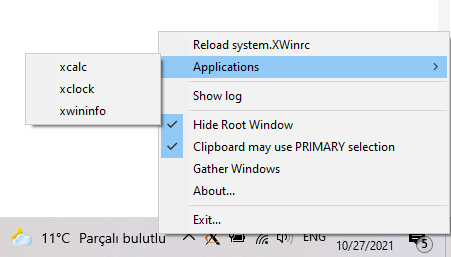
Open Xlaunch from menu
Select Multiple Window
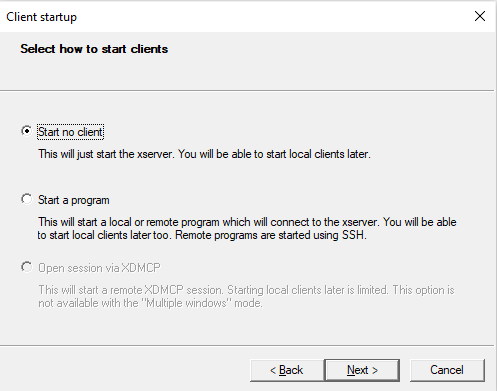
Select Start No Client
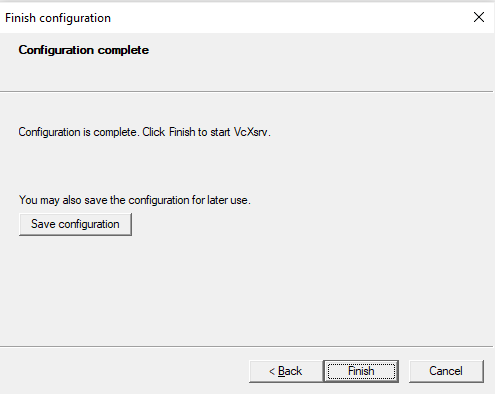
Disable Access Control, avoid connection issues

Save Configurations for later use
in the taskbar you will see its running

Open Powershell
Check is there running session
wsl -l -v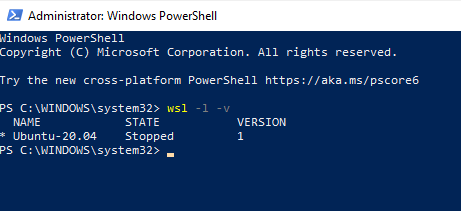
if there is running session then shutdown it
wsl --shutdown
Enter wsl
wsl
Enter xfce4-session command (if permission required then use sudo)
xfce4-session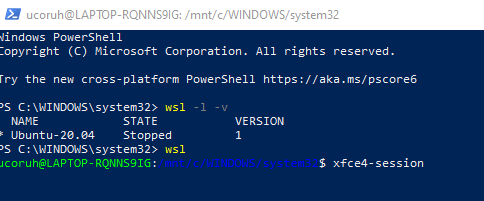
it will log operations on powershell and then will open WSL Desktop
If not connected then reset environment with shutdown and try again during this operation close all open terminals.
If command successfully operated then you will see WSL GUI. In multiple screen setups there are some problems to fit monitor screen sizes
Windows PowerShell
Copyright (C) Microsoft Corporation. All rights reserved.

Try the new cross-platform PowerShell https://aka.ms/pscore6

PS C:\WINDOWS\system32> wsl -l -v
  NAME            STATE           VERSION
* Ubuntu-20.04    Stopped         1
PS C:\WINDOWS\system32> wsl
ucoruh@LAPTOP-RQNNS9IG:/mnt/c/WINDOWS/system32$ xfce4-session
_IceTransmkdir: Owner of /tmp/.ICE-unix should be set to root
gpg-agent[61]: WARNING: "--write-env-file" is an obsolete option - it has no effect
gpg-agent[62]: gpg-agent (GnuPG) 2.2.19 started

(xfce4-session:23): xfce4-session-WARNING **: 02:47:18.049: gpg-agent returned no PID in the variables

(xfsettingsd:64): libupower-glib-WARNING **: 02:47:18.293: Couldn't connect to proxy: Could not connect: No such file or directory

(xfsettingsd:64): libupower-glib-CRITICAL **: 02:47:18.294: up_client_get_lid_is_closed: assertion 'UP_IS_CLIENT (client)' failed

(xfsettingsd:64): GLib-GObject-WARNING **: 02:47:18.295: invalid (NULL) pointer instance

(xfsettingsd:64): GLib-GObject-CRITICAL **: 02:47:18.295: g_signal_connect_data: assertion 'G_TYPE_CHECK_INSTANCE (instance)' failed
xfce4-panel: No window manager registered on screen 0. To start the panel without this check, run with --disable-wm-check.
No window manager registered on screen 0. To start the xfdesktop without this check, run with --disable-wm-check.

(xfce4-session:23): GLib-WARNING **: 02:47:24.848: GChildWatchSource: Exit status of a child process was requested but ECHILD was received by waitpid(). See the documentation of g_child_watch_source_new() for possible causes.
shared memfd open() failed: Function not implemented
Connection failure: Connection refused
pa_context_connect() failed: Connection refused

(polkit-gnome-authentication-agent-1:117): polkit-gnome-1-WARNING **: 02:47:25.518: Error getting authority: Error initializing authority: Could not connect: No such file or directory

(nm-applet:112): nm-applet-WARNING **: 02:47:25.735: Error connecting to system D-Bus: Could not connect: No such file or directory

(nm-applet:112): nm-applet-WARNING **: 02:47:25.739: Could not connect: No such file or directory

(nm-applet:112): libnm-CRITICAL **: 02:47:25.747: ((libnm/nm-client.c:3905)): assertion '<dropped>' failed

(nm-applet:112): libnm-CRITICAL **: 02:47:25.764: ((libnm/nm-client.c:3859)): assertion '<dropped>' failed

(nm-applet:112): libnm-CRITICAL **: 02:47:25.768: ((libnm/nm-client.c:3937)): assertion '<dropped>' failed

(nm-applet:112): libnm-CRITICAL **: 02:47:25.770: ((libnm/nm-client.c:3986)): assertion '<dropped>' failed

(nm-applet:112): libnm-CRITICAL **: 02:47:25.775: ((libnm/nm-client.c:4026)): assertion '<dropped>' failed

(nm-applet:112): libnm-CRITICAL **: 02:47:25.779: ((libnm/nm-client.c:4042)): assertion '<dropped>' failed

(nm-applet:112): libnm-CRITICAL **: 02:47:25.790: ((libnm/nm-client.c:4080)): assertion '<dropped>' failed

(nm-applet:112): libnm-CRITICAL **: 02:47:25.795: ((libnm/nm-client.c:4598)): assertion '<dropped>' failed

(nm-applet:112): libnm-CRITICAL **: 02:47:25.812: ((libnm/nm-client.c:4598)): assertion '<dropped>' failed
xfsettingsd: No window manager registered on screen 0.

** (xiccd:165): CRITICAL **: 02:47:26.059: Failed to connect to colord: Could not connect: No such file or directory

** (wrapper-2.0:111): WARNING **: 02:47:26.379: No outputs have backlight property

(wrapper-2.0:111): libupower-glib-WARNING **: 02:47:26.478: Couldn't connect to proxy: Could not connect: No such file or directory

(wrapper-2.0:113): GLib-GIO-CRITICAL **: 02:47:26.509: g_file_new_for_path: assertion 'path != NULL' failed

(wrapper-2.0:113): GLib-GIO-CRITICAL **: 02:47:26.515: g_file_monitor_file: assertion 'G_IS_FILE (file)' failed

(wrapper-2.0:113): GLib-GObject-WARNING **: 02:47:26.521: invalid (NULL) pointer instance

(wrapper-2.0:113): GLib-GObject-CRITICAL **: 02:47:26.529: g_signal_connect_data: assertion 'G_TYPE_CHECK_INSTANCE (instance)' failed

(wrapper-2.0:113): Gtk-WARNING **: 02:47:26.534: Attempting to add a widget with type GtkToggleButton to a container of type XfcePanelPlugin, but the widget is already inside a container of type XfcePanelPlugin, please remove the widget from its existing container first.

(wrapper-2.0:111): GLib-GObject-WARNING **: 02:47:26.547: invalid (NULL) pointer instance

(wrapper-2.0:111): GLib-GObject-CRITICAL **: 02:47:26.553: g_signal_connect_data: assertion 'G_TYPE_CHECK_INSTANCE (instance)' failed

(wrapper-2.0:111): GLib-GObject-WARNING **: 02:47:26.560: invalid (NULL) pointer instance

(wrapper-2.0:111): GLib-GObject-CRITICAL **: 02:47:26.564: g_signal_connect_data: assertion 'G_TYPE_CHECK_INSTANCE (instance)' failed

(xfce4-session:23): xfce4-session-WARNING **: 02:47:26.632: failed to run script: Failed to execute child process “/usr/bin/pm-is-supported” (No such file or directory)

** (wrapper-2.0:106): WARNING **: 02:47:26.650: Binding 'XF86AudioMicMute' failed!

(wrapper-2.0:106): pulseaudio-plugin-WARNING **: 02:47:26.653: Could not have grabbed volume control keys. Is another volume control application (xfce4-volumed) running?

(xfce4-session:23): xfce4-session-WARNING **: 02:47:26.656: failed to run script: Failed to execute child process “/usr/bin/pm-is-supported” (No such file or directory)
shared memfd open() failed: Function not implemented

(xfce4-session:23): xfce4-session-WARNING **: 02:47:26.696: failed to run script: Failed to execute child process “/usr/bin/pm-is-supported” (No such file or directory)
dbus[158]: arguments to dbus_connection_send_with_reply_and_block() were incorrect, assertion "connection != NULL" failed in file ../../../dbus/dbus-connection.c line 3544.
This is normally a bug in some application using the D-Bus library.

  D-Bus not built with -rdynamic so unable to print a backtrace

(wrapper-2.0:111): libupower-glib-CRITICAL **: 02:47:26.851: up_device_get_object_path: assertion 'UP_IS_DEVICE (device)' failed

(wrapper-2.0:111): GLib-GObject-CRITICAL **: 02:47:26.855: g_object_get: assertion 'G_IS_OBJECT (object)' failed

(wrapper-2.0:111): GLib-GObject-WARNING **: 02:47:26.860: invalid (NULL) pointer instance

(wrapper-2.0:111): GLib-GObject-CRITICAL **: 02:47:26.864: g_signal_connect_data: assertion 'G_TYPE_CHECK_INSTANCE (instance)' failed

(wrapper-2.0:111): GLib-GObject-CRITICAL **: 02:47:26.868: g_object_ref: assertion 'G_IS_OBJECT (object)' failed

(wrapper-2.0:111): libupower-glib-CRITICAL **: 02:47:26.872: up_device_get_object_path: assertion 'UP_IS_DEVICE (device)' failed

(wrapper-2.0:111): GLib-GObject-CRITICAL **: 02:47:26.883: g_object_get: assertion 'G_IS_OBJECT (object)' failed

(wrapper-2.0:111): libupower-glib-CRITICAL **: 02:47:26.887: up_client_get_lid_is_present: assertion 'UP_IS_CLIENT (client)' failed

(wrapper-2.0:111): libupower-glib-CRITICAL **: 02:47:26.893: up_client_get_on_battery: assertion 'UP_IS_CLIENT (client)' failed

(wrapper-2.0:111): GLib-GObject-CRITICAL **: 02:47:26.917: g_object_get: assertion 'G_IS_OBJECT (object)' failed

(wrapper-2.0:111): libupower-glib-CRITICAL **: 02:47:26.923: up_device_get_object_path: assertion 'UP_IS_DEVICE (device)' failed

(wrapper-2.0:111): libupower-glib-CRITICAL **: 02:47:26.952: up_device_get_object_path: assertion 'UP_IS_DEVICE (device)' failed

(wrapper-2.0:111): GLib-GObject-CRITICAL **: 02:47:26.956: g_object_unref: assertion 'G_IS_OBJECT (object)' failed

(wrapper-2.0:111): libupower-glib-CRITICAL **: 02:47:27.004: up_device_get_object_path: assertion 'UP_IS_DEVICE (device)' failed

(wrapper-2.0:111): libupower-glib-CRITICAL **: 02:47:27.017: up_device_get_object_path: assertion 'UP_IS_DEVICE (device)' failed

(wrapper-2.0:111): GLib-GObject-CRITICAL **: 02:47:27.023: g_object_unref: assertion 'G_IS_OBJECT (object)' failed

(wrapper-2.0:122): Gtk-WARNING **: 02:47:27.027: Negative content width -1 (allocation 1, extents 1x1) while allocating gadget (node button, owner XfceArrowButton)

(wrapper-2.0:113): Gtk-WARNING **: 02:47:27.068: Negative content width -3 (allocation 1, extents 2x2) while allocating gadget (node button, owner GtkToggleButton)

(wrapper-2.0:111): libupower-glib-CRITICAL **: 02:47:27.228: up_client_get_devices2: assertion 'UP_IS_CLIENT (client)' failed

(wrapper-2.0:106): Gtk-WARNING **: 02:47:27.438: Negative content width -3 (allocation 1, extents 2x2) while allocating gadget (node button, owner PulseaudioButton)

(wrapper-2.0:111): Gtk-WARNING **: 02:47:27.521: Negative content width -3 (allocation 1, extents 2x2) while allocating gadget (node button, owner PowerManagerButton)

(xfdesktop:92): GVFS-RemoteVolumeMonitor-WARNING **: 02:47:27.720: remote volume monitor with dbus name org.gtk.vfs.UDisks2VolumeMonitor is not supported

** (xfdesktop:92): WARNING **: 02:47:28.474: Failed to get system bus: Could not connect: No such file or directory
system-config-printer-applet: failed to connect to system D-Bus
Traceback (most recent call last):
  File "/usr/bin/blueman-applet", line 16, in <module>
    from blueman.main.Applet import BluemanApplet
  File "/usr/lib/python3/dist-packages/blueman/main/Applet.py", line 3, in <module>
    import blueman.bluez as bluez
  File "/usr/lib/python3/dist-packages/blueman/bluez/__init__.py", line 2, in <module>
    from blueman.bluez.Adapter import Adapter, AnyAdapter  # noqa: F401
  File "/usr/lib/python3/dist-packages/blueman/bluez/Adapter.py", line 4, in <module>
    from blueman.bluez.AnyBase import AnyBase
  File "/usr/lib/python3/dist-packages/blueman/bluez/AnyBase.py", line 5, in <module>
    class AnyBase(GObject.GObject):
  File "/usr/lib/python3/dist-packages/blueman/bluez/AnyBase.py", line 14, in AnyBase
    __bus = Gio.bus_get_sync(Gio.BusType.SYSTEM)
gi.repository.GLib.Error: g-io-error-quark: Could not connect: No such file or directory (1)
Error getting authority: Error initializing authority: Could not connect: No such file or directory
You will see task bar and icon bar

right click them to unlock and move a ergonomic position on the screen default is close windows close buttons.
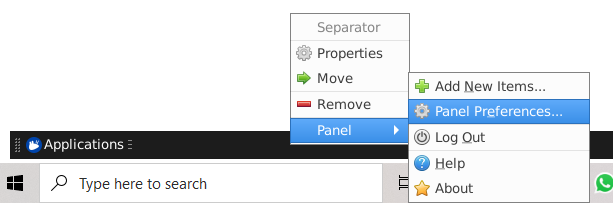
Select panel 1 from list and uncheck lock panel

also select panel 2 from list and uncheck lock panel

now you can move panels
I recommend to move panel near the windows bar
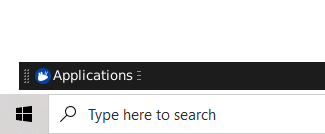
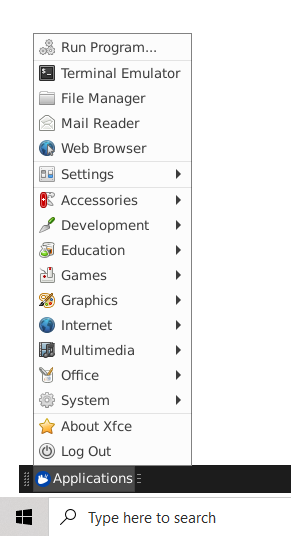
you click Applications from bar and open terminal
this terminal is linux application not windows application. But window is opened in your desktop.
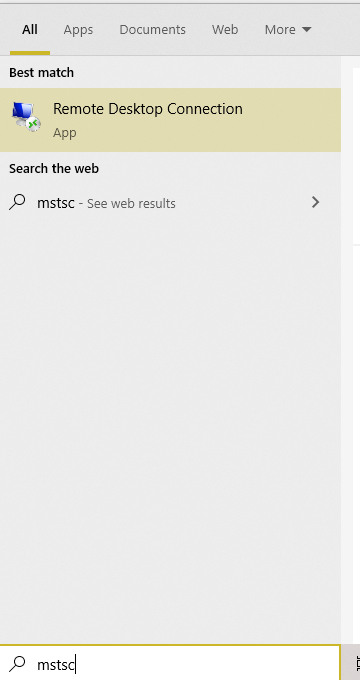
With this terminal you can also install RDP client via following command to use RDP for connection for WSL environment
sudo apt install xrdpand run service with
sudo service xrdp start you can check all services with following command
service --status-allCheck ip address of WSL environment with
ip addrfor RDP usage you need to enter RDP client from another computer as follow. You should enter IP of your WSL environment

Untill this step WSL and Xfce installed on your computer Step-4 is related with ns3 and you don't need to install it.
Open mozilla firefox and visit Releases | ns-3 to download ns-3 package.
You can also download this package on Windows 10 and then copy via
/mnt/ / <windows 10 folder path> to home folder on WSL.
You can check following sample
ucoruh@LAPTOP-RQNNS9IG:/$ ls
bin   dev  home  lib    lib64   media  opt   root  sbin  srv  tmp  var
boot  etc  init  lib32  libx32  mnt    proc  run   snap  sys  usr
ucoruh@LAPTOP-RQNNS9IG:/$ cd mnt
ucoruh@LAPTOP-RQNNS9IG:/mnt$ ls
c  d  e
ucoruh@LAPTOP-RQNNS9IG:/mnt$ cd c
ucoruh@LAPTOP-RQNNS9IG:/mnt/c$ cd Users
ucoruh@LAPTOP-RQNNS9IG:/mnt/c/Users$ cd ugur.coruh/
ucoruh@LAPTOP-RQNNS9IG:/mnt/c/Users/ugur.coruh$ ls
enter home user directory such as (home/ucoruh) and copy ns-allinone-xx.x package here and extract here with right click then enter folder via terminal and build ns3
cd ns-allinone-x.xx/
./build.py --enable-examples --enable-tests
This approximately takes 20 min.
After build enter ns-x.xx folder and run following command to test environment
./waf --run hello-simulatorucoruh@LAPTOP-RQNNS9IG:~/ns-allinone-3.34/ns-3.34$ ./waf --run hello-simulator
Waf: Entering directory `/home/ucoruh/ns-allinone-3.34/ns-3.34/build'
Waf: Leaving directory `/home/ucoruh/ns-allinone-3.34/ns-3.34/build'
Build commands will be stored in build/compile_commands.json
'build' finished successfully (2.584s)
Hello Simulatorns3 applications run in scratch folder under ns-x.xx folder. You can copy any example here and then run as same as follow
ucoruh@LAPTOP-RQNNS9IG:~/ns-allinone-3.34/ns-3.34$ cp examples/tutorial/first.cc scratch/
ucoruh@LAPTOP-RQNNS9IG:~/ns-allinone-3.34/ns-3.34$ ./waf --run scratch/first
Waf: Entering directory `/home/ucoruh/ns-allinone-3.34/ns-3.34/build'
Waf: Leaving directory `/home/ucoruh/ns-allinone-3.34/ns-3.34/build'
Build commands will be stored in build/compile_commands.json
'build' finished successfully (1.974s)
At time +2s client sent 1024 bytes to 10.1.1.2 port 9
At time +2.00369s server received 1024 bytes from 10.1.1.1 port 49153
At time +2.00369s server sent 1024 bytes to 10.1.1.1 port 49153
At time +2.00737s client received 1024 bytes from 10.1.1.2 port 9vim first.cc add header netanim-module
#include "ns3/core-module.h"
#include "ns3/network-module.h"
#include "ns3/internet-module.h"
#include "ns3/point-to-point-module.h"
#include "ns3/applications-module.h"
#include "ns3/netanim-module.h"

...

  AnimationInterface anim("first.xml");
  Simulator::Run ();
Simulator::Destroy ();ucoruh@LAPTOP-RQNNS9IG:~/ns-allinone-3.34/ns-3.34$ ./waf --run scratch/first
Waf: Entering directory `/home/ucoruh/ns-allinone-3.34/ns-3.34/build'
[2930/2984] Compiling scratch/first.cc
[2945/2984] Linking build/scratch/first
Waf: Leaving directory `/home/ucoruh/ns-allinone-3.34/ns-3.34/build'
Build commands will be stored in build/compile_commands.json
'build' finished successfully (8.757s)
AnimationInterface WARNING:Node:0 Does not have a mobility model. Use SetConstantPosition if it is stationary
AnimationInterface WARNING:Node:1 Does not have a mobility model. Use SetConstantPosition if it is stationary
AnimationInterface WARNING:Node:0 Does not have a mobility model. Use SetConstantPosition if it is stationary
AnimationInterface WARNING:Node:1 Does not have a mobility model. Use SetConstantPosition if it is stationary
At time +2s client sent 1024 bytes to 10.1.1.2 port 9
At time +2.00369s server received 1024 bytes from 10.1.1.1 port 49153
At time +2.00369s server sent 1024 bytes to 10.1.1.1 port 49153
At time +2.00737s client received 1024 bytes from 10.1.1.2 port 9Enter NetAnim folder and run application
ucoruh@LAPTOP-RQNNS9IG:~/ns-allinone-3.34/ns-3.34$ cd ../netanim-3.108/ucoruh@LAPTOP-RQNNS9IG:~/ns-allinone-3.34/netanim-3.108$ sudo ./NetAnimIf you get following error
./NetAnim: error while loading shared libraries: libQt5Core.so.5: cannot open shared object file: No such file or directoryI tried following command and solved in my case
ucoruh@LAPTOP-RQNNS9IG:~/ns-allinone-3.34/netanim-3.108$ sudo strip --remove-section=.note.ABI-tag /usr/lib/x86_64-linux-gnu/libQt5Core.so.5After successfull running GUI will be opened and then open first.xml file (/home/ucoruh/ns-allinone-3.34/ns-3.34/first.xml) and play animation
Thats all!!
ns3 Simulator - VANET using WaveNetDevice tutorial - YouTube
GitHub - addola/NS3-HelperScripts: Helper Scripts to run NS3