uWave underwater acoustic modems demo application
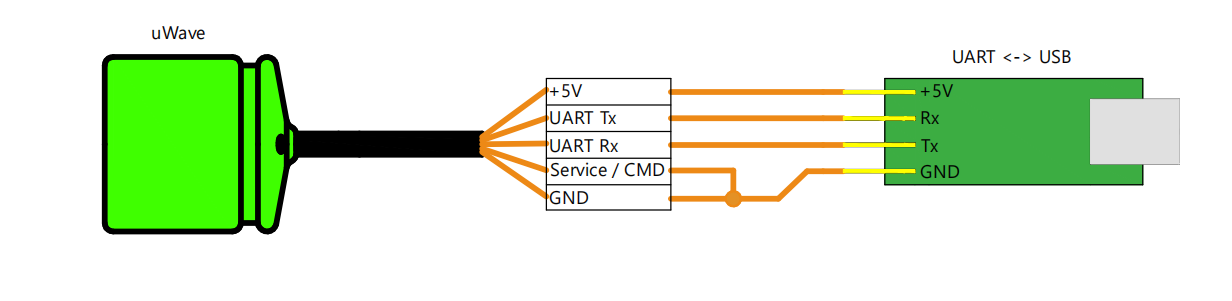
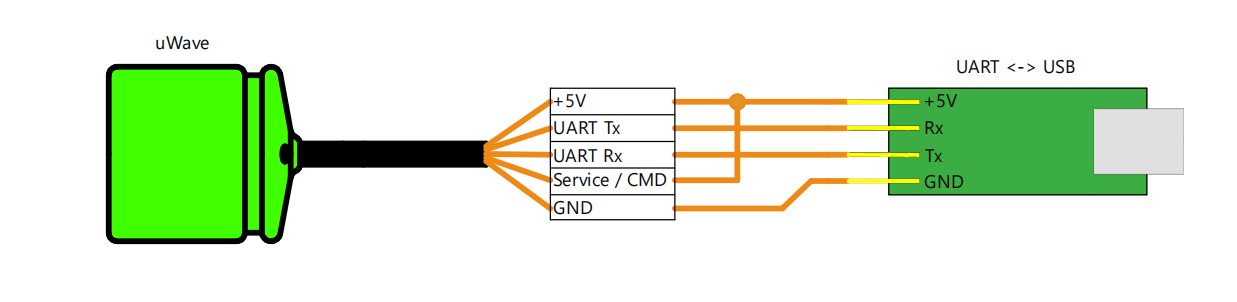
You will need a UART-USB converter, that can work with 3.3V UART. Here is diagrams for soldering:
Before connecting to a PC, make sure that CMD wire is connected to GND
After connecting to your PC, you have to connect CMD wire to logic one (3.3 or 5 V) to enable command mode in your modem:
Run the application and press 🔌 LINK button, if everything is done properly, the application will find your device soon:

You will see information about the device: FW version, serial number etc.
You can see real-time plots of readings of built-in sensors - pressure, depth, temperature, voltage etc. To enable the feature:
You will see something like that:

To disable the feature:
Go to tab Remote requests and press AUTO button. The application will start to invoke the modem sending sort remote requests. If you have the second device from the uWave devices family properly set up and turned on, you will see something like the following pic:

Go to tab Packet mode. Here you can:
- send packet requests (similar to short requests, but performed with logical addressing among 255 devices)
- send data packets with guaranteed delivery
- received data packets
Here is a relevant screenshot:
