I bought a HPE Microserver Gen10 only to realize afterwards that the stock fan is WAY too loud to use this server as a 24/7 NAS in my flat. After some digging it turned out that HPE uses special Delta fans that are controlled by an inverted PWM signal (0% duty-cycle = full-on, 100% = off) and come with a special "revolution detect" (RD) signal that indicates whether the fan is jammed. So no easy way of replacing the fan with a more silent one (not to mention that HPE uses a custom 6-pin connector while regular chassis fans use a 4-pin one...).
To fix the fan noise (and also have some fun along the way), I've come up with the following solution:
- An Arduino-based fan controller (I had some spare Arduino Nanos lying around) that outputs a regular PWM signal so the usual PC fans work
- A daemon process running on the microserver that continously monitors system temperatures (both HDD and mainboard sensors) and sends the desired fan speed to the Arduino via a USB serial line
Features
- rather fail-safe design
- Arduino always starts up with 100% fan speed
- Arduino hardware watchdog will reset the Arduino if the main loop (that listens for incoming commands on the serial line) is blocked for more than 3 seconds
- another watchdog timer will reset the fan speed to 100% if the PC does not send a "set fan speed" command at least every 2 seconds
- service on the PC-side monitored by systemd, periodically calls sd_notify() from inside the main loop to tell systemd that the service is still alive (otherwise systemd watchdog timeout will restart the service as well)
- buzzer that will sound
- one beep after the arduino has powered up
- two beeps when the arduino got reset because the PC failed send a 'set fan speed' command within 3 seconds
- three beeps if the watchdog timer kicked in because the arduino entered an infinite loop
- min/max fan speed customizable via JSON config file
- fan speed changes can be smoothed using configurable exponential moving average (JSON config file)
- can read both mainboard and HDD temperature sensors
- configurable mapping from temperatures to fan speed (linear interpolation, as many control points as you want)
- sensors can be grouped into thermal zones, each with their own fan speed mapping
- final fan speed is determined by picking the highest fan speed of all thermal zones (we only control a single fan, after all)
What you'll need:
- 120mm PC chassis fan with PWM speed control (4-pin connector). I went straight for the hopefully most silent but definitely most expensive one and got myself a "Silent Wings 3" 120mm high-speed from Be Quiet!. I have used other case/CPU cooler fans from them before and they were always exceptionally quiet. Note that this fan has a slightly lower airflow than the delta one it's going to replace but since I don't live in a desert and won't put any serious load on the server I think this is going to be ok.
- Arduino-compatible AVR Atmega328p board (I'm using the watchdog timer, 2 PWM outputs (buzzer+fan), one 16-bit timer and 2 8-bit timers) ... you can probably get away with a smaller AVR but I didn't test this and you'll probably have to rewrite some of the assembly)
- ISP programmer for your Arduino board (you can probably also upload the binary some other way, I just never bothered)
- Soldering iron & a steady hand (I just cut off the cable from the stock Delta fan and used it to connect to a tiny perfboard)
- Various small parts, see below
The assembly code (yes, I could've written this in C ... but where's the fun in that?) compiles with my own AVR assembler (https://github.com/toby1984/javr) but with minor modifications you should be able to also build it with other assemblers (watch out for LPM instructions, my assembler assumes byte not word addresses). For convenience I've provided a raw binary as well that you can upload with a 'avrdude' line similar to this:
/usr/bin/avrdude -F -V -c stk500v2 -p ATMEGA328P -P /dev/ttyACM0 -b 115200 -U flash:w:fancontrol.flash.raw
You need to select the right programmer type , serial device and speed of course.
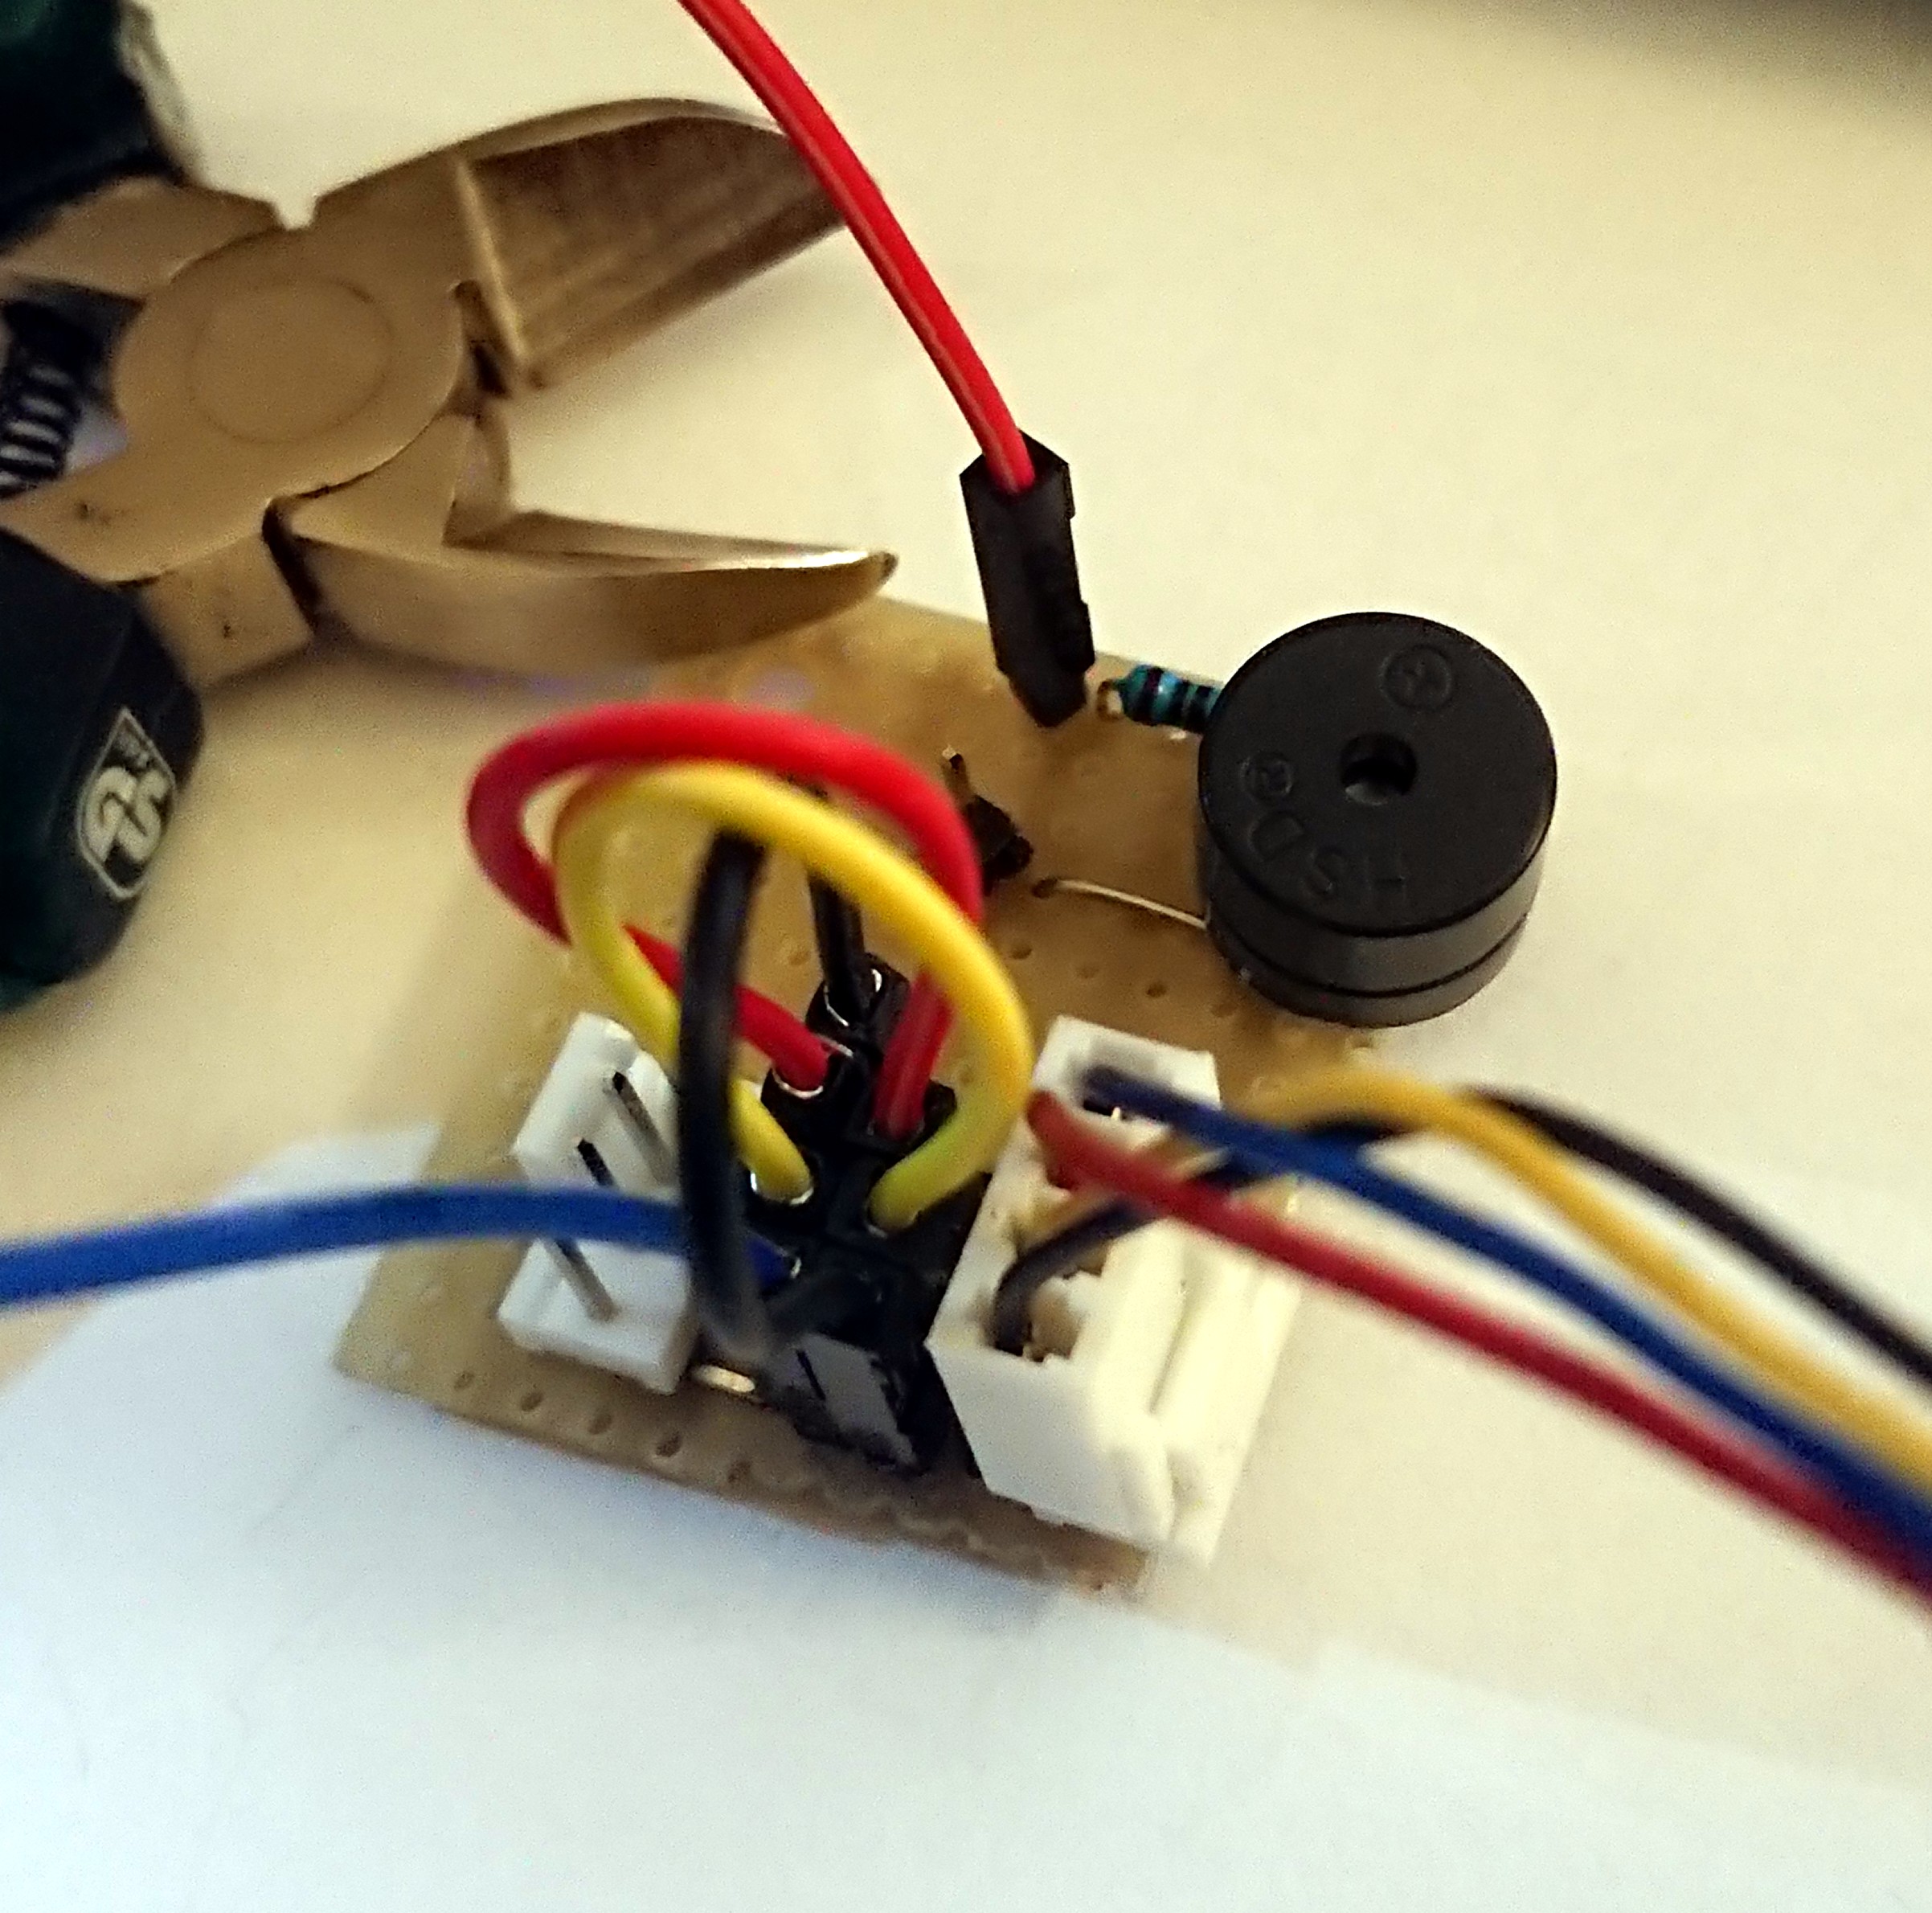
I've created a little perfboard on which I soldered two 4-pin fan connectors (I spent ages looking for those and finally settled on getting the original Molex ones that cost a fortune) plus 2x four pins to create a sort of patch-bay, mostly because I wasn't sure whether I might also need to feed a fake sense signal back to the mainboard or not...and I needed some place where to put the piezo buzzer anyway.
- perfboard
- molex connectors (for connecting the fan & mainboard, see below for part numbers - i ordered some more because it's always nice to have spare parts and otherwise the shipping cost would've exceeded the price of the parts which I hate)
- dupont connectors for the patch bay (or whatever you have handy, ofc you can skip this completely and just solder everything together directly)
- piezo buzzer from spare parts bin
- 100 ohm resistor for the buzzer

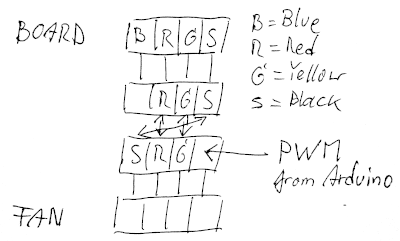
Here's a crude schematic how I wired the fan ; pay attention to the orientation of the fan headers on my perf board (see photo above). Note that I accidently soldered one fan connector the wrong way and was too lazy to fix this, that's why I had to cross-connect the GND wire (black).
I've written a small C program that will use libatasmart / libsensor to get temperature readings, translate them into a fan speed value and send this to the Arduino via the USB serial port. This whole solution only works nicely because the HPE Microserver has an internal USB port, for regular PCs you would need to somehow hook-up the Arduino to an internal USB header on the mainboard which would be more hassle.
I've used Ubuntu 19.10 to develop it with the following libraries:
- libsystemd (libsystemd.so.0.26.0)
- libatasmart (libatasmart.so.4.0.5)
- libsensors (libsensors.so.5.0.0)
- libcjson (libcjson.so.1.7.10)
I've also used GNU Make 4.2.1 and gcc version 9.2.1 20191008 (Ubuntu 9.2.1-9ubuntu2)
Software installation:
-
Build the software
Just change to the 'fancontrol-daemon' folder and run
makeCopy the resulting binary to wherever suits you.
-
You'll need to create a JSON configuration to map sensors to temperature zones and temperatures to fan speeds. An example file (example.json) is contained inside the 'systemd' folder.
-
You'll also want to install the program as a proper daemon that gets started when the server comes up. Copy the fancontrol.service file to /etc/systemd/system, edit it so that the binary path as well as the path to your JSON configuration file are correct and then execute the following commands
 systemctl daemon-reload
 systemctl start fancontrol.service
 # and if all goes well..
 systemctl enable fancontrol.service