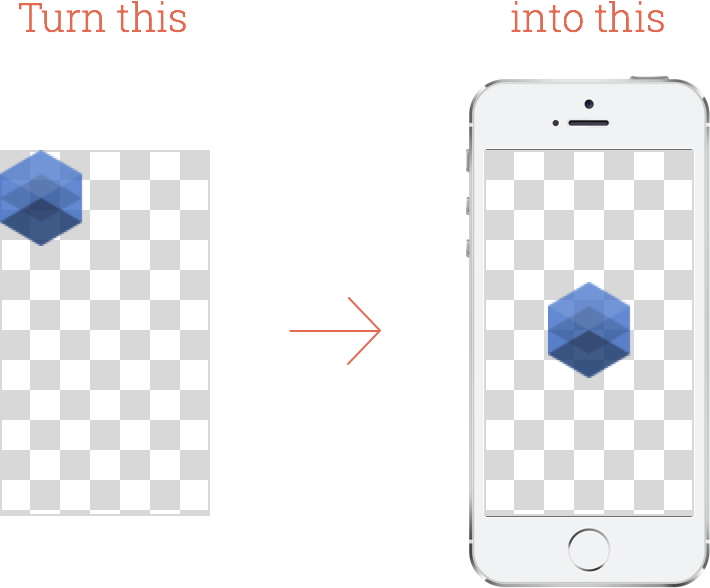
- When viewed on a desktop browser, your prototype will appear inside a device "frame", with an optional background behind it. The content of your prototype will be scaled to match the size of your browser window.
- When viewed on a mobile device, the frame disappears, so your prototype can feel like a real app. As a bonus, Mobile Safari's bouncy scrolling is also prevented automatically.
- Self-contained. All you need to do is link to a script. No need to bother with additional assets or write code.
- Option to prompt users to add the prototype as an app on their homescreen before using it.
- Switch between presentation and development mode by pressing
Alt + P. - Switch between zoom levels with
Alt + 1(100%),Alt + 2(75%),Alt + 3(50%),Alt + 4(25%),Alt + 0(Fit to Screen). You can also useAlt + -to zoom out andAlt + =to zoom in.
- Download a template file from
templates/that matches your needs and place it in your prototype's main directory. Here's the list of all currently available templates:
- iPhone 5s (White, Portrait)
- iPhone 5s (White, Landscape)
- iPhone 5s (Black, Portrait)
- iPhone 5s (Black, Landscape)
- iPhone 5s (Gold, Portrait)
- iPhone 5s (Gold, Landscape)
- iPhone 5c (White, Portrait)
- iPhone 5c (White, Landscape)
- iPhone 5c (Blue, Portrait)
- iPhone 5c (Blue, Landscape)
- iPhone 5c (Green, Portrait)
- iPhone 5c (Green, Landscape)
- iPhone 5c (Red, Portrait)
- iPhone 5c (Red, Landscape)
- iPhone 5c (Yellow, Portrait)
- iPhone 5c (Yellow, Landscape)
- iPad Mini (White, Portrait)
- iPad Mini (White, Landscape)
- iPad Mini (Black, Portrait)
- iPad Mini (Black, Landscape)
- Nexus 5 (Portrait)
- Nexus 5 (Landscape)
- Android Wear (Circle)
- Android Wear (Square)
- Open your
index.htmlin a text editor and link to the template using a<script>tag. The template should be included after theframer.jsscript:
<script src="framer/framer.js"></script>
<script src="framer/framerps.js"></script>
<script src="app.js"></script>

<!-- Link to the template script: -->
<script src="iphone-5s-white.js"></script>- Load
index.htmlin a browser. You should see your prototype appear inside the presentation template.
-
Download one of the templates and place it in the folder of your project, under
framer/. -
Put this at the top of your script:
Utils.domLoadScriptSync('framer/iphone-5c-blue-landscape.js')- Choose the Fullscreen option in the Preview pane, so you don't get the "phone in a phone" effect.
You can use bower to install and keep the templates up to date:
bower install framer-templates
All of the available templates will be installed to bower_components/framer-templates/templates.
The presentation templates are fully compatible with Framer 3. You can still download the old, Framer 2 compatible version of the templates from here: Download Framer 2 Templates.
If you're upgrading from a Framer 2 template, everything should work as expected by just replacing the template file. If you've used the config.template = { ... } syntax to customize the appearance of your template, you should change it to Framer.Config.template = { ... }.
The default background image is a plain off-white color, but if that's not to your tastes, you can use your own by specifying it as a template option before you load the template:
<script>FramerTemplateConfig = { backgroundImage: '[url to your background image]' };</script>
<script src="iphone-5s-white.js"></script>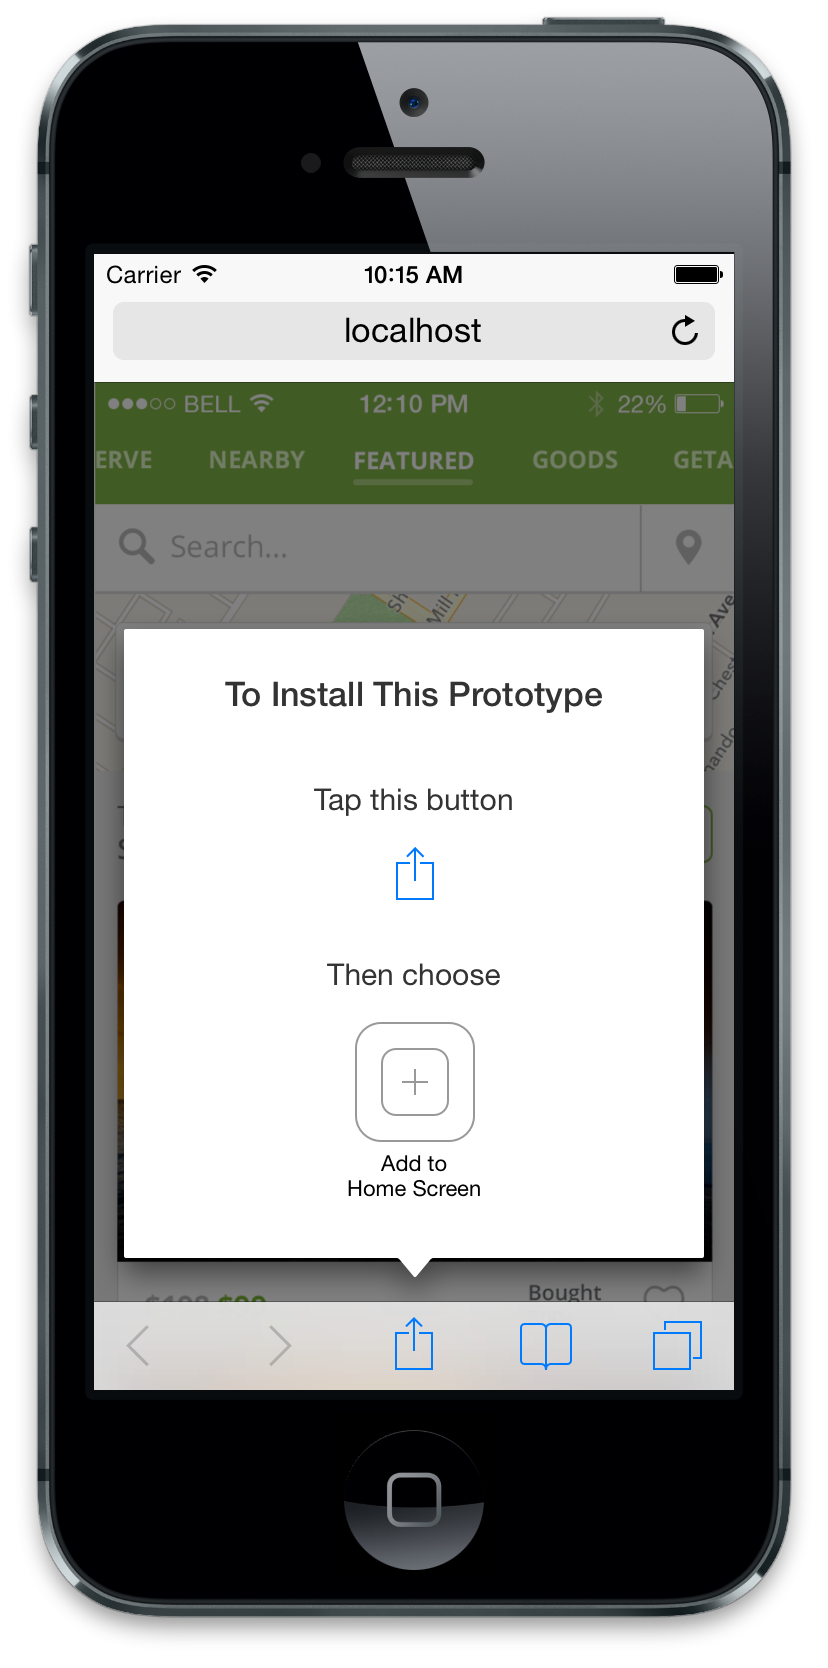
The templates have built-in capability for reminding users that view your prototype inside a mobile browser to add it to their homescreen for a more app-like experience. This feature is off by default, but you can turn it on like this:
<script>FramerTemplateConfig = { shouldShowAddToHomescreenPrompt: true };</script>
<script src="iphone-5s-white.js"></script>- Append
#devto the URL of your prototype to load it directly in developer mode (no device frame, scaled to 100%). E.g.http://localhost/prototype/index.html#dev - Append
#z75to the URL of your prototype to load it at 75% scale. Putting any number after thezwill work. E.g.http://localhost/prototype/index.html#z75
All templates use the same basic code, but vary in configuration, depending on which device you want to use to present your prototype. Here's what the configuration file for the white iPhone template looks like:
{
  "backgroundImage": "",
  "shouldShowAddToHomescreenPrompt": false,
  "deviceWidth": 385,
  "deviceHeight": 805,
  "screenWidth": 320,
  "screenHeight": 568,
  "contentWidth": 640,
  "contentHeight": 1136,
  "cursorWidth": 32,
  "promptAnchorTop": 704,
  "promptAnchorLeft": 320,
  "addToHomescreenPromptImage": "images/addtohomescreen-prompt-iphone.png",
  "deviceImage": "images/iphone-5s-white.png",
  "cursorImage1x": "",
  "cursorImage2x": ""
}
Let's go over the different attributes:
-
backgroundImage(data URI, URL, or image path)Default: emptyAn image that will be placed behind the device image.
-
preventBounce(true or false)Default: truePrevents the entire page from bouncing when scrolled up/down (will also prevent scrolling beyond the content boundaries).
-
shouldShowAddToHomescreenPrompt(true or false)Default: falseSpecifies whether an "add to homescreen" prompt should be shown when the prototype is viewed on an iOS device, but not in homescreen standalone app mode.
-
deviceWidthanddeviceHeight(number)The width and height of the device image you're using. Note that the device image is automatically scaled by 50% in order to look crisp and clear on a retina screen, so you'll need to specify the size / 2 (e.g. if your image is 2050px, put in 1025 for device width).
-
screenWidthandscreenHeight(number)The size of the actual screen in your device image. For the iPhone background, for example, the size of the screen is
320x568. -
contentWidthandcontentHeight(number)The size of your actual prototype. This is usually the screen size multiplied by 2. By default, Framer's template assumes that your content is 640px wide (iPhone sized).
-
sidePadding(number)Default: 50The minimum amount of padding (in px) you want to leave between the edges of the browser window and the device image.
-
zoomFactor(number) Default: not setA specific zoom factor to use, instead of automatically re-scaling your prototype to fit inside your browser window. A zoom factor of
0.75would mean75%, a factor of2would mean200%. -
cursorWidth(number)The width of the custom cursor image you supplied. This is used to figure out the location of anchor point of the cursor (for circular cursors, for example, this would be the middle of the circle).
-
promptAnchorTopandpromptAnchorLeft(number)This is the point in the "add to homescreen" prompt image that the arrow points to. You don't have to specify this if you're not using the prompt in the first place.
-
addToHomescreenPromptImage(data URI, URL, or image path)This image will be displayed if the prototype is viewed on a mobile device and not in standalone (homescreen app) mode.
-
deviceImage(data URI, URL, or image path)This is the device image that will be used to "hold" your prototype. Make sure that the actual screen portion of the device is centered perfectly in the image (hint: use one of the existing images for a template).
-
cursorImage1xandcursorImage2x(data URI, URL, or image path)Default: a 66x66 bobble cursor.Custom cursor images in normal and retina resolutions.
-
cursorPressedImage1xandcursorPressedImage2x(data URI, URL, or image path)Default: a 66x66 bobble cursor.Custom pressed state cursor images in normal and retina resolutions.
Note: All image paths are automatically converted to data URIs, so that the template is self-contained.
To create your own template, copy one of the config-*.json files, edit the configuration values in there and then run:
npm install
cake build
You should see something like this:
clean Cleaning out templates directory...
build Using src/config-ipad-mini-black.json to generate templates/ipad-mini-black.js
build Using src/config-ipad-mini-white.json to generate templates/ipad-mini-white.js
build Using src/config-iphone-5c-blue.json to generate templates/iphone-5c-blue.js
build Using src/config-iphone-5c-green.json to generate templates/iphone-5c-green.js
build Using src/config-iphone-5c-red.json to generate templates/iphone-5c-red.js
build Using src/config-iphone-5c-white.json to generate templates/iphone-5c-white.js
build Using src/config-iphone-5c-yellow.json to generate templates/iphone-5c-yellow.js
build Using src/config-iphone-5s-black.json to generate templates/iphone-5s-black.js
build Using src/config-iphone-5s-gold.json to generate templates/iphone-5s-gold.js
build Using src/config-iphone-5s-white.json to generate templates/iphone-5s-white.js
build Using src/config-nexus-5.json to generate templates/nexus-5.js

All done. Have a nice day!
The newly generated template will appear under the templates/ directory.
- iPhone 5s & 5c PSD by Louie Mantia
- Nexus 5 PSD by Victor Stuber
- Bobble Cursor Image from Josh Puckett's FramerWebView
- Android Wear templates by Patrick Keenan