Rasberry Pi rack running clustered Hashicorp datacenter infrastructure (nomad, vault, consul)
In order to follow along with this build, you would need to have the following components and tools available to you:
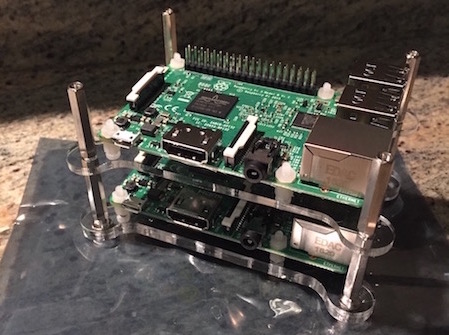
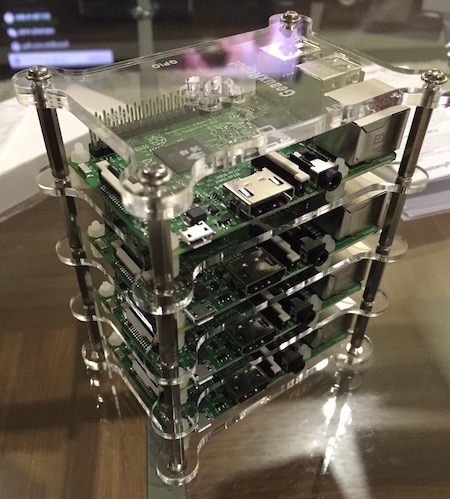
- 1x GearRobot Case
- 1x DualComm 5-Port Switch (USB Powered)
- 4x Raspberry Pi 3 Model B Motherboard
- 4x 16GB SDHC cards
- 1x Anker 5-Port powered USB hub
- 1x 16x2 LCD screen
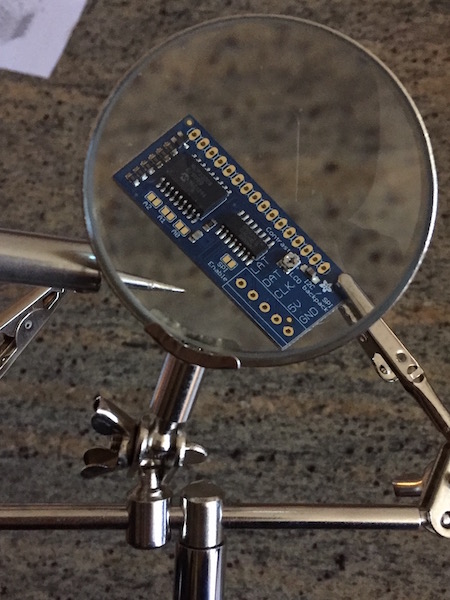
- 1x i2c / SPI LCD backpack
- 1x Male to Female Jumper Wires
- 4x small Cat5e cable (typically you make these, but you can buy pre-made ones if you want)
- 4x USB-B to USB-micro converter. These are for AC power to the motherboard from the hub.
- 1x Soldering Iron
- 1x pack of solder (leaded or lead-free, either will work)
- 1x Crimping Tool
- 1x pair of thin, long-nose pliers (these are useful for the case build)
- 1x case of minature / precision screwdrivers (e.g. these or these)
- Assemble the motherboards with the case (instructions from the case).
- Cut and crimp the nessicary ethernet cables needed to connect the motherboards to the switch. Choose a scheme (A or B, but stick to just one):

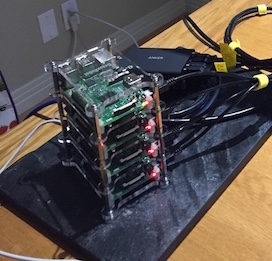
- Connect the USB power cords and the network cables to the motherboards.
-
If you're having issues with the motherboard, there are two LEDs indicate status. Explanations for which can be found here.
-
Now its time to attach the i2pc backpack to the LCD. There's a decent tutorial over here, but you absolutely need to know how to solder and use the aforementioned tools (never a better time to learn this stuff that the present!).
These instructions assume you are running Raspbian Lite, Jesse or later (this requires systemd). You can download Raspbian Lite from here, and I would strongly recomend checking out resin.io Ether for a quick and convenient way to flash your SD cards from OSX, with the vanilla Raspbian image you are downloading.
There is a set of initial setup that must be done manually to get the Pi's accessible remotely (and availalbe for automatic provisioning). I used the following steps to get the nodes going:
# set a new root password
$ sudo passwd root
<enter new password>

# set your the password for the `pi` user
$ sudo passwd pi
<enter new password>

$ sudo reboot

# update the system, disable avahi and bluetooth
$ sudo systemctl enable ssh && \
  sudo systemctl start ssh

# optionally install a few useful utilities
$ sudo apt-get install -y htop
Now we have our four Pi's running SSH and have disabled the features we wont be using in this cluster build out (e.g. bluetooth). Now we are ready to deploy the bulk of the software! This repo makes use of Ansible as its provisioning system; in order to automate the vast majority of operations we conduct on the cluster. This makes them repeatable and testable. Please checkout the Ansible documentation if you are not familiar with the tool.
The bootstrap playbook setups up core functionality so that we can run more complicated playbooks on the Pis themselves, and also get access to the cluster nodes without having to SSH with an explicit username and password (add your key to the user roles vars file). After first turning on the cluster and enabling SSH, the following should be executed in the root of the repository:
./bootstrap.yml
This mainly kills avahai-daemon and several other processes we will not be needing, going forward.
Once you've bootstrapped your cluster and you can SSH into the nodes with your key, then we can simply run the ansible site plays, and let it install all the nessicary gubbins.
./site.yml
Any other time you update the cluster using the site.yml playbook, be sure to run with the following option:
./site.yml --skip-tags=consul-servers,bootstrap
This will ensure that the consul servers used to corrdinate everything don't get screwed up during the deployment of new software.
This set of playbooks installs the following software (in order).
- Debugging Utils (htop, nslookup, telnet etc)
- Consul (runs on 3 nodes as a quorum)
- Vault (uses Consul as its secure backend; runs on rpi01)
- Nomad (only rpi01 has the
servercomponent of Nomad installed) - Prometheus (only runs on rpi01)
- Grafana
- Docker
Whilst the setup is vastly automated, there are a few manual steps. When first installing Vault, there is a set of keys that are generated which cannot be automated away, because they are required for vault initialization. The steps to first setup the vault are documented in this blog post but the TL;DR is:
$ ssh pi@<baron-ip>
$ export VAULT_ADDR="http://`ip -4 route get 8.8.8.8 | awk '{print $7}' | xargs echo -n`:8200"
$ vault init

# be sure to keep the generated keys in a safe place, and absolutely do not check them in anywhere!

$ vault -tls-skip-verify unseal
Given this is just a local raspberry pi cluster, I'm not fussing around with SSL as its a development cluster for me. I do however really, really recommend that you use SSL on this thing - or anything else for that matter - that is the best practice can self-signed certs can be easily generated and provided to vault. See the documentation for more information on that.