This firmware is currently being used for my newer 2022 model keypads.
- Support input methods:
- direct (key to pin mapping)
- matrix
- This will probably be done later when I make a real matrix model for real (like a 3x3.)
- touch
- Uses patched version of HID Project library for NKRO support and additional mappable keys.
- Uses serial communication for all configuration.
- Idle mode with configurable timeout
- Multi-key mapping (ie. mapping key 1 to ctrl+alt+delete.)
- This will use a lot of flash space, and also creates a bit of confusion. F13-F24 + AutoHotKey may be the better way to go, but I'd like to keep this implemented for those that already use it.
- Remove xx from previous firmware versions and instead take all 3 keys at once.
- Maybe use an alias for modifiers like autohotkey with
^*!#, since these keys could still be used with shift.
- Mouse button support for M1-M5 keys
- LEDs will change color while remapping to reflect the current key being remapped.
- Allow changing touch sensitivity in the configurator.
- Have menu option for auto-calibration.
- Add max values for incoming data through serial monitor
- RGBW LED support
I have removed some features from the original firmware to simplify some of the code. The focus was on removing legacy code, as trying to keep it backwards compatible was adding too much complexity. These features may be re-implemented in the future. The removed features are:
- Multi-mode side button: This complicates storing mapping in EEPROM and conflicts with multi-key mapping. It's also less intuitive than having it just function as a normal button.
- AVR support: Any future 7k model will most likely use a SAMD21 board, so this is unnecessary.
Select the latest release in the sidebar to get the latest release of the firmware. Run upload.bat to update the firmware on your keypad.
Building from source is very easy from the command line. Install git and platformio through your package manager (both available through MacOS homebrew, Ubuntu's apt, and Arch's pacman.) If platformio isn't available through your package manager, you can follow the platformio docs here to get it.
Clone the repo:
git clone https://github.com/thnikk/unified-2022
cd into the repo:
cd unified-2022
Compile and upload the code for your model (replace 2k with your model if you have a 4k or MegaTouch):
pio run -t upload -e 2k
That's it!
Download and install VS Code from the link here:
You'll also need Git so download and install it from here. Leave all defaults selected during installation.
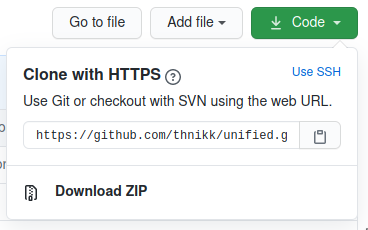
You also need to download the code from this repository. This can be done by clicking on the code button on the top right and selecting "Download ZIP". Extract the zip to somewhere for later.
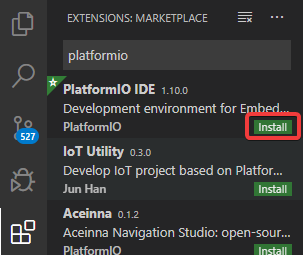
PlatformIO is what converts the code into something the keypad can understand. To install it, open VS Code and click on the icon with the 3 connected squares and one floating square in the side bar.

From here, you can type "platformio" into the search bar and click the install button Platformio IDE. Restart if it prompts you to.
After platformio is installed, please reboot your computer.
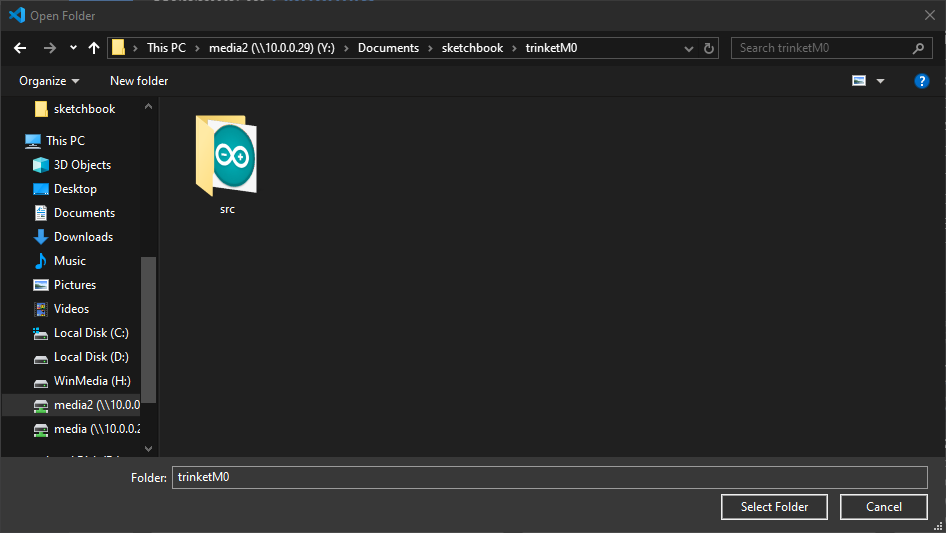
Now you can go to File>Open Folder and select the folder you extracted from the GitHub download. The folder you open should contain another folder called src.
Now you can click on the PlatformIO logo (the ant head) in the side bar. If you have anything starting with "Env" under project tasks, click the one for your corresponding model to expand the menu.
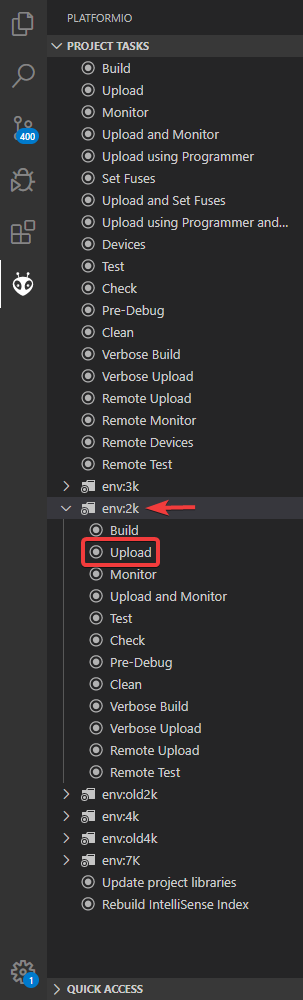
Now click upload and you should see a terminal pop up on the bottom of the screen start spitting out information. When it's done, you should see the environment you selected with "SUCCESS" next to it, meaning your keypad has been programmed!

If the build fails, you should be able to scroll up to see an error message in red. If you can't figure out what the problem is (ones related to upload port usually mean the keypad isn't plugged in or you're using a bad USB cable,) let me know and I'll do my best to help you.