- Configuration of Docker Host and Client
- Creation of Dockerfile for creation of Image to be used as an agent
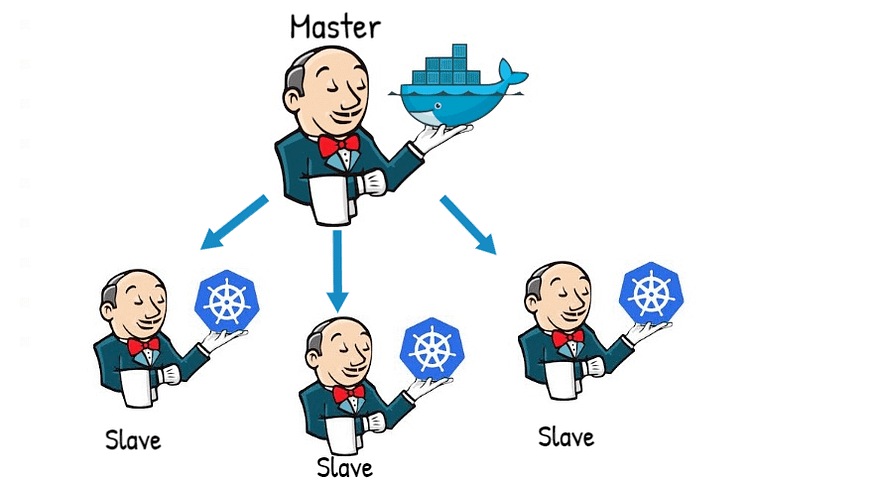
- Configuration of Dynamic Cloud with Docker Agent in Jenkins
- Creation of Jenkins Slave Node Jobs
- Setup of RHEL8 VM (in case base OS is Windows or MacOS)
- Setup of Docker, Jenkins and kubectl within the respective VM
- Minikube as well as kubectl needs to be installed in base OS
Consider two systems, one as Docker Host and the other as Docker Client, and understand the configuration required in both of them for implementing the following setup
- To configure the Docker Host, the first thing that needs to be configured is /usr/lib/systemd/system/docker.service, this path could be obtained by the output of systemctl status docker.
- After accessing the docker.service file , the ExecStart keyword within it is modified as per requirement i.e., -H tcp:0.0.0.0:4243. This modification allows TCP communication from any IP on the port 4243. Port 4243 is also one of the Docker port used.
- After the file is modified , it needs to be reloaded to implement the changes , and therefore the command below is used for the same
- Next, the docker service needs to be restarted as well, the command used for the same is
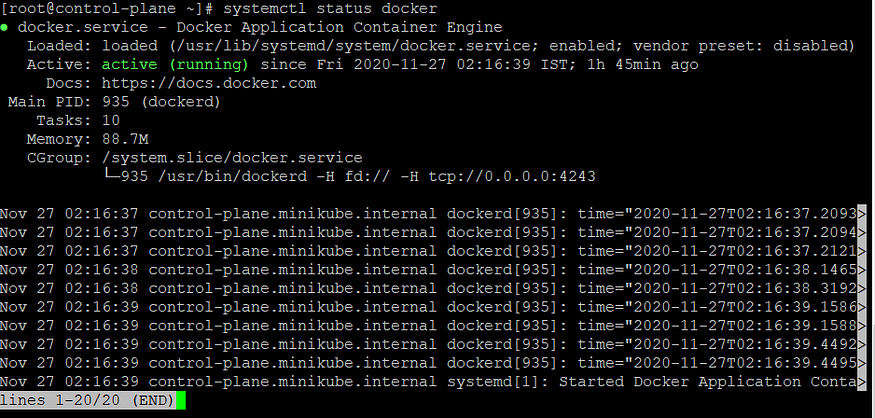
“systemctl status docker” command output
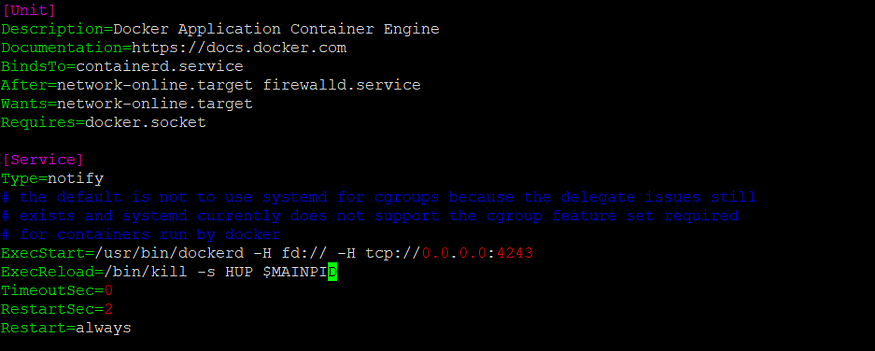
Modified docker.service file
systemctl daemon-reload
systemctl restart docker
- After the required setup in the Docker Host, Docker service, if running , needs to be stopped in this system, and could be done by following command:
- Next, the IP of the Docker Host needs to be exported from this system using the DOCKER_HOST variable and export command is used for the same.
systemctl stop docker
export DOCKER_HOST=<DOCKER_HOST_IP>:4243
- First of all , a Dockerfile is created for generation of image to be used as a Docker agent for Dynamic Jenkins Slave.
- Next, image could be build using the following command, also it is necessary to name the dockerfile as ‘Dockerfile’ for the command to execute successfully.
- Also , the image generated needs to be pushed to public Docker registry like Docker Hub. So before executing the commands below , it is necessary to have an account in Docker Hub, the link for the same is present at the bottom of this README.
- After login to Docker Hub using the CLI, tag operation needs to be performed before pushing the image , the reason being that the image name format should be /image_name:version, the command for the same is as follows:
- After tagging, the image could be pushed using the command below:
FROM centos

RUN yum install curl -y

RUN curl -LO "https://storage.googleapis.com/kubernetes-release/release/$(curl -s https://storage.googleapis.com/kubernetes-release/release/stable.txt)/bin/linux/amd64/kubectl"

RUN chmod +x kubectl

RUN mv kubectl /usr/bin

RUN mkdir /main/

RUN mkdir /root/web/

RUN mkdir /root/.kube/

COPY  ca.crt   /root/

COPY  client.crt  /root/

COPY  client.key  /root/

COPY .kube/  /root/.kube/

RUN kubectl config get-contexts

RUN yum install git -y

RUN yum install openssh-server java -y

RUN yum install java-1.8.0-openjdk -y

COPY docker.repo  /etc/yum.repos.d/

RUN yum install docker-ce --nobest -y

CMD killall firewalld -DFOREGROUND

CMD /usr/sbin/sshd -DFOREGROUND

CMD /usr/bin/dockerd -DFOREGROUND

RUN ssh-keygen -A

EXPOSE 22

EXPOSE 8080
docker build -t image_name:version /path/to/Dockerfile
docker login -u <Docker Hub username> -p <Docker Hub password>
docker tag image_name:version <Docker Hub username>/image_name:version
docker push <Docker Hub username>/image_name:version
- Cloud is the one that would launch the Dynamic Jenkins Slave, Jenkins is accessed from the system acting as the Docker Client.
- Before starting the configuration of Dynamic Cloud in Jenkins, Docker plugin should be installed and could be installed from Manage Plugins in the Manage Jenkins section.
- Clouds in Jenkins could be configured by accessing Manage Jenkins > Manage Nodes and Clouds > Configure Clouds.
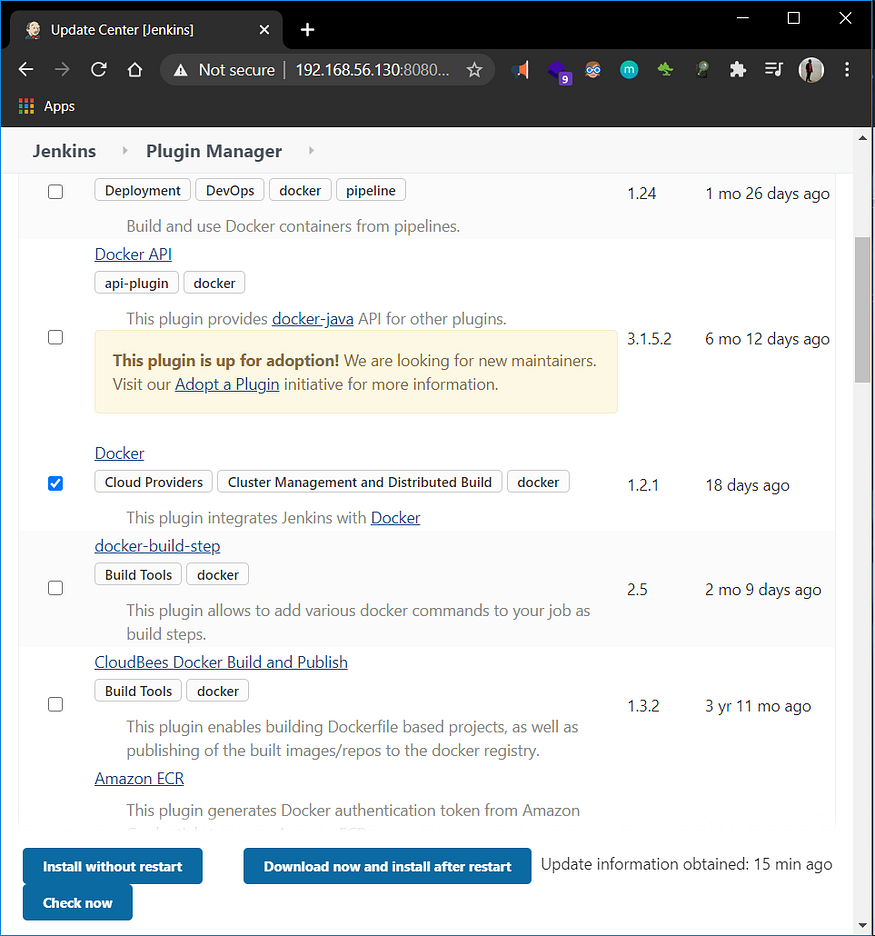
Docker Plugin
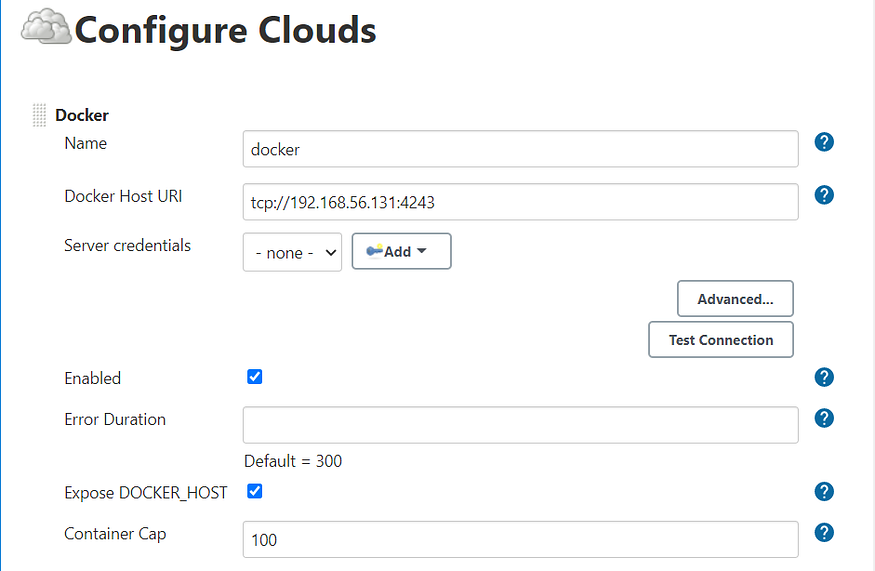
Setting up Docker Host (Docker Client IP is mentioned above )
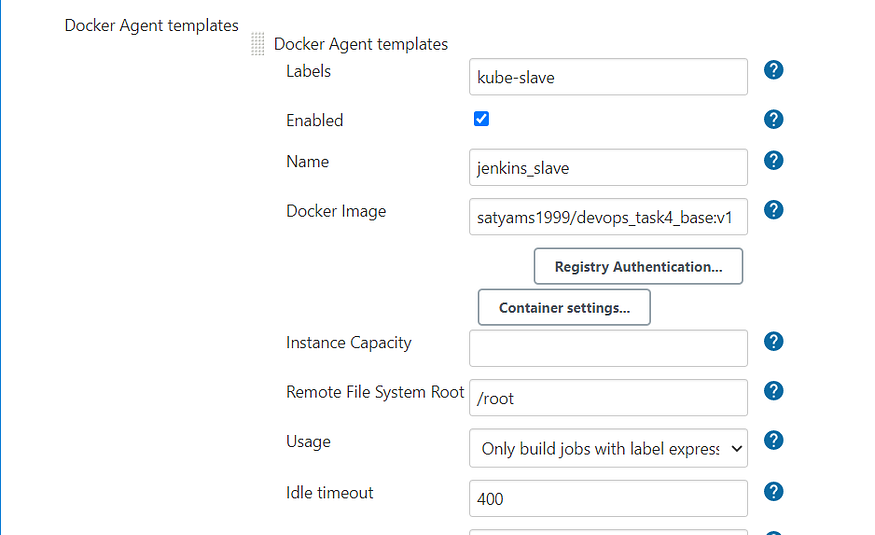
Docker(Slave) Agent Setup (The image specified is generated from the Dockerfile mentioned above)
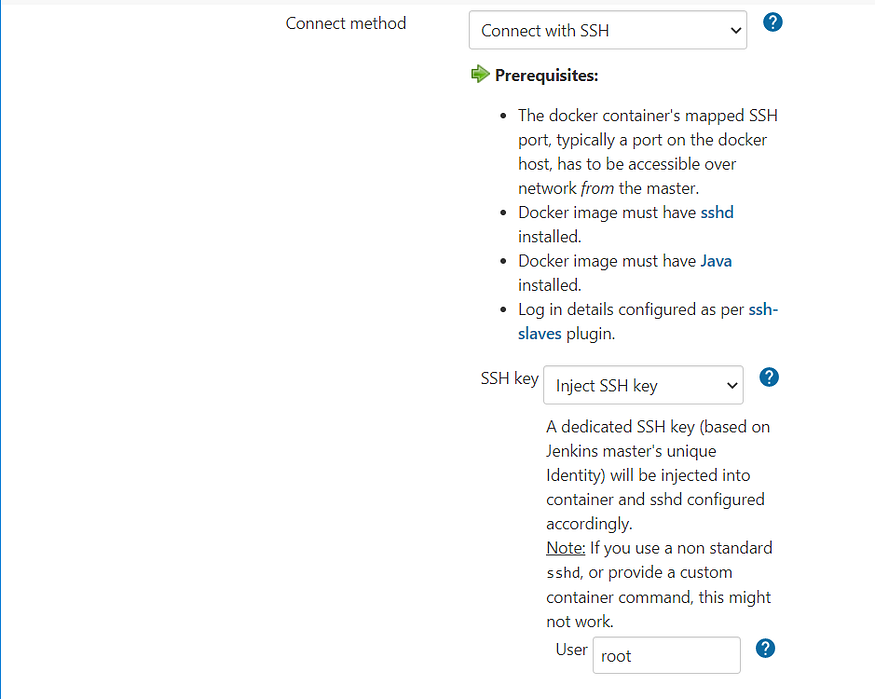
Connect Method is SSH between Master and Slave, also the prerequisites mentioned needs to be satisfied by the Docker Image mentioned , other than this , SSH Key needs to generated and this requirements are satisfied and could be observed in the Dockerfile above.
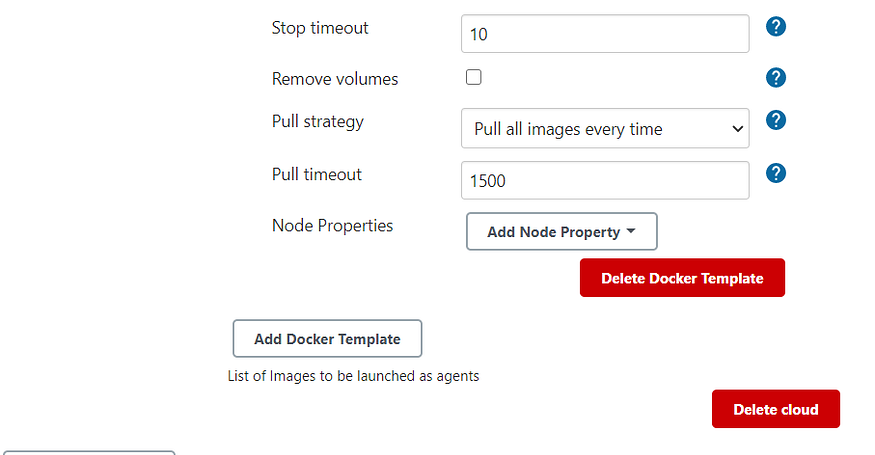
Image Pull Strategy every time Jenkins Slave is created
Some setup that are common for both jobs, is as follows:
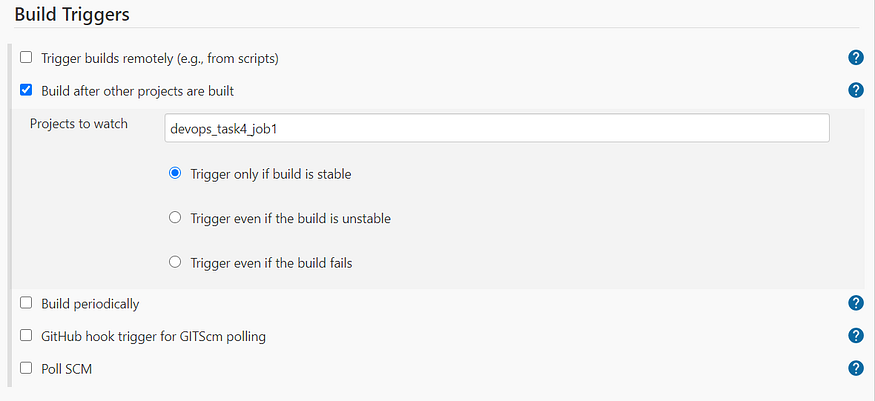
- For both the job to run under the slave created dynamically, it should be restricted by placing the label that was mentioned during the configuration of dynamic cloud.
- Next setup involves setting up GitHub hook triggers , and could be added using a webhook to the GitHub repo. For creation of webhook in the repo, public URL is required that could be generated using ngrok, using the concept of Tunneling.

Here, kube-slave is the label used
./ngrok http 8080
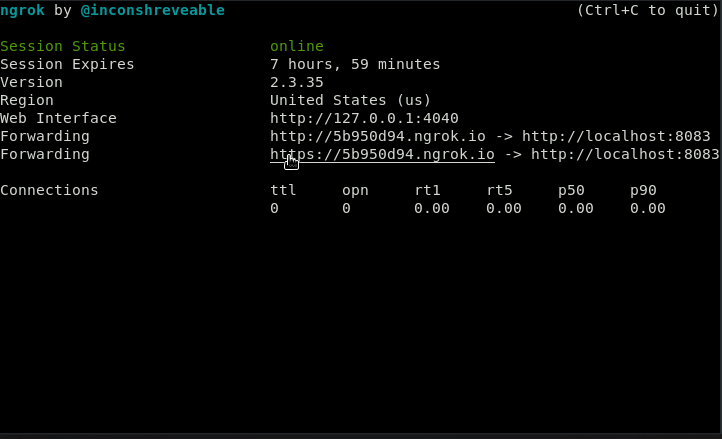
Public URL using ngrok
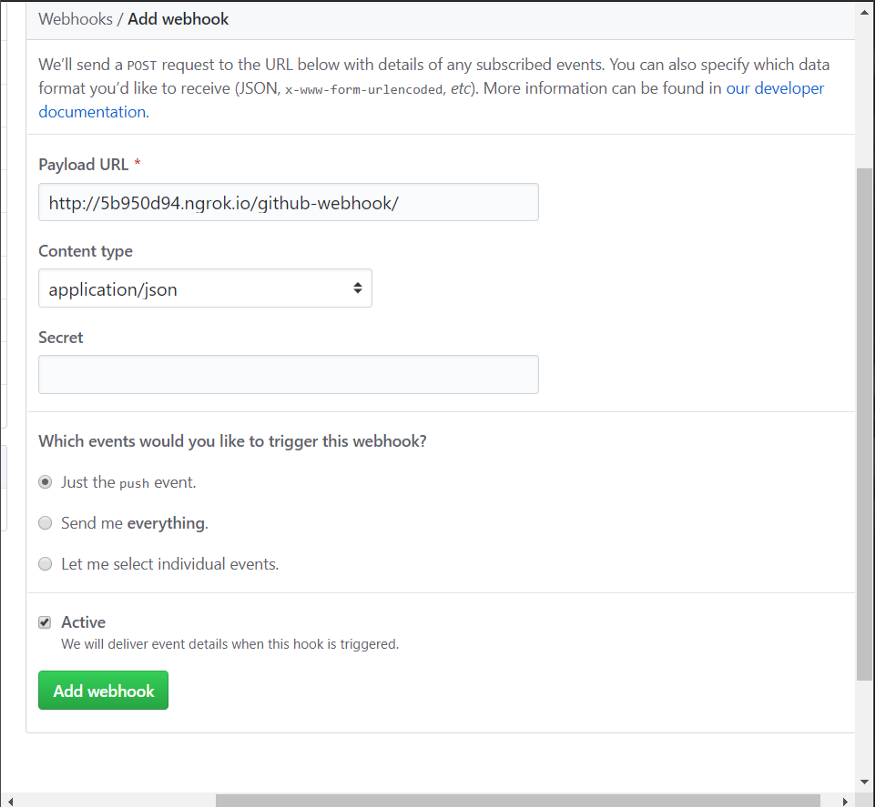
Addition of Webhook to the GitHub repository
- In this job ,certain program files needs to be obtained from SCM(Source Code Management) like GitHub in this case. Thereby GitHub repo URL needs to be specified in the Job itself.
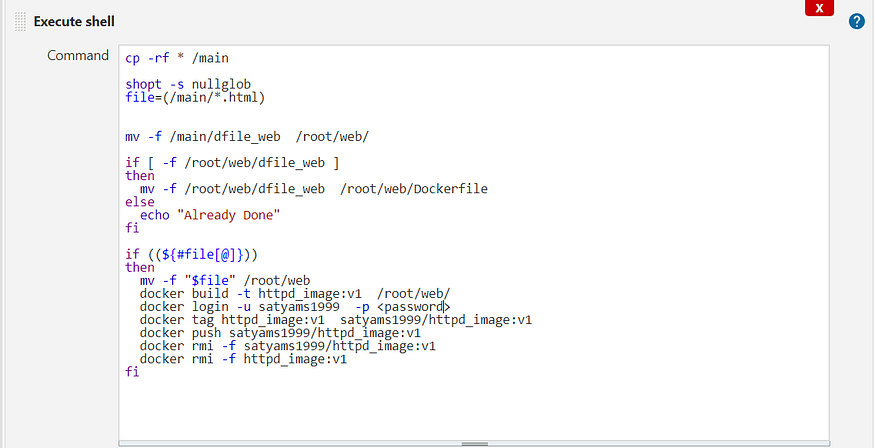
- The script used for implementation of Job 1 is as follows :
- The above script needs a Dockerfile(dfile_web) , which is shown below
- The script builds the image for the Apache HTTPD Webserver using the Dockerfile above and tags to the format needed to push the image to DockerHub , and then it logins to DockerHub and pushes the tagged image.
- The local copy of image and the tagged image is removed to avoid conflict in case it gets triggered again due to changes in SCM.
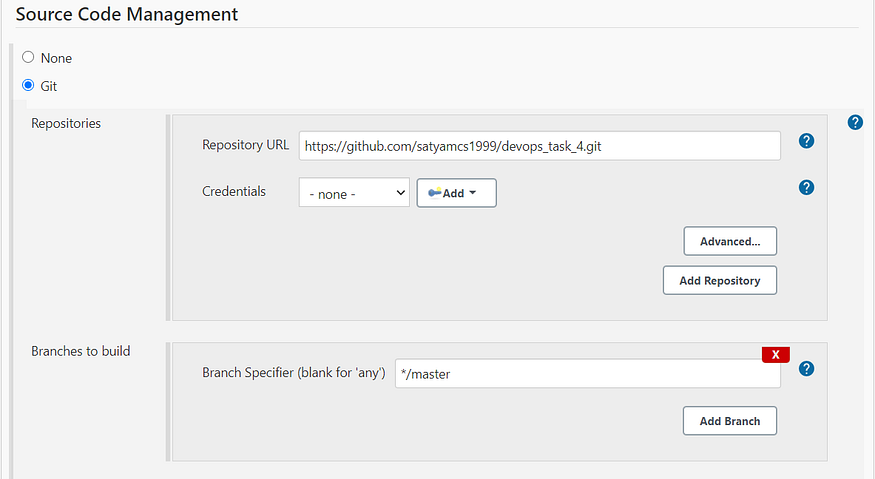
Specification of GitHub repo and branch
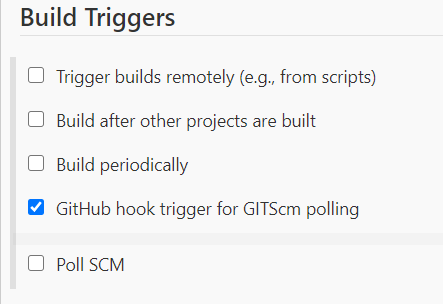
Build Trigger for Job 1
Job 1 Shell Script
FROM centos
RUN yum install httpd -y
COPY *.html  /var/www/html/
CMD /usr/sbin/httpd -DFOREGROUND
EXPOSE 80/tcp
- This job is the downstream project for Job 1, the YAML file to set up Kubernetes deployment needs to be obtained from SCM, i.e., GitHub in this case. Here , the file is specified in different branch i.e., modify of the repository same as the one used by Job 1, the reason being to avoid copying unnecessary file.
- The script used for implementation of Job 2 is as follows:
- The YAML file(kub_task4.yaml) required in the above file is shown below
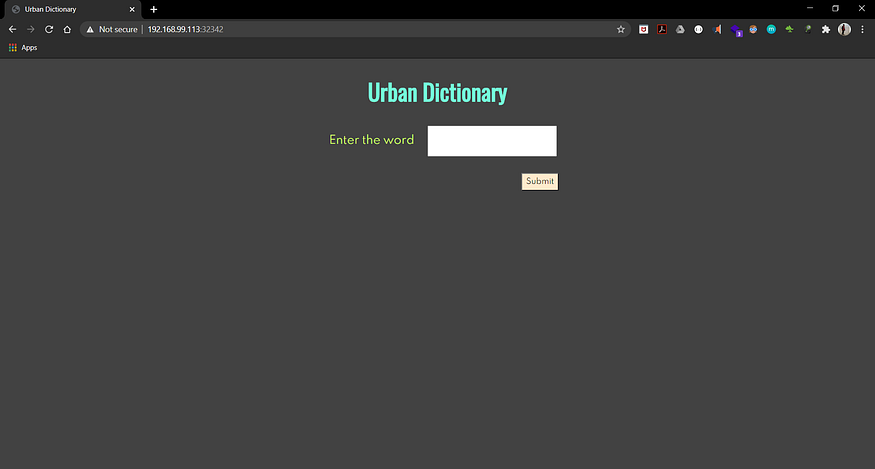
- The Job 2 script creates a Kubernetes deployment using the above script and if deployment already exists , it performs rollout operations which updates the existing pod in the deployment(useful in cases where image is modified and needs to be implemented with zero downtime).
- Else, if deployment doesn’t exists already, it creates the deployment and expose it as well.

Specification of GitHub repo and branch
Build Trigger for Job 2
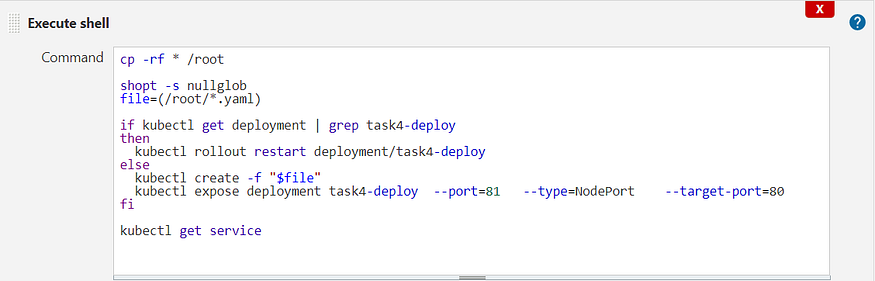
Job 2 Shell Script
apiVersion: apps/v1
kind: Deployment
metadata:
  name: task4-deploy
  labels:
    app: kubapp
spec:
  replicas: 1
  selector:
    matchLabels:
      app: kubapp
  template:
    metadata:
      labels:
        app: kubapp
    spec:
      containers:
       - name: task4-httpd
         image: satyams1999/httpd_image:v1
         imagePullPolicy: "Always"
      nodeSelector:
        kubernetes.io/hostname: minikube
https://www.linkedin.com/in/satyam-singh-95a266182