A quiz that tests New Yorkers' knowledge of the City's subway! Originally published by THE CITY. It was build using our Full-page React Template.
THE CITY is a nonprofit, nonpartisan, digital newsroom dedicated to hard-hitting reporting that serves the people of New York. We publish news apps and data graphics regularly, and we try and open source as much of our code as we can so that others can use it. You can check out a list of our recent projects on THE CITY Projects Page.
First you’ll need to clone this repository down to your computer to work with the code.
Open up your terminal and cd to your code folder. Clone the project into your folder. This will copy the project onto your computer.
gh repo clone https://github.com/thecityny/subway-quizOnce the repository has finished downloading, cd into it and install the Node.js dependencies.
npm installOnce the dependencies have been installed, you’re ready to preview the project. Run the following to start the test server.
npm startNow go to localhost:3000 in your browser. You should see a app ready for your customizations.
This code is free and open source and you are permitted to use for your own projects under the Apache 2.0 License included in this repository. However, before deploying anything publicly using this codebase, you must:
- Change
_fonts/scss— our fonts are proprietary and are not permitted for use outside of THE CITY's domain. Please change these fonts to ones you own publishing rights to, or use free, web-safe fonts instead. - Remove
logo.svg— our logo is trademarked and cannot be used without THE CITY's explicit permission. Please remove this logo, or swap in your own logo.
Also, as part of our license, we require that any online publication of work built using this software include a credit and link to THE CITY. The code includes the suggested sentence “Made with ♥ in NYC by THE CITY” in the page footer — feel free to leave that in.
Lastly, we want to hear from you! We'd love to know if you are using this code to publish your own projects. Drop us a line at data@thecity.nyc.
In the project directory, you can run:
Runs the app in the development mode.
Open http://localhost:3000 to view it in your browser.
The page will reload when you make changes.
You may also see any lint errors in the console.
Launches the test runner in the interactive watch mode.
See the section about running tests for more information.
Builds the app for production to the build folder.
It correctly bundles React in production mode and optimizes the build for the best performance.
The build is minified and the filenames include the hashes.
Your app is ready to be deployed!
See the section about deployment for more information.
Note: this is a one-way operation. Once you eject, you can't go back!
If you aren't satisfied with the build tool and configuration choices, you can eject at any time. This command will remove the single build dependency from your project.
Instead, it will copy all the configuration files and the transitive dependencies (webpack, Babel, ESLint, etc) right into your project so you have full control over them. All of the commands except eject will still work, but they will point to the copied scripts so you can tweak them. At this point you're on your own.
You don't have to ever use eject. The curated feature set is suitable for small and middle deployments, and you shouldn't feel obligated to use this feature. However we understand that this tool wouldn't be useful if you couldn't customize it when you are ready for it.
We've set up automatic deployment to AWS S3 based on the Baker Rig project by the L.A. Times. See these instructions on how to set that up:
Before you can deploy an app created by this repository, you will need to configure your Amazon AWS account and add a set of credentials to your GitHub account.
First, you'll need to create two buckets in Amazon's S3 storage service. One is for your staging site. The other is for your production site. For this simple example, each should allow public access and be configured to serve a static website.
The names of those buckets should then be stored as GitHub "secrets" accessible to the Actions that deploy the site. You should visit your settings panel for your account or organization. Start by adding these two secrets.
| Name | Value |
|---|---|
AWS_S3_STAGING_BUCKET |
The name of your staging bucket |
AWS_S3_STAGING_REGION |
The S3 region where your staging bucket was created |
AWS_S3_PRODUCTION_BUCKET |
The name of your production bucket |
AWS_S3_PRODUCTION_REGION |
The S3 region where your production bucket was created |
Next you should ensure that you have an key pair from AWS that has the ability to upload public files to your two buckets. The values should also be added to your secrets.
| Name | Value |
|---|---|
AWS_ACCESS_KEY_ID |
The AWS access key |
AWS_SECRET_ACCESS_KEY |
The AWS secret key |
You can set up a CloudFront distribution on AWS for both your staging and production buckets — during deployment, Github Actions will invalidate the old distribution to refresh the cache for your site.
Once you create your distributions, copy the distribution IDs and store them as GitHub "secrets" accessible to the Actions that deploy the site.
| Name | Value |
|---|---|
AWS_STAGING_CLOUDFRONT_DISTRIBUTION |
The distribution ID for the staging bucket |
AWS_CLOUDFRONT_DISTRIBUTION |
The distribution ID for the production bucket |
A GitHub Action included with this repository will automatically publish a staging version for every branch. For instance, code pushed to the default main branch will appear at https://your-staging-bucket-url/your-repo/main/.
If you were to create a new git branch called bugfix and push your code, you would soon see a new staging version at https://your-staging-bucket-url/your-repo/bugfix/.
Before you send your page live, you should settle on a final slug for the URL. This will set the subdirectory in your bucket where the page will be published. This feature allows The Times to publish numerous pages inside the same bucket with each page managed by a different repository.
Step one is to enter the slug for your URL into the .env configuration file.
REACT_APP_SLUG: your-page-slugYou should also set the domain within the .env configuration file to match your production bucket url.
REACT_APP_DOMAIN: https://your-production-bucket-url/It’s never a bad idea to make sure your slug hasn’t already been taken. You can do that by visiting https://your-production-bucket-url/your-slug/ and ensuring it returns a page not found error.
Next you commit your change to the configuration file and make sure it’s pushed to the main branch on GitHub.
Visit the releases section of your repository’s page on GitHub. You can find it on the repo’s homepage.
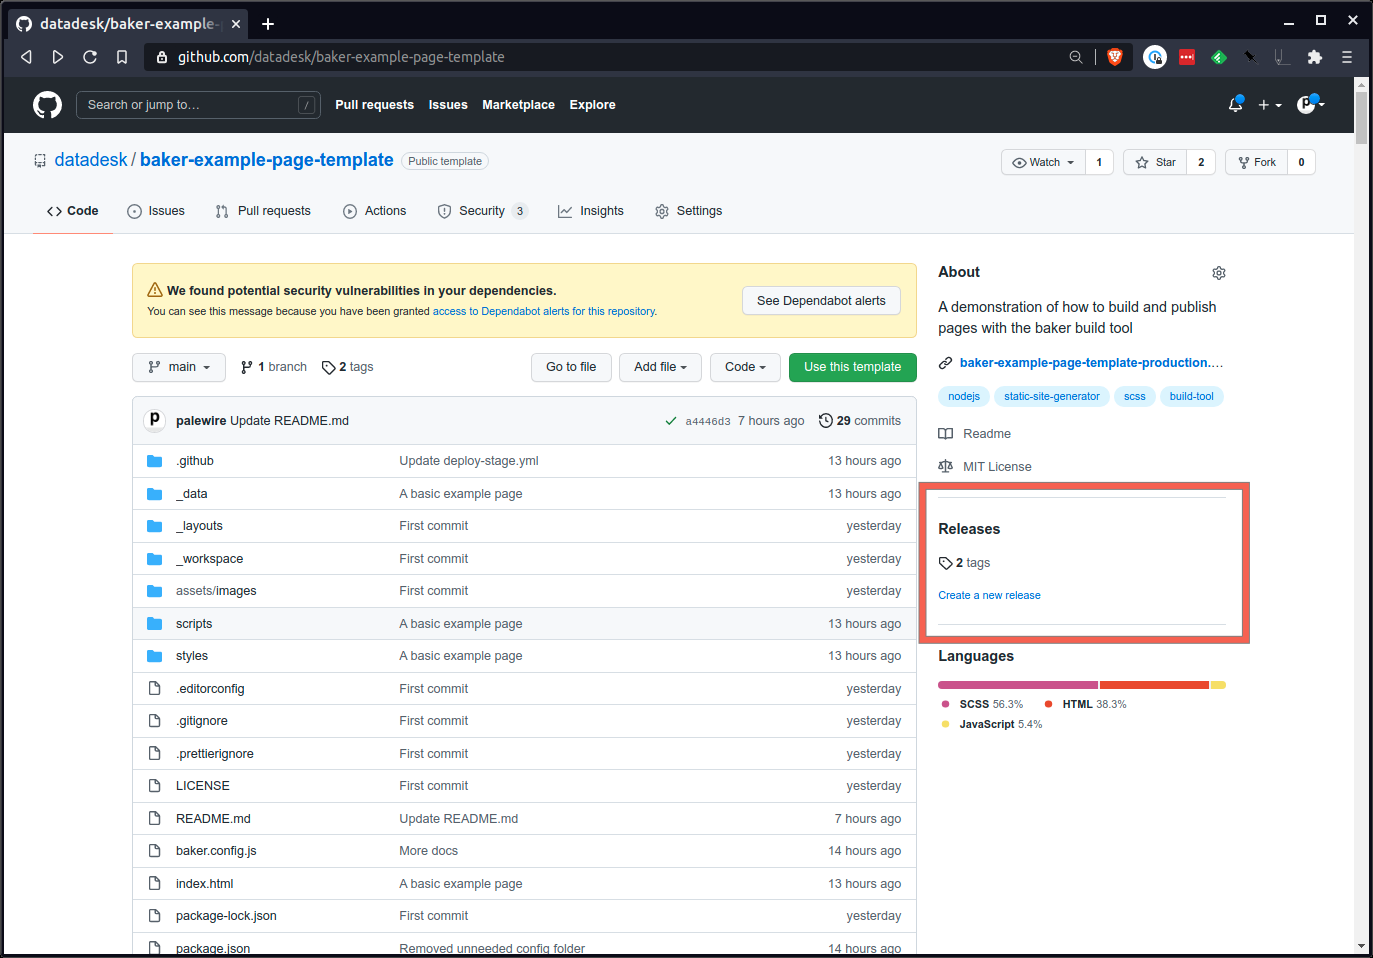
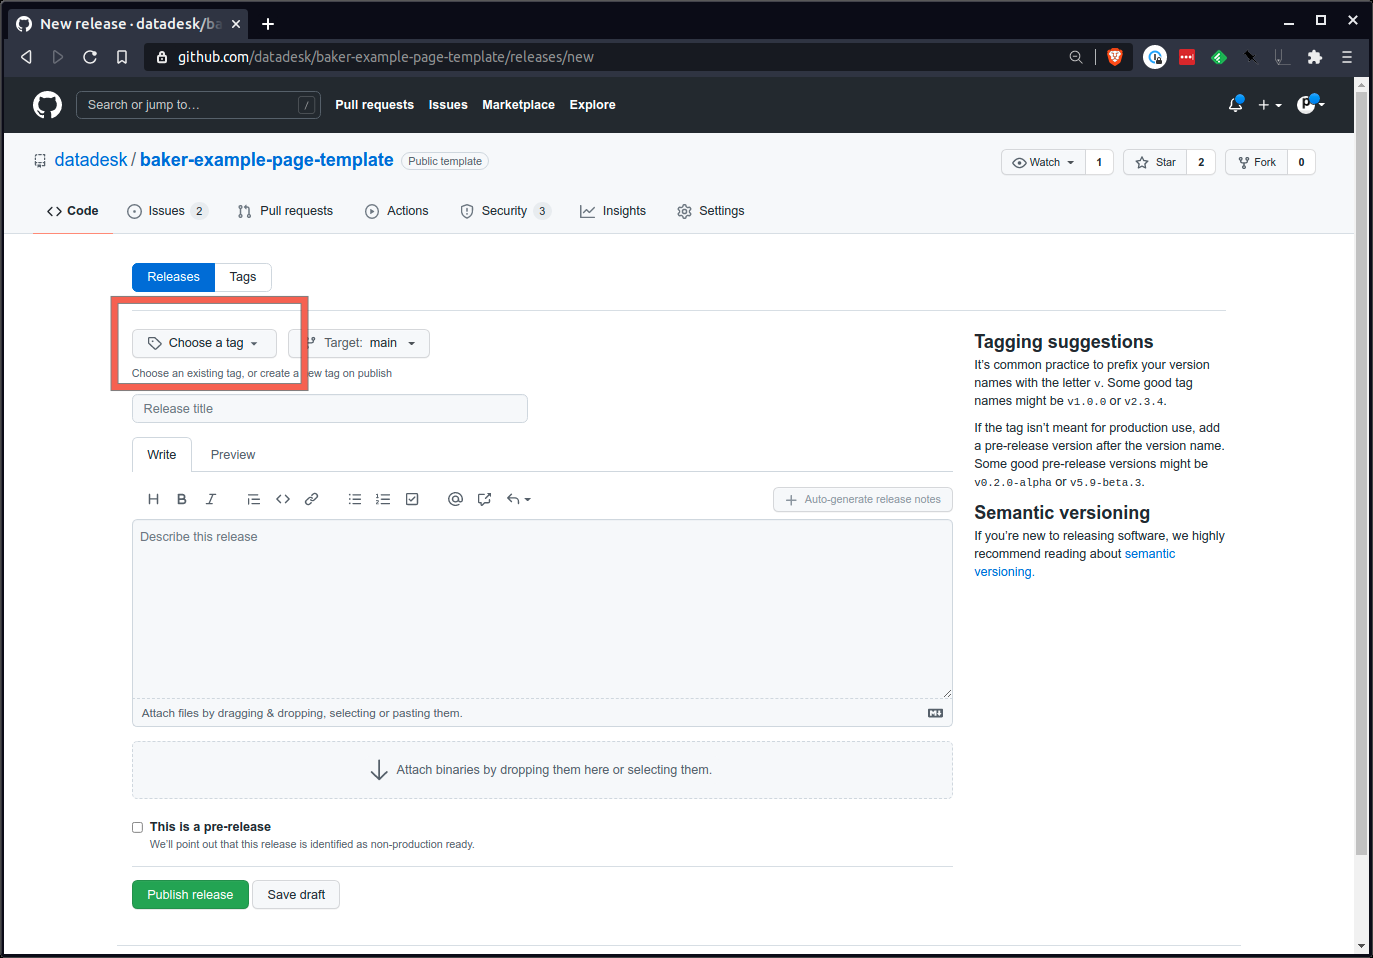
Draft a new release.

There you’ll create a new tag number. A good approach is to start with an x.x.x format number that follows semantic versioning standards. 1.0.0 is a fine start.
Finally, hit the big green button at the bottom and send out the release.
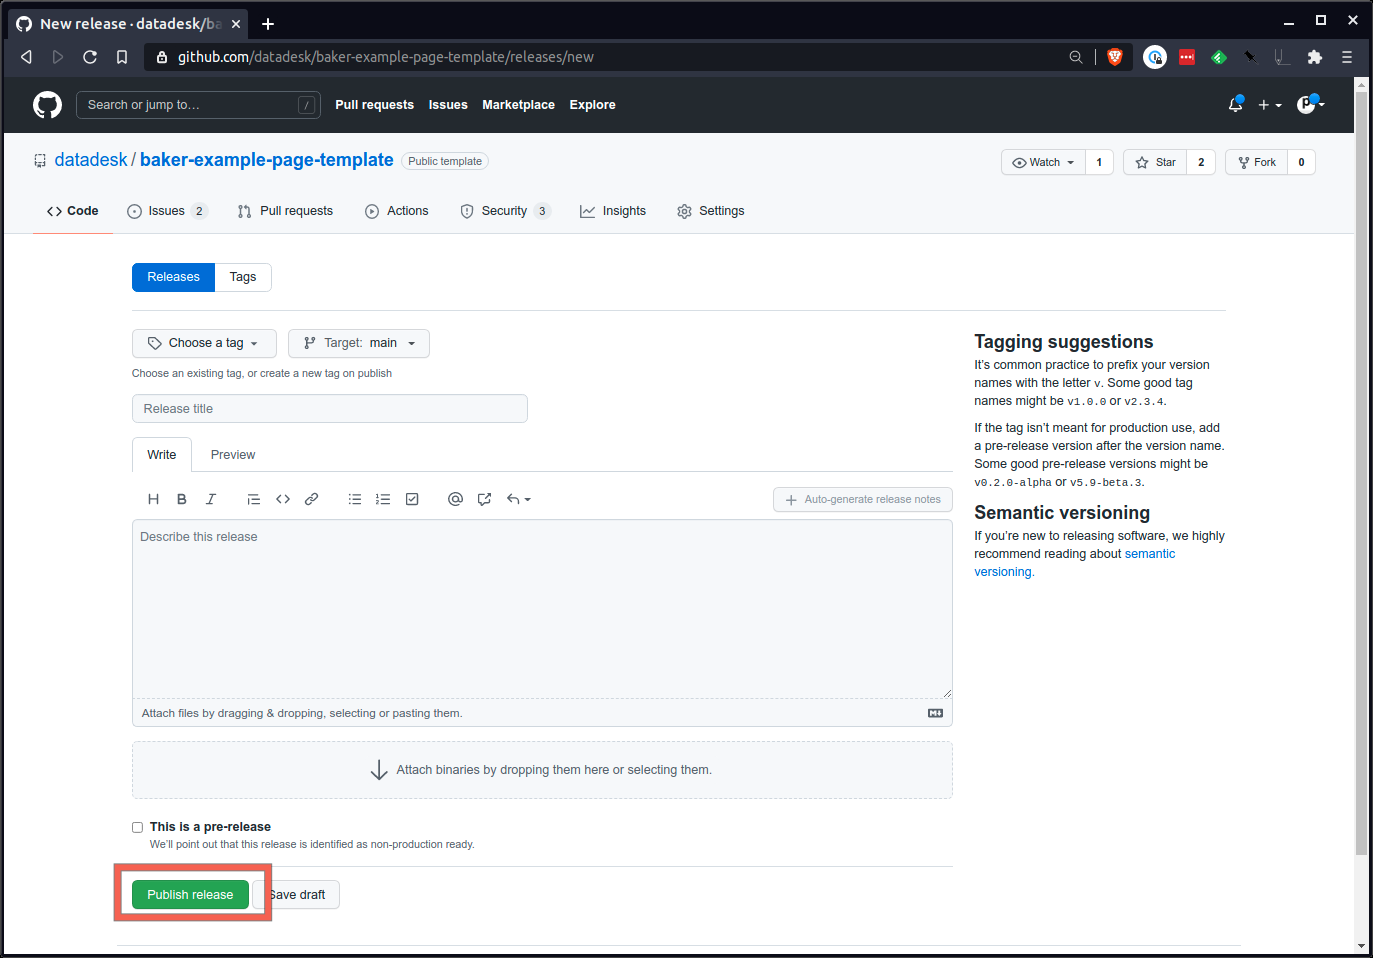
Wait a few minutes and your page should show up at https://your-production-bucket-url/your-slug/.
You can learn more in the Create React App documentation.
To learn React, check out the React documentation.
This section has moved here: https://facebook.github.io/create-react-app/docs/code-splitting
This section has moved here: https://facebook.github.io/create-react-app/docs/analyzing-the-bundle-size
This section has moved here: https://facebook.github.io/create-react-app/docs/making-a-progressive-web-app
This section has moved here: https://facebook.github.io/create-react-app/docs/advanced-configuration
This section has moved here: https://facebook.github.io/create-react-app/docs/troubleshooting#npm-run-build-fails-to-minify