Well... if you're here, then that new and shiny SD2IEC for your Commodore 64 wasn't cycle-exact enough for you? Sure, there are great FPGA-based solutions available that can be purchased at a premium pricepoint. For the rest of us who are either on a tight budget - or - simply want something that they can build at home, then the excellent Pi1541-software written by Steve White may very well be the solution you've been looking for. With a Raspberry Pi 3 at its core, it is able to provide cycle-exact disk drive emulation with many improvements over the drive you had in your youth!

A Pi1541 can be constructed in many ways, but even though you can easily build one without the help of a PCB such as the ones provided by this project - I've found it a lot easier to make them work when you have a PCB available. I've released the design files for a more traditional Raspberry Pi-hat if you would rather build one of those, these can be found in my old repository at C64-Pi1541-Module. A slightly different take on the device can also be found at C64-Pi1541-II as it was made to resemble a slightly smaller stack of floppy disks.

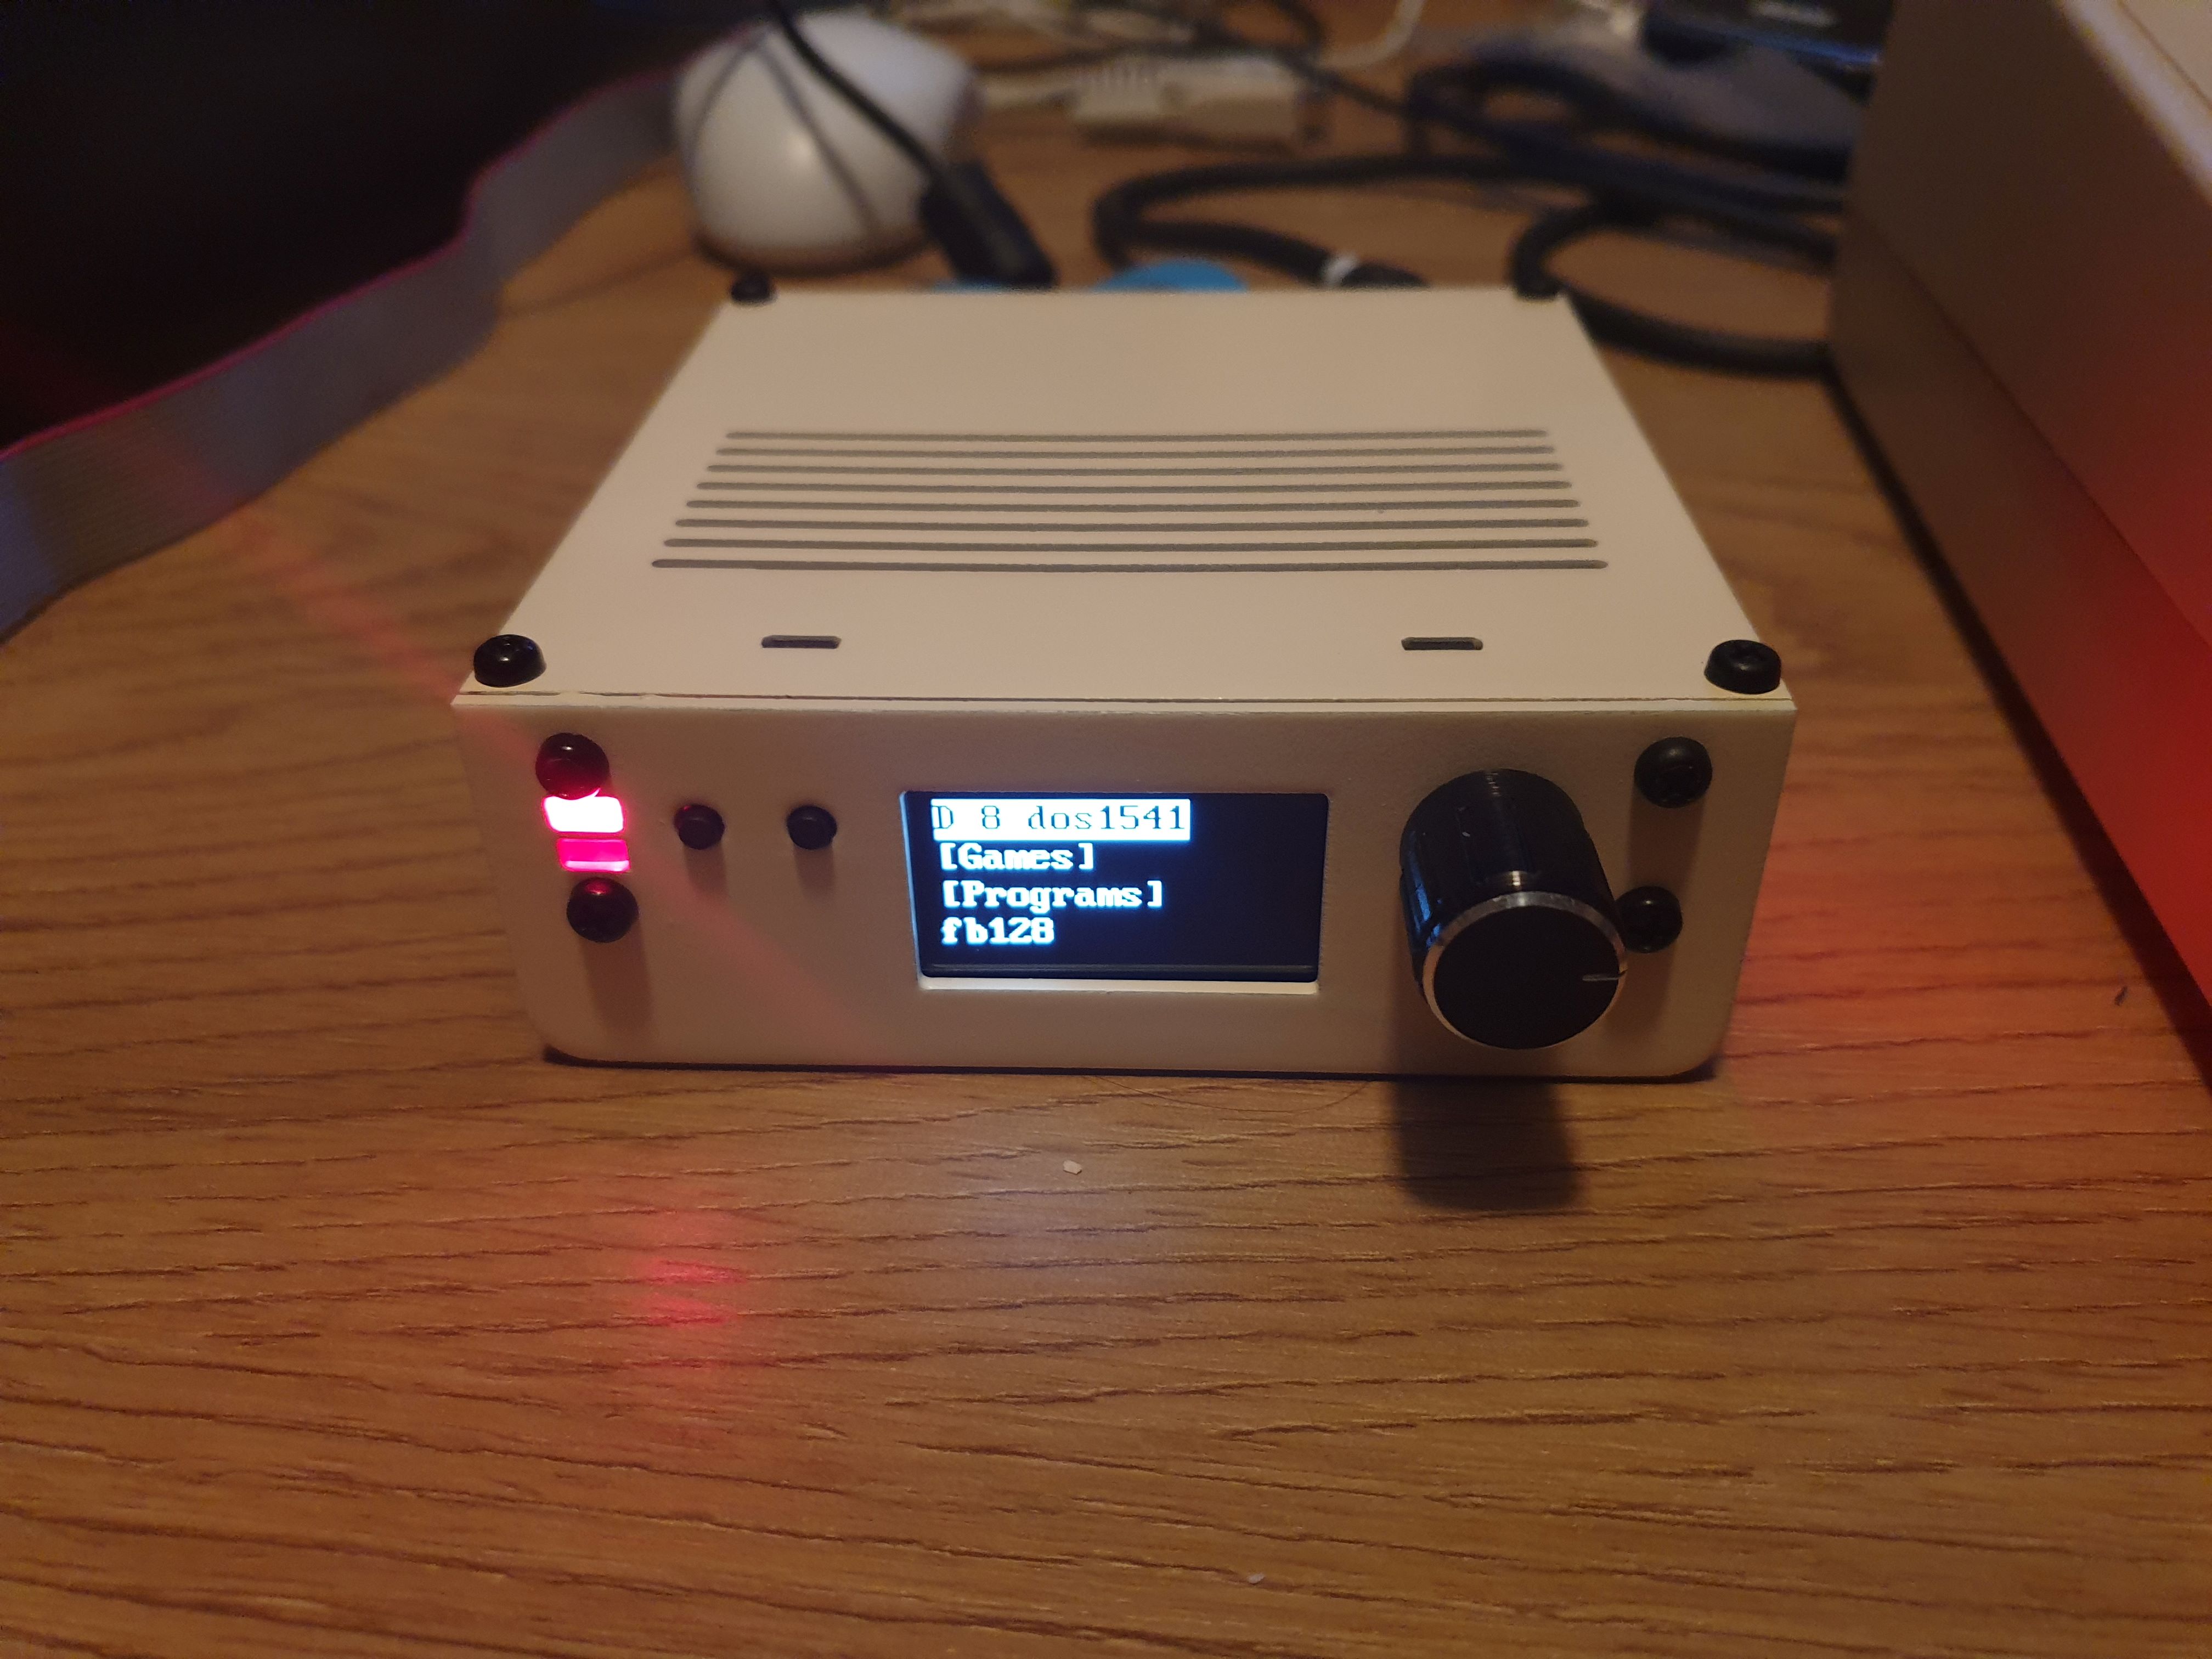
With this third version I've instead attempted to make one that's more akin to a modern device, incorporating a 1.3" OLED on the front as being controlled via the use of a rotary encoder. While the design aesthetic makes it slightly harder to build than your standard Pi1541, I believe that it more than makes up for it.
A complete Pi1541 requires no less than five PCBs in order to be built as pictured, for a somewhat simpler build you may skip the bottom faceplate though that also serves a purpose and it wouldn't entirely be complete without it. See below for a side view of how the device is put together, there is a top and bottom faceplate as well as another faceplate on the front. The PCB at the center will in the documentation be referred to as the Pi1541-III Module while the smaller one towards the front will be referred to as the panel.

In order to keep things in an order that's mostly organized, I've had to separate out information such as the BOM that goes into the build for the modules they belong to - hopefully making things easier if I ever start doing alternate versions with other components. See further below for documentation on how to assemble one, set it up as well as anything else that you might need to know.
| Module | Required | Description | Documentation | Order |
|---|---|---|---|---|
| C64 Pi1541-III Module | Yes | Main module | BOM | PCBWay |
| C64 Pi1541-III Module Panel | Yes | Adds a vertical surface for mounting switches and rotary encoder. | BOM | PCBWay |
| C64 Pi1541-III Faceplate (FB1) | Yes | Top faceplate, provides mechanical support for front panel. | PCBWay | |
| C64 Pi1541-III Faceplate (FB2) | Recommended | Bottom faceplate, adds a layer of security so that you don't accidentally short out the device on something placed under it. | PCBWay | |
| C64 Pi1541-III Faceplate (FP1) | Recommended | Front faceplate, this is mainly here to make things look nice. | PCBWay |
There are many things that need to be said in order to successfully put a working Pi1541 together, and while the information may seem pedantic and at that times simplified for veterans at building electronical devices - I'm just an amateur and so I try to include everything that would have been needed when I first started building things such as this.
If you've just come across this page and have been wondering exactly what components you need to order in order to build the Pi1541, then I suggest that you start on the modules-section - each of modules listed are PCBs that you will most likely want. In the same list there is a link to the BOM belonging to that specific module, you need to order the components for each of them.
This repository does not include Gerber-files, you either need to generate those from the KiCAD source files found in this repository - the easiest way to order them via PCBWay. Note that for the faceplates specifically, you may want to pay a little bit extra to avoid having the order number printed on it - or specifically tell them to put it on the back.
For everything else, I can only hope that one of the following documents will provide you with the answers that you need:
Everything comes from something, in particular when it comes to most of my electronics projects. I mainly build things I would like to own, often doing a respin to fit my own particular style and preferences with most of the hardest parts of the designs already provided by people more knowledgable than I.
The Pi1541-III would not exist if it were not for the work of Steve White, creator of the Pi1541-software that makes this jumble of PCBs come alive!