A drag and drop interaction done in Articulate Storyline.
📈 Purpose 🔝
Last year, I was teaching a group of students how to read music. The students had no trouble learning the notes; in fact, they learned them quickly and at a very competent skill level. However, they could not recall the information after a few days and had to relearn the information from scratch, resulting in an endless cycle of reteaching. I wondered if there might be a better teaching strategy, and identified a need for more engaging practice aids to assist them between lessons. This interaction was one such solution.
🔎 Project Overview 🔝
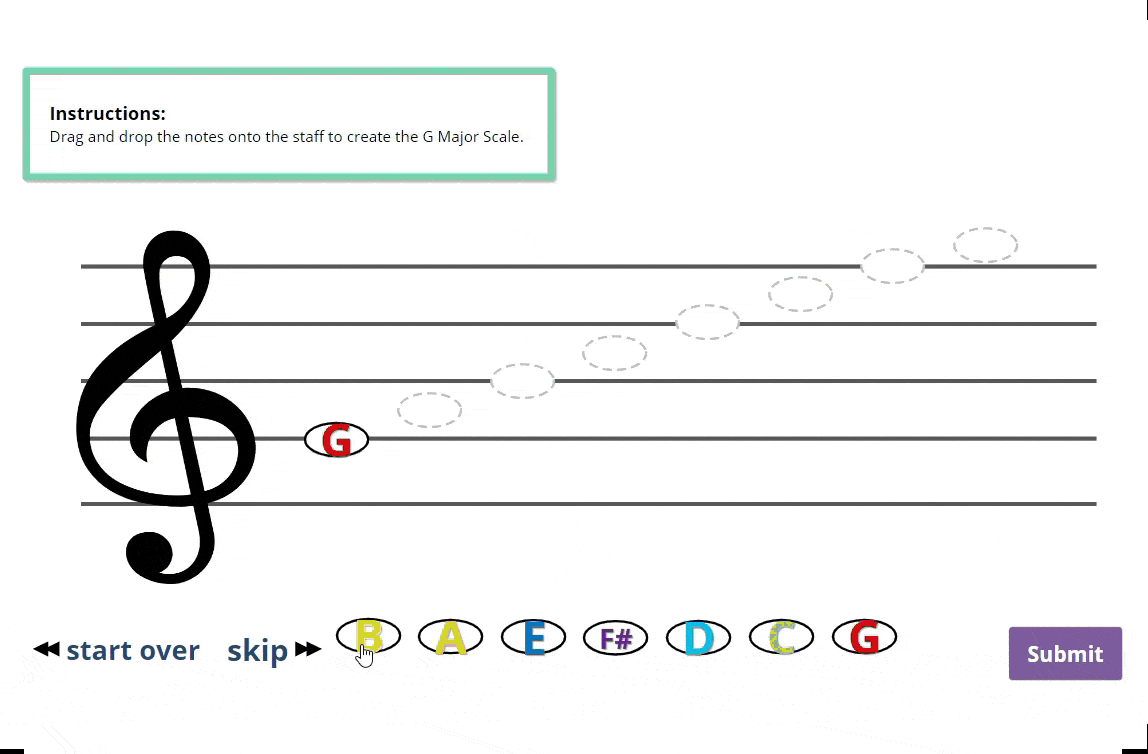
First, the student is taken to a slide where notes are shuffled into a random order at the bottom of the screen.
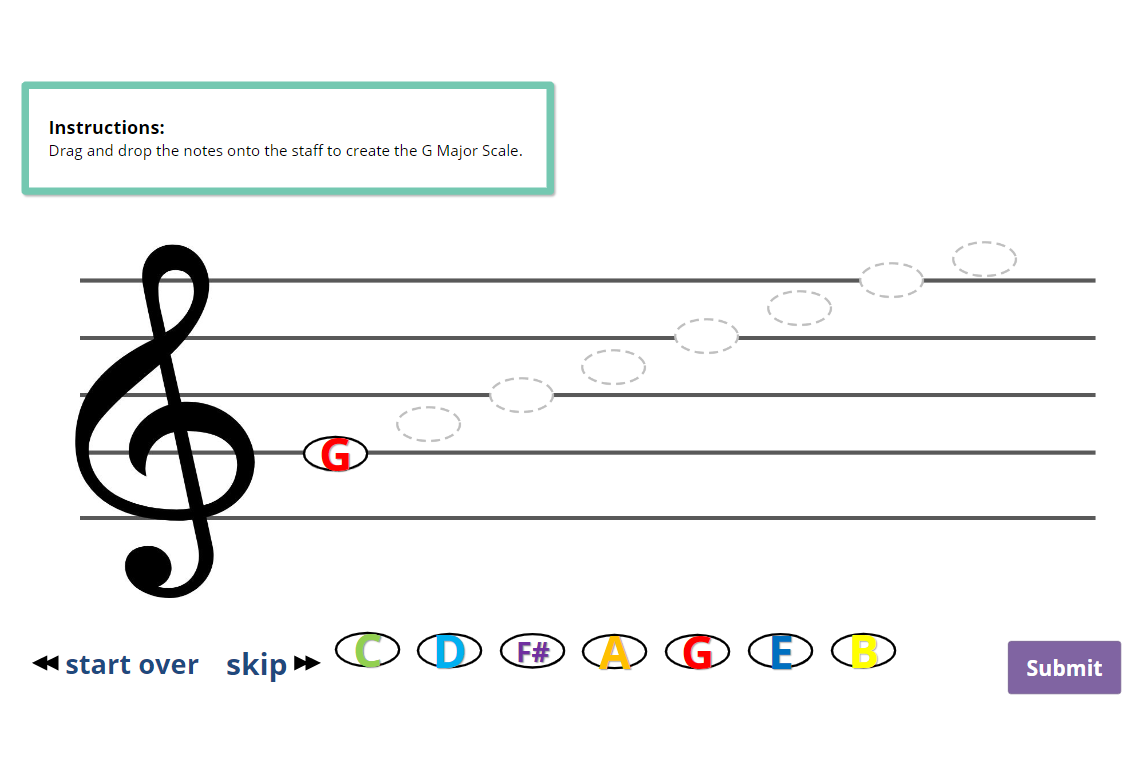
Each time the student returns, the notes are in a different order, to prevent memorizing their positions. Clicking the "start over" button will also shuffle all the notes and return them to their positions at the bottom of the screen.
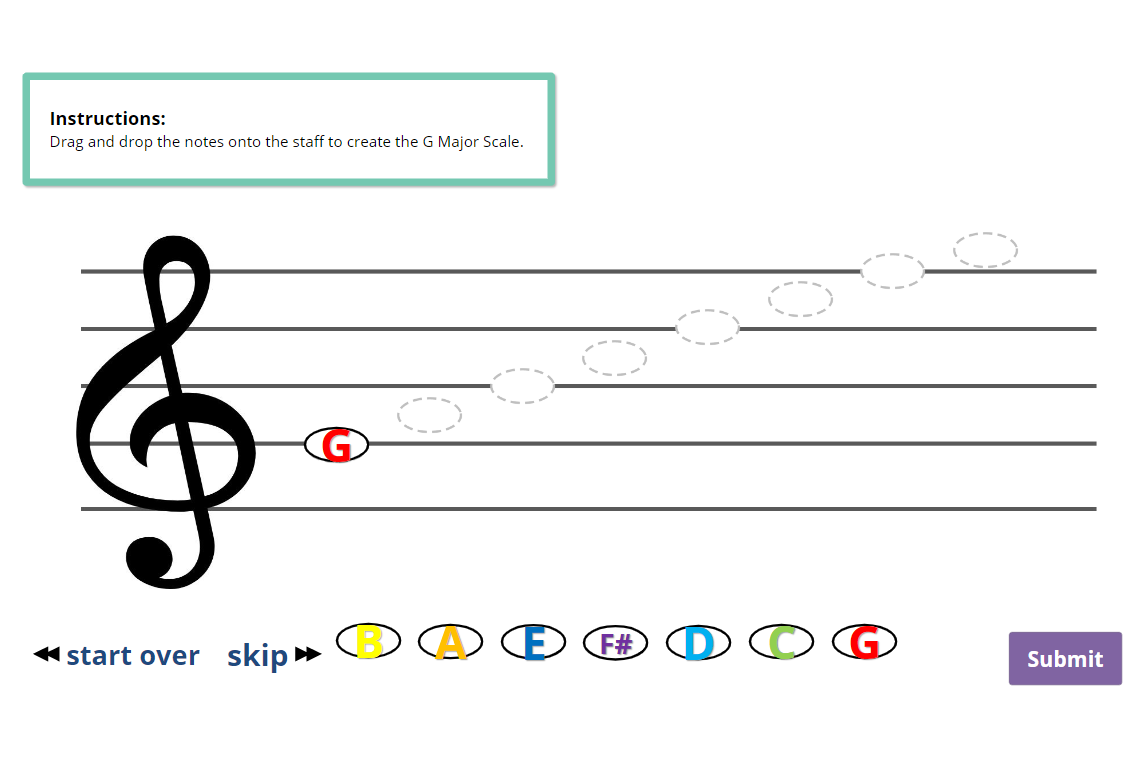
To help nudge things along, the note will only stick when dropped on a correct location; otherwise; it will return to its position at the bottom.
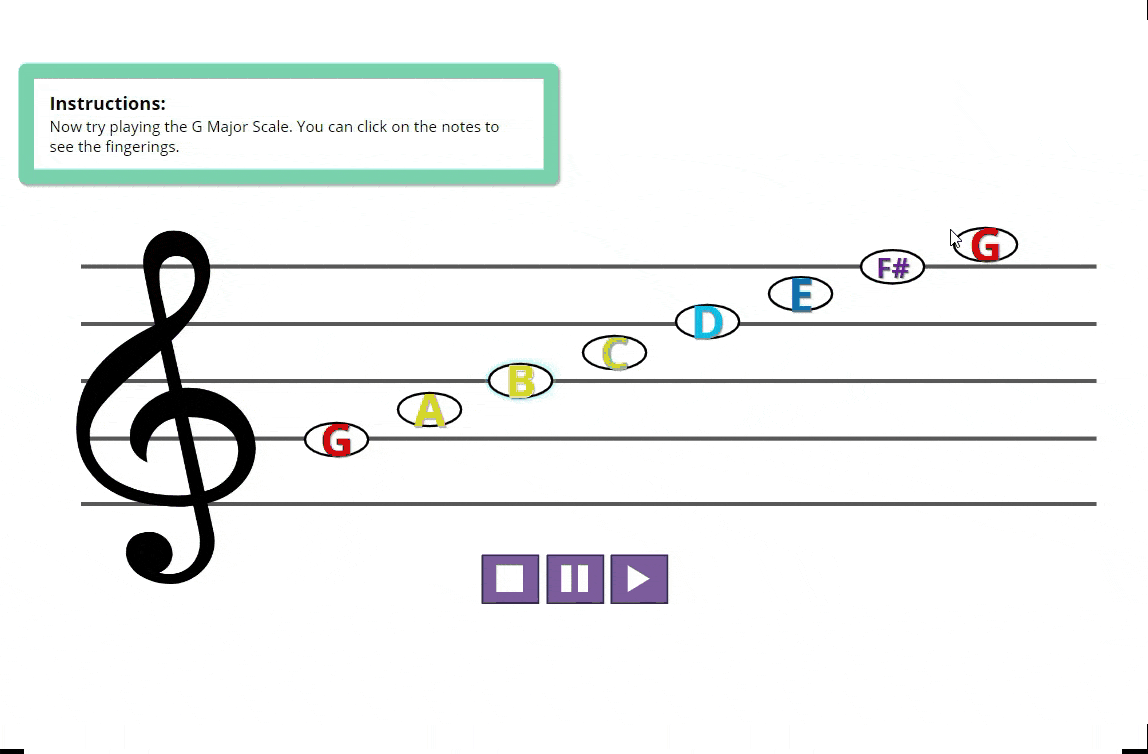
After this exercise is complete, the student is taken to a slide that allows them to interact with the scale. The play, pause, and stop buttons allow them to hear the scale being played. An indicator moves across the screen, showing the current position in the scale.
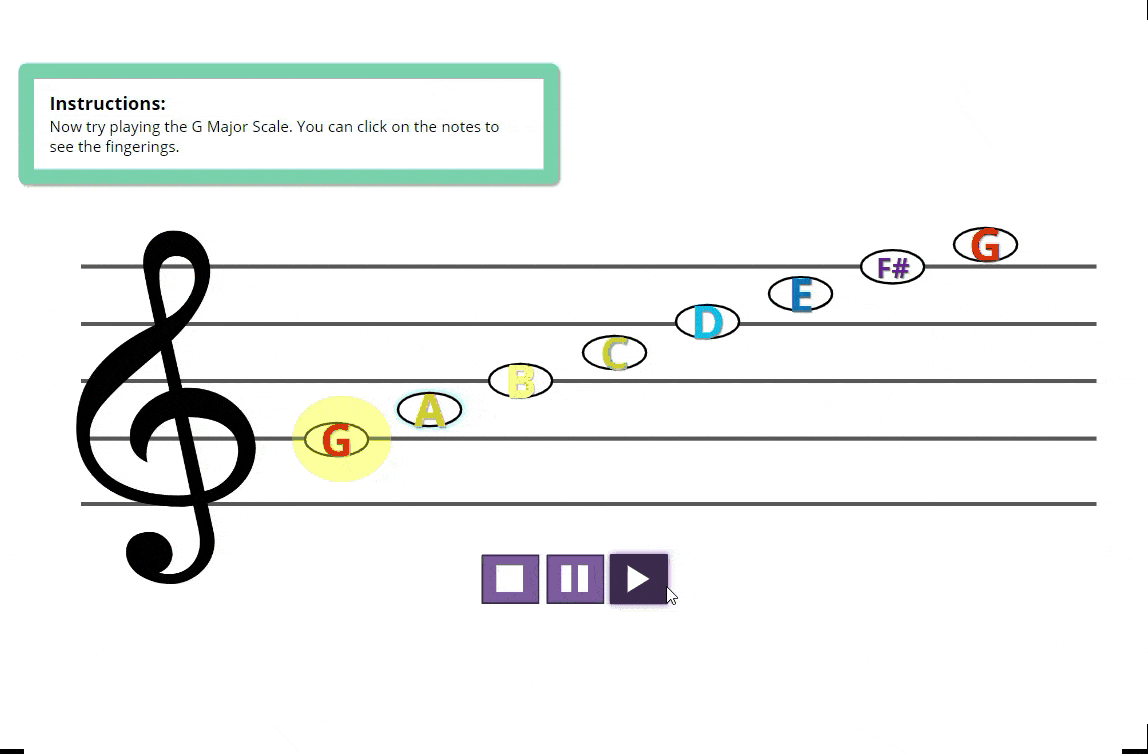
They can also click on any note to see its flute fingering.
📐 Build Process 🔝
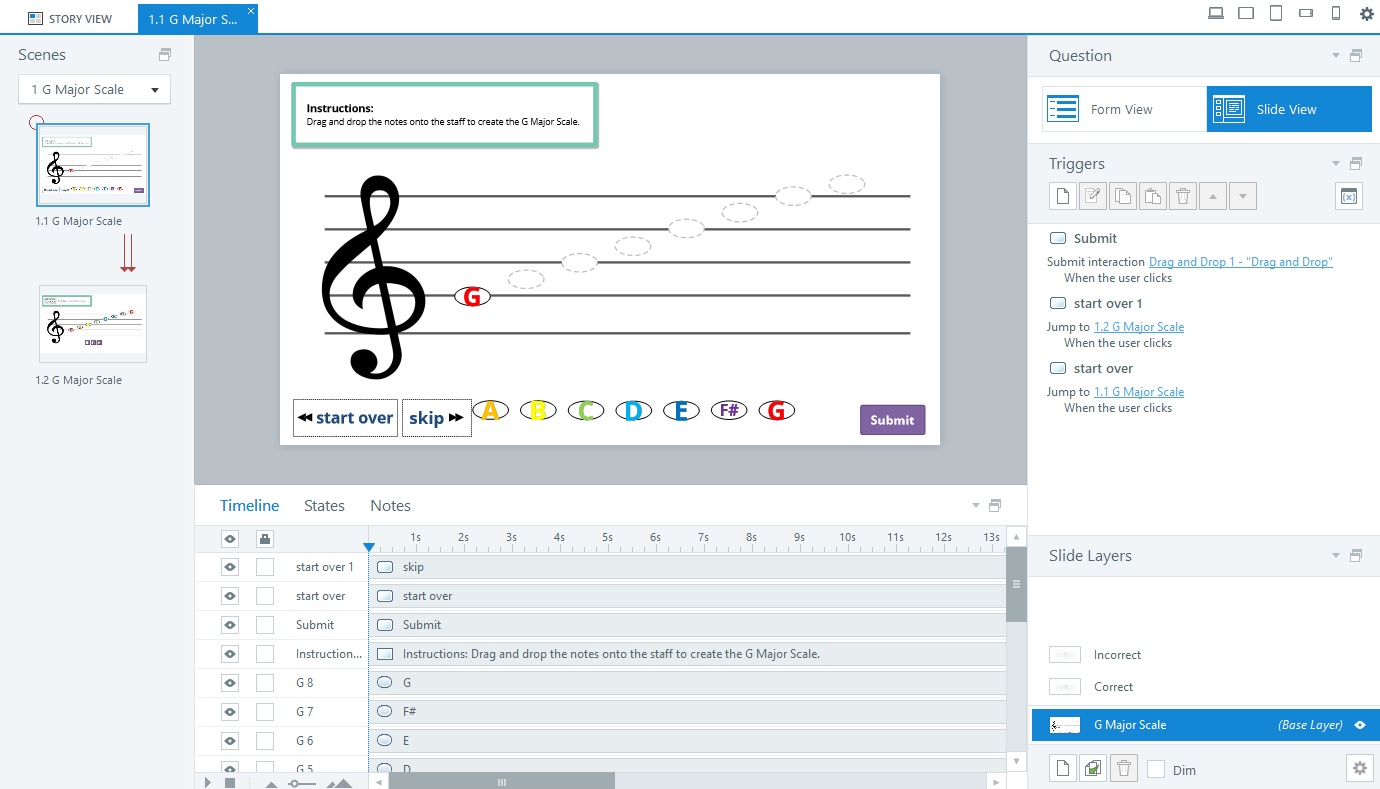
The slide itself has very little going on. Most of the work is done through Articulate's built-in freeform question tool. I choose "drag and drop" as the type of interaction, and then entered the form view to set everything up.

The items on the left are the "drag items", or items that can be moved around by the student. The items on the left are the "drop targets". These can be anything (they can even be fully transparent shapes if you want them to be invisible), but I chose to make them ovals with dashed borders so it would be clear.
That's really all there was to building the drag and drop portion of this project. There are only three triggers on this slide, corresponding to each button on the screen:
- start over: reset the interaction
- skip: skip to the next screen (for those who had already done the interaction and just wanted to get to the practice screen)
- submit: submit the interaction
Once this exercise was complete, the students are directed to the practice slide.
🎶 The Practice Slide 🔝 [top]
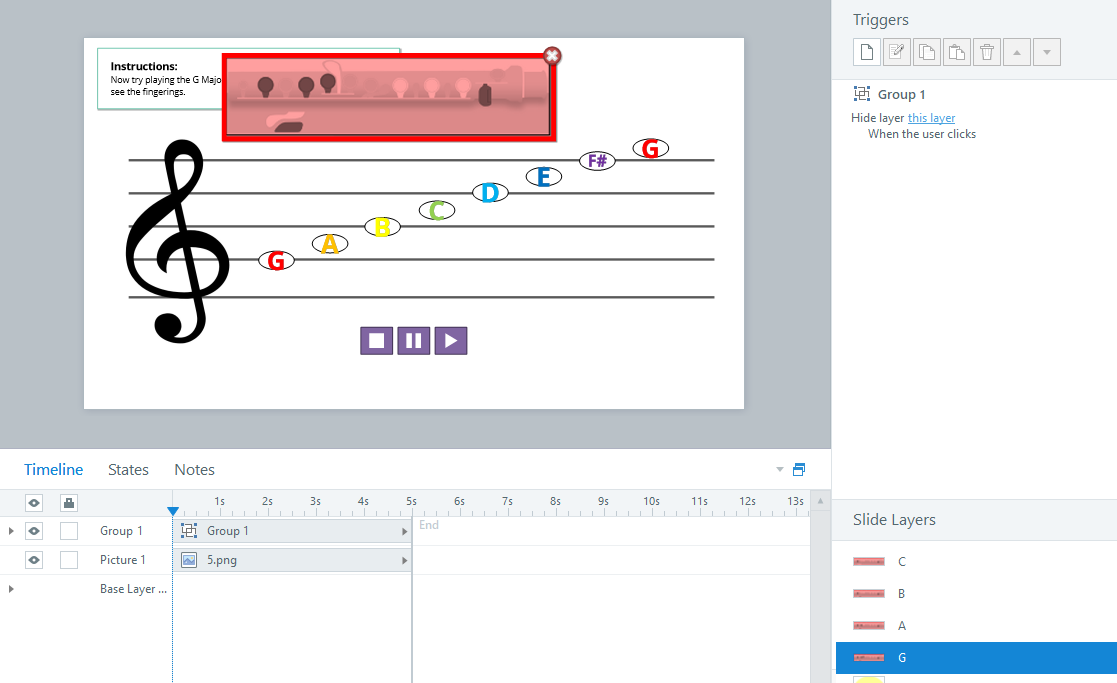
There's actually quite a bit more to making this slide work, despite it appearing more simple. To start out, let's look at my slide layers:
| A layer for each flute fingering, and an audio layer |
 |
The "Music Indicator" layer handles the audio being played. It contains the moving yellow circle and the audio file itself. Here's a closer look:

When the timeline reaches .4 seconds, the yellow circle starts to move along Line Motion Path 1. Looking at the audio waveform below, you can see that .4 seconds is approximately when the sound starts. "Line Motion Path 1" looks like this:

It took a bit of experimentation to get the timing right, but basically it moves straight across as the scale is ascending. The second trigger is exactly the same, but in reverse and with different timings. It's perhaps better to see a demonstration:
The flute fingering layers appear when a note is clicked on the base layer.
| Just a button to close the layer here |
 |
🎛️ Media Controls 🔝 [top]
The music controls were made by adding triggers to the buttons that would either show or hide the music layer, as well as pausing or resuming the timeline on that layer.

🥳 Results 🔝
After introducing this practice aid, I noticed an immediate increase in the confidence and enthusiasm levels in the classroom. The students were eager to practice and show off their new skills.
This increased confidence turned out to be a huge key in propelling my students forward. The number of students who practiced at home increased by more than half, and the need for reteaching decreased dramatically.