
Hardware code is present in the repo.
Project hosted live on https://aframesockets.glitch.me/ .
The project is a VR experience titled 'Genesis' set to Genesis by Grimes . The visual experience involves spheres revolving around to form patterns and shapes. When connected to our controller made using an Arduino, you can control these patterns by tilting the device.
The concept of Genesis is to give the user an illusion of creation - which is demonstrated in the visuals in the form of control of particles in an alternate universe with nothing but red towers around.
We decided to work together we both decided we would like to create a VR experience. That's all we knew in the start and we were told by the professor that we had a long way to go conceptually. We started looking all over for inspiration, and with a little bit of physics and art, we came up with Genesis.
Track is a 3D/VR experience created using Three.js. It involves the user travelling forward in a 3D space as the lighting, color, shapes etc. change around them. All of it is set to music. When we looked at it, we realzied we wanted to move in a similar abstract direction. We still needed more inspiration in terms of what kind of art to create.

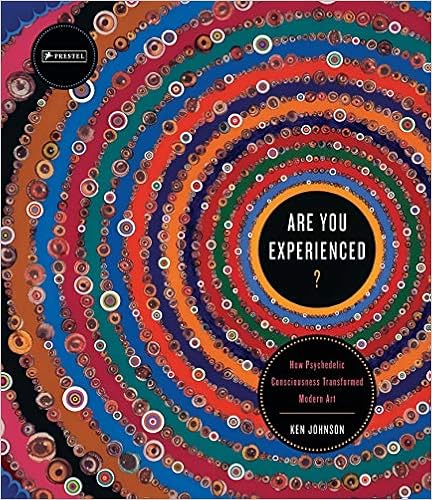
At this point when we got introduced to the book we had aframe (a JS library) set up and the arduino set up as well. We had some sort of idea of what we could do with aframe. Our professor gave us this book titled 'Are you Expreinced: How Psychedelic Consciousness Transformed Modern Art" by Ken Johnson which included various forms of psychedlic artworks as well as text about how psychedelic art came to be. Learning theory about psychedlic art helped us conceptualize more. We realized our visuals were slowly evolving into psychedelic spirals.
Genesis by Grimes was crucial for the concept of this project to come to fruition. I have loved this track since quite some time but I chose to revisit it recently and I realized our project has to revolve around it. Taking support from Grimes' music, the visualizer revolves around imagining our interpreation of genesis - creation of all life. The person is given a wand which they can use to control energy around them to create different arrangements.
The project works using an accelerometers and two buttons for input.
The reason we used accelerators was due to the fact that it allowed us to take 3 dimentional input. Since the visual side of the project was to be in a 3 dimentional space, we thought it best to use a sensor that could provide input for the same. Also, the use of such a sensor left a lot of space to experiment with the variables it could control. 
Next, since we would be using a 3D sensor, it made perfect sense to make it wireless - to allow the user complete freedom to move around without being tethered to a wire or getting tangled.
We used XBEE modules for wireless communication. The devices gave us quite some trouble but after some toying around we were able to get it going. The buttons were soldered and done in the end. It was all put in an encasing that resembles a periscope.

 accel.read();

      String packet = String(accel.cx);
      packet += "\t";
      packet += String(accel.cy);
      packet += "\t";
      packet += String(accel.cz);
      packet += "\t";
      // accel.readPL() will return a byte containing information
      // about the orientation of the sensor. It will be either
      // PORTRAIT_U, PORTRAIT_D, LANDSCAPE_R, LANDSCAPE_L, or
      // LOCKOUT.
      byte pl = accel.readPL();
      switch (pl)
      {
        case PORTRAIT_U:
          packet += "Portrait Up";
          break;
        case PORTRAIT_D:
          packet += "Portrait Down";
          break;
        case LANDSCAPE_R:
          packet += "Landscape Right";
          break;
        case LANDSCAPE_L:
          packet += "Landscape Left";
          break;
        case LOCKOUT:
          packet += "Flat";
          break;
      }
      packet += "\t";
      packet += String(!(digitalRead(button1Pin)));
      packet += "\t";
packet += String(!(digitalRead(button2Pin)));The code is written using aframe. The world is initiliazed in aframe using the aframe-environment component. Then I coded 50 layers of 9 balls each. Then I set animations of rotate, expansion and size change on them. Then I set a delay on them to make chaotic patterns emerge from the chaos. The VR visualizer would still run on our phone using a google cardboard type of device. Hence, I wrote a socket.js express node.js web server that would send data from the laptop to phone whenver change was detected.
for (let i = 0; i < 50; i++) {
    rVal += 5;
    // rVal %= 250
    parentEntityEl = document.createElement("a-entity");
    parentEntityEl.classList.add("parent");
    parentEntityEl.setAttribute("position", {
      x: "0",
      y: i + 150,
      z: "0",
    });
    parentEntityEl.setAttribute("animation", {
      property: "rotation",
      delay: i * 100,
      from: {
        x: "90",
        y: "0",
        z: "0",
      },
      to: {
        x: "90",
        y: "0",
        z: "360",
      },
      loop: true,
      dur: 5000,

      easing: "easeOutCubic",
    });

    for (let j = 0; j < circleNo; j++) {
      let entityEl = document.createElement("a-sphere");
      // let color =`rgb(${rVal},165,0)`;
      // let ballColor = Math.floor(Math.random()*16777215).toString(16);
      let ballColor = "rgb(255,255,255)";
      // Do `.setAttribute()`s to initialize the entity.
      entityEl.setAttribute("geometry", {
        radius: "0.5",
      });
      entityEl.setAttribute("material", {
        // color: "white",
        color: ballColor,
      });
      // entityEl.setAttribute("material", {
      //   shader: "flat",
      // });
      // console.log(Math.cos(i*(Math.PI/circleNo)*4),Math.sin(i*(Math.PI/circleNo)*4) )

      entityEl.setAttribute("animation__shrink", {
        property: "geometry.radius",
        delay: i * 100,
        to: "1",
        from: "0.5",
        loop: true,
        dur: 5000,

        easing: "easeOutCubic",

        dir: "alternate",
      });
      entityEl.setAttribute("animation", {
        property: "position",
        delay: i * 100,
        from: {
          x: Math.cos(j * ((Math.PI * 2) / circleNo)) * 1,
          y: Math.sin(j * ((Math.PI * 2) / circleNo)) * 1,
          z: 4 * i,
        },
        to: {
          x: Math.cos(j * ((Math.PI * 2) / circleNo)) * 20,
          y: Math.sin(j * ((Math.PI * 2) / circleNo)) * 20,
          z: 4 * i,
        },
        loop: true,
        dur: 5000,

        easing: "easeOutCubic",

        dir: "alternate",
      });

      parentEntityEl.appendChild(entityEl);
    }
    sceneEl.appendChild(parentEntityEl);
  }
});Upon getting x-axis values, the program counts if enough change has been triggered (if the change value crosses a certain threshold). If it has then that value is used to slow or fasten the rotation of the circles.
Upon getting y-axis values, the program counts if a change threshold is crossed. If it has it shrinks or expands the the circle's radius.
Upon getting z-axis values, the colors are changed from red to blue upon crossing certain thresholds. The lighting is a mix of red and blue hence it makes sense for the spheres to have intermediate values that are a mix of red and blue.
The buttons are used to make the camera go up or down. The music is emanating from the floor hence, as you get closer to the ground the music becomes louder too.
socket.on("cameraMove", (yPos) => {
 // console.log(yPos);
 camera.setAttribute("position", {
   x: 0,
   y: yPos,
   z: 0,
 });
});
socket.on("rotationDur", (duration) => {
 console.log(Math.floor(duration));

 let allParents = document.querySelectorAll(".parent");
 for (let i = 0; i < allParents.length; i++) {
   // print(allParents[i]);
   allParents[i].setAttribute("animation", {
     from: {
       x: "90",
       y: "0",
       z: "0",
     },
     to: {
       x: "90",
       y: "0",
       z: "360",
     },
     dur: Math.floor(duration),
     // dur: 20000,
   });
 }
});
socket.on("colorChange", (colorVal) => {
 let r= Math.floor(colorVal);
 let b= 255 - Math.floor(colorVal);
 let allSpheres = document.querySelectorAll("a-sphere");
 for (let i = 0; i < allSpheres.length; i++) {
    allSpheres[i].setAttribute("material", {
       // color: "white",
       color: `rgb(${r},0,${b})`,
     });
 }
});
socket.on("spread", (spread) => {
 console.log(Math.floor(spread));

 let allSpheres = document.querySelectorAll("a-sphere");
 for (let i = 0; i < allSpheres.length; i++) {
   // print(allParents[i]);
   let oldValues = allSpheres[i].getAttribute("animation");

   let newY = 1+ ((oldValues.to.y / 20) * Math.floor(spread));

   // console.log(i,oldValues.to.y,newY)
   allSpheres[i].setAttribute("animation", {
     from: {
       x: oldValues.from.x,
       y: oldValues.from.y,
       z: oldValues.from.z,
     },
     to: {
       x: oldValues.to.x,
       y: newY,
       z: oldValues.to.z,
     },
   });
 }
});The XBEE was the biggest challnge we faced. It was glitchly, buggy and straight up unresponsive at times. Getting it to work at first was big enough of a challenge. When the module was setup and transmitting data we realized the XBEE couldn't write string values. Hence we had to convert our string packet into a Character array before we sent it over XBee.
  char* buf = (char*) malloc(sizeof(char) * packet.length() + 1);

//      Serial.println("Using toCharArray");
      packet.toCharArray(buf, packet.length() + 1);

      Serial.println(buf);
      XBee.write(buf);

//      Serial.println("Freeing the memory");
      free(buf);
//      Serial.println("No leaking!");

      delay(10);
      XBee.write(13);
      delay(10);
      XBee.write(10);
delay(10);Aframe was a completely new library to me. Getting the animations set up was very challenging as I was still not used to working in a 3D space where lighting and the z-axis was invoved.
The hardware sends too much data in realtime for the software to respond in time hence it was a huge challenge for me to figure out how to make it react to changes. Here is where I came with the idea of thresholds and triggering events only when certain numeric values were crossed.
socket.on("xOrient",(xOrient)=>{

   if(Math.abs(oldXOrient - xOrient) >= 5000){

     oldXOrient = xOrient
     io.sockets.emit("rotationDur",xOrient)
   }
 })
  socket.on("yOrient",(yOrient)=>{

   if(Math.abs(oldYOrient - yOrient) >= 5000){

     oldYOrient = yOrient
     io.sockets.emit("spread",yOrient/500)
   }
 })
   socket.on("zOrient",(zOrient)=>{

   if(Math.abs(oldZOrient - zOrient) >= 50){

     oldZOrient = zOrient
     io.sockets.emit("colorChange",zOrient)
   }
})The casing was something that was hard for us to do since both of us were unfamiliar with crafts. I decided to go with cardboard and spent quite some time making even a simple casing. Make it look good was even a bigger challenge. Duct tape helped us make it in the first place, ribbons helped us make it look better.
This project was made in collaboration with Aakarsh Singh