Welcome to the repository that contains the simulation environment for the miniature vehicle platform Kiwi.
- Have
dockerinstalled: Ubuntu Linux, Windows, MacOS - Have
docker-composeinstalled: Instructions
After having installed docker and docker-compose, clone this repository:
git clone https://github.com/se-research/kiwi-simulation.git
Start the simulation environment by running the docker-compose.yml file. Thus, change to the directory where you just cloned the repository and run:
docker-compose -f docker-compose.yml up
docker will download the necessary components of the simulation environment and start them immediately.
Next, start a web-browser and connect it to: http://localhost:8081 You should see the front-end as shown below:

In the main window, you are seeing four tabs: Overview, Messages, Plot, and Simulation. In the center part, you see the spiderweb visualization of the readings from the simulated Kiwi's distance sensors, and on the right side, you see the messages being currently exchanged in the simulation. The area to enter your JavaScript code for steering, accelerating, or deceleration Kiwi is shown at the bottom.
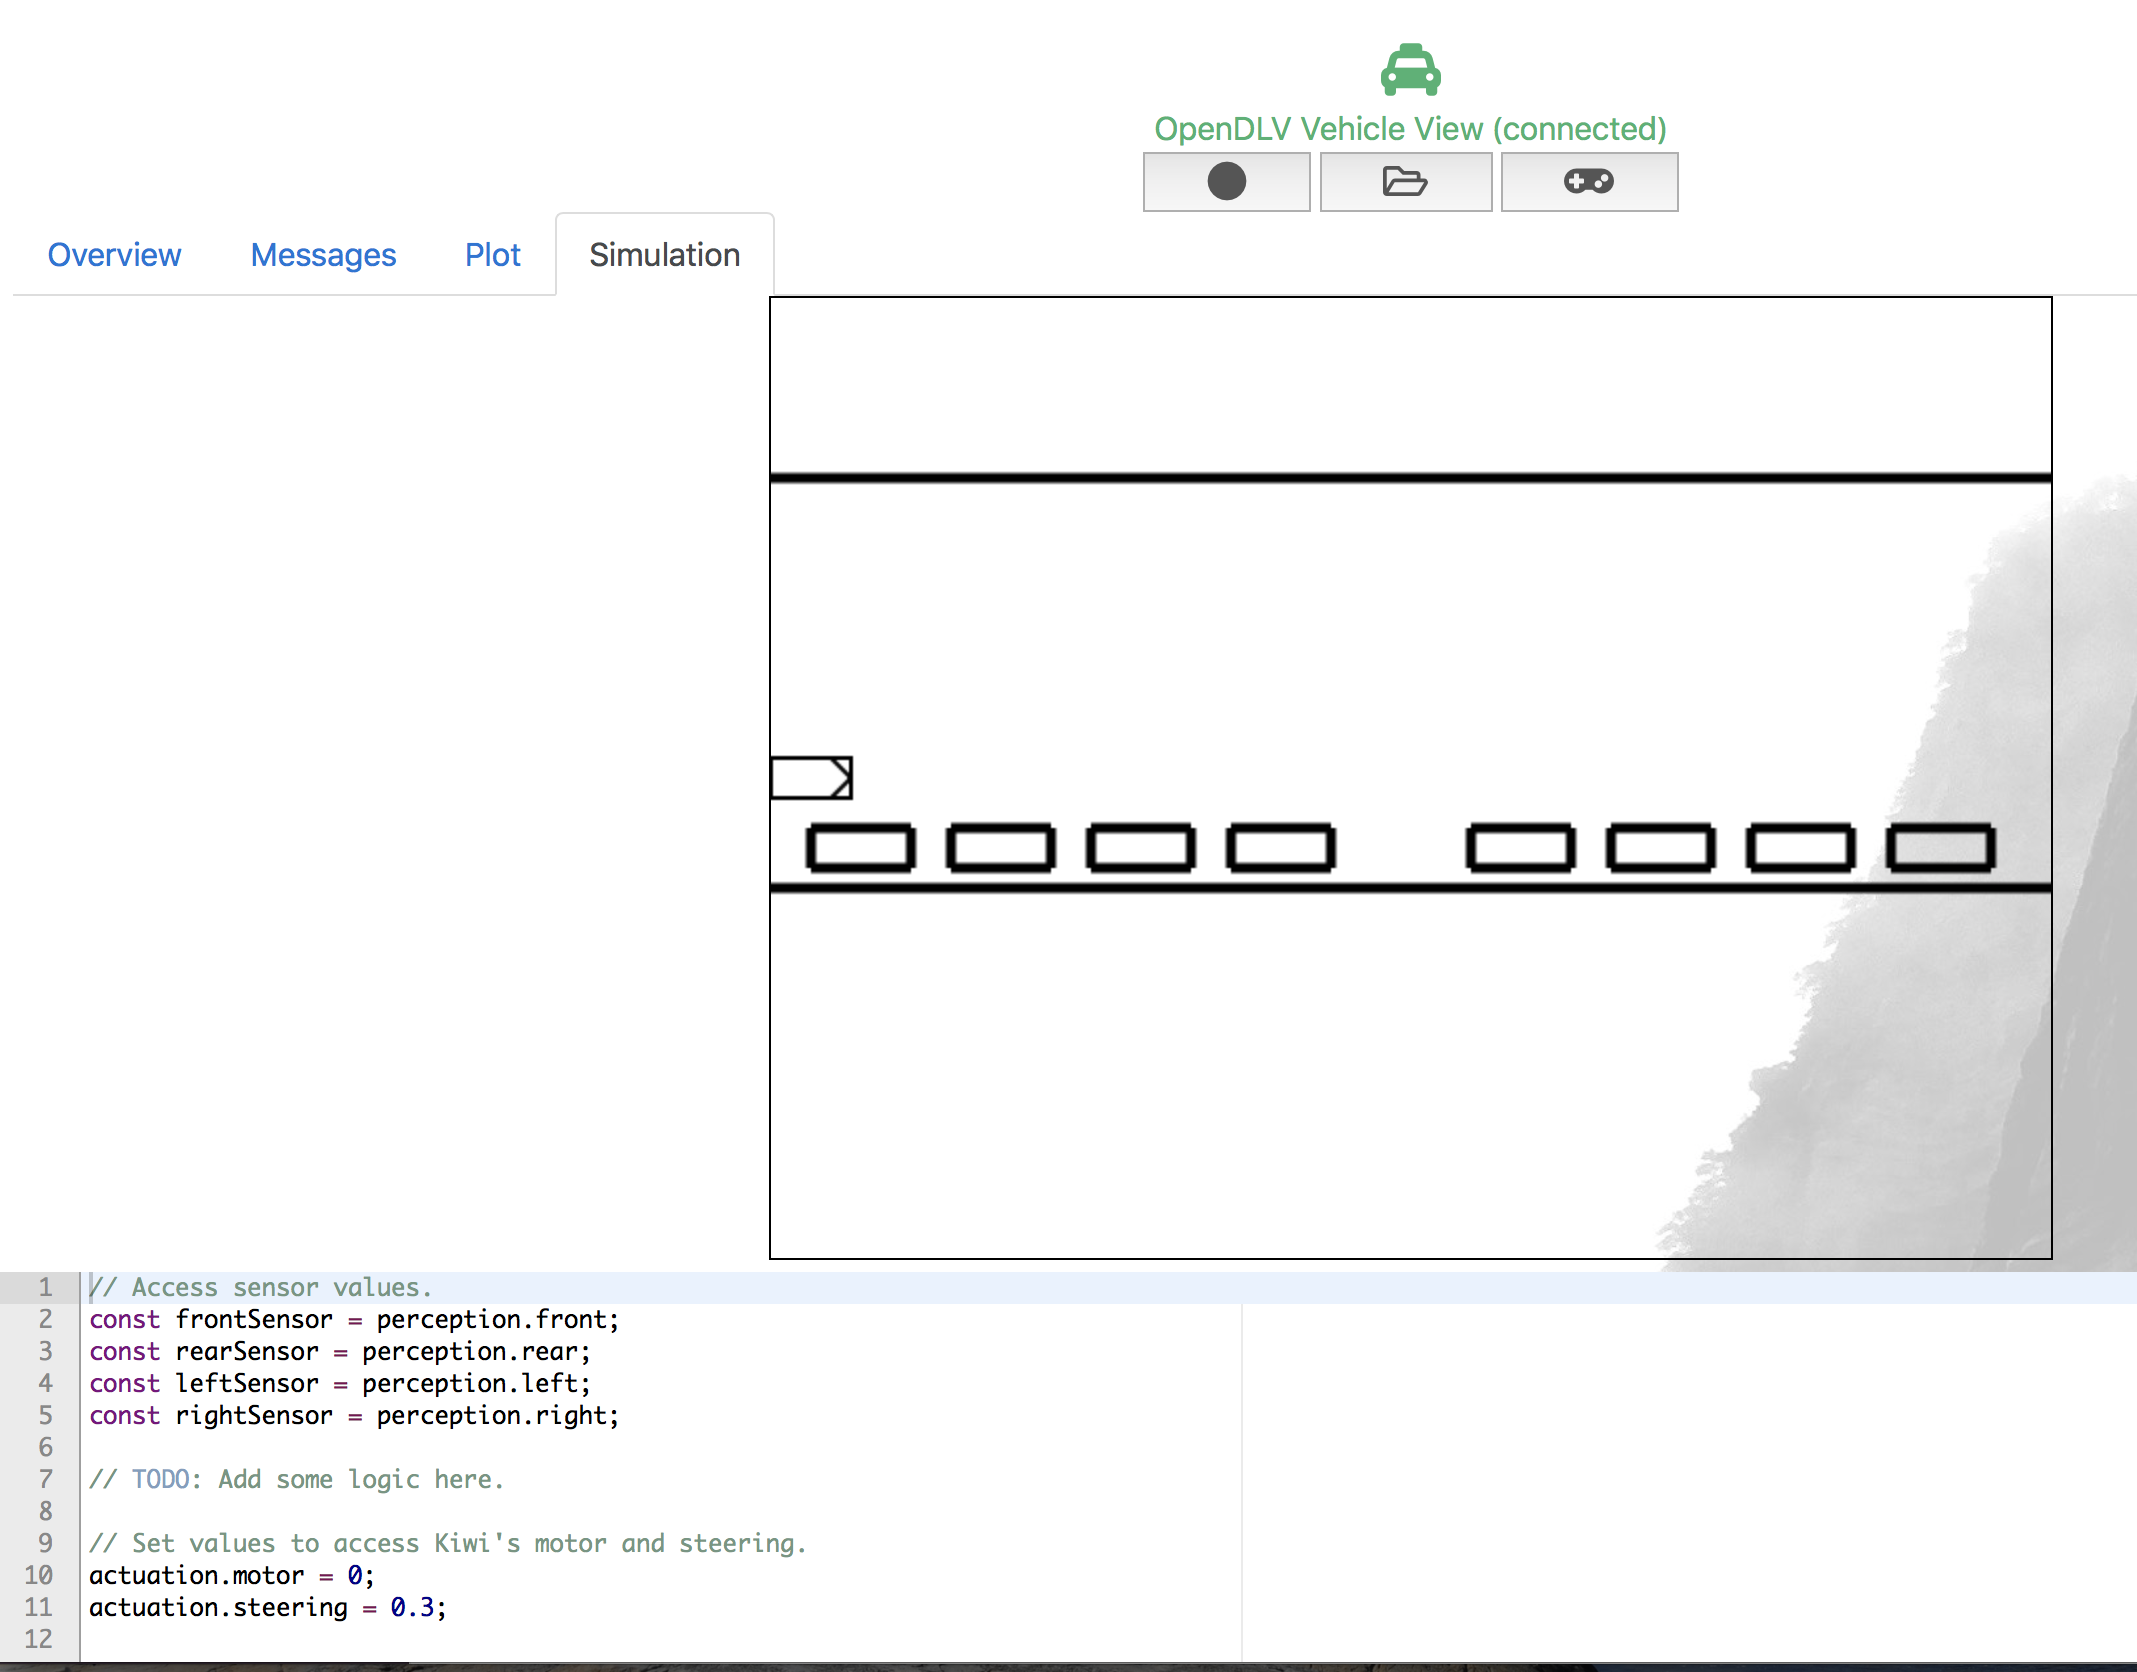
Next, click on the tab Simulation and you will see the currently active scenario:
If you want to send steering, acceleration, or deceleration commands to the simulated Kiwi, return to the Overview tab and activate the button labeled Code on the right side; it will turn green.
Next, click on the tab Simulation to return to the simulation view. In the code area, you see two lines:
// Set values to access Kiwi's motor and steering.
actuation.motor = 0;
actuation.steering = 0.3;
You can change these values to influence the behavior of the simulated Kiwi car. If you want to accelerate, you can send values like actuation.motor = 10;. If you want to go reverse, send actuation.motor = -10;. If you want to steer to left, send: actuation.steering = 0.5;; steering to the right is actuation.steering = -0.5;.
This repository contains one recording file named CID-111-recording-2018-10-07_183647.rec that demonstrates how the Kiwi car could be parked in the available gap. To replay that file, click on the folder icon in the top/center part where you will be presented with a page listing all available files. Select the one with the file name ending on .rec and click on the play button. The web-browser will return to replay view; next, click on the tab Simulation and observe how the car is parked.
The sensor data from the four distance sensors is stored in the following four constants:
const frontSensor = perception.front;
const rearSensor = perception.rear;
const leftSensor = perception.left;
const rightSensor = perception.right;
If you want to see the values, you can either change to tab Messages or you can print the content in Javascript:
const frontSensor = perception.front;
const rearSensor = perception.rear;
const leftSensor = perception.left;
const rightSensor = perception.right;

console.log("Front = " + frontSensor + ", Rear = " + rearSensor + ", Left = " + leftSensor + ", Right = " + rightSensor);
Then, you need to activate the Javascript Console in your web-browser; for Safari, click on Develop-Show JavaScript Console and for Chrome: View-Developer-JavaScript Console. You should see the print out of your values.
If you need to restart the simulation, go to the terminal where you ran docker-compose. Press Ctrl-C and wait for the command prompt. Then, run docker-compose -f docker-compose.yml down to end the simulation. Then, you can restart the simulation with docker-compose -f docker-compose.yml up again. Afterwards, simply refresh your web-browser.
If you want to try one of the other scenarios, stop the simulation and simply delete the file simulation-map.txt. Then, copy one of the other scenarios emptry.txt or two-cars.txt and name the copied file simulation-map.txt. Afterwards, restart the simulation again and refresh your web-browser.
The source code in the code area is executed with 10Hz and hence, the sensor values are updates ten times per seconds as well as the control values are sent to the vehicle by 10 times per second. Furthermore, the code area does not have the possibility to store a variable value throughout one iteration; i.e., a statement like var oldValue = rearSensor; and later trying to evaluate the old value from the previous iteration of the code does not work.
Instead, you need to work with so called sessionStorage objects (cf. API) that are persistent through one iteration. You could use it for example as follows:
// Initialize sessionStorage object:
if (sessionStorage.getItem("oldRearSensor") === null) {
    sessionStorage.oldRearSensor = 0;
}
...
// Do something with the old value.
...
sessionStorage.oldRearSensor = rearSensor;
These sessionStorage objects can also be used to model a state machine that keeps track about the various parking states. You can find further information about a potential parking algorithm design in this paper.