This repository contains all the model files, assembly instructions and code files for building reactive LED speakers.


Watch a demo of the speakers on Youtube:
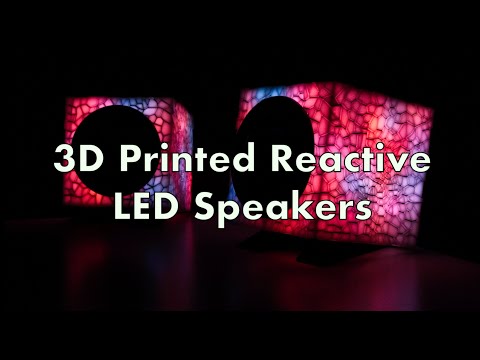

The entire setup consists of two speakers which are composed of a 3D printed enclosure that contains the speaker cone and a 1.5m long LED strip. The enclosure is mainly printed from transparent PLA+ with some black accents. The speakers are connected to an amplifier which gets its audio input from a Raspberry Pi. Devices, like phones or PCs can connect to the Raspberry Pi via Bluetooth to play audio. The audio input is processed to create different visual patterns on the connected LED strips.
- Raspberry Pi
- Ideally a Raspberry Pi 4, since it has in-built Bluetooth and Wifi
- Older versions also work but need additional dongles for Bluetooth
- 5V power supply
- Amplifier
- 3m RGB LED strip
- 1.5m for each speaker
- 4-inch speakers
- 4mm Dual Banana Jack Socket Binding Post to 2 Screws Adapter Connector
- For connecting the Amplifier to the Speakers
- Wire
- For connecting all the components
- Heat shrink tubes
- For insulating soldered wires
- Soldering iron + solder
- Hot glue gun + Hot glue
- Clear PLA+
- Enclosure
- Black PLA+
- Inner LED cage, stand, enclosure
- [optional] Glow-in-the-dark filament
- The last few upper layers can be printed with Glow-in-the-dark filament for some interesting glow-in-the-dark effects
The speaker enclosure consists of multiple parts that can be found in the model/ directory.
The outer enclosure walls are printed from clear PLA+. For a better contrast of the rough structure, the gaps are printed in black PLA. To change filament mid-print, the Multicolor prints with a single extruder in Cura plugin can be used.

The LED strip will be cut into smaller strips that will get attached to an inner cage to stay in place. All parts of the cage are printed in PLA and glued together using hot glue.

The assembled cage with the LEDs glued on is then attached to one of the enclosure walls.

Walls:
- Infill: 50%
- Infill Pattern: Gyroid
- Layer Height: 0.3mm
- Support: no
Inner cage:
- Infill: 15%
- Layer Height: 0.3mm
- Support: no
Currently, only USB input is supported. Connect the amplifier to the Raspberry Pi using USB and connect the LED strips to the SPI pins of the Raspberry Pi. A 5V power supply is used to power the Raspberry Pi as well as the LED strips. The amplifier uses a separate power supply.
All of these components (except for the amplifier) are placed in a separate printed enclosure.
Based on Another How to turn your Pi in a Bluetooth Speaker Tutorial
Install Pulseaudio and bluetooth module:
sudo apt-get install pulseaudio pulseaudio-module-bluetooth
Add user to group bluetooth:
sudo usermod -a -G bluetooth pi
sudo reboot
Make discoverable:
sudo nano /etc/bluetooth/main.conf

...
Class = 0x41C
DiscoverableTimeout = 0
...

sudo systemctl restart bluetooth
In bluetoothctl, setup Bluetooth:
pi@raspberrypi:~ $ bluetoothctl
[NEW] Controller XX:XX:XX:XX:XX:XX raspberrypi [default]
[bluetooth]# power on
Changing power on succeeded
[bluetooth]# discoverable on
Changing discoverable on succeeded
[CHG] Controller XX:XX:XX:XX:XX:XX Discoverable: yes
[bluetooth]# pairable on
Changing pairable on succeeded
[bluetooth]# agent on
Agent registered
[bluetooth]# default-agent
Default agent request successful
[bluetooth]# quit
Agent unregistered
[DEL] Controller XX:XX:XX:XX:XX:XX raspberrypi [default]
Start Pulseaudio and check status:
pulseaudio --start

sudo systemctl status bluetooth
Start Pulseaudio on boot
systemctl --user enable pulseaudio
Auto-pairing
sudo apt-get install bluez-tools

sudo nano /etc/systemd/system/bt-agent.service

[Unit]
Description=Bluetooth Auth Agent
After=bluetooth.service
PartOf=bluetooth.service

[Service]
Type=simple
ExecStart=/usr/bin/bt-agent -c NoInputNoOutput

[Install]
WantedBy=bluetooth.target


sudo systemctl enable bt-agent
Disable onboard Bluetooth module in favour of Bluetooth dongle:
sudo nano /etc/modprobe.d/blacklist-bluetooth.conf

blacklist btbcm
blacklist hci_uart
Controlling volume:
sudo nano /etc/systemd/system/bluetooth.target.wants/bluetooth.service

...
ExecStart=/usr/lib/bluetooth/bluetoothd --noplugin=avrcp
...
Use SPI for LED strip:
/boot/cmdline.txt
append
spidev.bufsiz=32768

core_freq=500
core_freq_min=500
Install cross
Build docker container with libpulse installed:
docker build -t rbp-cross .
Build project
cross build --target=armv7-unknown-linux-gnueabihf --release
Go to the web/ folder: cd web/
Update the .env file and set the correct host and ports.
To build the web app run: make
Once the server and web app have been built successfully, copy the led_speakers binary, the web/static directory and the config.json file on to the Raspberry Pi.
The software can be manually started by running ./led_speakers and the web app will be ready to be accessed under the configured host and port.
Settings can be changed in the config.json file.
To start the software automatically when booting, create a custom systemd service:
sudo nano ~/.config/systemd/user/led-speakers.service
[Unit]
Description=LED Speakers Service

[Service]
Type=idle
ExecStart=/home/pi/led_speakers
Restart=on-failure
RestartSec=60

[Install]
WantedBy=default.target
To enable the service:
systemctl --user enable led-speakers.service
systemctl --user daemon-reload
Settings can be changed in the config.json file:
{
    // available visualizations and default configurations
    "visualizations": {
        "rotating_viz": {
            "pretty_name": "Rotating Viz",
            "speed": 5.0,
            "falloff": 0.1
        },
        "sparkle_viz": {
            "pretty_name": "Sparkle Viz",
            "falloff": 0.1,
            "speed": 5.0,
            "max_ignite": 2.0
        },
        "solid_viz": {
            "pretty_name": "Solid Viz"
        },
        "center_viz": {
            "pretty_name": "Center Viz"
        },
        "solid_beat_viz": {
            "pretty_name": "Solid Beat Viz",
            "fade_colors": true,
            "fade_duration": 20
        },
        "fading_beat_viz": {
            "pretty_name": "Fading Beat Viz",
            "fade_duration": 1,
            "fade_threshold": 10,
            "frequency_magnitude_buffer_size": 300
        },
        "blend_viz": {
            "pretty_name": "Blend Viz",
            "spread": 6,
            "blend_speed": 3,
            "offset_weight": 1,
            "blend_factor": 10
        }
    },
    // configures the pins that control the LED strip
    "output": {
        "left": {
            "spi": "/dev/spidev0.0",
            "total_leds": 150
        },
        "right": {
            "spi": "/dev/spidev1.0",
            "total_leds": 150
        }
    },
    // default themes
    "themes": [
        {
            "name": "Rainbow",
            "colors": [
                [255, 0, 0],
                [255, 100, 0],
                [255, 200, 0],
                [100, 255, 0],
                [0, 255, 0],
                [0, 255, 100],
                [0, 255, 255],
                [0, 100, 255],
                [0, 0, 255],
                [100, 0, 255],
                [255, 0, 255]
            ]
        },
        {
            "name": "Test Theme",
            "colors": [
                [255, 0, 0]
            ]
        }
    ],
    // parameters for the audio transformation
    "transformer": {
        "sink": "alsa_output.usb-Generic_USB2.0_Device_20170726905959-00.analog-stereo",
        "fft_len": 3000,
        "total_bands": 6,
        "lower_cutoff": 50.0,
        "upper_cutoff": 10000.0,
        "monstercat": 50.0,
        "decay": 10.0,
        "buffer_size": 65535
    },
    // host and port web app is hosted under
    "server_host": "127.0.0.1",
    "server_port": "8000"
}
More detailed docs about certain aspects of the software can be found in docs/