![]()
CYBORG R.A.T. on Linux
Xorg Server Configuration & Setup for R.A.T.9
**Problem:**
After being plugged, the mouse seems to work, but with issues :
-Unable to operate buttons (open/close windows, etc..);
-Unable to drag open windows (apps) or move between them;
-Mouse in general is unresponsive and dificult to work with.
**Reason:**
The problems are caused by an interaction between R.A.T 'Mode button' (the profile changer) and the Xorg server.
**Workaround:**
The 'Profile Changer' button must be disabled in Xorg to make the mouse work.
In the terminal go to: /etc/X11/xorg.conf.d and as a root create separate file
10-evdev.conf
10-evdev.conf file for all necessary details ! ). Why separate file and not make changes directly inside xorg.conf?
Any potential update of X server will default xorg.conf file, and separate evdev.conf file will be untouched thus mouse will be operational.
**Tested on:**
This setup has been tested on Funtoo/Gentoo/Arch and Ubuntu Linux machines with the latest Xorg server. Workaround works with kernel line from 2.6 up to the current (besides this is not kernel issue - so it is a kernel agnostic workaround).
-
Gentoo testing profile (~ current); -
Funtoo - current profile (~ standard); -
Arch (current); -
Ubuntu (tested from 14.04 to 18.04.1.
Xorg/evdev version compatibility:
All versions --> to current.
====================================================================
This workaround is compatible with all kernel versions and mods ( tested with: pf, ck on Arch Linux).
You can use this setup for any Linux Distribution - and in most cases it should just works fine as it is either xorg, kernel & distro agnostic setup.
====================================================================
**MOUSE TECHNICAL DETAILS:**
-Mouse with Very Low Latency 2.4Ghz Wireless (v.9) or Cable Versions (v.3 and v.7);
-DPI Range – 25-6400dpi (in 25dpi increments - track approx up to 6 meters per second);
-Buttons:
* 2 regular: left and right mouse buttons
* 4 Custom DPI Settings
* 6 Programmable Buttons
* 3 'Cyborg Modes'
* A total of: 8 buttons.
==============================================================
All settings are fully customizable and transferable between different mouse models (MadCatz & Saitek).
I believe that the problem with 'setting up' multi button mouses (I mean mouses with more then 2 or 3 buttons) in the linux environment is wider than MadCatz R.A.T. series) and this instruction could be be helpfull as a reference with other mice makers/models/vendors.
==============================================================
**SETUP:**
Before we can program the mouse buttons, we need to know each button’s number. Each mouse button is identified by a ID number. Use the xinput command in the terminal:
xinput list
This should produce output similar to the following:
Virtual core pointer id=2 [master pointer (3)]
↳ Virtual core XTEST pointer id=4 [slave pointer (2)]
↳ Saitek Cyborg R.A.T.9 Wireless Mouse id=10 [slave pointer (2)]
And look for the line containing the Cyborg R.A.T.9 Wireless Mouse and note its id to the right of the string. In this case: id=10. We need this id number for the next step.
Now, run
xinput
xinput --test 10 The terminal waits for you to press mouse buttons and move the mouse around. Each button press generates text reading something like: “button press 10″ and “button release 10.” The number you see in the output is the number of the button. Test all mouse buttons and write those numbers.
Example:
left button: 1
right right: 3
vertical wheel press down: 2
vertical wheel up: 4
vertical wheel down: 5
left site back button: 8
left side forward button: 9
left side 'sniper' red button: 12
horizontal wheel left: 11
horizontal wheel right: 10
'mode buttons': 11, 12, 13
==============================================================
Now we need to specify a button map for Xorg.
Edit /etc/X11/xorg.conf.d/10-evdev.conf:
Add all 'mouse buttons' numbers from the previous test and disable the 'mode buttons'. First line is the maximum number you've got from the test:
Option "Buttons" "17"
Option "ButtonMapping" "1 2 3 4 5 0 0 8 9 7 6 12 0 0 0 16 17"
In this example there was no 6 and 7.
11, 12, 13 'mode buttons' has been disabled.
==============================================================
Write all changes to /etc/X11/xorg.conf.d/10-evdev.conf:
Example:
Section "InputClass"
Identifier "Mouse Remap"
MatchProduct "Saitek Cyborg R.A.T.9 Wireless Mouse"
MatchVendor "Saitek|SAITEK"
MatchIsPointer "on"
MatchDevicePath "/dev/input/event*"
Option "Protocol" "auto"
Option "Buttons" "17"
Option "ButtonMapping" "1 2 3 4 5 0 0 8 9 7 6 12 0 0 0 16 17"
Option "ZaxisMapping" "4 5 6 7"
Option "AutoReleaseButtons" "13 14 15"
EndSection
==============================================================
Recently I've found that there is a better way to set R.A.T. mouse. It appears that linux kernel already have drivers specially developed for Madcatz/Saitek mouses. But they are not turn on by default - this require some kernel compilation basic skills.
**Mouse drivers inside kernel**
Make sure you have all necessary tools (gcc, make, ctags, ncurses-devel) and kernel sources - or install them (howto depends on distribution). When you are ready:
Fire up terminal:
cd /usr/src/linux
and:
sudo make menuconfig
(In the shown menu the blue bar indicates the position of the cursor. With the ↑ and ↓ arrow keys change the position of the cursor. The ← and → arrow keys traverse the menu bar in the bottom and define what happens when the Enter key is pressed. For the menu bar below, Select switches to a sub menu for the menu entries ending with ---> while Exit exits a sub menu. As an alternative the Esc key can be pressed twice to exit the application).
Inside menuconfig just go to the drivers section --> input drivers:
Main Menu:
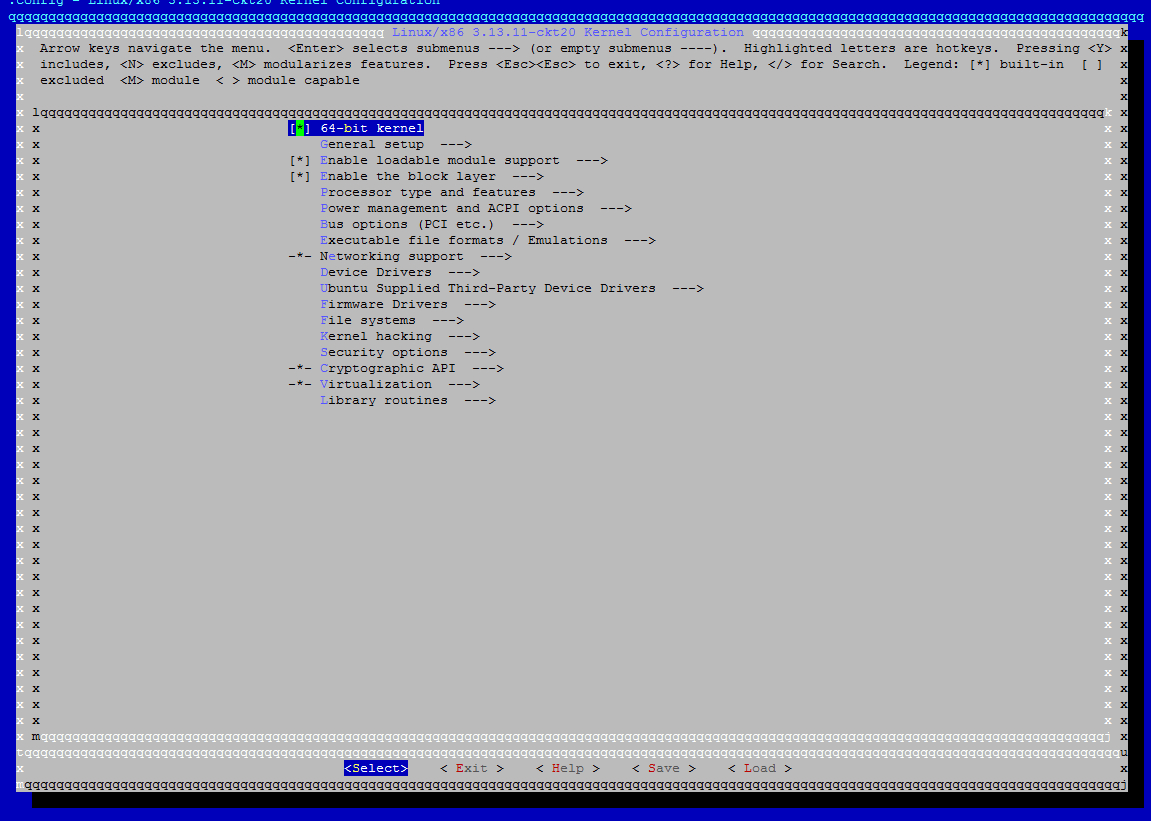
↳ Device Drivers Section:
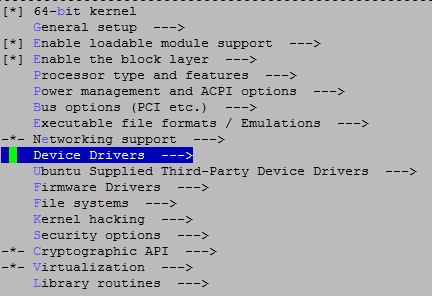
↳ Input Devices --> Mice:
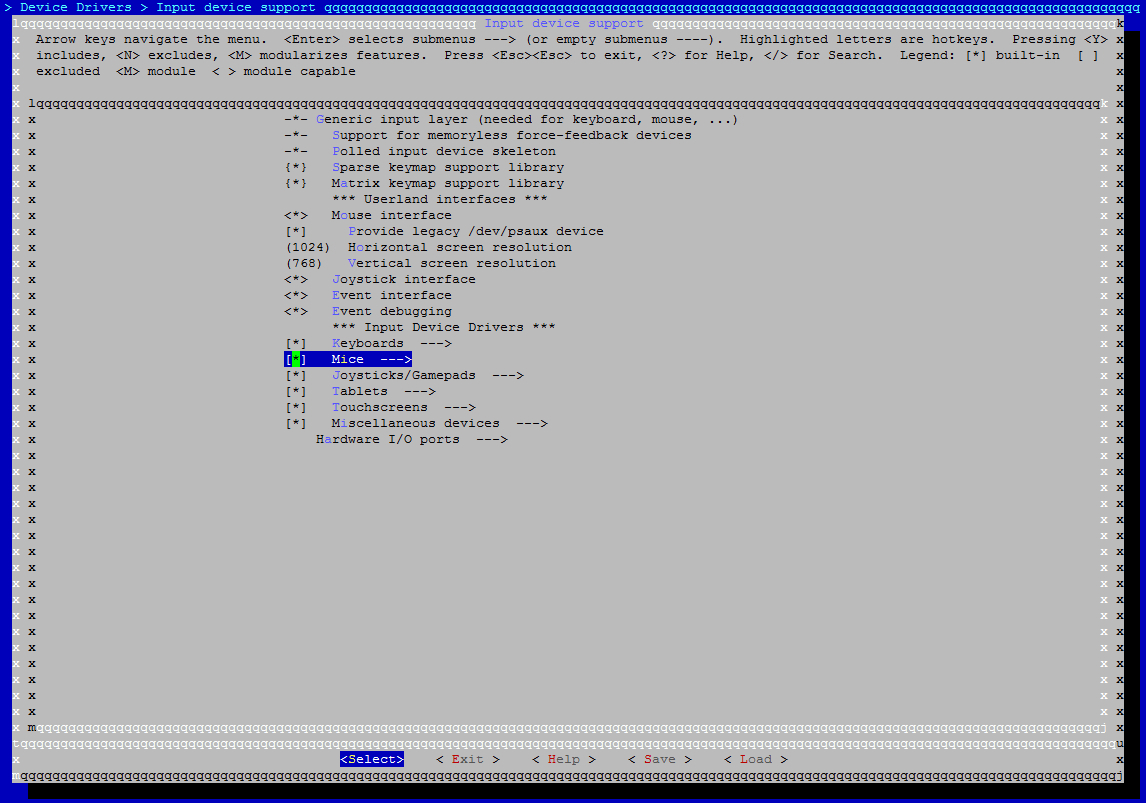
Change M for * (build in not as a module):
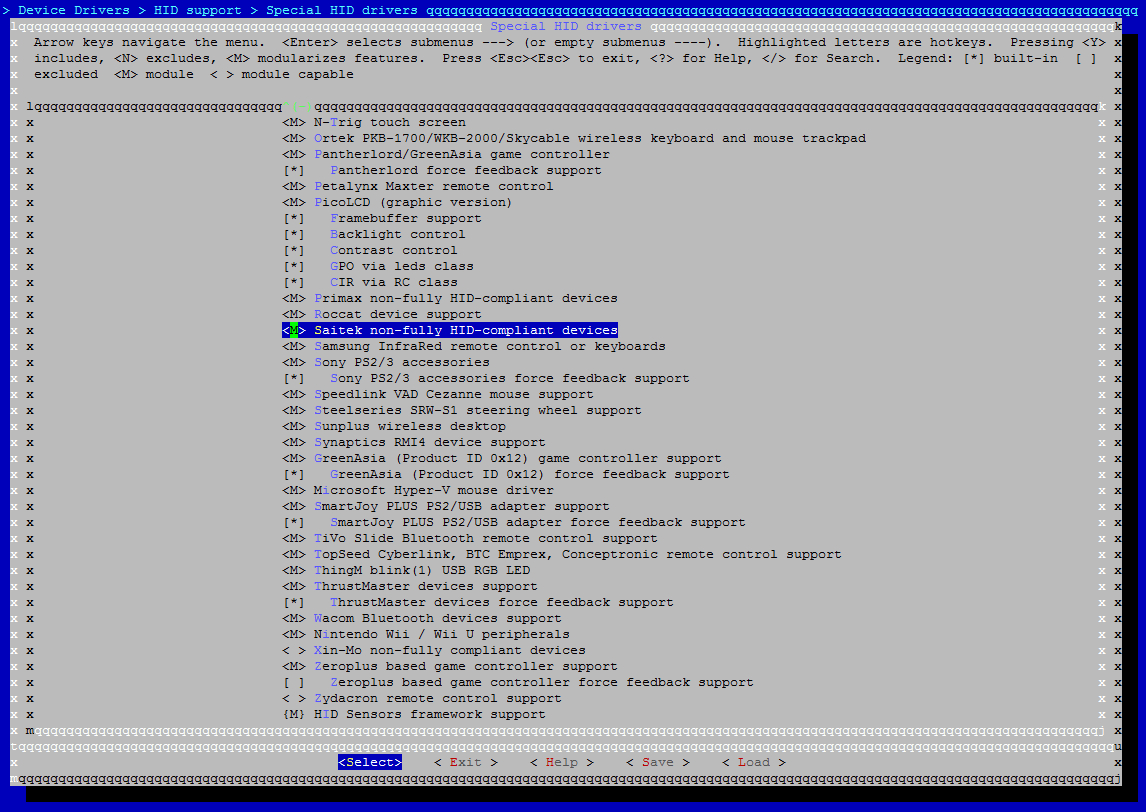
Exactly as shown here:

I'm not sure about that part - is it true or not. This is small change and only one driver more inside the kernel. I know that this is Logitec driver (not MadCatz!) - I've read that in some cases it works somehow (-_-) (well it won't brake anything):

After that - exit Kernel Menu.
Now we are ready to start the build. You can speed up the compilation process by enabling parallel make with the -j flag. The recommended use is ‘processor cores + 1′, e.g. 5 if you have a quad core processor:
sudo make -j5 && sudo make modules_install
Finally, install the kernel:
sudo make install
And done - you should have MadCatz mouse drivers enabled without any xorg configuration files to worry about.
FOR DETAILED & SPECIFIC TO YOUR LINUX DISTRIBUTION KERNEL COMPILATION PROCESS - PLEASE CHECK YOUR DISTRIBUTION MANUAL/DOCUMENTATION
This is only 'general howto' where those drivers are inside the kernel, if you'll make your system unbootable due to misconfigured kernel setup/compilation do not blame me. If you don't know the dark side of kernel - don't go there Luke.