Some code for reading and writing to a laptop display's EDID information with an Arduino Special thanks to https://github.com/ItsVixano for helping me with some issues in the code
Disclaimer: I am not responsible for dead EEPROM or Parade eDP chip. You are doing it at your own risk, and my success doesn't garantee yours, as different screens have different parts. The following instructions and code was used to flash a LP140WF1-SPK3 screen, and while I'm pretty sure most screens EEPROMs operate very similarly, I don't have all the panels to know that. While most EEPROMs can tolerate 3.3V and 5V, I can't be certain for all of them.
read.ino: used to read information from the screen
write.ino: used to write information to the eeprom and report back what was written.
Instructions:
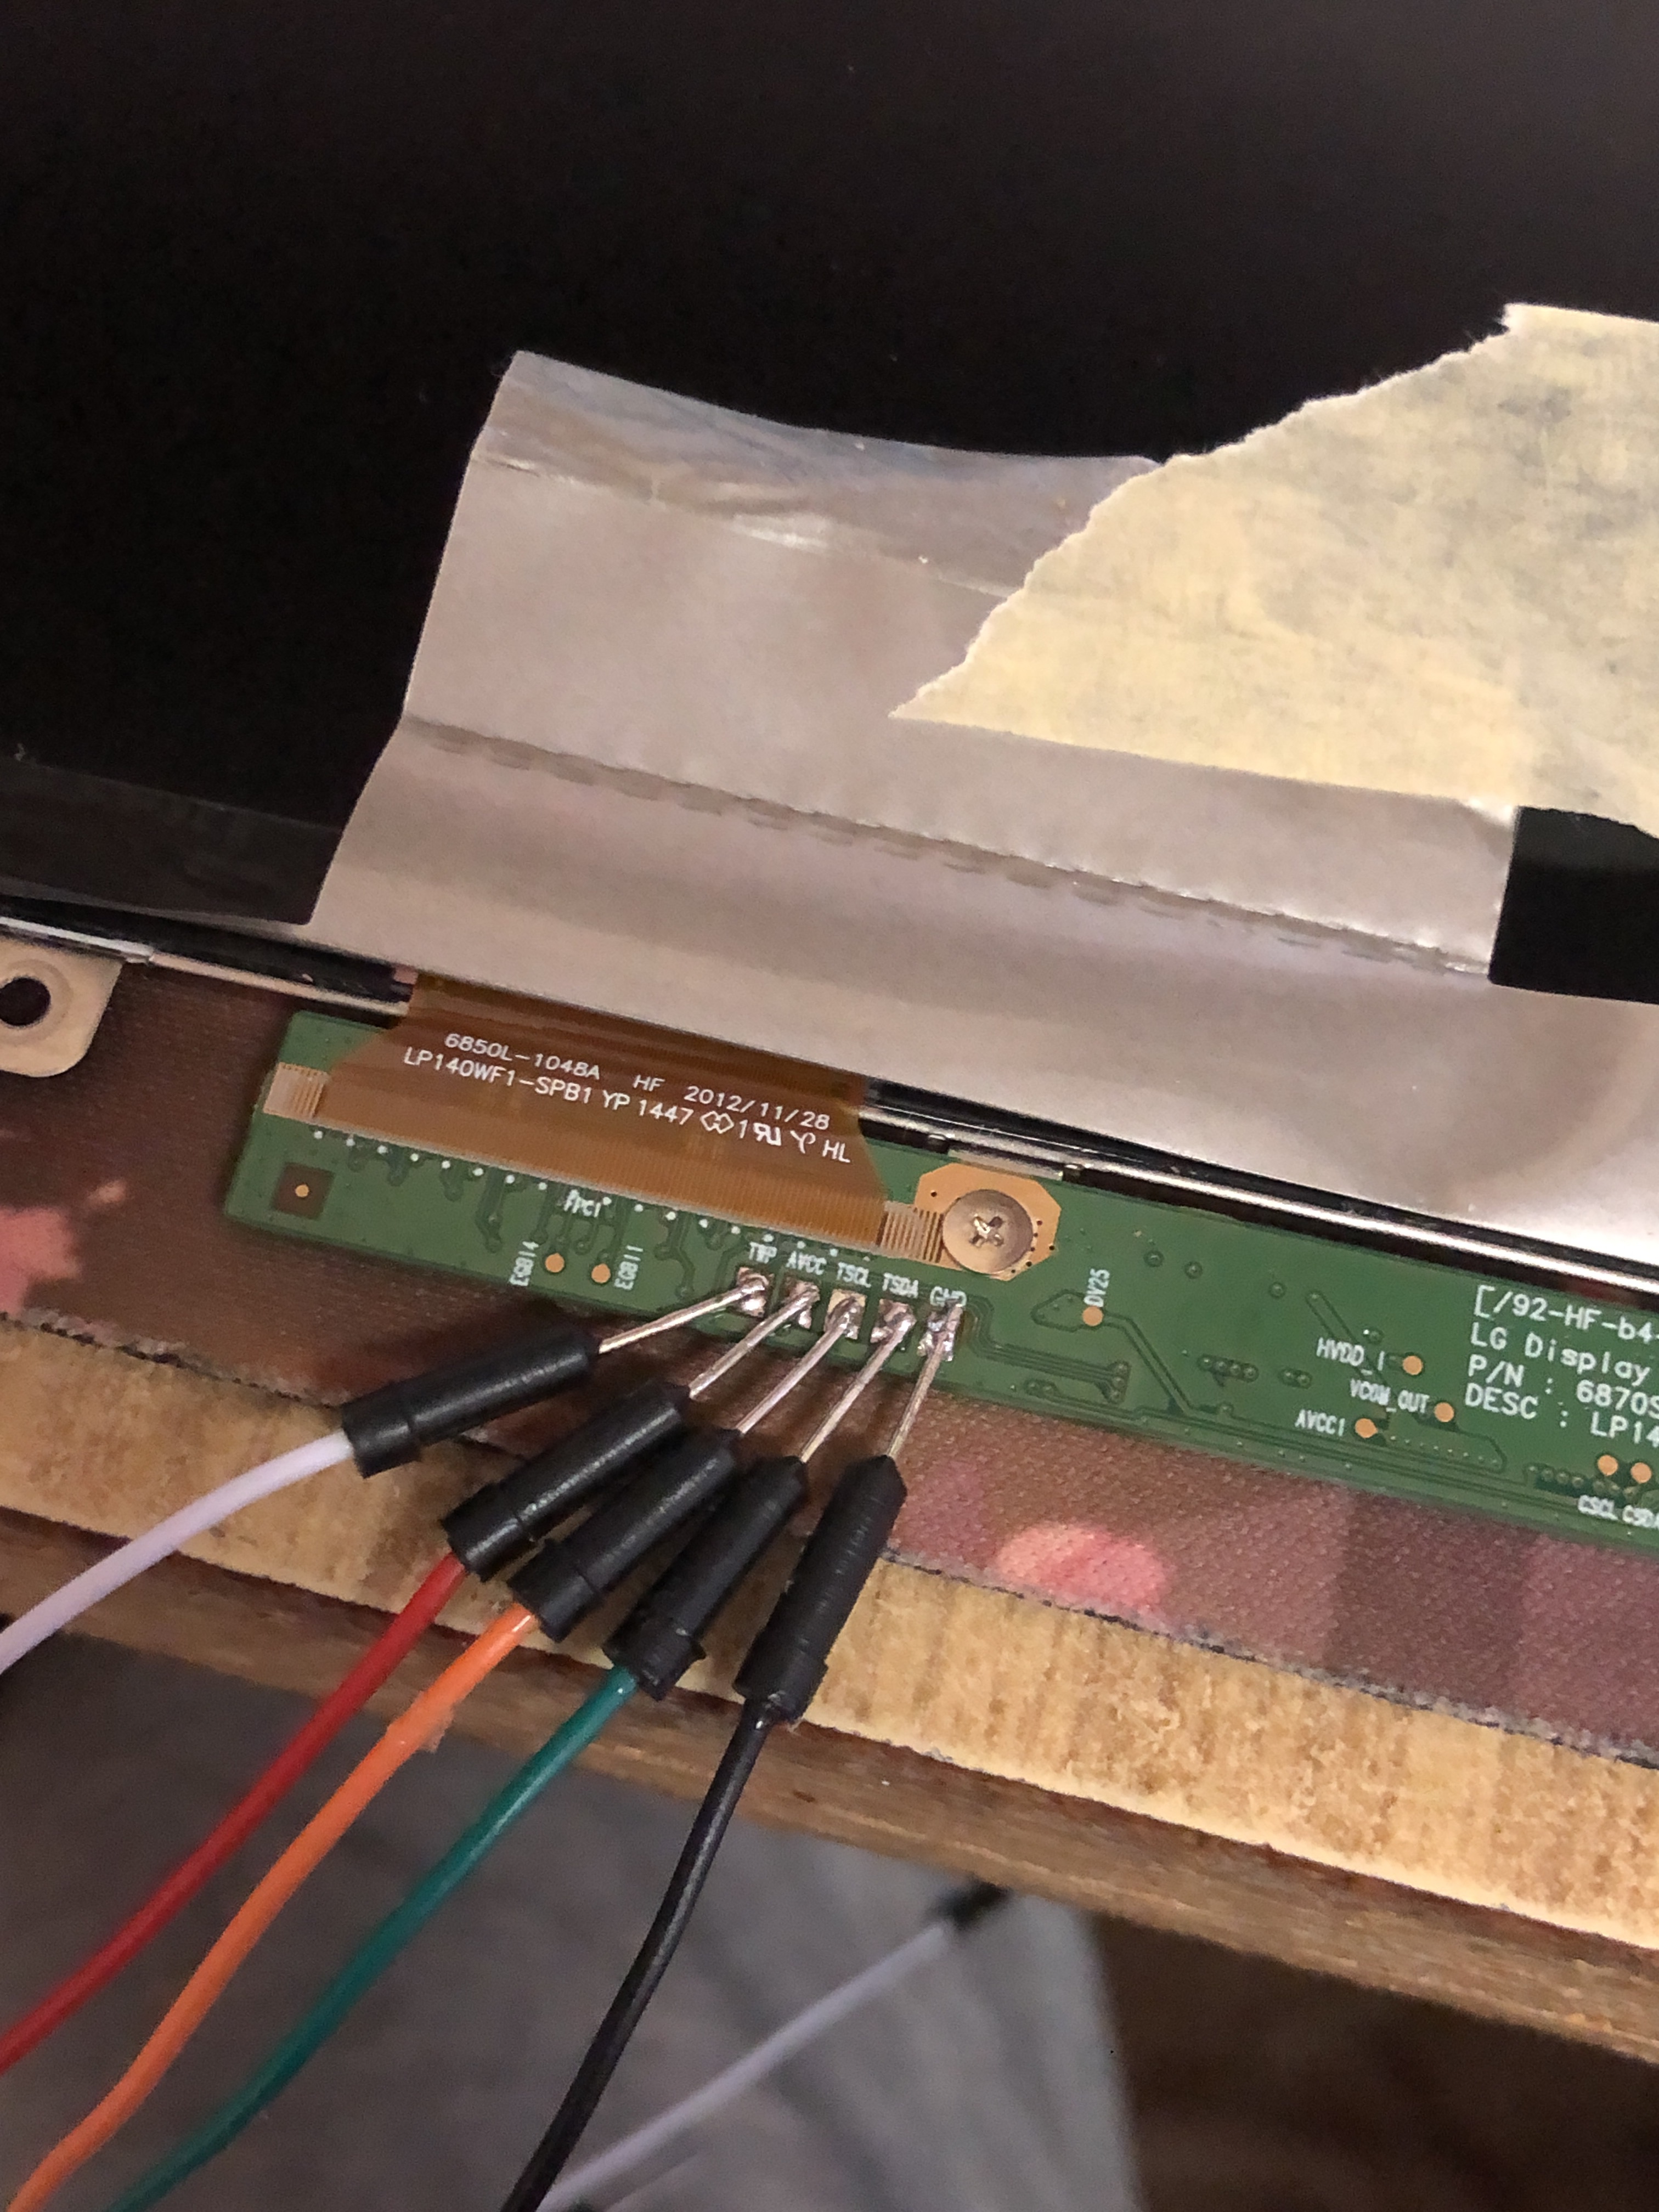
-Peel off the protective cover surrounding the LCD control board, starting from the back side. I can't stress enough how careful you should be here, as the flex cables that connect the LCD lines are sensitive and any excess bending/kinking can destroy the panel. The EEPROM test pins are usually on the front side.
-Connect Vcc to a power supply, usually 2.5V, but the internal 3.3V of the Arduino worked for me
-Connect GND to the Arduino GND
-Connect the SDA pin to the SDA pin of your Arduino
-Connect the SCL pin to the SCL pin of your Arduino
-Connect the WP/WE pin to any digital pin of your Arduino
If you have different than Arduino Uno, you can check the pinouts of different Arduino models to see where the SDA/SCL pins are. Keep in mind that the I2c pins of the arduino operate at 5V, so again, its risky, you might want to use a level shifter, but I connected them directly and was fine.

-Checking the I2c address of the display after its connected
You can use the I2cScanner code: https://playground.arduino.cc/Main/I2cScanner/ upload it to your Arduino and see what pops up. In my case the I2c address was 0x54. This indicates that our screen is connected and detected, so we can proceed to the next step.
-Reading the EEPROM
Using read.ino we can read our screen EEPROM to make sure our connection is correct. Please make sure that EEPROM_ADDR is your correct i2c address and WP_PIN is set to where you connected it to. The program will spit out the output in the Serial monitor in hex. At this point, you should have something to reference it to, such as an internally dumped EDID or an EDID from the internet, and see if they match or atleast resemble a normal EDID code. if not, check your connections.
Internally dumped EDID:
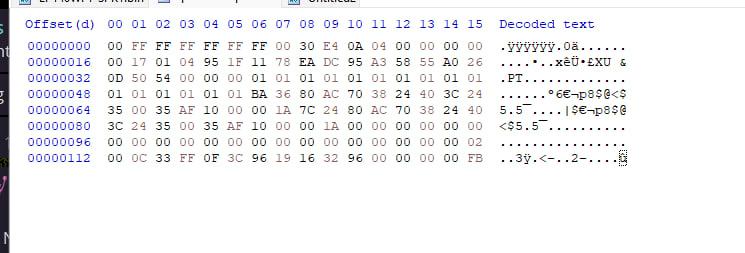
Our EDID that we just dumped with the Arduino:

If all is well and the data is matching, we can proceed on to the next step.
-Writing: using write.ino. Again, please make sure that the EEPROM_ADDR and WP_PIN are correct. In this code, the "lainovo_EDID" is a hex table of 128 bytes where you should write YOUR edid hex values. The values that are in the code are just example values for a LP140WF1-SPK1 screen. Side note is that different screens have Write Protect or Write Enable pins. For my screen it was Write protect (WP), so during writing, it has to be pulled low. If you have Write Enable (WE), you might want to pull it high.
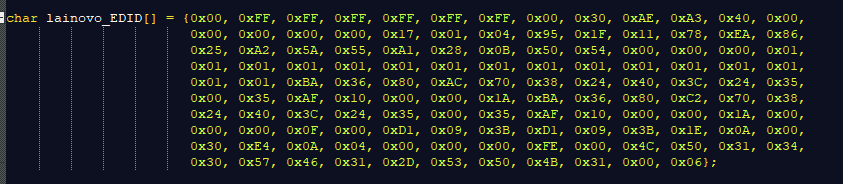
Insert your screen EDID hex data here
After correcting the hex values, that's it, you can upload the code to the Arduino and run it. If all ran well, it should have written the EDID, and it will spit out the newly flashed EDID output in the serial monitor. And that's all!