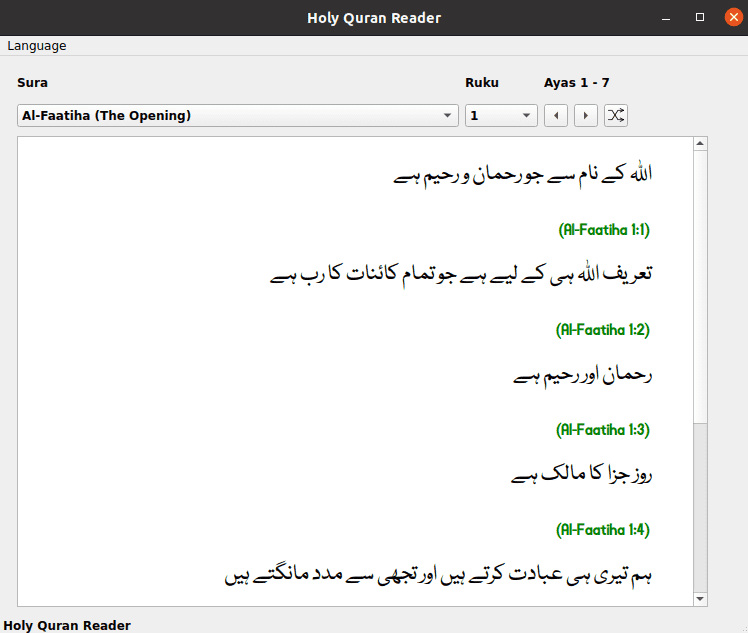
The Islam Companion project is a desktop application. It is available as a snap application on Ubuntu Store. It allows users to read Holy Quran and Hadith. It provides two applications. A Hadith reader and a Quran reader.
The Quran text can be read in 43 languages. These are: Amharic, Arabic, Azerbaijani, Bosnian, Bengali, Bulgarian, Amazigh, Czech, German, Divehi, Spanish, English, Persian, French, Hindi, Hausa, Indonesian, Italian, Japanese, Korean, Kurdish, Malayalam, Malay, Dutch, Norwegian, Portuguese, Polish, Russian, Romanian, Swedish, Somali, Sindhi, Albanian, Swahili, Turkish, Tajik, Tamil, Tatar, Thai, Uzbek, Urdu, Uyghur and Chinese..
Hadith text can be read in Urdu, English and Arabic languages.
The Islam Companion has the following limitations:
- The text for some languages may be difficult to read because of font size.
- The hadith text in English language is a rough translation and may contain grammatical errors.
The Islam Companion application may be downloaded from the Ubuntu Snap Store.

The following steps are required to run the Islam Companion Desktop application from source code.
- Create a Python virtual environment based on Python version 3.6.14 using the command:
python3 -m virtualenv islam-companion -p /usr/bin/python3.6 - Change directory to the new virtual environment and activate the environment using the command:
source bin/activate. - Clone the git repository using the command:
git clone https://github.com/pakjiddat/islam-companion.git. Move the contents of the cloned directory to the root of the virtual environment. The root directory should contain the folders: deploy, snap and source. - Next install the required Python packages using the command:
pip install requirements.txt. - Click here to download the data for the quran and hadith readers. Rename the downloaded folder to data and move it to the source/ folder.
- Run the quran reader application using the command:
python -m source.quran. The command should be run from the root folder of the virtual environment. The hadith reader can be run using the command:python -m source.hadith. - The unit tests for the quran reader can be run using the command:
python -m source.test.test_qapi. - The unit tests for the hadith reader can be run using the command:
python -m source.test.test_hapi. - The quran and hadith readers were developed using the Visual Studio Code editor. The cloned repository contains configuration settings for the Visual Studio Code editor. The source files are in the source/ folder.
- To edit the user interface of the quran reader, open the file qreader.ui using the Qt Designer. This can be done using the command:
qt5-tools designer source/qreader.ui. After editing the file, convert the qreader.ui file to Python code using the pyuic5 tool. This can be done using the command:pyuic5 source/qreader.ui -o source/qreader.py. - The user interface of the hadith reader can be updated in the same way. The user interface file for the hadith reader is hreader.ui.
Before generating executable files update the configuration for quran and hadith readers to production mode. This can be done by setting the variable mode to prod in qconfig.py and hconfig.py.
It is possible to generate standalone executable files for the quran and hadith readers using pyqtdeploy. The executable files contain an embedded Python interpreter as well as the Qt and PyQt5 dependencies. It should be possible to run the executable files on any Linux based desktop environment without installing any packages.
The pyqtdeploy source code contains a demo application that can be used to understand how to use pyqtdeploy. The pyqtdeploy website provides complete information on how to generate executable files. The main steps involved are as follows:
- Create a sysroot using a sysroot specification file. The sysroot.toml file in the demo/ folder is a good starting point. A sysroot is basically a self contained folder which contains all the dependencies of the application. The core dependencies are Python interpreter, PyQt and Qt. Other dependencies such as SSL and Zlib may be specified but are not required.
The dependencies are listed in the sysroot specification file. Each dependency is referred to as a sysroot component. It contains the component version and configuration options, such as list of modules to include or exclude.
Once the sysroot specification file has been created, the sysroot can be generated using the command: pyqtdeploy-sysroot sysroot-config-file. The pyqtdeploy-sysroot script has many useful options such as verifying the validity of the sysroot specification file and viewing available options for all sysroot components. Generating the sysroot takes quite some time depending on your computers hardware resources. On a computer with 4Gb RAM and 2 CPUs, it took around 9 hours.
- Once the sysroot has been created, the next step is to build the source code for the required hardware platform. pyqtdeploy supports deployment on Linux, Windows, MacOs and Android.
It order to build the source code, we need to create a pyqtdeploy project file. The demo.pdt file that is included with the demo application is a good starting point. This file can be edited using the command: pyqtdeploy project-file. This will open a graphical application with several options. The application allows selecting the source code folder, the required PyQt5 modules and Python Standard Library packages. It also allows selecting the main entry point for the application.
Once the project file has been created, we can build the source code using the command: pyqtdeploy-build project-file. This will create a new folder called build-linux-64 in the current directory. The command should take a few seconds to run. Next change directory to this folder and run the qmake command, specifying the full path to the qmake binary that was created in the sysroot. For example: ../sysroot-linux-64/Qt/bin/qmake. The qmake command generates configuration files for the build. It should take a few seconds to run.
The next step is to build the source code using the command: make. This should take 1 or 2 minutes. Once this step has completed, the application binary should be present in the current folder.
To generate executable files for the quran and hadith readers, we need to follow the above steps seperately for each reader. The quran and hadith reader source code in the GitHub repository, contains the sysroot specification file, deploy/sysroot.toml. It also includes the pyqtdeploy project files, which are: deploy/qreader.pdf and deploy/hreader.pdt. Each reader has its own project file. The sysroot specification file is common to both readers.
In order to run the executable files we need to download the data files to the /usr/local/share/islamcompanion folder. This folder should contain a fonts sub folder and the quran and hadith sqlite database files. It also contains an icon file and desktop launcher files.
It should now be possible to run the quran and hadith applications.
A snap is an application packaging format that is supported by all major Linux distributions. A snap application has its own runtime environment and is by default completely isolated from the host environment. It can use resources from the host environment such as desktop interfaces, sound card and more. The snapcraft website provides complete information on building snap applications.
The main steps involved in building snap applications are:
- Install the snapcraft command line tool using the command:
sudo apt-get install snapcraft. - Next create a snapcraft.yaml file that completly describes the application. Place this file in a folder called snap.
- Run the command:
snapcraft --debug, from the folder that contains the snap folder. This will start the packaging process in a virtual machines using multipass. The first time the process is run, it downloads virtual machine image files and installs the required packages, which can take 15 to 20 minutes, depending on the network speed. The next time the process is run, it takes much less time.
If the process ends successfully, there should be a snap file with the .snap file extension in the current directory. This file can be installed in the local computer using the command: sudo snap install snap-file-name --dangerous --devmode. The file may also be uploaded to the Ubuntu Snap Store.
To create a snap file for the quran and hadith readers, run the command: snapcraft --debug --enable-experimental-extensions from the root folder of the virtual environment. The root folder should have a subfolder which contains the snapcraft.yaml configuration file.
Once the snap file has been created, it can be installed on the local computer or uploaded to the Ubuntu Snap Store.
The purpose of the Islam Companion project is to allow users to read the Holy Quran and Hadith text in their own language.
The following resources were used in the development of the project:
- Translations of the Quran were obtained from: https://tanzil.net/trans/
- Translations of the Hadith were obtained from: http://www.hadithcollection.com/downloads.html
- Icons were obtained from: https://www.iconfinder.com/
- Banner image was obtained from: https://pixabay.com/
- Language fonts were obtained from:
- Persian and Uyghur: https://fontlibrary.org/en/font/xb-shafigh
- Sindhi: https://fonts2u.com/zaheer-sindhi.font
- Amharic: https://www.metaappz.com/References/Amharic_Fonts.aspx
- Divehi: https://www.fontspace.com/mv-dawlatulislam-font-f22932
- Kurdish: https://www.kurdfonts.com/font-info/609
- The quran and hadith readers were developed using the PyQt5 framework. The applications were developed in Python language and use Sqlite3 for the database.
To report bugs or make feature requests, post an issue. Constructive feedback is most welcome !.
The Islam Companion project is available under the MIT licence. You may use the application source code in your own projects.