Fully automated process for converting all png and jpeg images to WebP format to the requirements of Google Pagespeed Insights.
Solves the problem "Serve images in next-gen formats".
Easy connection to Joomla.
| English | Español | Deutsch | Türk | Français | Italiano | Português | Polski | Čeština | Русский | Беларуская | 中国 | 日本 | বেঙ্গল | 한국인 |
https://optipic.io/en/webp/joomla/

CDN OptiPic — simple solution to the problem "Serve images in next-gen formats"
- 181 reviews ⭐⭐⭐⭐⭐
- According to recommendations Google PageSpeed Insights
- Easy connection in 5 minutes
- Video instruction in 2 minutes
- Free technical support + installation help
What does OptiPic CDN do when trying to request an image from it:
- Returns the WebP version of the image (if the browser supports WebP format)
- Returns a compressed version without webp (if the browser does not support WebP)
- Makes responsive to mobile screens (if the image is opened from a mobile)
- Caches and speeds up loading reducing the load from your hosting
- Protects your images preserving copyright by EXIF and IPTC tags
- Use your own domain name to load images from img.domain.com, etc
- Lazy load images Images load as you scroll through the pages
Convertation to Webp and image compression occurs in the background and does not slow down the opening of images on the browser. If the optimized version is not yet ready at the time of the image request, the original version is returned without any processing.
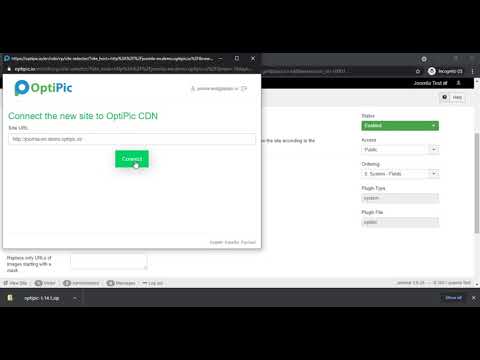
Download and install the official CDN OptiPic plugin for Joomla on your site.
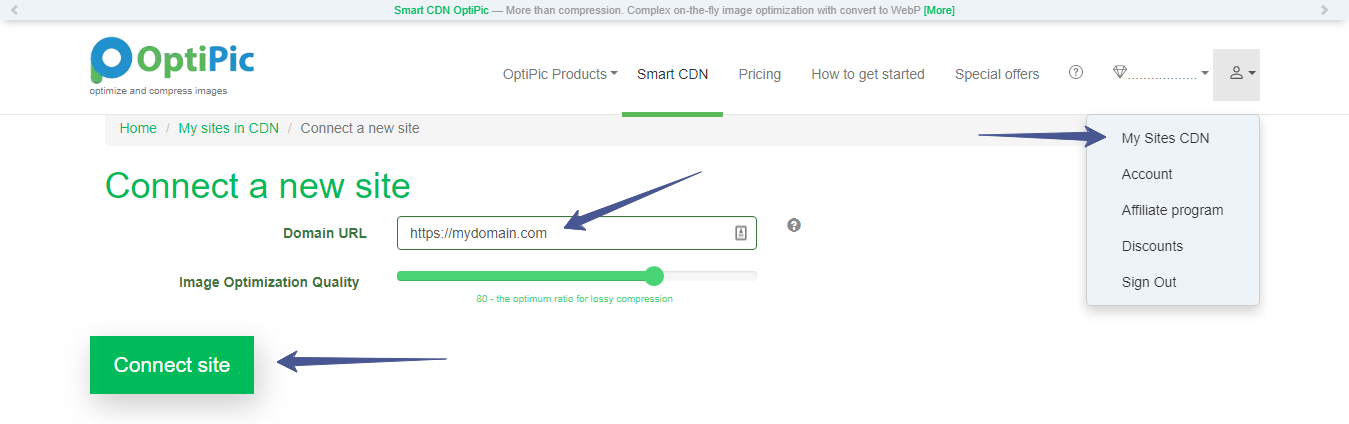
Register in your OptiPic CDN account and add a new site to your CDN control panel.
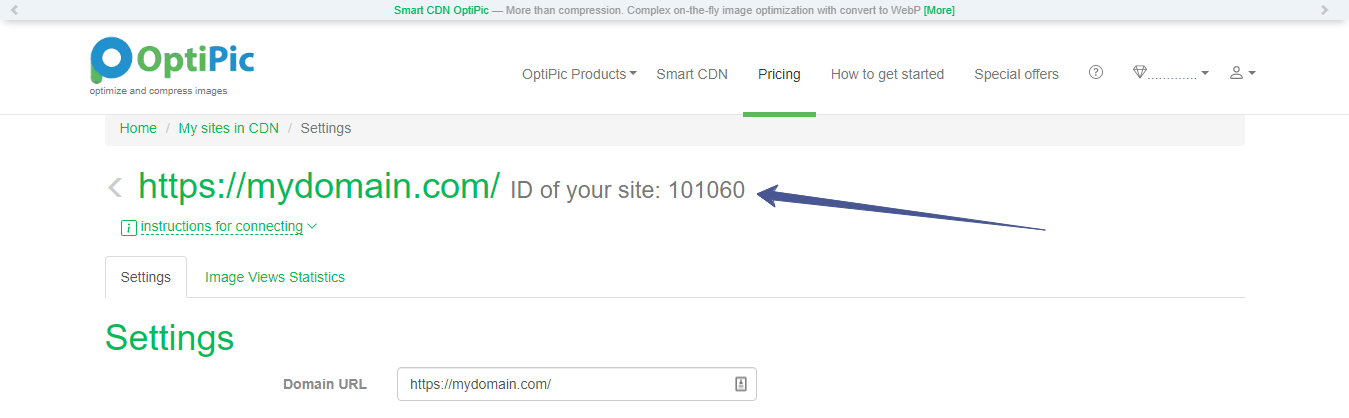
Copy the ID of the created website to the clipboard (Ctrl + C)
Go to the settings page of the previously installed plugin on your site. Paste the copied site ID into the corresponding settings field.
Save plugin settings. Clear the cache in the control panel Joomla. Change other plugin settings if necessary
- Site ID in your personal account CDN OptiPic
You can find out your website ID in your CDN OptiPic personal account.
Add your site to your account if you have not already done so.
To turn off auto-fidelity, just clear the site ID.
-
Domain list (if images are loaded via absolute URL)
Each on a new line and without specifying the protocol (http/https). Examples: mydomain.com www.mydomain.com -
Site pages that do not include auto-replace
Each on a new line and must start with a slash (/) -
Replace only URLs of images starting with a mask
Each on a new line and must start with a slash (/) Examples: /upload/ /upload/test.jpeg -
List of 'srcset' attributes
List of tag attributes, in which you need to replace srcset-markup of images What is srcset? Examples: srcset data-srcset -
CDN domain
Domain through which CDN OptiPic will work.
You can use your subdomain (img.yourdomain.com, optipic.yourdomain.com, etc.) instead of the standard cdn.optipic.io.
To connect your subdomain, contact OptiPic technical support.