This is a simple web application built to compile all FCSIT survey forms for faculty courses. For usage of FCSIT UM undergraduate students only.
-
Individual survey form sharing leads to spams
Every semester, there is always going to be a period of time especially during mid-semester where students will be required to create survey forms for their group/individual assignments and dissemminate them to the public en masse through various platforms, mainly WhatsApp, Telegram and even email. Dubbed as the 'survey season', one is expected to find their social media platforms flooded with endless survey forms which can sometimes lead to spams. This can be quite a nuisance to some especially when the same survey forms are being forwarded in as many common groups as possible to reach more people.
-
Lack of incentive to fill survey forms
Pertaining to point #1, one of the major implications of the survey forms being shared in an unorganised and cluttered manner is that it further disincentivises people — which let's face it, are already generally unresponsive when it comes to filling survey forms — from doing so in the first place.
-
No Single Point of Reference
Due to the lack of a single, reliable, user-friendly and easily accessible platform to host all the survey forms, students understandably have no choice but to share their survey forms in multiple platforms in order to reach as many respondents as possible. Students are also restricted to the target groups that they can access (e.g. A first year student could not share their survey forms in sophomore or final year students' groups), further limiting the number of possible respondents.
There are essentially 3 key reasons that motivated me to do this side project:
-
'What I wish I knew as a 1st Year CS student' by Desmond Yeoh
On the 5th of December 2020, I attended a short sharing session by one of FCSIT's prominent alumni, Desmond Yeoh. He shared some tips on what students can and should do in their early years of study. One of the recommendations include building your GitHub portfolios such as by developing stuffs that can solve real life problems. He outlined 3 benefits of doing so:
- You can flex your resume as interviewers ALWAYS ask for GitHub & portfolios
- You get to solve your own problems as well as the community
- You can showcase your technical & problem solving skills
Soon after that, I started brainstorming on several ideas on what existing real life issues can I solve as a mini side project. Judging by this GitHub repository and the endless notifications I got from my social media platforms, you know the answer already.
-
Improve existing FCSIT FYP Survey web app
Full disclaimer: This idea is not originally mine, at least at its most fundamentals. Earlier this year, two of my seniors Jia Xiong and Chun Wah developed a simple React web app to compile all FYP survey forms. It was not properly advertised (I was among the few who found it lying somewhere inside SiswaMail). Nevertheless, the concept of hosting the survey forms in one place intrigued me, and I decided to expand the idea by collecting not just FYP survey forms, but also for other courses and years as well.
-
Cement my understanding of Django
This web app is built almost entirely using Python's Django back-end framework. I have been learning and using it extensively for months during my internship. I figured, what better way to actually put my months worth of skills in web development to the test than to actually develop my own app? In addition, I decided to challenge myself further by testing whether I can finish the web app in less than a week, or even a day. Hackathon-style, so to speak.
Huge shoutouts to the following groups of people for supporting this mini side project of mine:
- Desmond Yeoh (for motivating me to do this in the first place)
- Jason Chao (my incredibly supportive internship supervisor)
- Izzah Gani (the first person whom I pitched the idea to at 1AM)
- Faidz Hazirah, Nadia Jamhari (my earliest beta testers)
- Bootstrap 4.5.3
- Bootstrap-Select 1.13.14
- Summernote 0.8.18
- Django==3.1.4
- djangorestframework==3.12.2
- django-summernote==0.8.11.6
- dj-database-url==0.5.0
- django-heroku==0.3.1
- gunicorn==20.0.4
- whitenoise==5.2.0
- python-dotenv==0.15.0
- psycopg2==2.8.6
- psycopg2-binary==2.8.6
- beautifulsoup4==4.9.3
- Markdown==3.3.3
Run the following command inside your virtual environment:
- Using pipenv:
$ pipenv install -r requirements.txt # (Python 2)
$ pipenv3 install -r requirements.txt # (Python 3)
- Using venv:
$ pip install -r requirements.txt # (Python 2)
$ pip3 install -r requirements.txt # (Python 3)
Click here to view the deployed web app!
Click here to visit the GitHub repository!
This simple web app is — well — incredibly simple. It is a single-page application (SPA) so users will not have to worry about navigations etc.
Right at the top, users can clearly see the call-to-action (CTA) 'Add my survey' button, which when clicked, will open a modal form that allows them to fill in the details of their surveys:
Survey forms are also unapproved by default, and will only appear on the web app after approval from the administrator. This is to ensure that each survey form is thoroughly inspected and to avoid spams or malicious contents.
Although incredibly simple at its core, the web app supports a wide range of functionalities. Users can easily customise your survey descriptions using:
- Basic markdowns (e.g. bold, italic, underline)
- Text-formatting (e.g. font-size, line-height, paragraph)
Users do not have to worry about searching for their courses, as the Year and Course Code dropdowns are inter-linked. Selecting the year will automatically filter the courses available in that year.
One distinct feature for this web app is that users can set the expiry date for their survey forms, giving them the ability to restrict how long they want their survey forms to be displayed in the web app. If users are uncertain on the expiry date, the system will automatically set the expiry date to 1 month from date of application. Credits to Faidz for suggesting this feature to me!
Using only simple Bootstrap tabs and pills navigation, users can browse the surveys easily with only a few clicks! The left-side pills refer to the years of study while the upper-tabs refer to the individual courses for each year. Users can also hover over each course code tab to see the course name (handy for those who wants to know the course name without having to click the tab itself).
Under each course tab, there is the course title as well as a search bar, which users can use to search for surveys based on their title, description and/or PIC name. The survey panels will adjust dynamically based on the search input. Credits to Izzah for suggesting this feature to me!

The survey forms are displayed in Bootstrap accordion/collapse. The panel header consists of the survey title, expiry date, link and share dropdown. Clicking the link will open a new tab, which will redirect you to the survey form itself.
Users can click on each accordion panel to expand its content, which contains the PIC name, email and description. You can only expand the content of the survey panel one at a time to ensure that the accordion is not cluttered.

This is my most favourite feature of all! When users click on the ellipsis '...' button at the right side of the survey panel, a dropdown menu will appear, listing the 3 ways to share their survey forms:
-
Share to WhatsApp
Thanks to WhatsApp API, users can forward the survey forms to their WhatsApp contacts/groups. Users will be prompted to open their WhatsApp Web client and select which groups of people to forward the survey to.
-
Share to Twitter
Twitter's Tweet Web Intent API allows users to also share the survey forms via tweet. Users will be prompted to log into their Twitter account if they haven't before posting the tweet.
-
Share to Email
Last but not least, users can also share their survey forms via email. By default, the web app will include student-info (student_info-list@siswa.um.edu.my) and FSKTM STUDENT - UG (fsktm_student-list@um.edu.my) as recipients, and attach the survey's title, description and link as subject and body respectively.


This last feature is strictly for administrators access only. With Django's built-in admin dashboard, administrators can directly access the dashboard by clicking the Admin link at the navigation bar.
This has been such a rewarding experience for me. I developed and deployed the whole web app in less than half a day, from my first ever commit on Monday, Dec 07 2020 at 2:38PM until my first successful deployment of the working prototype on Monday, Dec 07 2020 at 11:39PM (thanks, Git Graph!). This is only the second web app developed entirely by me, so it is undeniably a personal achievement.
That being said, I hope that this web app will be beneficial to the students of FCSIT and serve its purpose, as well as motivate others to come up with creative ways and make use of their technical prowess to solve real-life problems and contribute back to society.
For any enquiries and bug reports, please contact me at mdrhmn99@gmail.com.
One of the main features of this web app is the ability for users to share the surveys to social media platforms such as WhatsApp, Email and Platform. However, because I integrated Summernote into the web app specifically the survey's description, parsing the description is not as straightforward. I need to find a way to convert the markdown text into plain text. I
There is no direct way to convert markdown to plain text. However, thankfully, I found a way to do just that by first converting the markdown text into HTML using Markdown library, and then convert the HTML to plain text using BeautifulSoup library:
First, import the necessary libraries and store all the string contents that you want to be converted inside a variable. Then, use the markdown function to convert the markdown string to HTML.
    from bs4 import BeautifulSoup
    from markdown import markdown

    markdown_string = request.POST['title'] + '\n\n' + request.POST['description'] + '\n\n' + request.POST['survey_link']
    html = markdown(markdown_string)
We also use regular expressions to remove code snippers.
    html = re.sub(r'<pre>(.*?)</pre>', ' ', html)
    html = re.sub(r'<code>(.*?)</code >', ' ', html)
Finally, use BeautifulSoup to parse the HTML back to plain text.
    soup = BeautifulSoup(html, "html.parser")
text = ''.join(soup.findAll(text=True))In order to use APIs such as that of WhatsApp's, first you need to encode your text into a URL-friendly format (called URL Encoding). This converts:
"your regular text, including links like https://facebook.com", into:
"your%20regular%20text%2C%20including%20links%20like%20https%3A%2F%2Ffacebook.com"
To do this in Django/Python, one just need to use the urllib.parse library as follows:
    import urllib.parse

    link = urllib.parse.quote(text)
    return redirect('https://api.whatsapp.com/send?phone=&text=' + link)
Using the library's quote() function, you can easily encode any string into URL-friendly format that is ready for API request.
What if you want to keep Summernote's markdown features but prevent any sort of editing?
If you Google it out, the official documentation will tell you to just disable Summernote using disable(). This is not what we want because this will also disable the markdown display as well.
After a ton of research and trial and error, I found a way to set Summernote to read only mode with a bit of clever tweaking.
First, set the Summernote initialisation settings for airMode, disableDragAndDrop and toolbar as follows. This is to ensure that the toolbar is hidden and users will not be able to drag and drop anything inside the Summernote textarea.
    $('.summernote').summernote({
        height: 200, // set editor height
        minHeight: 200, // set minimum height of editor
        maxHeight: 340, // set maximum height of editor
        airMode: false,
        disableDragAndDrop: true,
        toolbar: [],
        // focus: true // set focus to editable area after initializing summernote
        placeholder: '',

    });
Next, add an ID into the div container that surrounds the Summernote textarea like the example below:
    <div class="card-body" id="survey-description-main">
        <label>Description</label>
        <textarea class="summernote" name="description" rows="7"
            placeholder="Enter description" required
            readonly>{{ survey.description }}</textarea>
    </div>
Then, using the container ID, disable Summernote's resize bar and make the whole Summernote textarea uneditable using the following codes:
    $("#survey-description-main .note-resizebar").removeClass("note-resizebar")
    $('#survey-description-main .note-editable').attr('contenteditable', false);
Removing the .note-resizebar class will remove the resize bar at the bottom of the textarea while setting the contenteditable attribute of ```.note-editable`` div to false will render the whole Summernote textarea uneditable.
If you're wondering as to why we need to use the container ID, this is because when I tried otherwise it did not work. It
Up until this point, you should notice that the whole Summernote textarea is greyed out with no toolbar and resize bar. We can fix this easily with a bit of CSS tweaking:
    .note-editor.note-airframe .note-editing-area .note-editable[contenteditable=false], .note-editor.note-frame .note-editing-area .note-editable[contenteditable=false] {
        background-color: white;
    }

    .note-editor.note-airframe .note-statusbar, .note-editor.note-frame .note-statusbar {
        background-color: rgba(255, 255, 255, 0);
        border-bottom-left-radius: 4px;
        border-bottom-right-radius: 4px;
        border-top: 0px solid rgba(0, 0, 0, .2);
    }

    .note-editor.note-frame {
        display: block!important;
    }
What these will do is that it will set the background color to white and remove any remnants of the resize bar.
When in development, by default Django will set DEBUG to True to allow developers to clearly see the error details for debugging purposes. However, in production one is expected to set it to false because obviously, you wouldn't want users to see the error details and prefer them to be obscured instead. Besides, having the error details displayed reveals a lot about your codes, which can be dangerous and susceptible to hacking.
Instead of having to manually set DEBUG to True and False back and forth, you can utilise Python's socket library to set the DEBUG state depending on which environment the web app is running:
    import socket

    if socket.gethostname().endswith(".local"): # True in your local computer
        DEBUG = True
        ALLOWED_HOSTS = ["localhost", "127.0.0.1",]
    else:
        DEBUG = False
        ALLOWED_HOSTS = ['https://fcsit-survey-app.herokuapp.com/']
With these few lines of codes, Django will automatically set DEBUG setting as well as the ALLOWED_HOSTS setting its appropriate value depending on the environment itself.
The local version of the Django app is using db.sqlite3 as its database. However, when we visit the Heroku version, APP_NAME.herokuapp.com, Heroku will need to use a PostgreSQL database instead.
What we want to do is to get our app running with SQLite whenever we’re working on it locally, and with Postgres whenever it’s in production. This can be done using the installed python-dotenv library.
We will then use a file called .env to tell Django to use SQLite when running locally. To create .env and have it point Django to your SQLite database:
$ echo 'DATABASE_URL=sqlite:///db.sqlite3' > .envInclude the .env file inside our .gitignore when pushing to Heroku by running the following command:
$ echo '.env' >> .gitignoreNext, import the necessary libraries for deployment purposes:
    # backend/settings.py

    import django_heroku
    import dotenv
    import dj_database_url
Then, we need to set up the database configuration:
    # backend/settings.py

    # Build paths inside the project like this: BASE_DIR / 'subdir'.
    BASE_DIR = Path(__file__).resolve().root.root

    dotenv_file = os.path.join(BASE_DIR, ".env")
    if os.path.isfile(dotenv_file):
        dotenv.load_dotenv(dotenv_file)
Since .env won’t exist on Heroku, dotenv.load_dotenv(dotenv_file) will never get called on Heroku and Heroku will proceed to try to find its own database — PostgreSQL.
We also need to configure the DATABASES setting as shown below:
    # backend/settings.py

    DATABASES = {}
    DATABASES['default'] = dj_database_url.config(conn_max_age=600)
The idea here is to clear the DATABASES variable and then set the 'default' key using the dj_database_url module. This module uses Heroku’s DATABASE_URL variable if it’s on Heroku, or it uses the DATABASE_URL we set in the .env file if we’re working locally.
If you ran the Django application as specified above, you might get an error when working locally because the dj_database_url module wants to log in with SSL. Heroku Postgres requires SSL, but SQLite doesn’t need or expect it. Here's how to fix that:
    # backend/settings.py

    # This should already be in your settings.py
    django_heroku.settings(locals())

    # Add these at the very last line of settings.py
    options = DATABASES['default'].get('OPTIONS', {})
    options.pop('sslmode', None)
Test everything out by running the local Django server using python3 manage.py runserver.
Here is an outline following Heroku's from-product-to-productionized instructions for a Django deployment to Heroku:
-
Signup for Heroku if you don't have an existing account.
-
Install the Heroku CLI. For MacOS, use
$ brew tap heroku/brew && brew install heroku. -
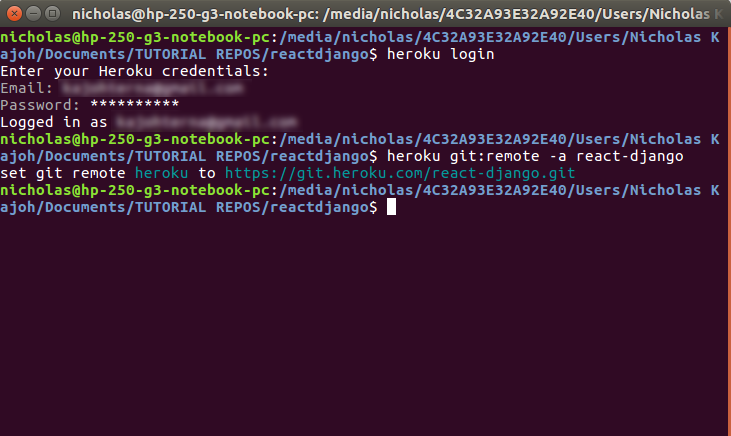
Log in to your Heroku account by entering your credentials using
$ heroku loginor$ heroku login -iif you faced IP address mismatch issue: -
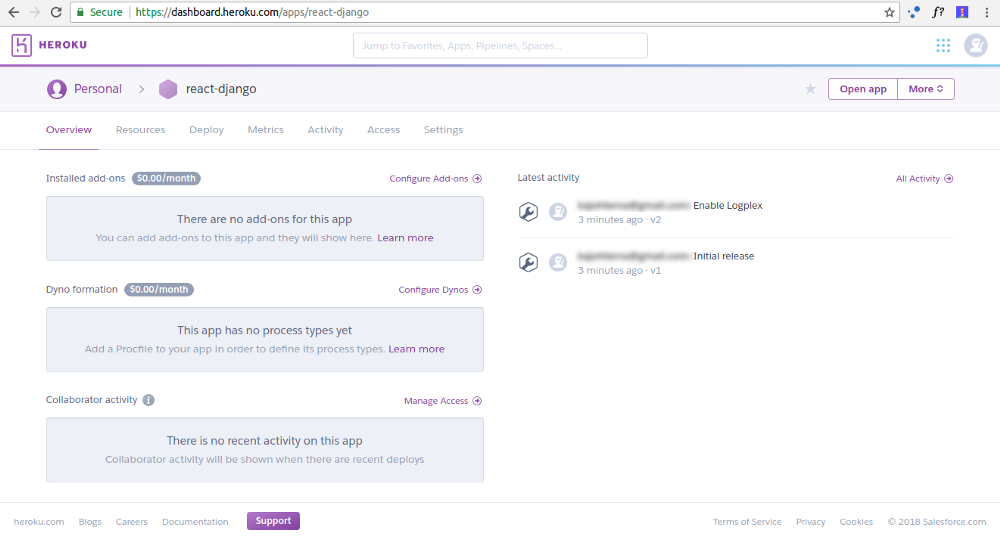
Create a new Heroku app either via Heroku CLI (
$ heroku create APP_NAME) or directly in the Heroku dashboard: -
Add the Heroku remote via
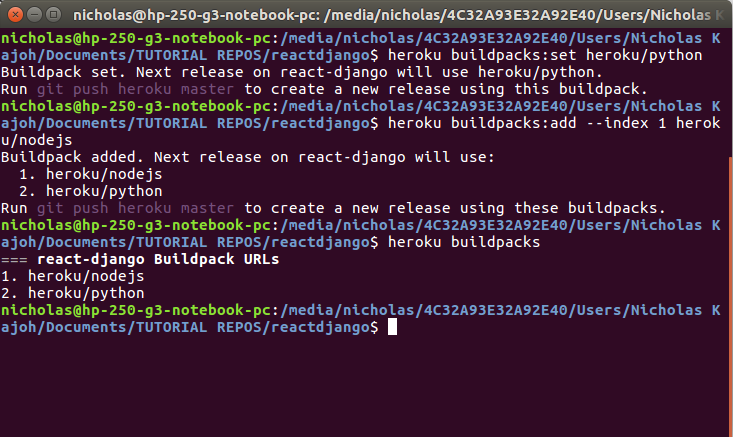
$ heroku git:remote -a your-heroku-app.- Note that the buildpacks must be added in that order. We can see the buildpacks we’ve added by running
$ heroku buildpacks. The last buildpack on the list determines the process type of the app.
- Note that the buildpacks must be added in that order. We can see the buildpacks we’ve added by running
-
Configure PostgreSQL Heroku addon
- During production, Heroku will not be using SQLite database. Instead, we need to use PostgreSQL by configuring the addon to our app using
$ heroku addons:create heroku-postgresql:hobby-dev - You can check whether this is successful by running
$ heroku config:
$ === APP_NAME Config Vars DATABASE_URL: postgres://[DATABASE_INFO_HERE]- The database info from the code snippet above refers to the URL containing your database’s location and access credentials all in one. Anyone with this URL can access your database, so be careful with it.
- You will notice that Heroku saves it as an environment variable called
DATABASE_URL. This URL can and does change, so you should never hard code it. Instead, we’ll use the variableDATABASE_URLin Django.
- During production, Heroku will not be using SQLite database. Instead, we need to use PostgreSQL by configuring the addon to our app using
-
Configure Heroku config variables
- According to Heroku, config variables are environment variables that can change the way your app behaves. In addition to creating your own, some add-ons come with their own.
- There are several environment variables that need to be set:
$ heroku config:set ALLOWED_HOSTS=APP_NAME.herokuapp.com $ heroku config:set ALLOWED_HOSTS=APP_NAME.herokuapp.com $ heroku config:set SECRET_KEY=DJANGO_SECRET_KEY $ heroku config:set WEB_CONCURRENCY=1 -
Import
django-herokuinsidesettings.pydjango-herokuis a Django library for Heroku applications that ensures a more seamless deployment and development experience.- This library provides:
- Settings configuration (Static files / WhiteNoise)
- Logging configuration
- Test runner (important for Heroku CI)
- In
settings.py, include the following at the very bottom:
    # backend/settings.py

    # Configure Django App for Heroku.
    import django_heroku
    django_heroku.settings(locals())
-
Set up WhiteNoise configuration
WhiteNoise allows your web app to serve its own static files, making it a self-contained unit that can be deployed anywhere without relying on nginx, Amazon S3 or any other external service. (Especially useful on Heroku, OpenShift and other PaaS providers.)
Since this is already installed from the
requirements.txtfile earlier on, we need to updatesettings.py:# backend/settings.py MIDDLEWARE = [ 'django.middleware.security.SecurityMiddleware', 'whitenoise.middleware.WhiteNoiseMiddleware', # ... ] STATIC_ROOT = os.path.join(BASE_DIR, 'staticfiles') STATICFILES_STORAGE = 'whitenoise.storage.CompressedManifestStaticFilesStorage'
-
Set up Heroku-specific files
Heroku will install a default Python version if you don't specify one, but if you want to pick your Python version, you'll need a
runtime.txtfile.Create one in the root directory, next to your
requirements.txt,manage.py,.gitignoreand the rest. Specify your Python version with the prefixpython-that you want your application to run on:python-3.9.0
When deploying the web app, Heroku will need to install all the required dependencies for the web app to run by referring to the
requirements.txtfile.To ensure that all dependencies are included, consider freezing your dependencies using the command
$ pip freeze > requirements.txt. This will make your build a little bit more predictable by locking your exact dependency versions into your Git repo. If your dependencies aren't locked, you might find yourself deploying one version of Django one day and a new one the next.Heroku apps include a Heroku-specific
Procfilethat specifies the processes our application should run. The processes specified in this file will automatically boot on deploy to Heroku.Create a file named
Procfilein the root level directory using$ touch Procfilecommand, right next to yourrequirements.txtandruntime.txtfiles. (Make sure to capitalize the P of Procfile otherwise Heroku might not recognize it!):Then, fill in the codes below:
release: python manage.py migrate web: gunicorn backend.wsgi --log-file - -
Commit and Push
Once all the previous steps are completed, we are ready to finally commit and push all changes:
    $ git add .
    $ git commit -m "blah blah blah"
    $ git push heroku master
After the build is done and your app has been released, visit
YOUR-APP-NAME.herokuapp.com
When deploying to Heroku, make sure that your migrations folder are not included inside .gitignore! Heroku will need the migration files to update the PostgreSQL database.
- https://fcsit-fyp-surveys.herokuapp.com/
- https://www.codementor.io/@jamesezechukwu/how-to-deploy-django-app-on-heroku-dtsee04d4
- https://stackoverflow.com/questions/59332225/hitting-500-error-on-django-with-debug-false-even-with-allowed-hosts
- https://stackoverflow.com/questions/6208363/sharing-a-url-with-a-query-string-on-twitter
- https://help.heroku.com/GDQ74SU2/django-migrations
- https://developer.twitter.com/en/docs/twitter-for-websites/web-intents/overview
- https://pixl.my/how-to-create-a-share-with-whatsapp-link-mobile-desktop-compatible/
- https://stackoverflow.com/questions/35803713/migrate-databases-from-local-django-to-heroku