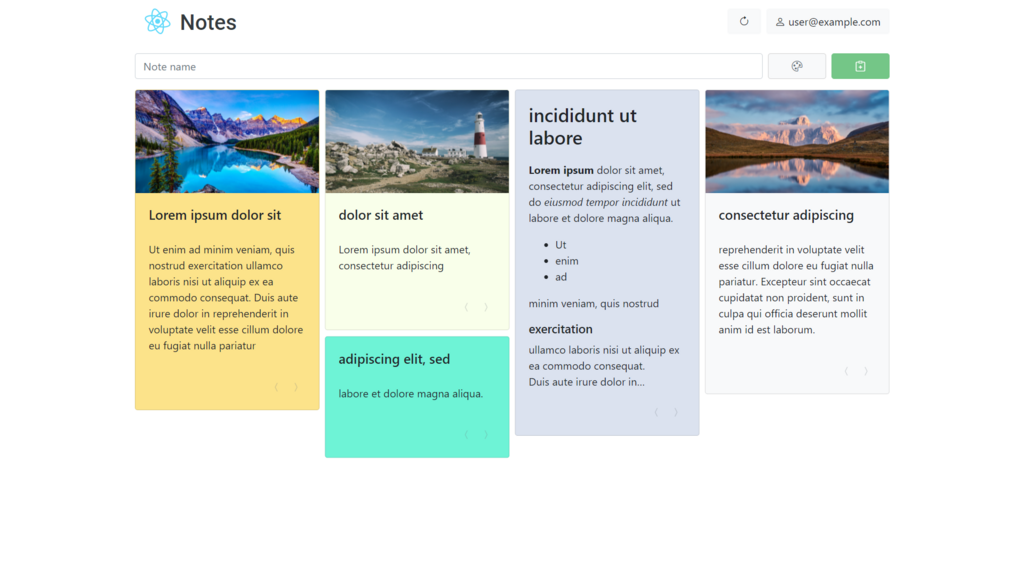
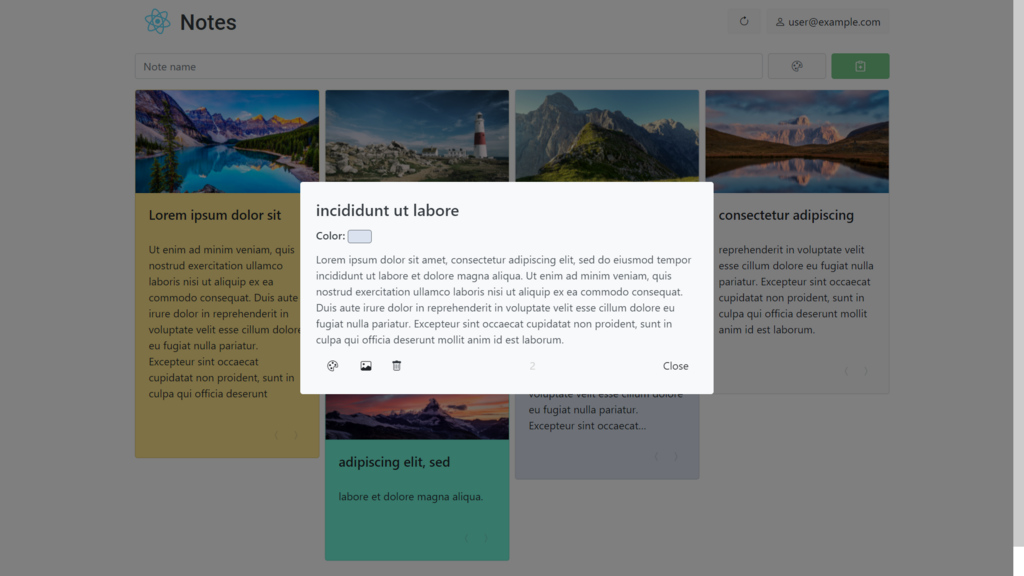
This is a MERN-based notes web-app with authorisation, live synchronization and functional user interface. Here you can edit notes text content, add some markdown elements, upload images for cards.
Project has "cliend and server" structure. You can find it in the corresponding subfolders.
The server with REST API was built with Node.js platform and Express library. It has three main API routes, additional route for WS addres check and default route for static client build. I used MongoDB and Mongoose lib to store and manage data. There are three entity types in database - Users, Notes and Media (images). For authorization, I used the JsonWebToken and Bcrypt libraries. I also used WebSocket to connect client and server for real-time synchronization.
The client was made with React framework. It was styled with Bootstrap 4. I used React Router DOM extension to route client pages - authorisation, main notes page and about page. I also used some libs to make interface more useful and pretty. The main one - React Stack Grid, used to conveniently arrange note cards on the screen. There are many custom hooks here to manage authorization, interface elements, user data, and their synchronization. Client was built with Progressiwe Web App technology. So it can be partially cached for offline use, or rather for faster loading.
I also tried to make unit tests and documentation based on code comments. You can see it below in this document.
Open mern-notesapp (here synchronization disabled) or react-notes (here PWA disabled) to view working demo in the browser.
First of all, set up your project by creating .env file in ./server folder with next content:
mongoUri = "<YOUR MONGO URI>"
jwtSecret = "<SECRET KEY>"
Main available scripts in the project directory:
installs packages for development
installs client and server packages
starts client and server concurrently in dev mode
Use next scripts:
to install and build app before run it
to run production app version
runs concurrently tests for client and server
Local mongoUri will be "mongodb://localhost:27017/mydb"
-
Download and install MongoDb server from www.mongodb.com/try/download/community (set it on "D:\Program Files" to not edit the .bat file)
-
Edit mongo_win_install.bat file and fix next variables (dont use spaces around "="):
- set
MongoDb_ExePath- path to mongod.exe - set
MongoDb_DataFolderPath- path to db folder
- set
-
To start Mongo database use
npm run mongo-windows:start
-
To prepare and setup mongo use
npm run mongo-ubuntu:full-setup -
To start Mongo database use
npm run mongo-ubuntu:start
Can be also used with Heroku
Use MongoDB Atlas. Look video lesson here
- Clone from GitHub
- Run
cd react-notes && npm run deploy && cd - Use PM2 with this ecosystem template:
module.exports = {
  apps: [
    {
      name: "react-notes",
      script: "./react-notes/server/app.js",
      watch: "./react-notes/",
      "ignore-watch": [
        "node_modules",
        "./react-notes/node_modules",
        "./react-notes/server/node_modules",
        "./react-notes/client/node_modules",
      ],
      "max-memory-restart": "150MB",
      env: {
        NODE_ENV: "production",
        mongoUri: "<YOUR MONGO URI>" /*replace this*/,
        httpsRedirect: false /*true if enable*/,
        jwtSecret: "<SECRET KEY>",
      },
    },
  ],
};
Be careful - bash start folder on your server may be located differently
- Create Heroku app
- Connect to GitHub repo
- Add Node.js buildpack in settings
- Add config vars:
- NODE_ENV: production
- mongoUri: YOUR MONGO URI
- httpsRedirect: true
- jwtSecret: SECRET KEY
- Click "Deploy branch" button
JSDoc documentation
use to generate docs
see exiting documentation