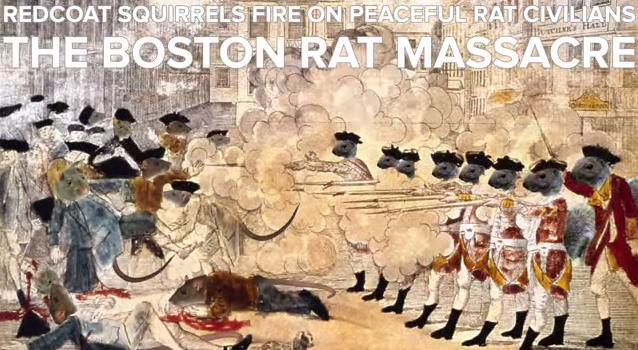
Since our January meetup, wherein we used squirrels as a theme for learning about LeafletJS, maptimeLEX and maptimeBoston, the latter of which is staunchly pro-rat, have been in a protracted #maptimewar. To get caught up to speed, check out the videos below produced by maptimeLEX and maptimeBoston, respectively:
Most of the vitriol has come from the folks in Beantown, but we've managed to stand our ground pretty well thus far. That said, it's time to go on the offensive!
- Getting Started with OdysseyJS
1.1. The sandbox
1.2. The editor
1.3. The basemap
1.4. Finishing and sharing - Markdown
- Boston Resouces
- Lexington Resources
- Maps + Story
For this March meetup, we are going to try and keep things simple. We will use CartoDB's story mapping platform, OdysseyJS, to create maps that, through sheer volume and wit, will bring those ratscallions to their grimy knees! Don't pull your punches. These are some nasty folks we're up against. If you need some inspiration, remember their blatant act of aggression, pouring a beloved Central Kentucky libation into Boston Harbor!

- Things I Find Displeasing about Boston, Ryan Cooper
- Happy St. Patrick's Day, Rats, Brittany Cook Barrineau
- Boston Sports Fails, Chris Doerge
- Squirrels March, Rats are Drunk, Eric Huntley
- Noble Squirrels, Ryan Cooper
- Rat Villains, Dan Cockayne (Warning: Gruesome truths)
- Squirrel Sanctuaries, Chase Southard
And then there's the map where Eric Schwartz overwhelmed us with a tour of all the places he lived during his nomadic years!
Submit a pull request on this repo to add your map or email the share URL to maptimelex@gmail.com so we can show them off!
The easiest way to get going with OdysseyJS is with their sandbox editor. Think of the sandbox as your place to play around with and build your map. You won't be able to take full advantage of the OdysseyJS library, but you'll be able to quickly get creative, do silly things, make mistakes, and do something amazing. The sandbox is a pretty good metaphor!
You can find the OdysseyJS sandbox at: http://cartodb.github.io/odyssey.js/sandbox/sandbox.html.
When you get to the OdysseyJS sandbox you'll have the opportunity to choose from 3 different templates:
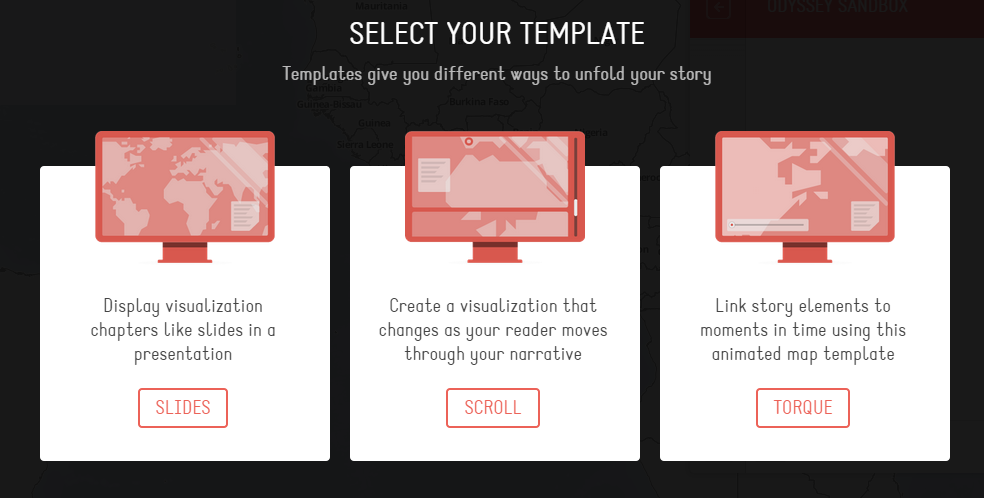
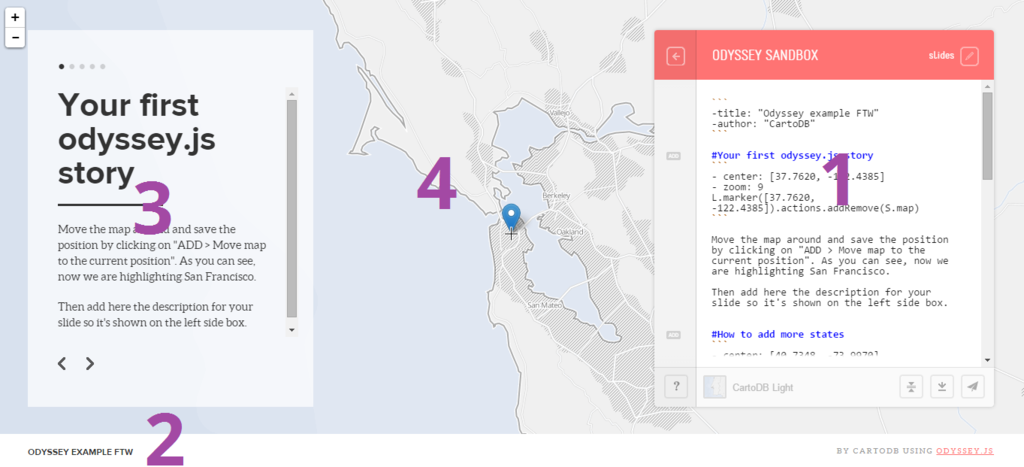
When you've selected your template, you'll head to the sandbox. There are 4 basic elements in the sandbox:
- Editor
- Title
- Content
- Map
The appearance of those elements will differ slightly depending on the template (We'll forego the Torque template for now)
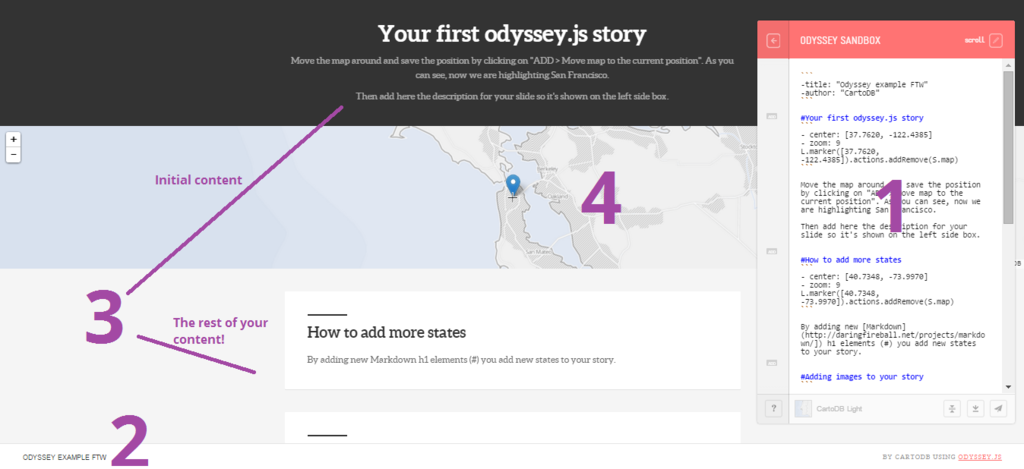
The nifty thing about the OdysseyJS sandbox is that each template uses the platform itself to present how to add content like images and text, change the position and zoom-level of the map, and place a marker in your map. You can follow along with the starter content that CartoDB has provided in the template, but let's still take a look at what's going on in the editor. We'll look at the content in the editor that comes with the slide template, but the principles hold up for scroll as well.
On a laptop the editor may partially cover the content, especially if you selected the scroll option. If this is the case, remember that you can read the instructions in the editor box.
Looking at the editor, there are two major parts of your story map:
- Header
- Chapters
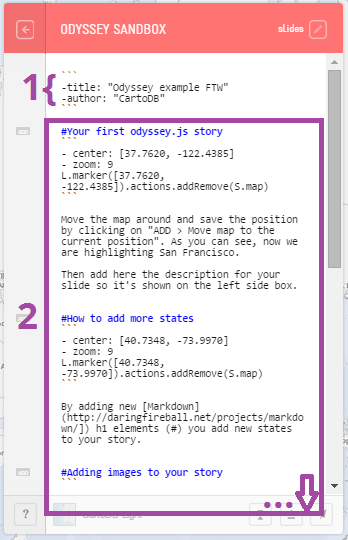
The header comes at the beginning of your project. It is where you'll include the title and the author of the story map. Subsequently, that content will show up along the white footer at the bottom of your project.
Chapters (sometimes also referred to as 'states') are where you tell your story with OdysseyJS. Each new chapter is denoted by a hashtag/pound symbol and blue text. This means that each time you slide or scroll to advance your story, you are moving the map to the stage as defined under the next line of blue text. Each time you do so, you can define a new center point and zoom level for your map, as well as new written content for your story. As your story moves along, you'll want to change content and perhaps the position of the map. You can also think of the chapters as slides or sections. There are three elements to each chapter:
- Heading
- Map position
- Content
Of these three elements, the heading is the most important. It's what tells OdysseyJS, "Hey! I want a new chapter!" That said, a story of headings, while not inherently boring, is perhaps better told with using a different platform or medium.
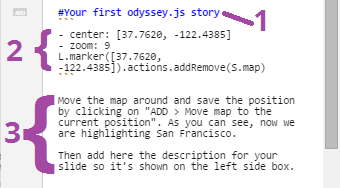
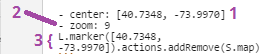
We'll get to the syntax used to format your project in just a minute, but let's take second to look at what you need to get your map positioned and place a marker. There are three things you'll need to specify for your map:
- Center:
- center: [<latitude>,< longitude>] - Zoom:
- zoom: <number 0-18> - Marker position:
L.marker([<latitude>, <longitude>]).actions.addRemove(S.map)
Note: Text between <> should be replaced with the value specified by that text. When you add your own value, you don't include the <>
You'll edit your map in the OdysseyJS in the sandbox using Markdown. Markdown is frequently used to format text, but in this case we're also using it to format our map. Pretty cool! Now if you've never used Markdown, some of the symbols may seem a bit overwhelming. And honestly, Markdown's syntax allows you to do some pretty complex formatting. However, for our case it takes understanding just a few of the elements of Markdown to make a map with OdysseyJS.
```Three backticks are used a couple of ways:
- At the beginning of your map you'll use two sets of three backticks to bracket your title and author.
- In your chapters three backticks are used to separate your heading from your map position information and your map position information from your content.
#The pound/hashtag denotes not only a heading, but also a new chapter!-You use the dash + space to list the properties of your map position element. The properties of the list items are used to format your map!
We've included a little cheatsheet of some basic Markdown syntax that will help you move beyond these essential elements to add some more custom styling to your map!
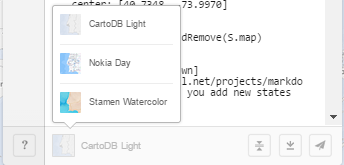
The default basemap in OdysseyJS is CartoDB Light. It's nice, but may not be the right aesthetic for your project. There are a couple ways to change your basemap
You can select from three basemaps by clicking the basemap button at the bottom of the editor.
You might notice that when you select a new basemap, there's a change in your header:
This is the URL used to access the basemap tiles used in your map. This leads us to option two
There is a wide variety of basemaps publicly and freely available for you to use. To add a basemap from outside OdysseyJS you need to:
- Find the basemap URL. You can find some samples here. Remember that you only need the URL, not the additional code listed under "Plain JavaScript."
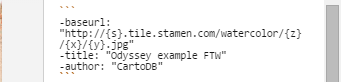
- Insert the basemap code into your header:
-baseurl: "<basemap URL>"
Note: Make sure the basemap URL is between quotation marks
When you're pleased with your map you have a few options for what to do next.
CartoDB really wanted to make it easy to share your map. You don't even have to have your own website or blog or anything! When you use the OdysseyJS sandbox your project is actually be saved online as an anonymous Gist. It's OK if you've never heard of Gists. What's important to know is your project is being hosted online and that while its URL won't be pretty, it will be shareable
So how do you share your OdysseyJS map immediately? It takes just a couple steps:
-
Click the "Share" button at the bottom-right of your editor (It looks like a little paper airplane!)
-
You'll be given the option to share as a URL or an IFRAME. 'URL' links directly to your map, whereas 'IFRAME' allows you to embed your map in a website, blog, or presentation. The choice is yours! Whichever you decide, click 'COPY' to copy the text string you need to share your map. Paste the URL in your browser's address bar or paste the IFRAME in your website. Hopefully you see your map!


If for some reason you need to leave your map and want to come back and edit it later, that's fine! It is, however, a little less straightforward than hitting "Save As." Each time you make a change to your map, the URL for the sandbox changes. In order to save your at a particular point, you simply bookmark your sandbox at that moment. When you want to return to your project, simply find that URL in your browser's bookmarks.
The upshot here of course is that if you share your map and then make changes to it in your sandbox, you'll need to share your map with its new URL for those changes to show up in your map.
As we mentioned above, the URL for sharing your map is not pretty. Maybe you want to host your OdysseyJS map and have it accessed from your own domain. Perhaps you'd like to mess around more with the OdysseyJS library (documentation) to add greater functionality to your map and fit your project to your own personal brand. Or maybe you just want to see what's going under the hood of your OdysseyJS project. Whatever the case may be, you have the option of downloading your project. This takes just a couple steps:
-
Click the "Download" button at the bottom-right of your editor (It's to the left of the "Share" button)
-
Your project will download as compressed .zip file. Unzip it. Inside is
index.html. That's your project! Check it out or upload it to your own host to share via your own domain.

Markdown (.md) is a language specifically designed to be quick and easy to both read and to write. When it is read by a browser, it is translated into HTML (hypertext markup langauge, often the language used to define the structure of a webpage), however it is also meant to be readable in its plaintext format.
If you're already familiar with Markdown (or HTML) that's great! But note that there are some minor differences between standard markdown and its use in OdysseyJS. Below are some of the most useful elements that you'll be using when interacting with OdysseyJS's editor.
For more information on Markdown check out this link to Daring Fireball's documentation. Also check out the OdysseyJS documentation on Markdown here.
```Three sets of backticks should both (1) surround your title and author at the top of the editor, and (2) surround your map position elements.#Defines a new chapter and a makes a large header.##Defines a smaller header.-Followed by a space, defines map properties in the map's position element.*or_Surrounding text with an asterix or underscore italicizes the text.**or__Surrounding text with a double asterix or double underscore makes that text bold.[text](URL)You can link externally by writing the text in square brackets, followed by a URL in regular parentheses.You can add images in the same way as providing a link, but adding an exclamation point before the text in square brackets. In this case the text is not displayed, only providing a metadata reference for your image.
- Worst Dressed US Cities (spoiler: Boston is #1)
- 10 Reasons Why Boston is Dumb (Rant Lifestyle)
- Terrible candy invented in Boston (Including something called Squirrel Nut Caramels!)
- Boston College basketball point shaving scandal
- New England Patriots Scandals
- Boston Red Sox terrible 2011 season
- Belle Brezing
- Henry Clay
- George Clooney
- Ashley Judd
- Mary Todd Lincoln
- Brain Littrell (of Backstreet Boys fame)
- Thomas Hunt Morgan
- Steve Zahn
- Meaning of the Squirrel
- Role in oak planting and dispersal
- Cannibal Squirrels could end California's drought!
- Hack Your Maps, Young Hahn
- The Adventure of the Bruce-Partington Plans. Story map adaptation of the Sir Arthur Conan Doyle story by Young Hahn for Mapbox