This is a layer for Yocto Project which provides a simple digital pattern
generator (dpgen) for Intel Galileo.
Aside from all the poky stuff, this layers depends on
meta-openembedded/meta-oe which provides mraa package. This setup was based
on rocko branch.
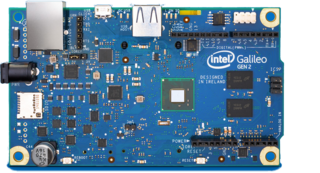
Moreover, meta-intel layer is required to provide a support for Intel Galileo
(intel-quark). For development only, one can use qemux86 to speed things up
in case no dev board is accessible at the moment - Intel Quark is
a variant of x86 anyway.
The project was build on Ubuntu 18.04 LTS. About 40GB of free space is required to store all the necessary build files. Build speed is heavily influenced by the number of cores, so the more powerful CPU the better.
First step is to clone all the necessary files.
git clone -b rocko git://git.yoctoproject.org/poky && cd poky
git clone -b rocko git://git.openembedded.org/meta-openembedded
git clone -b rocko git://git.openembedded.org/meta-intel
git clone git@github.com:maciejstanek/meta-dpgen.git
Next, prepare the build configuration. This includes adding all the necessary layers and modifying a config file appropriately. This will take a few hours to build.
. oe-init-build-env build
echo 'MACHINE = "intel-quark"' >> conf/local.conf
echo 'PREFERRED_PROVIDER_virtual/kernel = "linux-intel-rt"' >> conf/local.conf
echo 'COMPATIBLE_MACHINE_intel-quark = "intel-quark"' >> conf/local.conf
bitbake-layers add-layer ../meta-openembedded/meta-oe
bitbake-layers add-layer ../meta-intel
bitbake-layers add-layer ../meta-dpgen
bitbake-layers show-layers
bitbake core-image-rt
Next, generate an SD card image.
wic create galileodisk-sd -e core-image-rt
Finally, burn the generated .direct file onto the SD card. Note, that the
output device might be different in your case; you can use either
sudo fdisk -l or dmesg to check it. Moreover, the card should be formatted
to FAT32.
sudo dd if=`ls galileodisk-sd-*-mmcblk0.direct | head -n 1` of=/dev/mmcblk0 bs=3M conv=fsync
Congratulations, you are done. Insert the SD card to Galileo, power it up and connect via UART.
Boot up the machine and log in as root; no password required. Next, make sure dpgen is installed by typing a help request.
dpgen -h
Next, connect a logic analyzer to a default pin D2 and playback an example sequence at the default frequency of 1 Hz. Note, that the generator will exit after finishing the playback.
dpgen /usr/share/dpgen/pattern/barker13
The following command outputs a pattern at the rate of 30 Hz to an output pin D4.
dpgen -f 30 -o 4 /usr/share/dpgen/pattern/pi
The generator can play the requested sequence in a loop. This comes in handy in case of the following example of a square wave.
dpgen -f 100 /usr/share/dpgen/pattern/square
The generator has a feature of generating a synchronization clock which toggles every time the pattern loops. This is can be utilized as a trigger for a connected oscilloscope. The clock is disabled by default.
dpgen -f 100 -s 3 /usr/share/dpgen/pattern/arecibo
Note: according to Intel, the maximum output frequency of GPIO pins is 230 Hz.
Directory /usr/share/dpgen/pattern contains some example sequence. The pattern files contain a sequence of 0 and 1 symbols; all other characters are ignored. Moreover, if a line starts with a pound, it is discarded entirely.
The following example generates a 25% PWM signal.
echo '1 0 0 0' > pwm_25p.dp
dpgen -r f 100 pwm_25p.dp
In case something breaks in the build process, there are a few options to consider. Firstly, one can build it without Intel Quark meta and debug it with an emulator.
echo 'MACHINE = "qemux86"' >> conf/local.conf
echo 'PREFERRED_PROVIDER_virtual/kernel = "linux-yocto-rt"' >> conf/local.conf
echo 'COMPATIBLE_MACHINE_quemux86 = "qemux86"' >> conf/local.conf
bitbake-layers remove-layer ../meta-intel
bitbake core-image-rt
runqemu qemux86
Alternatively, dpgen utility can be removed.
bitbake-layers remove-layer ../meta-dpgen
bitbake core-image-rt
If everything else fails, one can rebuild the whole project. To save the time
spent on downloading Yocto modules, a bitbake cleanup command can be used.
bitbake -c cleansstate world
The recommended development enviroment consists of two TTYs. The first one is used for building and emulating.
. oe-init-build-env build
bitbake dpgen && bitbake core-image-rt && runqemu qemux86
The second one is used for developing the C app.