
OpenCore Version: 0.8.0
OpenCore Version: 0.9.3
Note: if you get a black screen on the internal display at boot, press "ctrl + shift + insert" and then any key ⚫️My ThinkPad X1C3 Hardware Specs 💻
| Model | Lenovo ThinkPad X1 Carbon 3rd Gen |
|---|---|
| Processor | Intel Core i7-5600U (2C, 4T, 2.60Hz / 3.20GHz) vPro (The best compatibility with macOS) |
| Graphics | Integrated Intel HD Graphics 5500 |
| Memory | 8GB Soldered |
| Display | 14" HD (2560x1440) non-touch |
| Storage | 512GB S.A.T.A PCIE SSD |
Hardware Compatibility 🧰
- Intel HD Graphics 5500
- Brightness Control
- Keyboard & Backlit
- TrackPoint (TrackPoint / Nipple Mouse Warriors, rejoice!)
- TouchPad with Gestures
- Secure Boot
- Sleep and Wake
- Audio and Mini DisplayPort Audio
- Power Management
- USB Ports
- Mini DisplayPort
- HDMI
- Wireless and Bluetooth
- DRM content
- FingerPrint Reader
Photos 📸


Getting Started
To start you'll need the following:
You must have the following items:
- Lenovo ThinkPad X1 Carbon 3rd Gen (Obviously 😁).
- Access to a working Windows machine with Python installed.
- A pendrive with more than 4 GB (Keep in mind, during the preperation we will format the disk to create the install media).
- an Internet connection via Ethernet.
- 1-2 hours of your time.
Creating the USB Installer
- To grab legacy installers is super easy, first grab a copy of OpenCorePkg and head to /Utilities/macrecovery/. Next copy the folder path for the macrecovery folder.
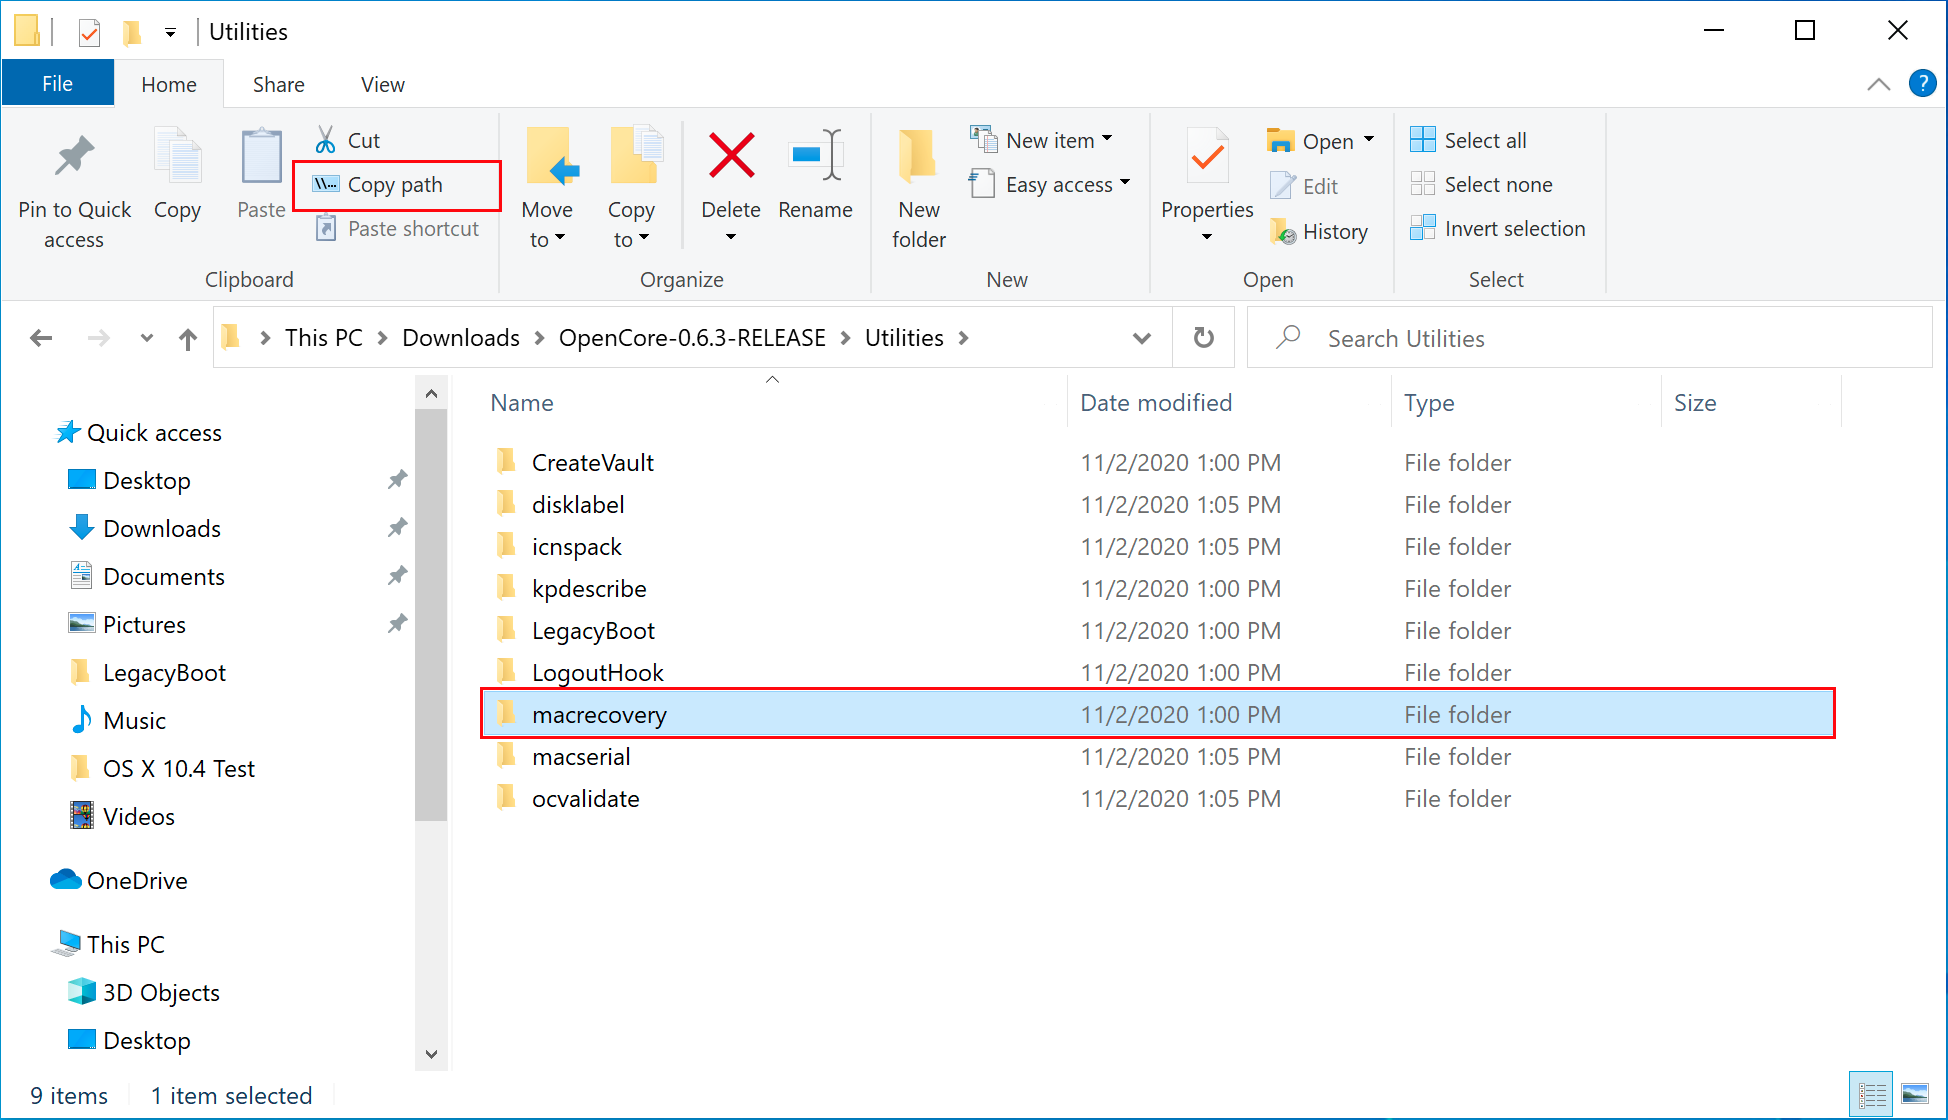
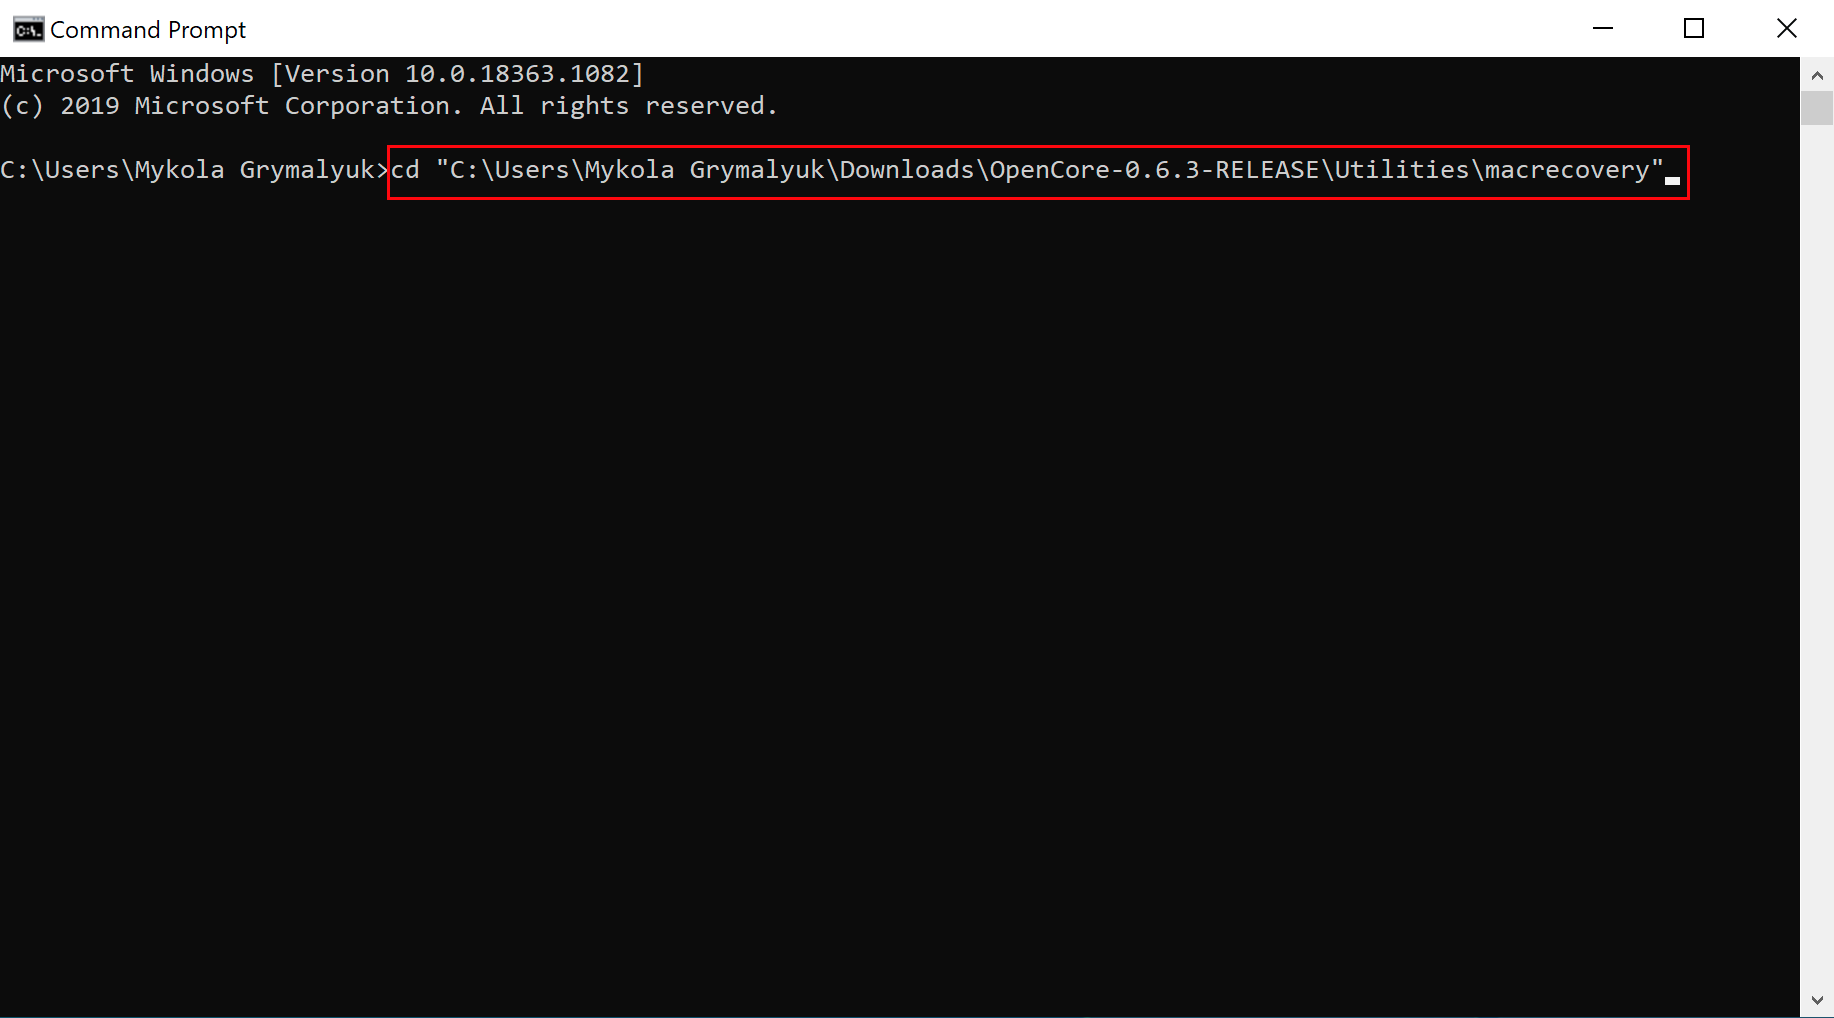
- From here, you'll want to open up a Command Prompt and cd into the macrecovery folder that we copied earlier:
cd Paste_Folder_Path
- Now run one of the following depending on what version of macOS you want(Note these scripts rely on Python support, please install if you haven't already):
# Monterey (12)
python macrecovery.py -b Mac-E43C1C25D4880AD6 -m 00000000000000000 download
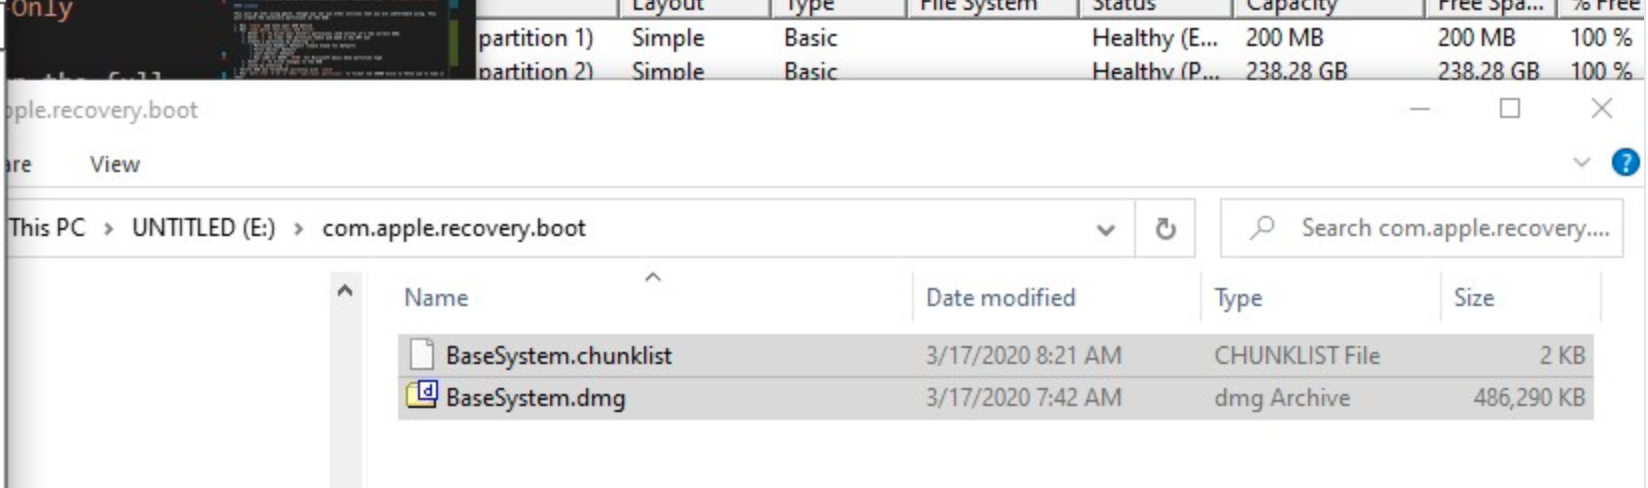
This will take some time, however once you're finished you should get either BaseSystem or RecoveryImage files:


- Download Rufus, set the BOOT selection as not bootable, set File System as Large FAT32, click Start, and delete all file autorun in USB Drive partition.

- Next, go to the root of this USB drive and create a folder called com.apple.recovery.boot. Then move the downloaded BaseSystem or RecoveryImage files. Please ensure you copy over both the .dmg and .chunklist files to this folder:
-
Open up and extract the EFI folder archive you downloaded earlier.
-
Copy the folder named, "EFI," to the root of your USB Drive.
-
Restart your computer.
Installing macOS
-
Open the BIOS and disable all the security options. (Security Chip, Intel (R) AT Module Activation, and Computrace Module)
-
Boot via your Flash Drive.
-
Boot the macOS installer.
-
Now open Disk Utility and format your internal or external Hard Drive or SSD as APFS.
-
Follow the on-screen prompts and install macOS.
-
Your system might reboot during the installation.
-
Now after install again boot into your usb drive and then select the drive that you installed macOS on.
-
Now copy the EFI Folder to the EFI Partition and overwrite it with the one system created.
-
Now try booting macOS without the USB drive.
-
Congratulations, you've successfully hackintoshed your Lenovo ThinkPad X1 Carbon 3rd Gen.