Introduction
After viewing this great example by Nikita Leonov, I too decided to work on HomeKit and Particle Photon. I decided to simulate Temperature, Humidity and Luminosity sensor and one Light. Here is the sample I completed.
Here in this sample, I am using Homebridge and HAP-NodeJS to emulate HomeKit API. Homebridge is a shim around HAP-NodeJS. HAP-NodeJS is a Node.js implementation of HomeKit Accessory Server.
Homebridge supports 2 types of shims, accessory and platforms. Accessory is a single or multiple accessory device. Platform a bridge to another system. In HAP-Node-JS each accessory has require Characteristics which must be implemented by the Accessory and some optional Characteristics which is optional. For this sample I created an accessory which emulates 4 devices, Temperature Sensor, Humidity Sensor, Luminosity Sensor and a Light. The Light supports brightness and hue characteristics. My Homebridge app is running on my Macbook Pro (you can Raspberry Pi or any Linux system also, I tried to compile Homebridge under Cygwin but failed).
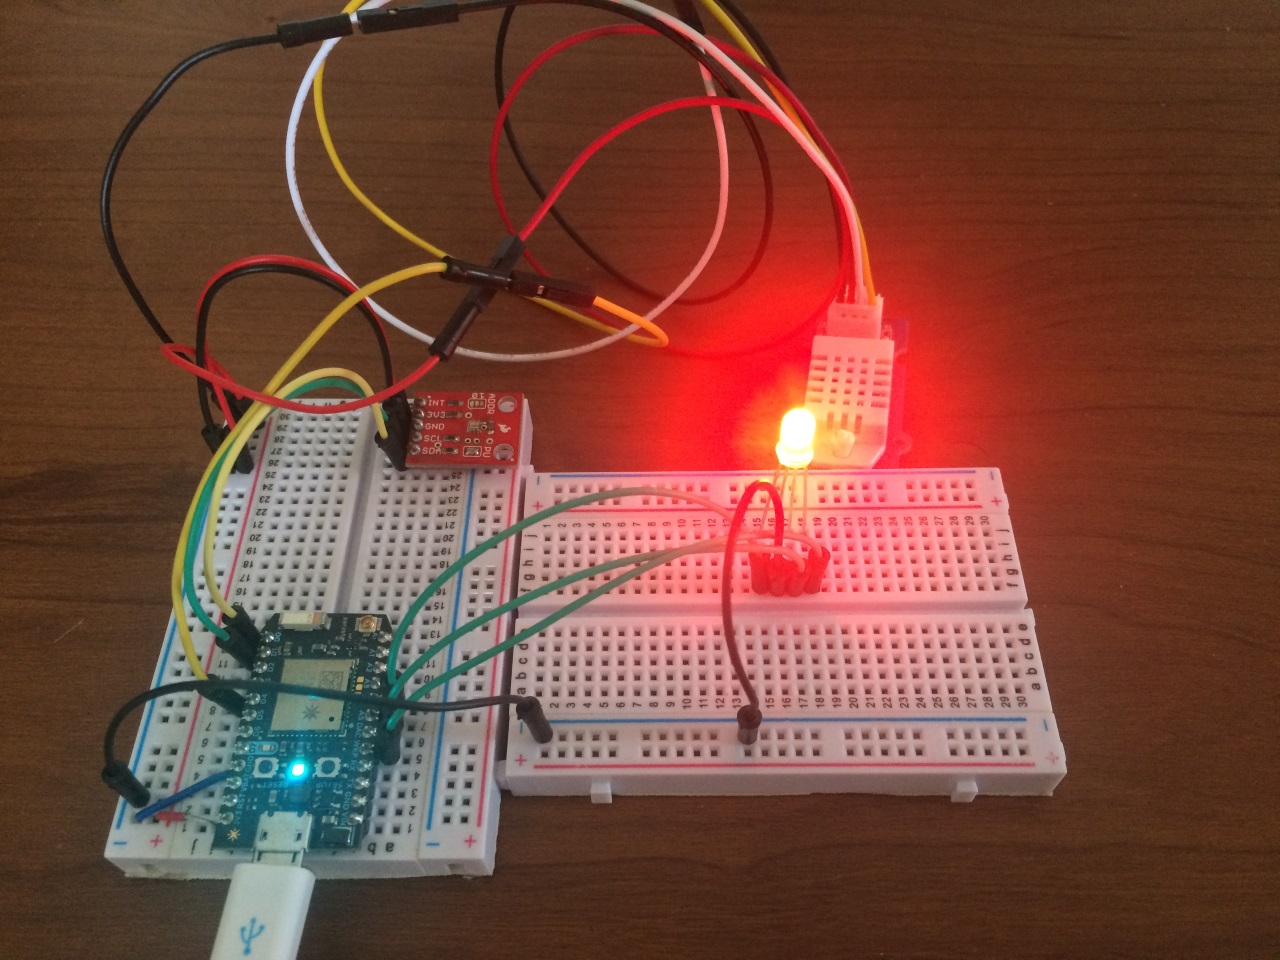
DHT22 sensor is used to read Temperature and Humidity, TSL2561 sensor is used for luminosity. To simulate light I am using a simple RGB Led. The Photon firmware reads Temperature, Humidity and Luminosity sensor values and publish an event at every 5 seconds.
The Particle Accessory listens for this events and whenever it is received, update the Characteristics. To control the light, the accessory calls Photon exposed functions to turn on/off, adjust brightness and set hue.
Wiring
- DHT22 Vcc to Photon 3.3v
- DHT22 GND to Photon GND
- DHT22 Data to Photon D4
- TSL2561 3.3vto Photon 3.3v
- TSL2561 GND to Photon GND
- TSL2561 SDA to Photon D0
- TSL2561 SCL to Photon D1
- RGB Led R to Photon A4
- RGB Led G to Photon A5
- RGB Led B to Photon A7
- RGB Led GND to Photon GND
How to run
-
Setup Particle Photon:- Wire the sensors as described above and compile the firmware source code and flash it to the Photon.
-
Configure Homebridge:- Copy the
Particle.jsfile to the Homebridge Accessory folder. Edit the config.json and add following underaccessorysection and replace the device id and access token. { "accessory": "Particle", "name": "Particle Sensors", "cloud_url": "https://api.spark.io/v1/devices/", "deviceid": "replace with your deviceid", "accesstoken": "replace with your access token" } -
Open a terminal and run
node app.js. If everything goes well you can see the Homebridge is up and running. Take a note of the PIN that is shown on the console. This is necessary to add the accessory to the iOS application. In every 5 seconds you can also see the sensor values received. -
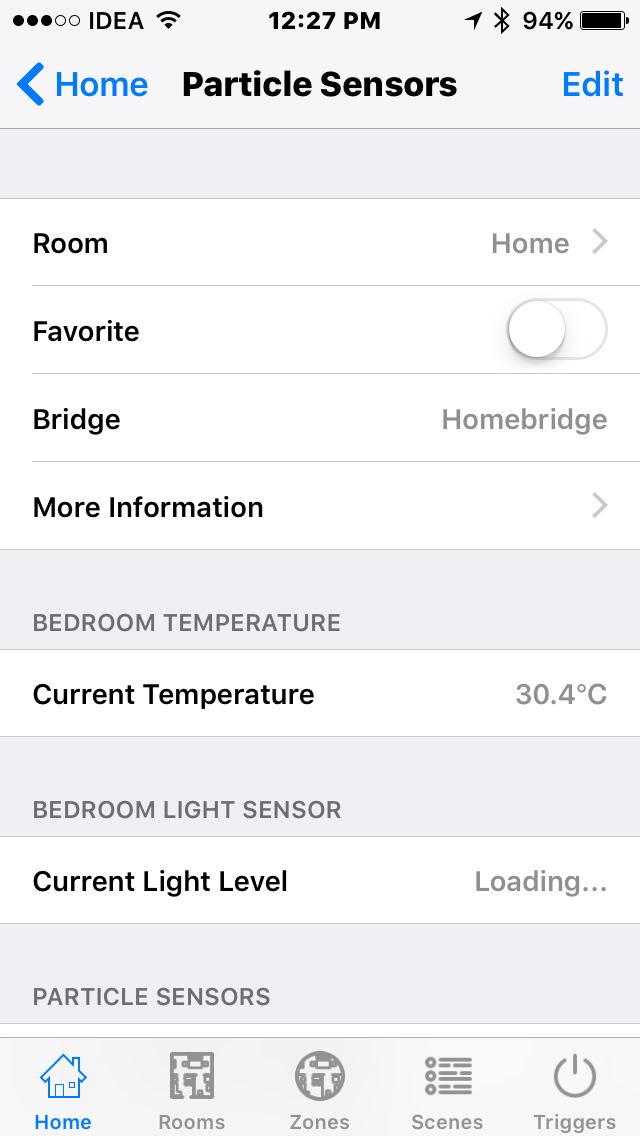
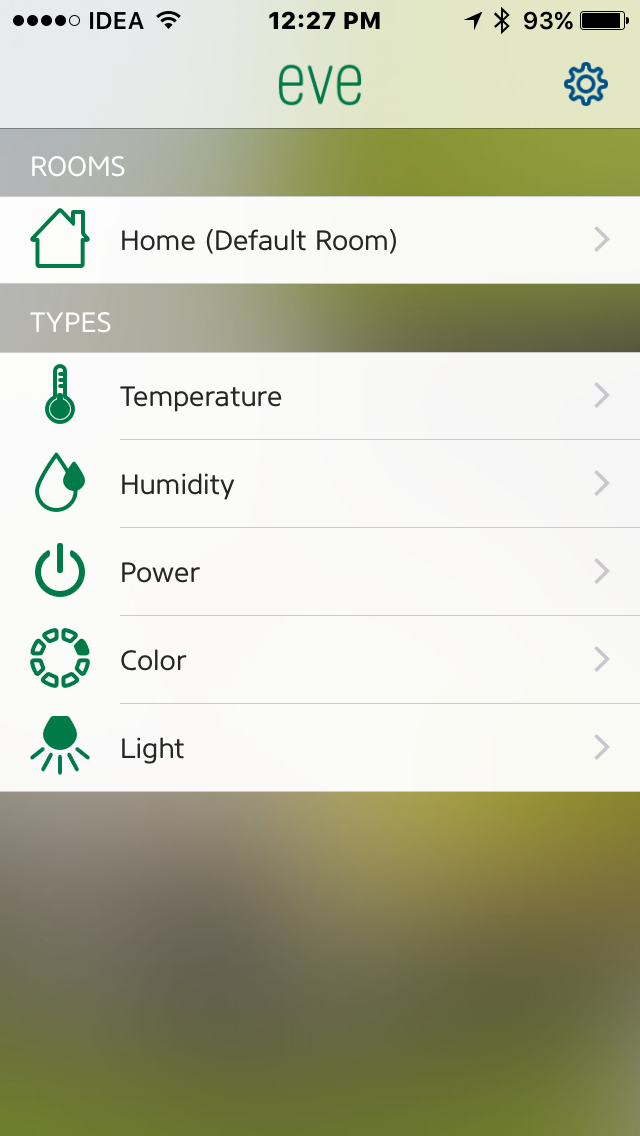
Control/Monitor using iOS Device:- Install any HomeKit application. There are different HomeKit application on iOS device. Some of them are free and some are paid. I have Home, Elgato Eve and Insteon+ installed on my iPhone. Open the app and add the accessory, when the device scan for accessory you can see Homebridge, under this every accessories will be listed. While adding you have to enter the PIN. Enter the pin shown on the console while running the Homebridge.
Screenshots

Demo Video
Controlling a Light using HomeKit application
https://www.youtube.com/watch?v=WPh9WSYANxc
Using Siri to control light