Your first Project
Top bar navigation [1] At the moment, titra has three selection options:
- Track - opens the time tracking view.
- Overview - opens the project overview with histogram and pie chart.
- Details - opens the table view with detailed information and filter possibilities.
Settings [2] More information about the settings can be found here.
New Project [3] Adds a new project and opens its options.

💬 The colored underline below the navigation indicates which view you are currently in.
▪️ First click on the New project button [3]. The settings page will be opened.
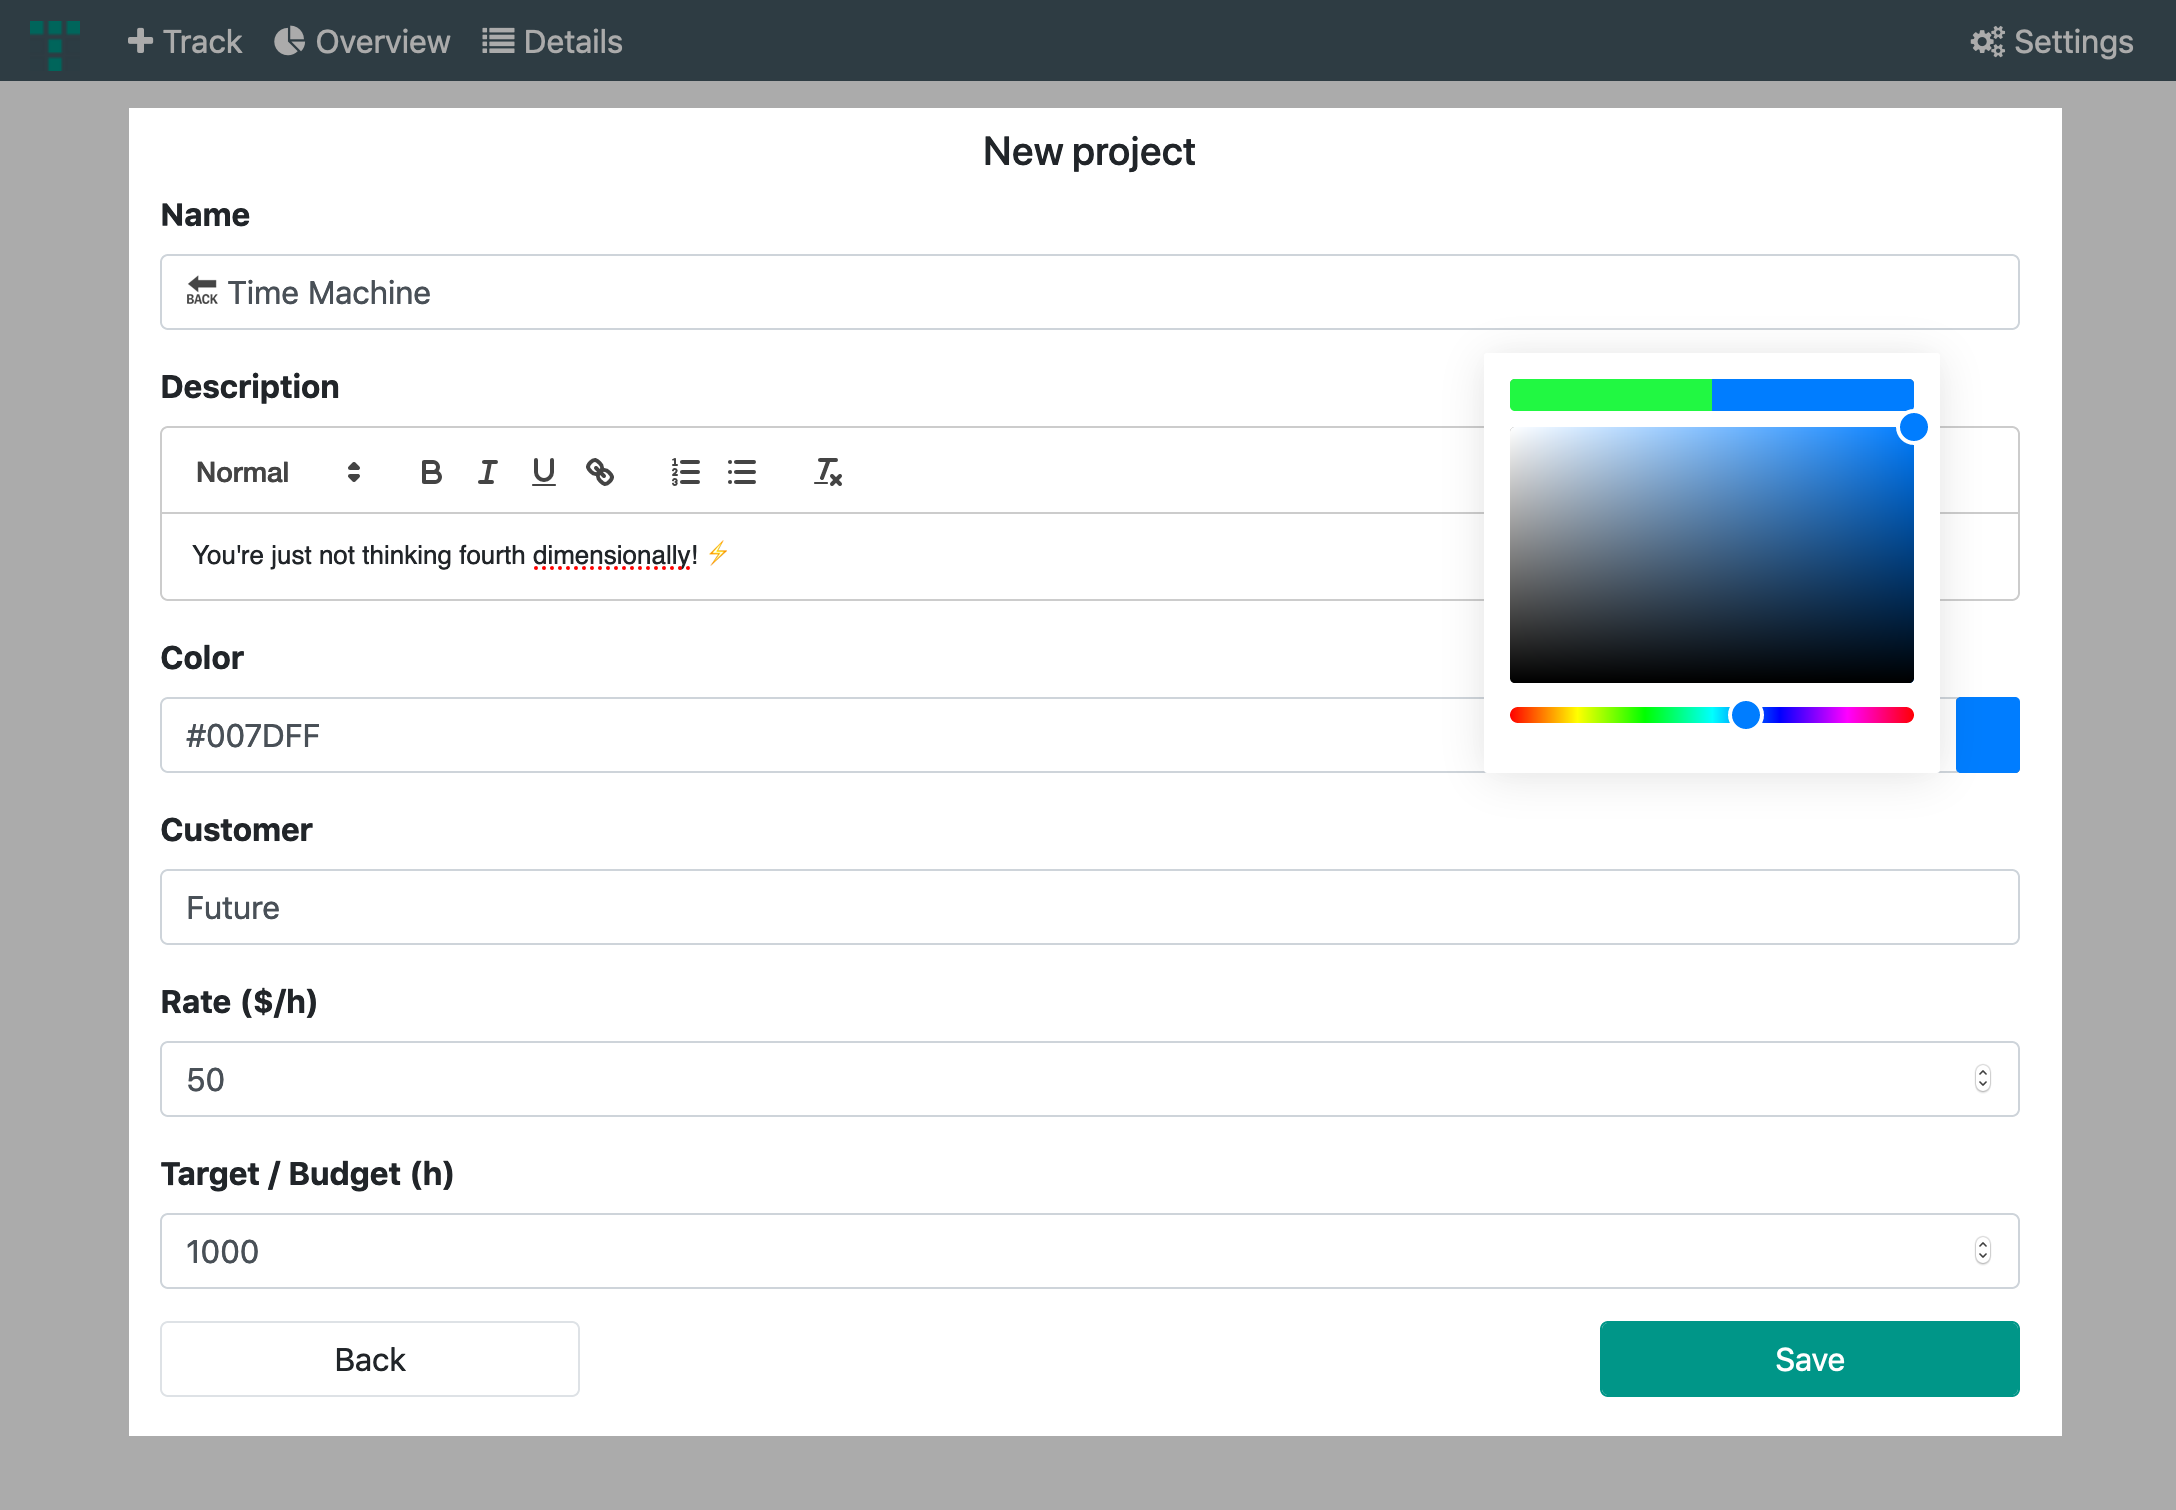
💬 The project will not be created until the settings are saved for the first time.
▪️ Add a Name for your project.
▪️ Add a project Description.
▪️ Set a custom Color to the project. Click colored button to open the color picker.
▪️ Add a Customer to the project.
▪️ Set a Rate($/hour) to the project. For example: 50$ per tracked hour.
▪️ Set a Target/Budget to the project. For example: 1000 hours.
▪️ Press Save to create the Project. The project settings can be adjusted at any time.
▪️ The Access rights are displayed after saving. Add colleagues or co-workers to give them access to the project. Type in the e-mail of your contact and press the Add button. Repeat the process to add more contacts.
To grant access to all users enable the check box ☑️ Public project (visible to all users)
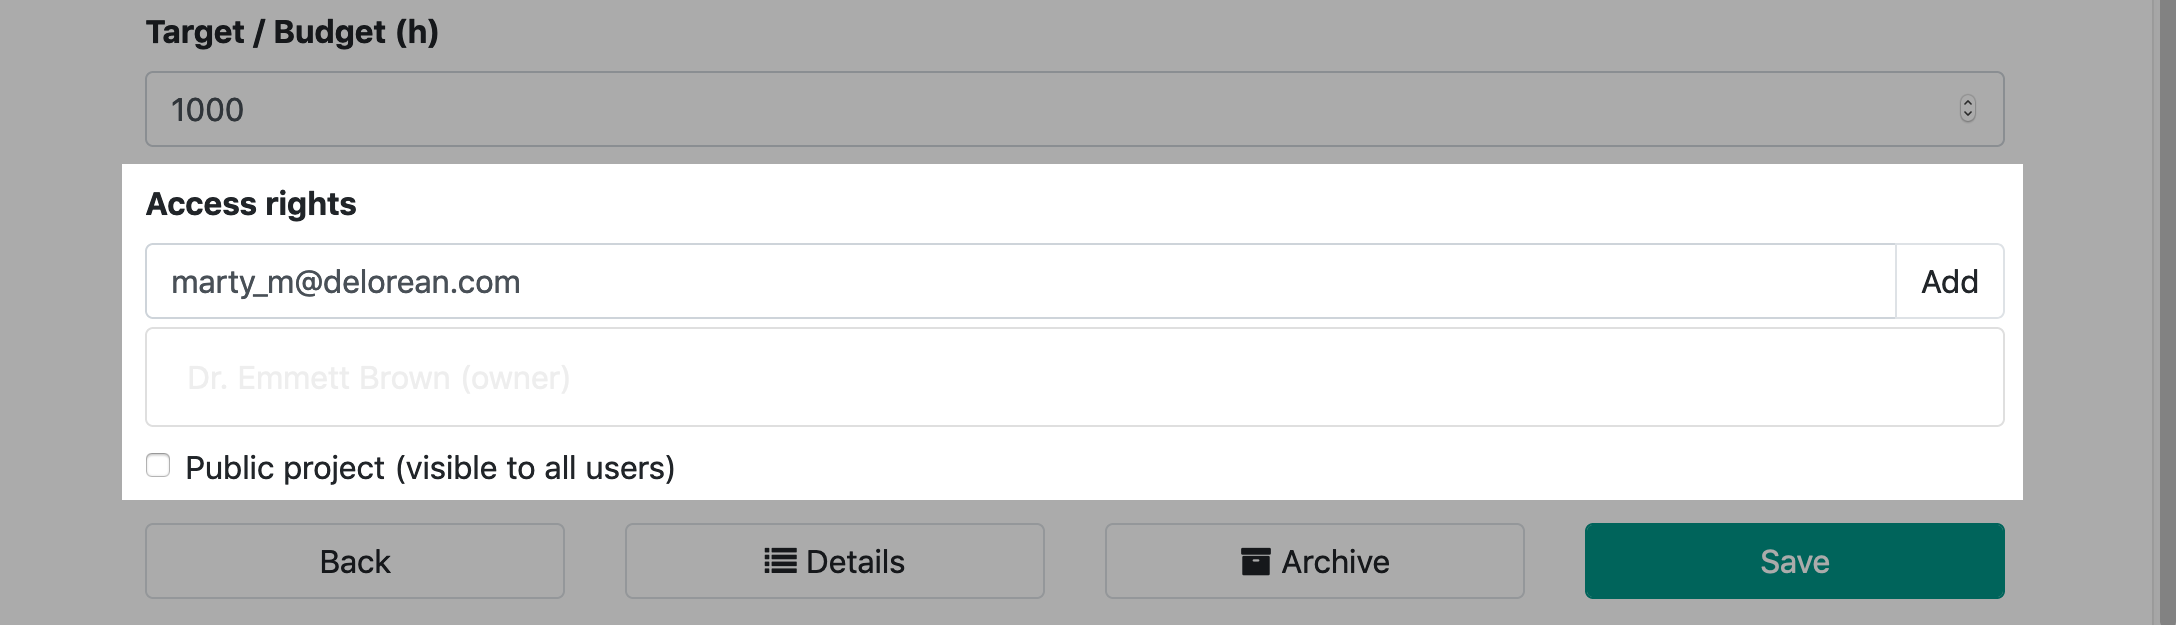
💬 Dont forget to save your changes 😉
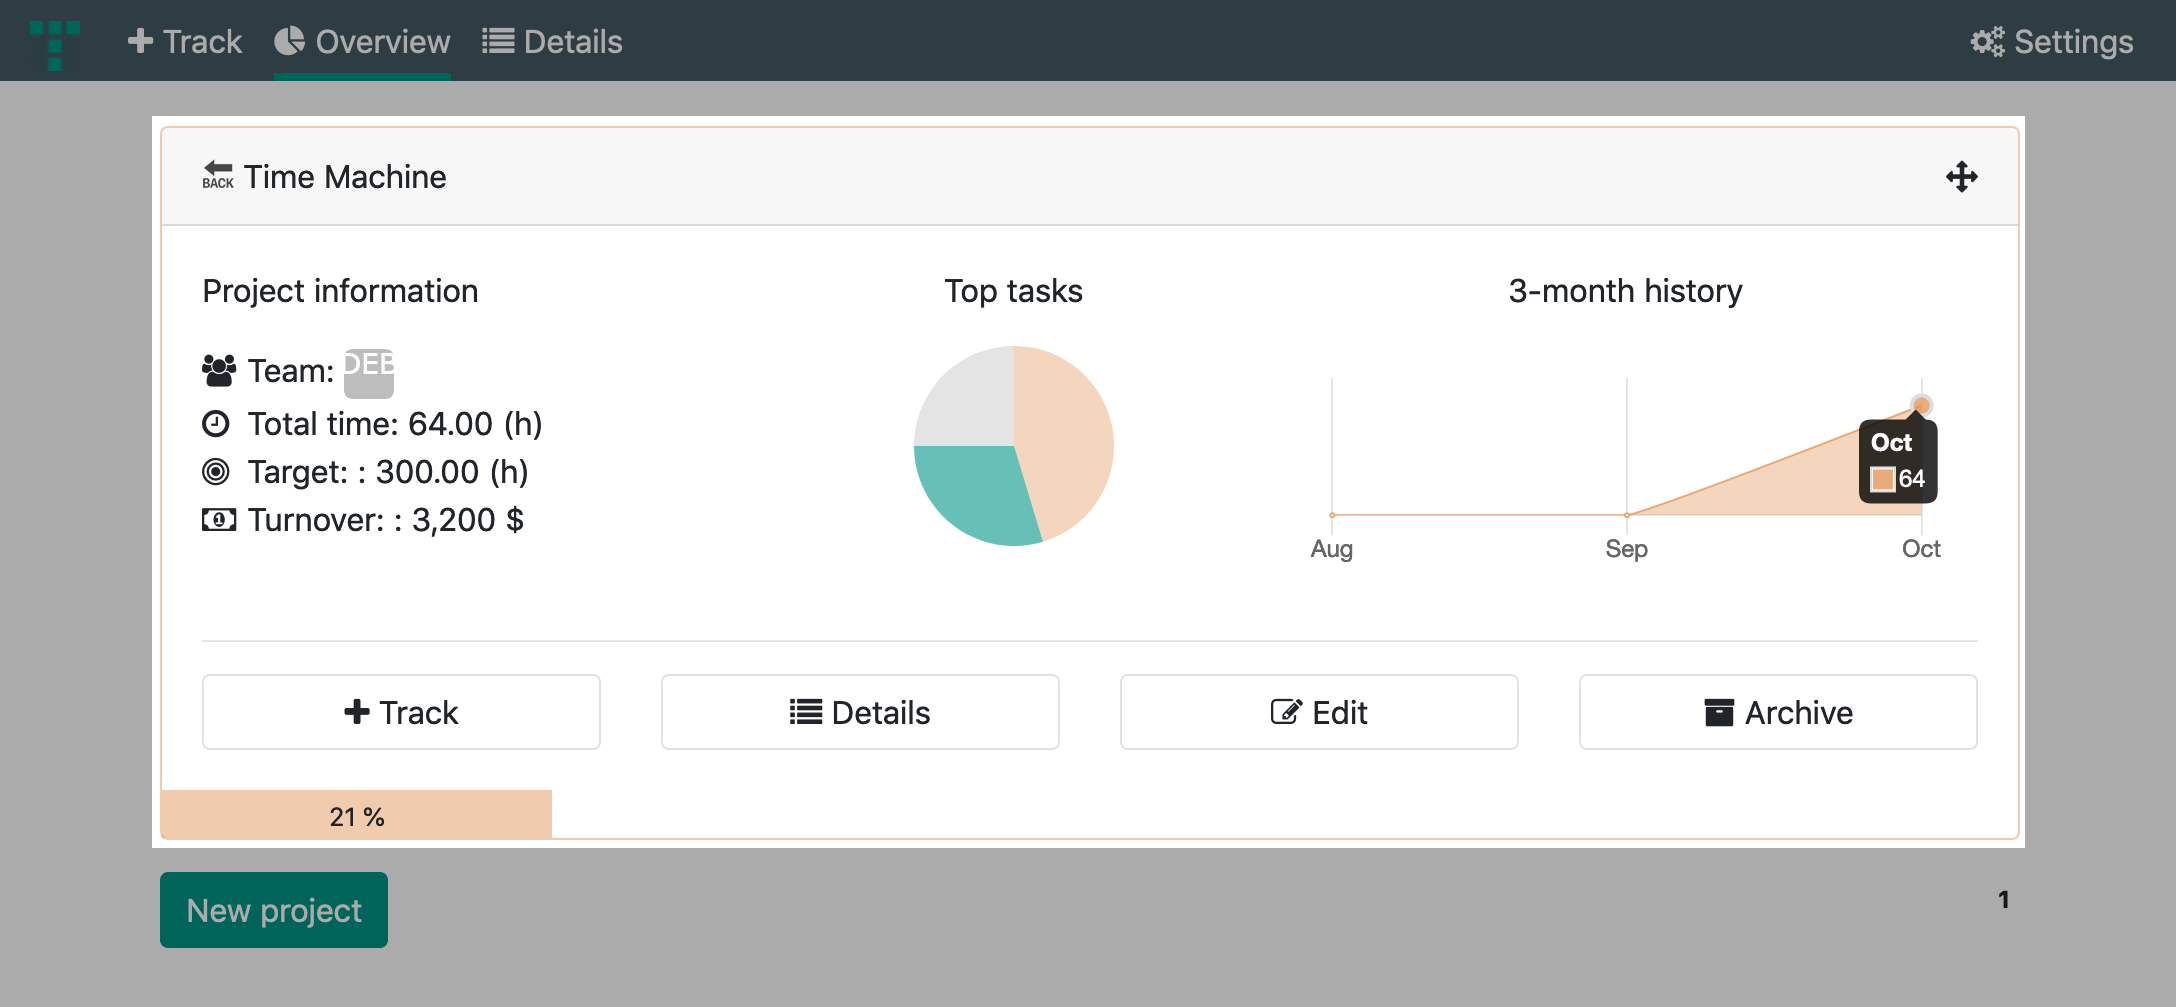
After creating a project, you will get an overview of the project and other options.
Each project has its own Project information panel displaying information and progress.
In this case, we initially see only a small amount of information.
This changes as soon as we start to track time.
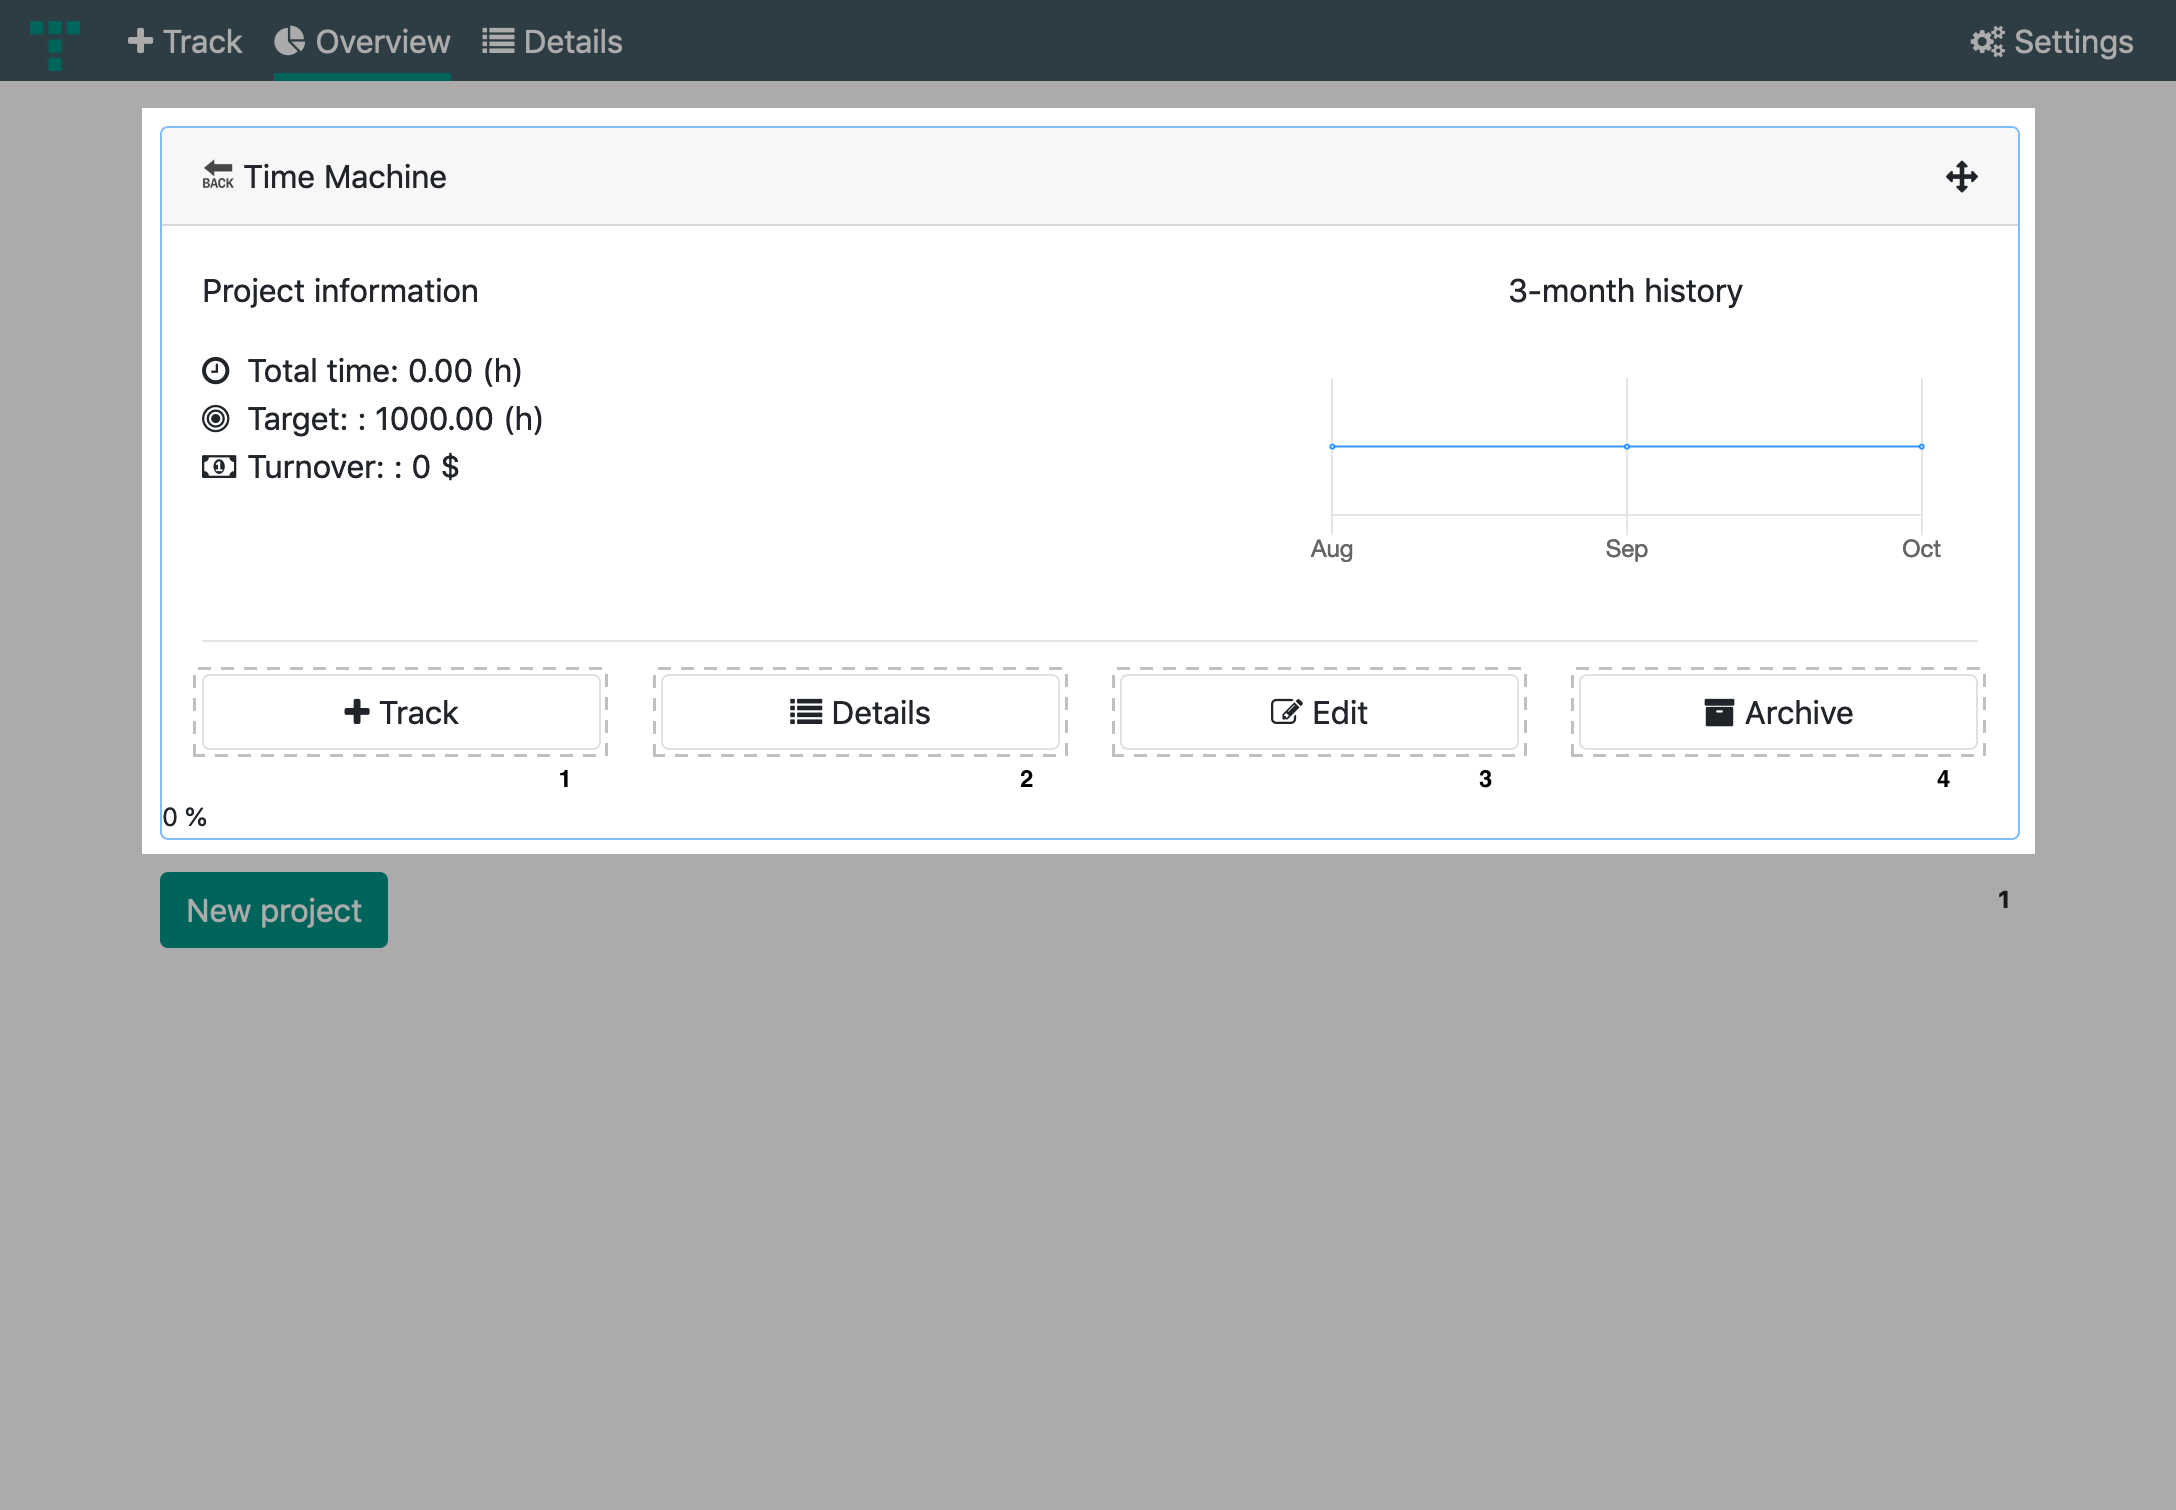
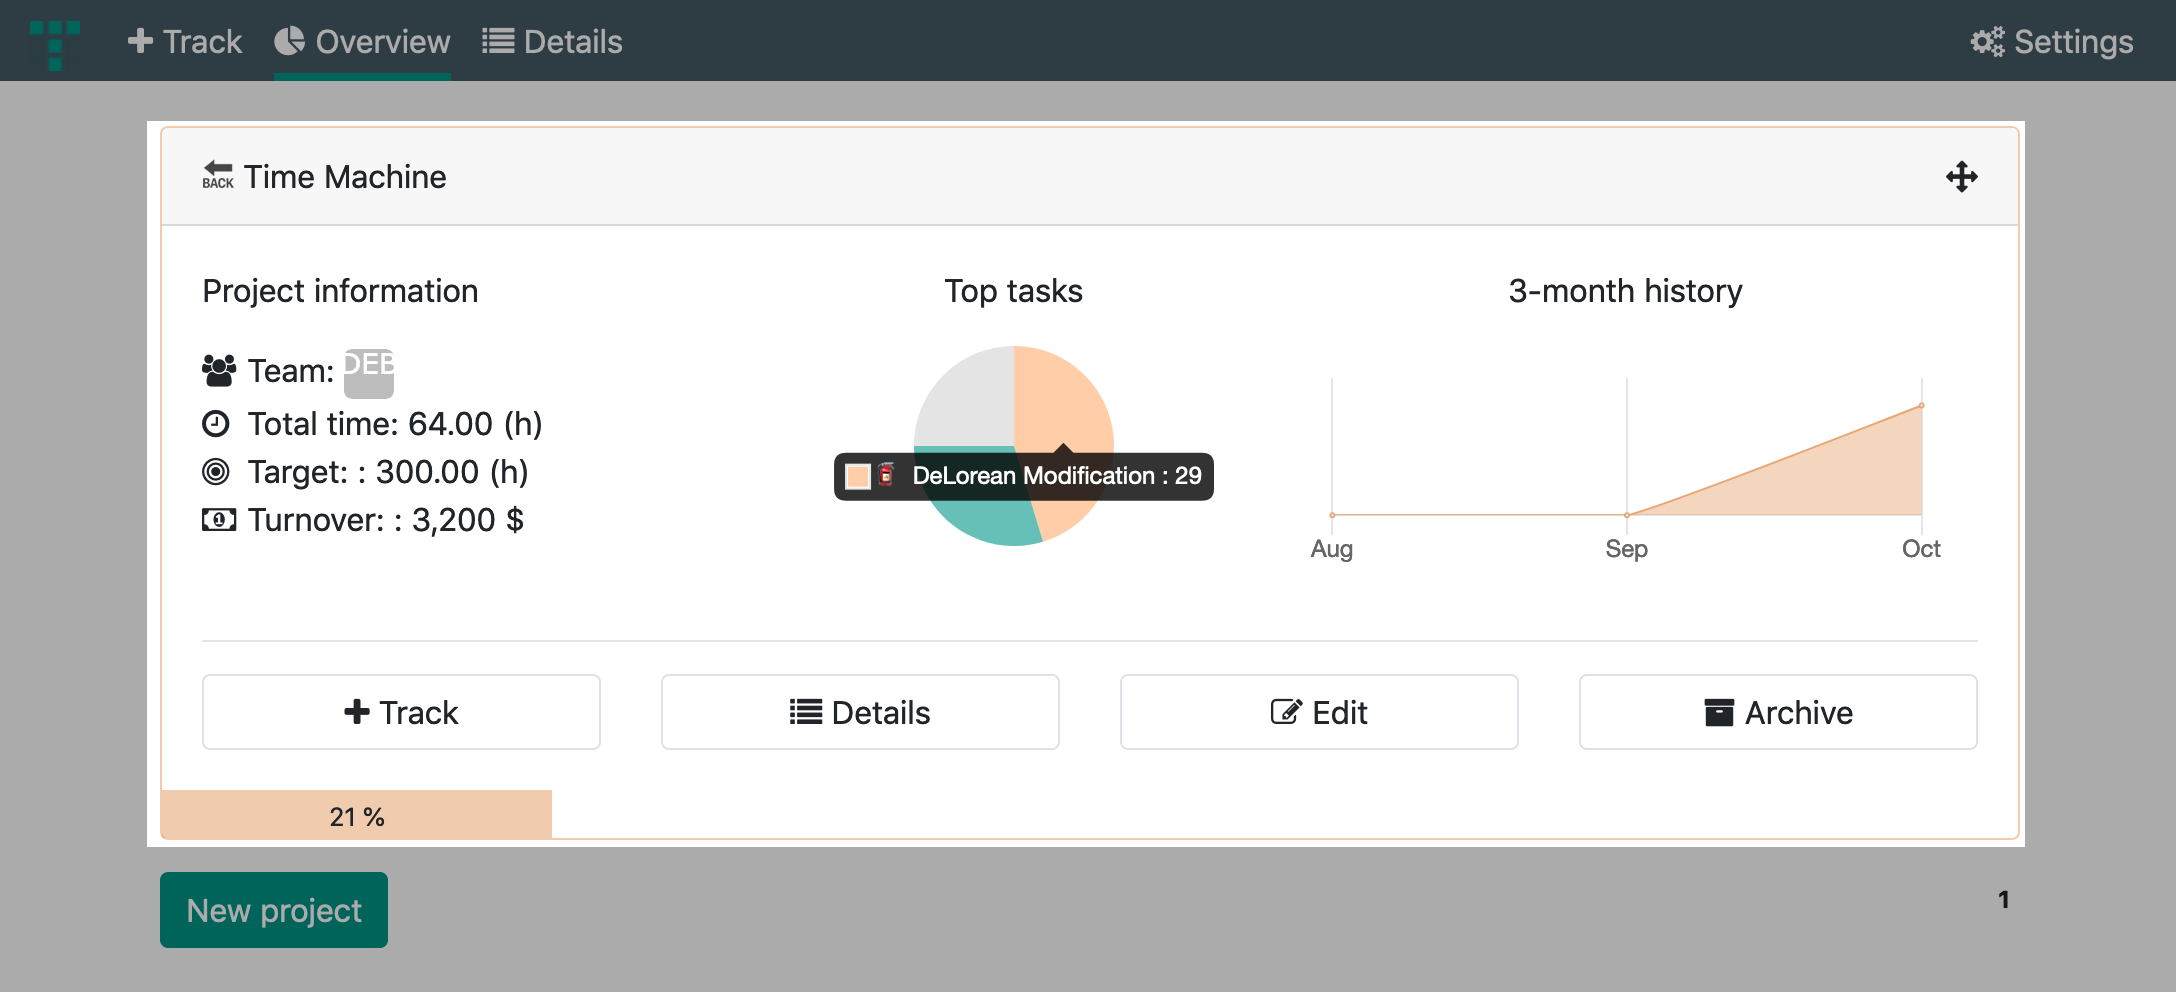
- Select the Track button [1] to track time on this project.
- Select the Details button [2] to open the details for this project.
- Select the Edit button [3] to open the project settings. (Project Owner only)
- Select the Archive button [4] to archive the project. (Project Owner only)
Select Track on the top main navigation or on the project panel of your desired project.
The time recording view shows up.
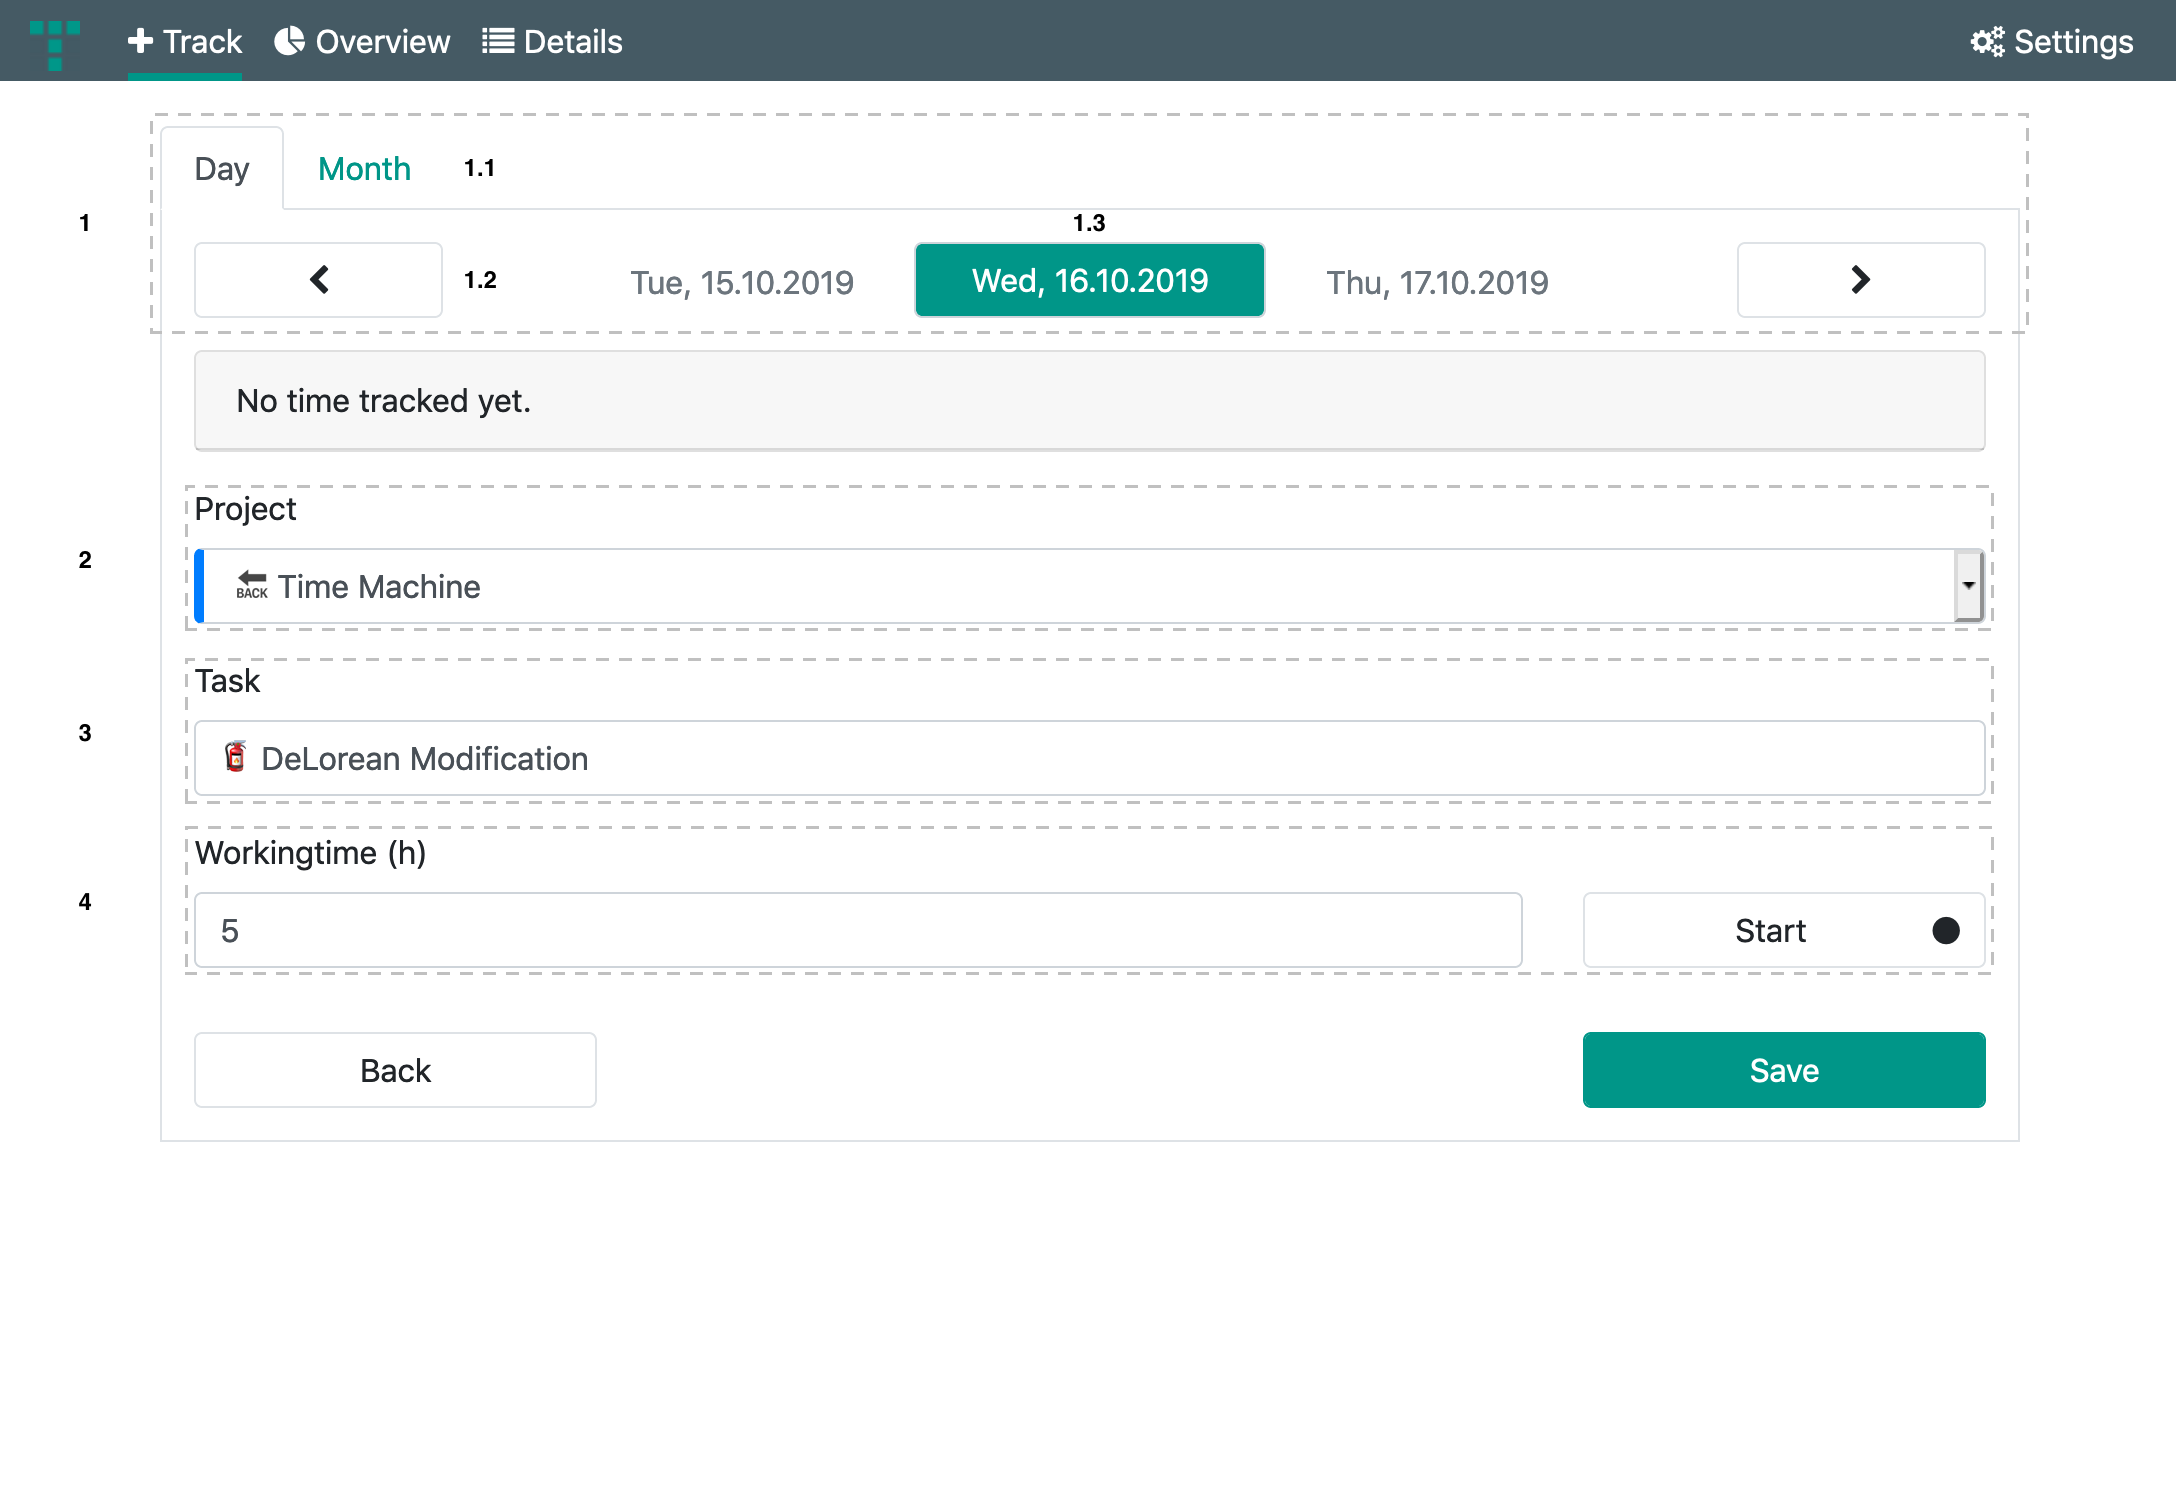
The date section [1] can be controlled in different ways. You can choose between Day and Month [1.1]. If Day is selected you can select a day by clicking on the indicator buttons left and right [1.2] or clicking on the previous or following day. For example: Thu, 17.10.2019.
By clicking the highlighted date in the middle [1.3], you can type in a date or select the calendar button to pick a date.
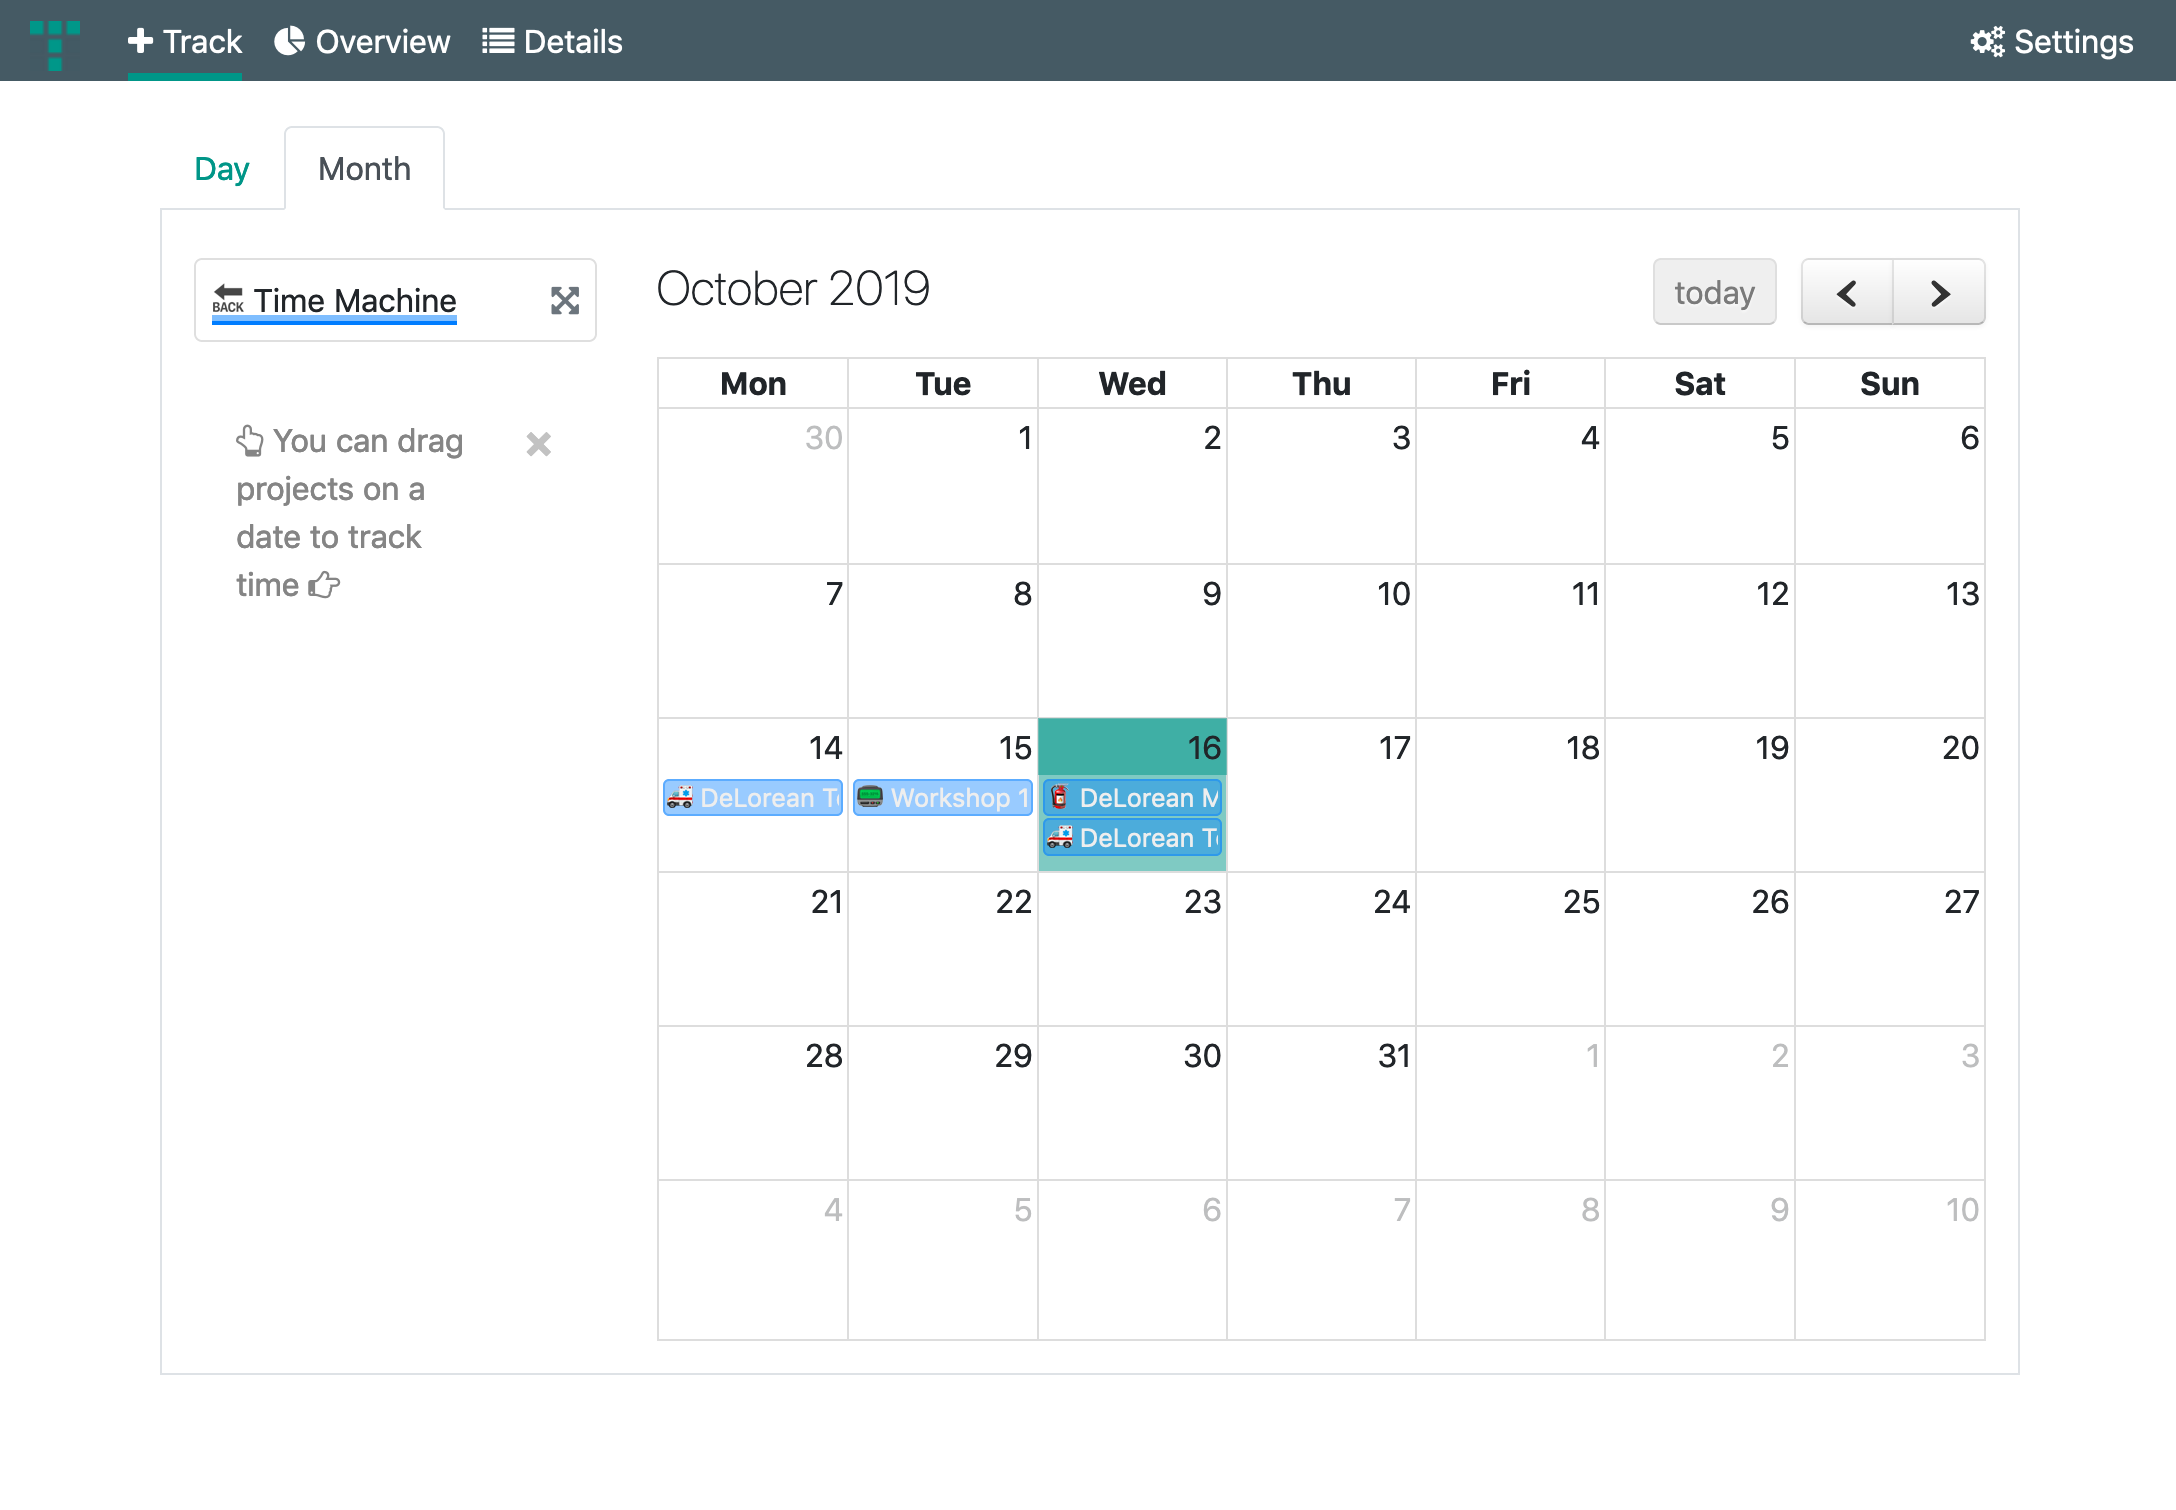
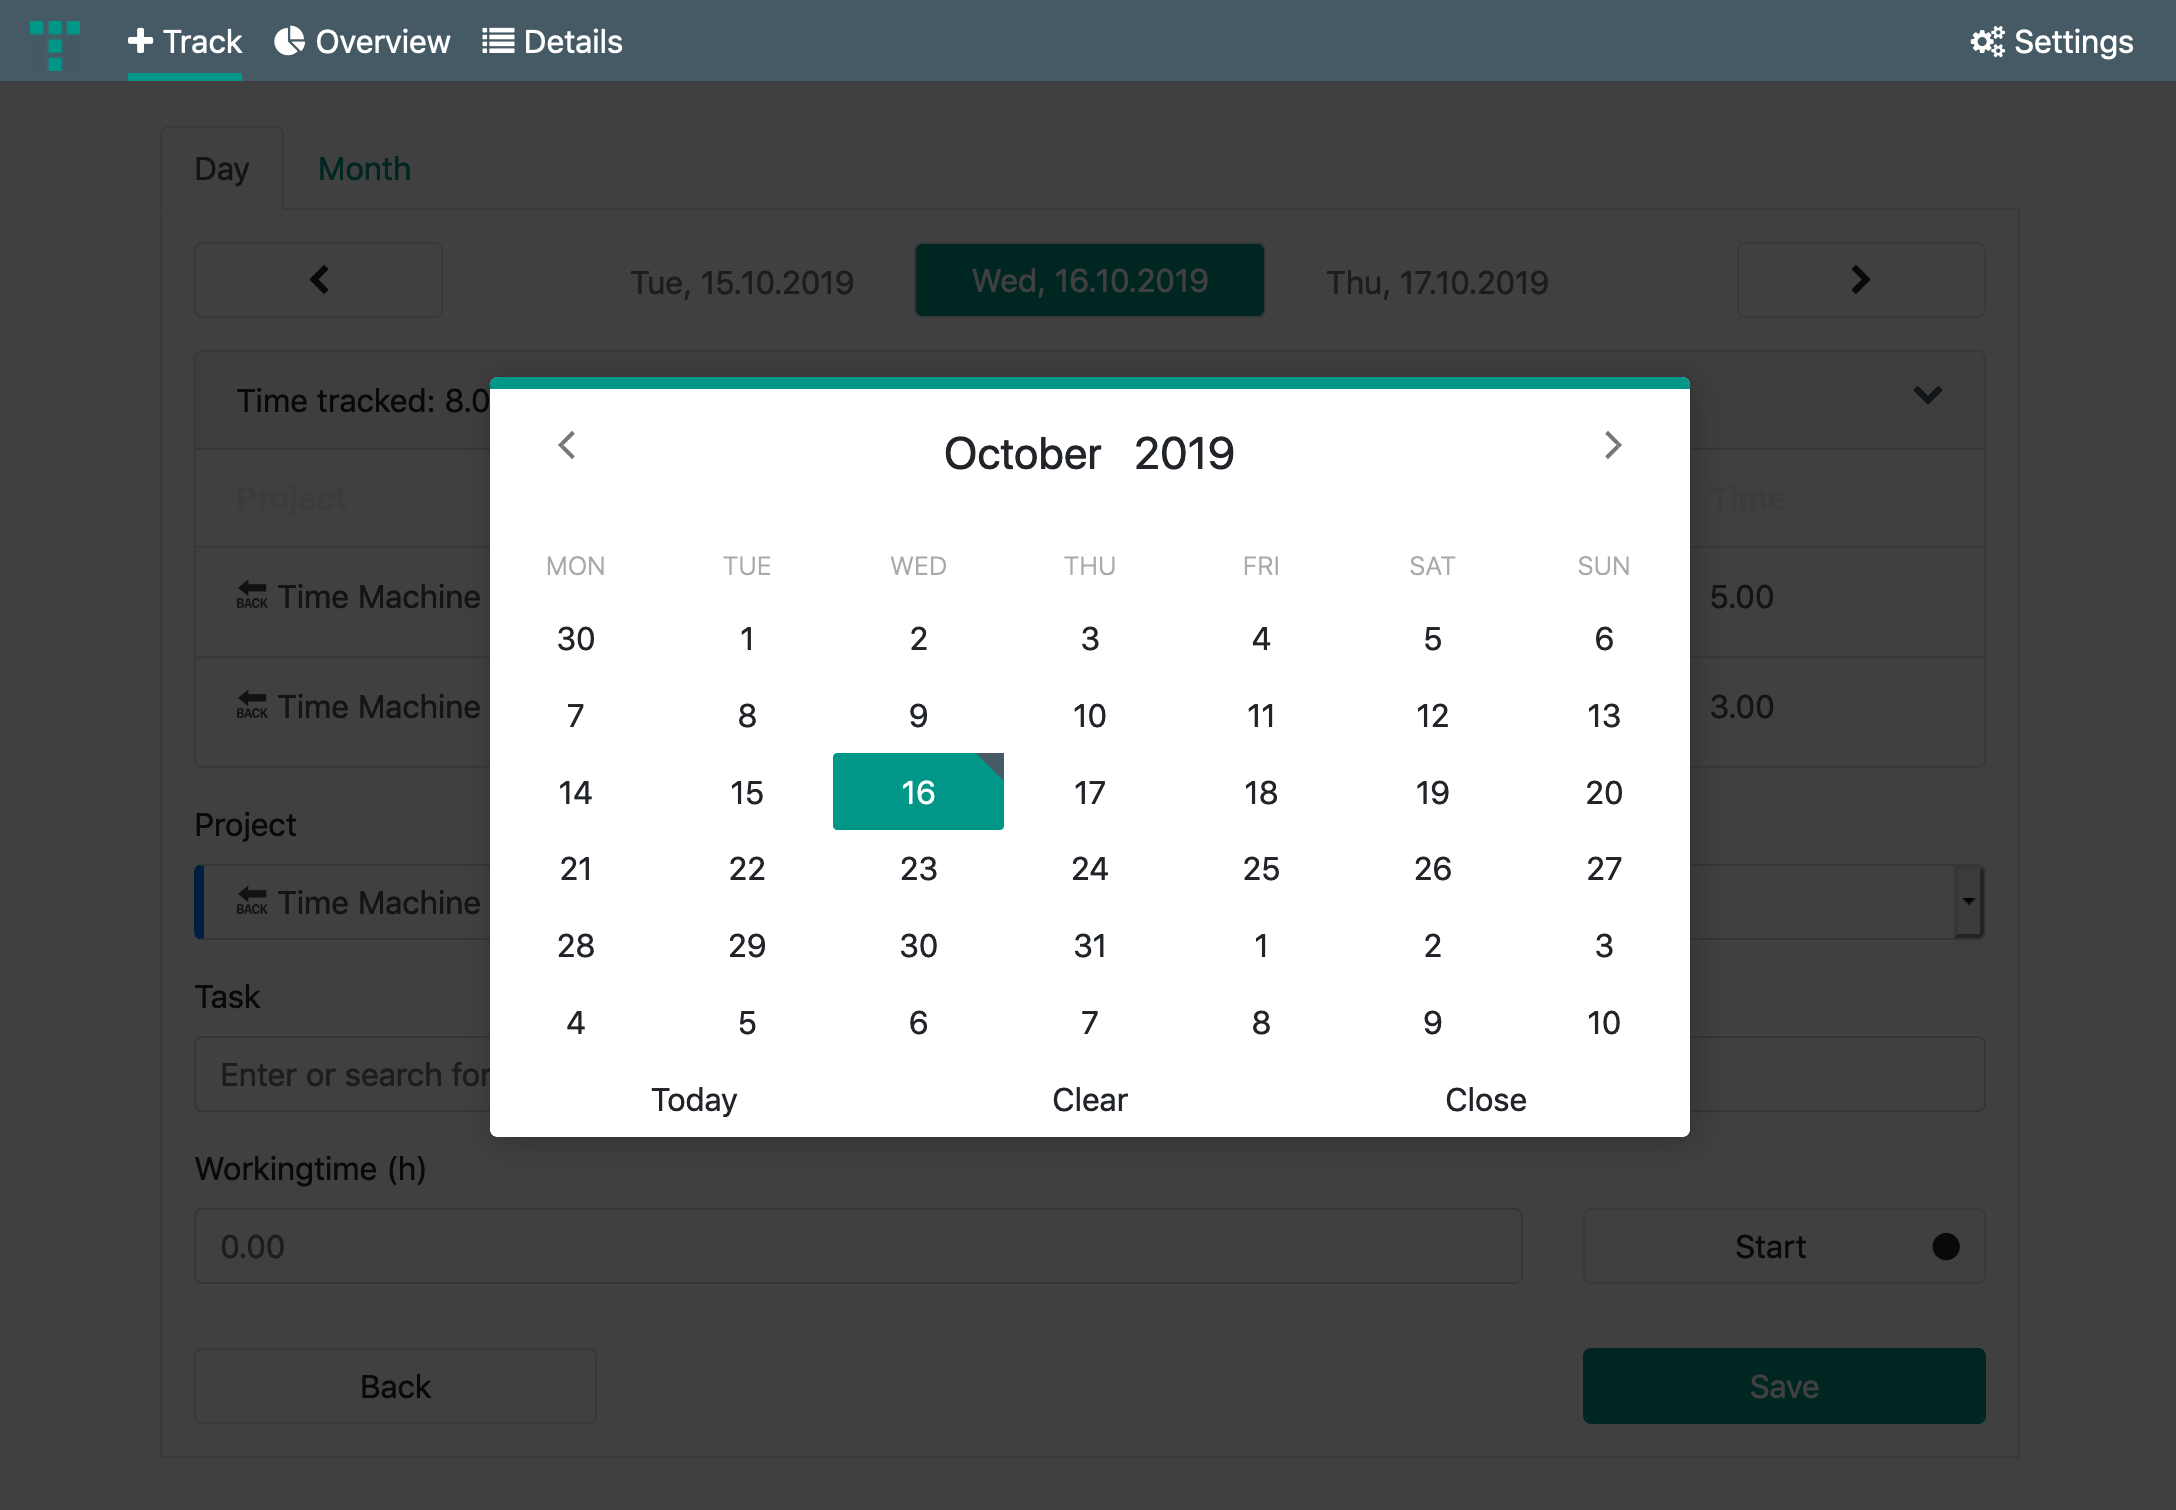 If you want a detailed calendar month view, select the month tab [1.1].
Select a project from the Project selection [2].
Choose existing or type in a new task by clicking in the task textbox [3].
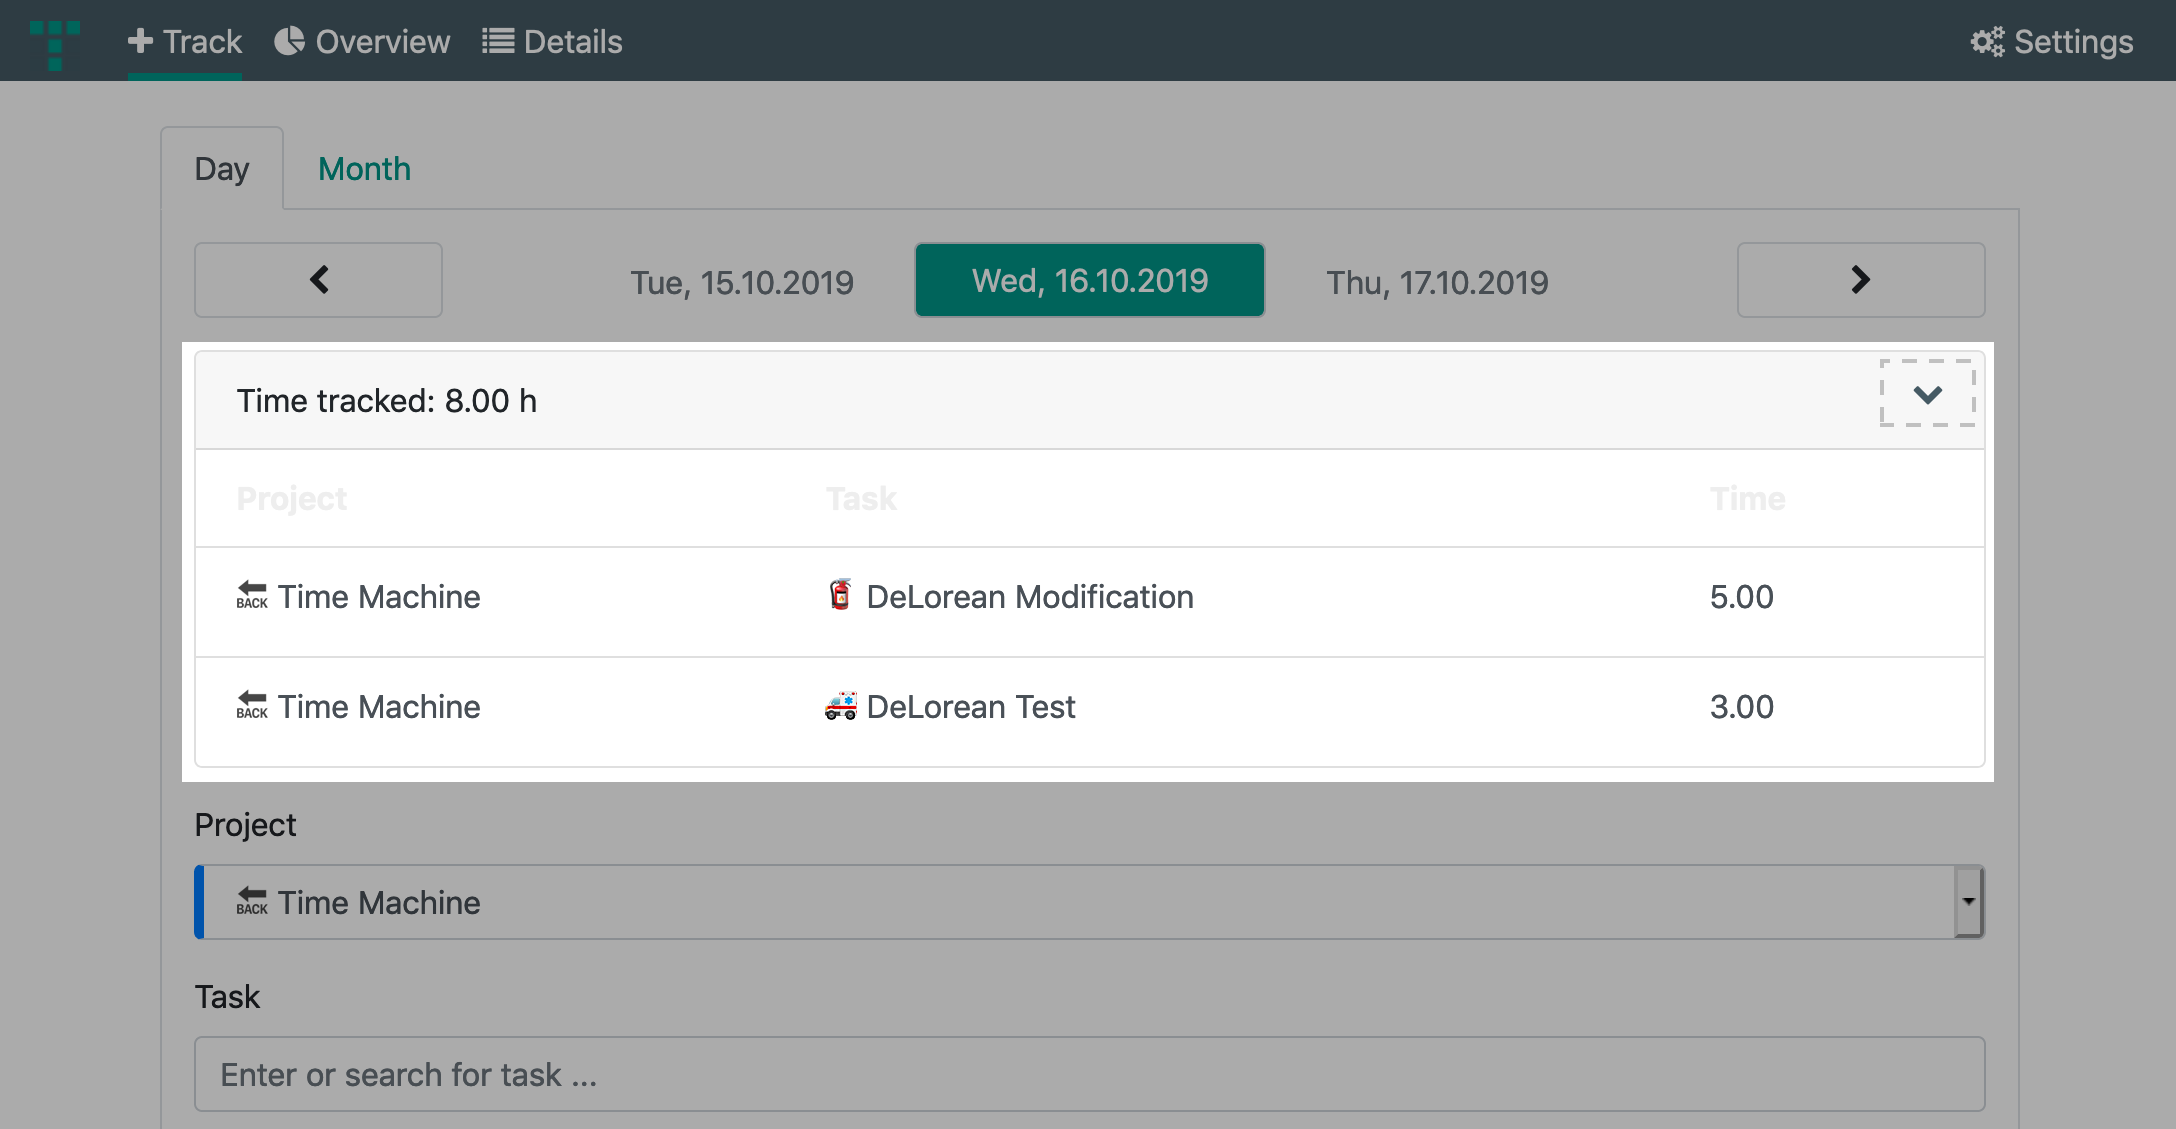
Type in the time for the task into the workingtime textbox [4]. Use the Start time track button to stop your working time.
Press Save to add the time for a task to the project.
Example: 5 hours for Task Delorean Modification to Project Time Machine
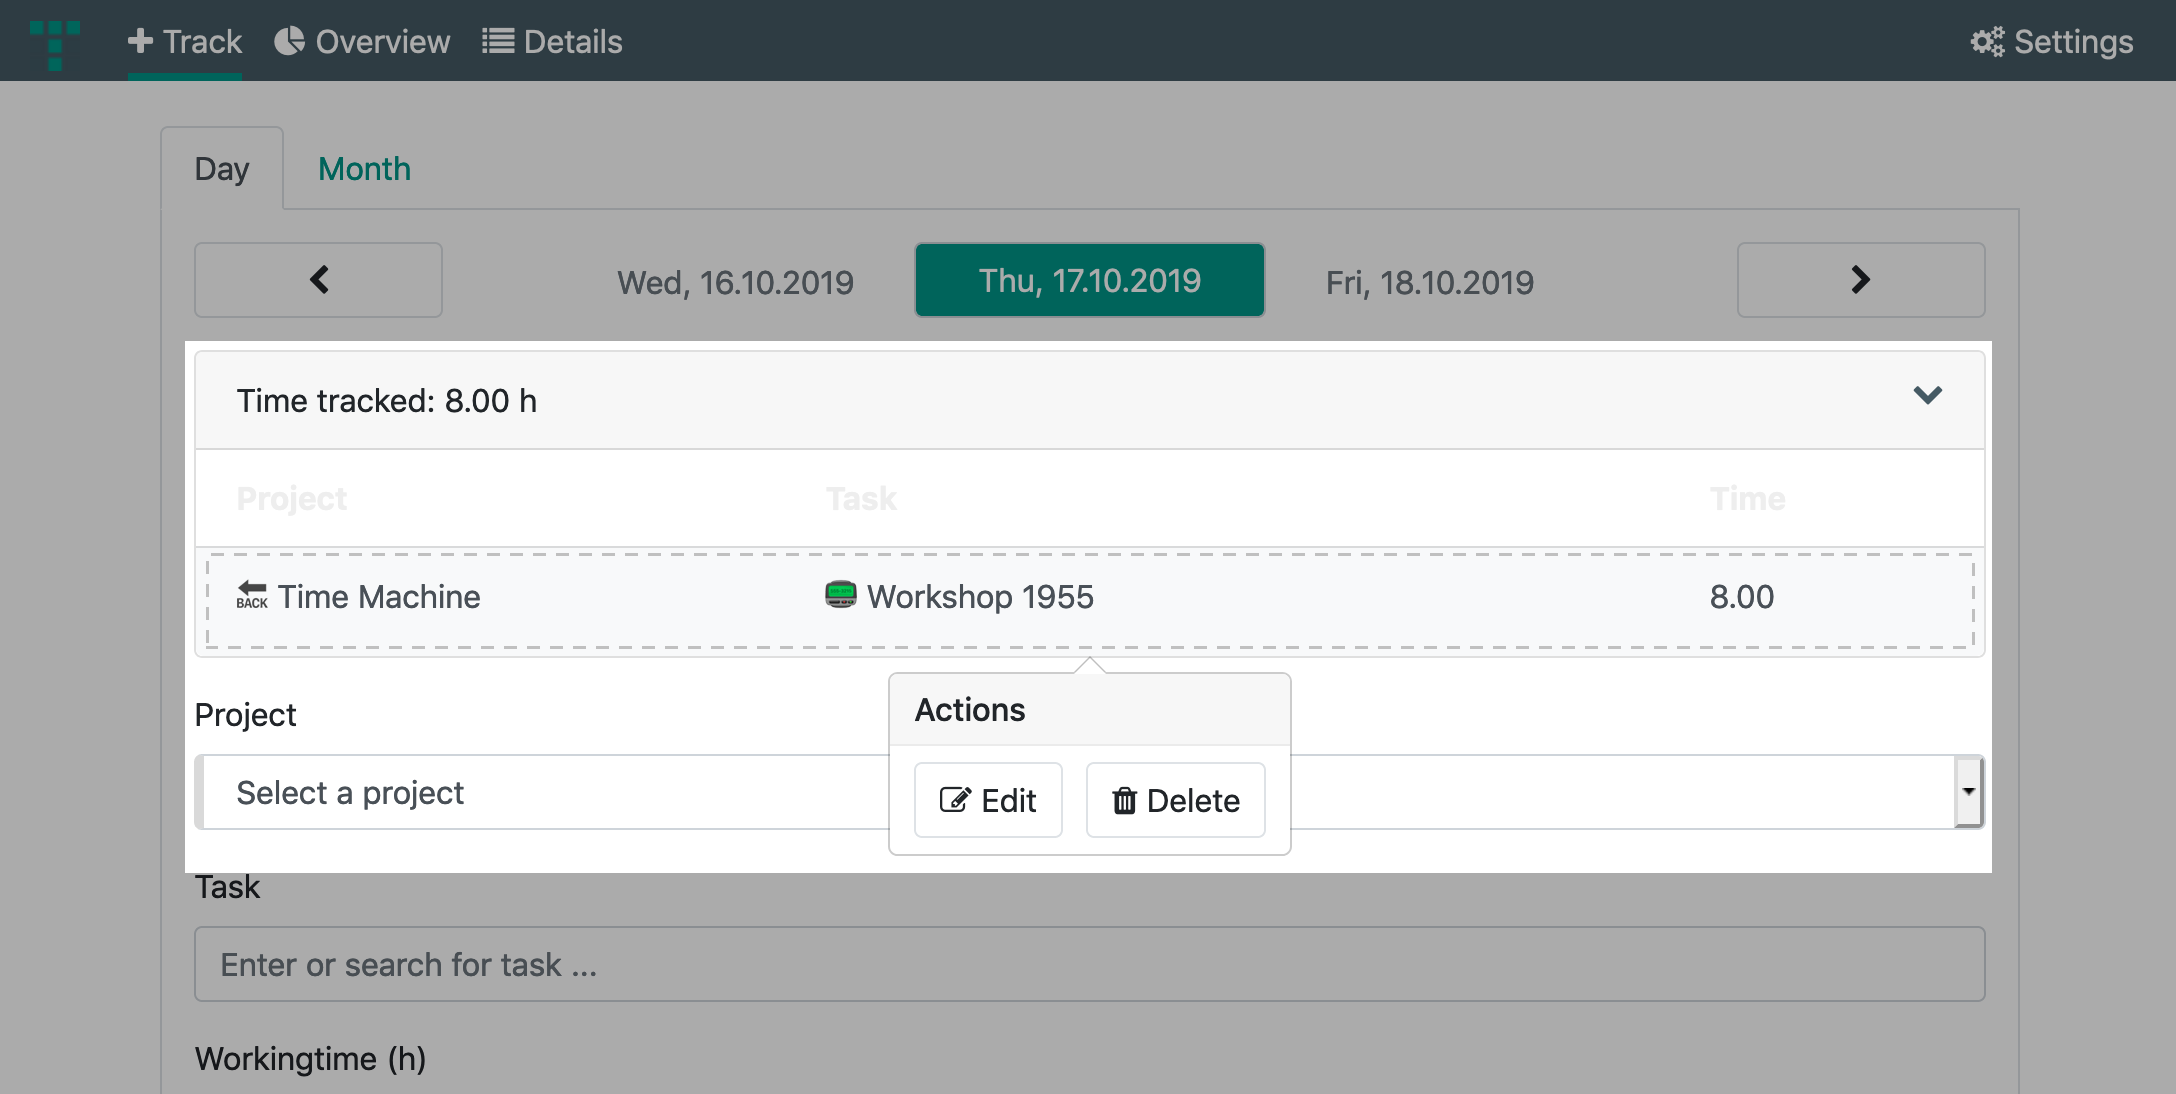
After saving you will get an overview of all tasks of the selected date. Click on the arrow to expand the view. It shows you all the tasks of the selected day.
From there you can Edit or Delete a existing task.
Once you have added the tasks to your projects you will get additional information on the Overview page.
Use the calendar to get a monthly overview. Select a date by click.
Use the Details view to get a better overview and more options. The task will be displayed in tables with filter, search, export/import, share and edit options. 
 visit us on