This is a short guide on setting up the system and environment dependencies required for the MFlix application to run.
Everything you will implement is located in the mflix/db.py file, which contains all database interfacing methods. The API will make calls to db.py to interact with MongoDB.
The unit tests in tests will test these database access methods directly, without going through the API. The UI will run these methods in integration tests, and therefore requires the full application to be running.
The API layer is fully implemented, as is the UI. If you need to run on a port other than 5000, you can edit the index.html file in the build directory to modify the value of window.host.
Please do not modify the API layer in any way, movies.py and user.py under the mflix/api directory. Doing so will most likely result in the frontend application failing to validate some of the labs.
We're going to use Anaconda to install Python 3 and to manage our Python 3 environment.
Installing Anaconda for Mac
You can download Anaconda from their MacOS download site. The installer will give you the option to "Change Install Location", so you can choose the path where the anaconda3 folder will be placed. Remember this location, because you will need it to activate the environment.
Once installed, you will have to create and activate a conda environment:
# navigate to the mflix-python directory
cd mflix-python

# enable the "conda" command in Terminal
echo ". /anaconda3/etc/profile.d/conda.sh" >> ~/.bash_profile
source ~/.bash_profile

# create a new environment for MFlix
conda create --name mflix

# activate the environment
conda activate mflix
You can deactivate the environment with the following command:
conda deactivateInstalling Anaconda for Windows
You can download Anaconda from their Windows download site.
The Anaconda installer will prompt you to Add Anaconda to your PATH. Select this option to use conda commands from the Command Prompt.
If you forget to select this option before installing, no worries. The installer will let you choose an "Install Location" for Anaconda, which is the directory where the Anaconda3 folder will be placed.
Using your machine's location of Anaconda3 as <path-to-Anaconda3>, run the following commands to activate conda commands from the Command Prompt:
set PATH=%PATH%;<path-to-Anaconda3>;<path-to-Anaconda3>\Scripts\Once installed, you will have to create and enable a conda environment.
# enter mflix-python folder
cd mflix-python

# create a new environment for MFlix
conda create --name mflix

# activate the environment
activate mflix
You can deactivate the environment with the following command:
deactivateNote: If you installed Anaconda instead, skip this step.
As an alternative to Anaconda, you can also use virtualenv, to define your Python 3 environment. You are required to have a Python 3 installed in your workstation.
You can find the virtualenv installation procedure on the PyPA website.
Once you've installed Python 3 and virtualenv, you will have to setup a virtualenv environment:
# navigate to the mflix-python directory
cd mflix-python

# create the virtual environment for MFlix
virtualenv -p YOUR_LOCAL_PYTHON3_PATH mflix_venv

# activate the virtual environment
source mflix_venv/bin/activate
You can deactivate the virtual environment with the following command:
deactivatePlease remember that you may have to reactivate the virtual environment if you open a new Terminal or Command Prompt window, or restart your system.
Once the Python 3 environment is activated, we need to install our python dependencies. These dependencies are defined in the requirements.txt file, and can be installed with the following command:
pip install -r requirements.txtIt is recommended to connect MFlix with MongoDB Atlas, so you do not need to have a MongoDB server running on your host machine. The lectures and labs in this course will assume that you are using an Atlas cluster instead of a local instance.
That said, you are still required to have the MongoDB server installed, in order to be able to use two server tool dependencies:
mongorestore- A utility for importing binary data into MongoDB.
mongo- The MongoDB shell
To download these command line tools, please visit the MongoDB download center and choose the appropriate platform.
MFlix uses MongoDB to persist all of its data.
One of easiest ways to get up and running with MongoDB is to use MongoDB Atlas, a hosted and fully-managed database solution.
If you have taken other MongoDB University courses like M001 or M121, you may already have an account - feel free to reuse that cluster for this course.
Note: Be advised that some of the UI aspects of Atlas may have changed since the inception of this README, therefore some of the screenshots in this file may be different from the actual Atlas UI interface.
If you already have a previous Atlas account created, perhaps because you've taken one of our other MongoDB university courses, you can repurpose it for M220P.
Log-in to your Atlas account and create a new project named M220 by clicking on the Context dropdown menu:
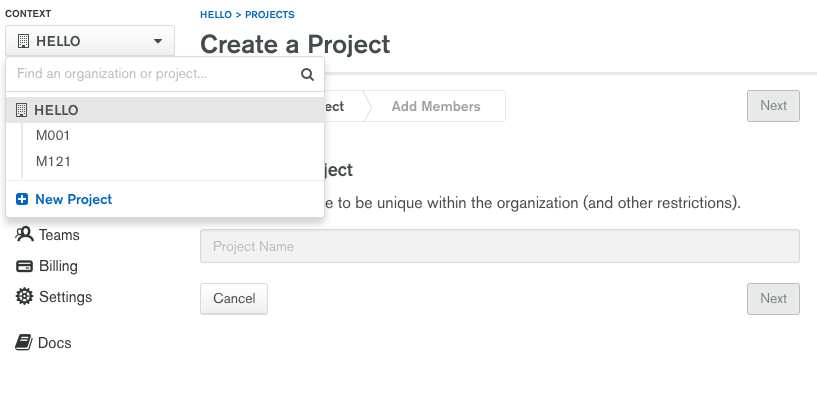
After creating a new project, you need to create a mflix free tier cluster.
If you do not have an existing Atlas account, go ahead and create an Atlas Account by filling in the required fields:
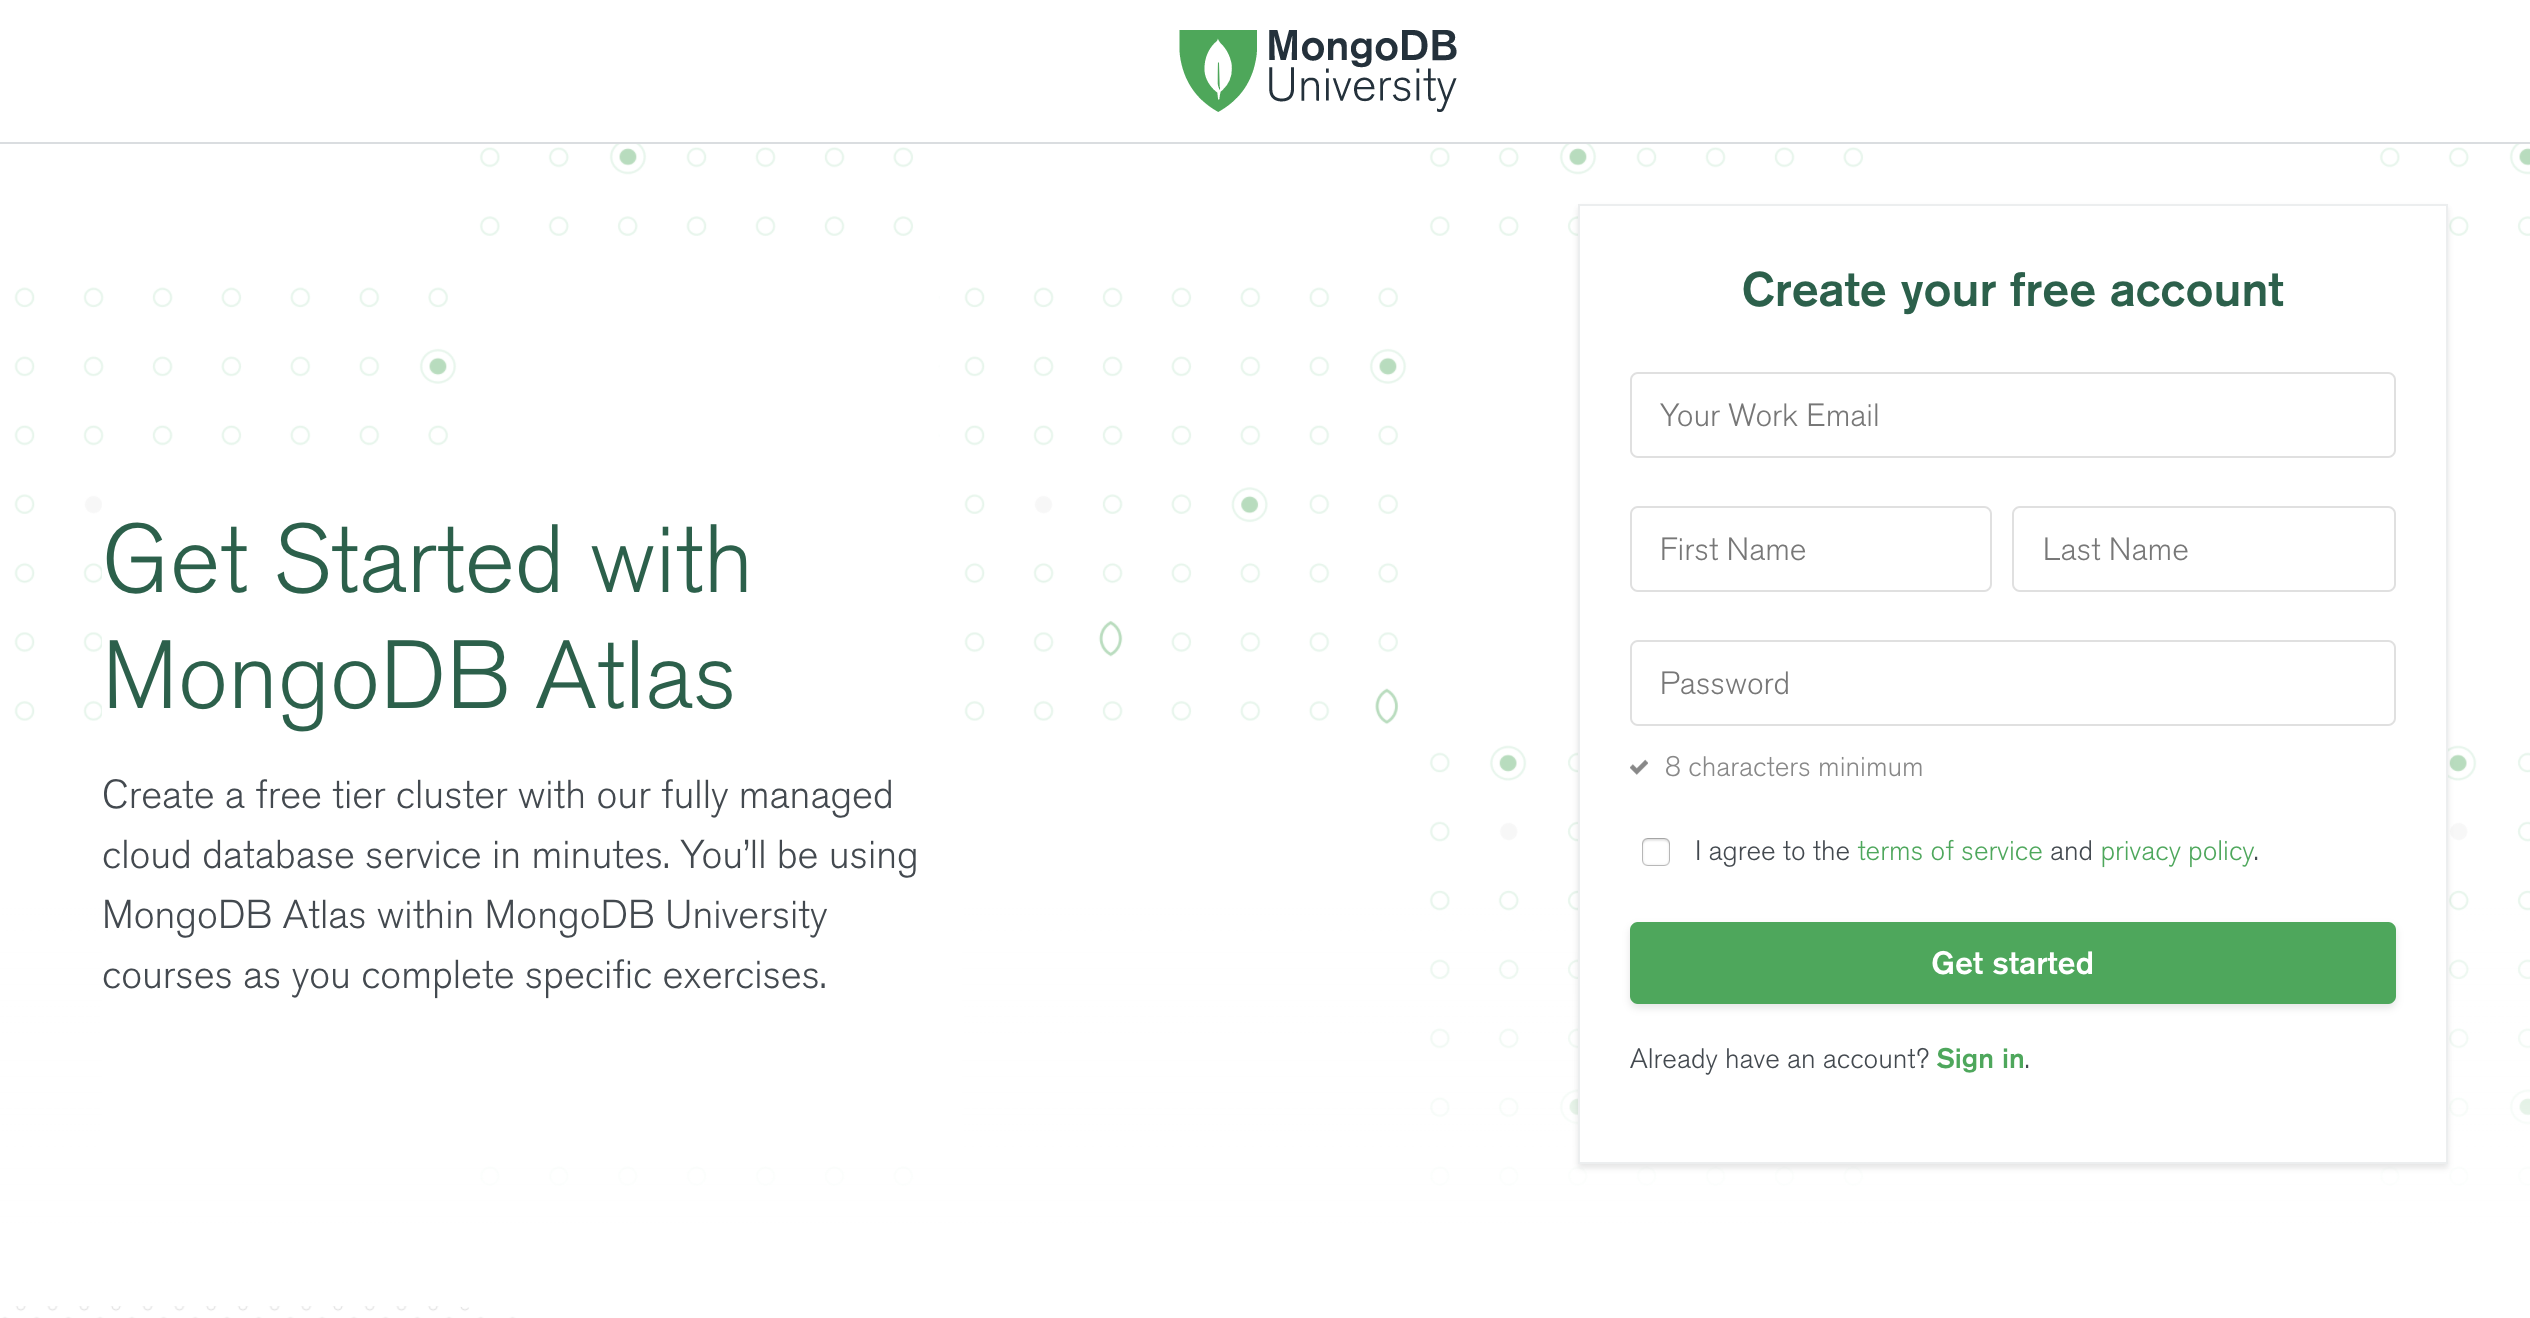
Note: You will need to do this step even if you are reusing an Atlas account.
- After creating a new project, you will be prompted to create the first cluster in that project:
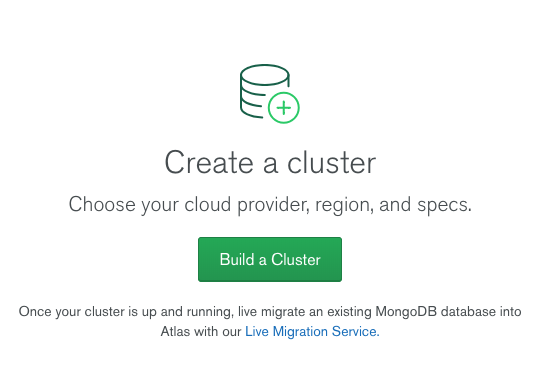
- Choose AWS as the cloud provider, in a Region that has the label
Free Tier Available:
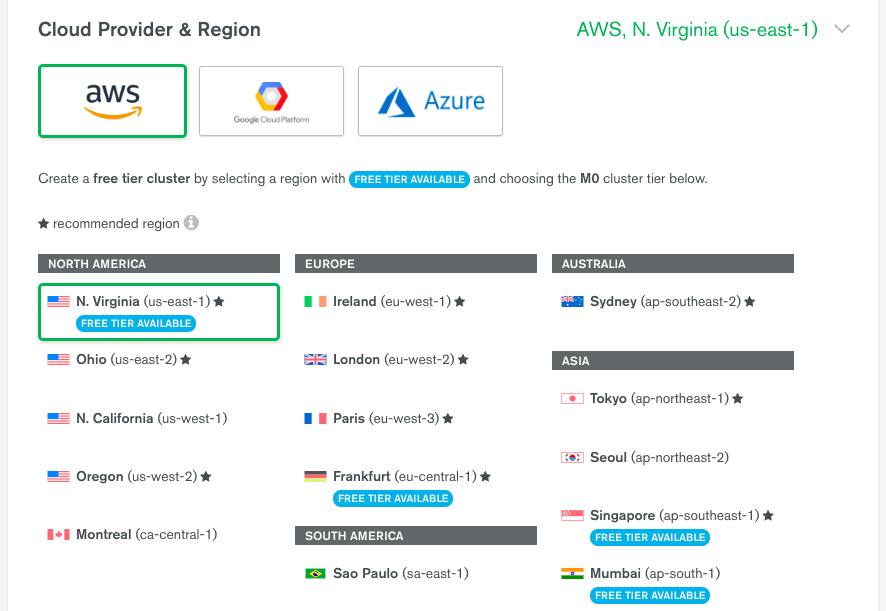
- Select Cluster Tier M0:

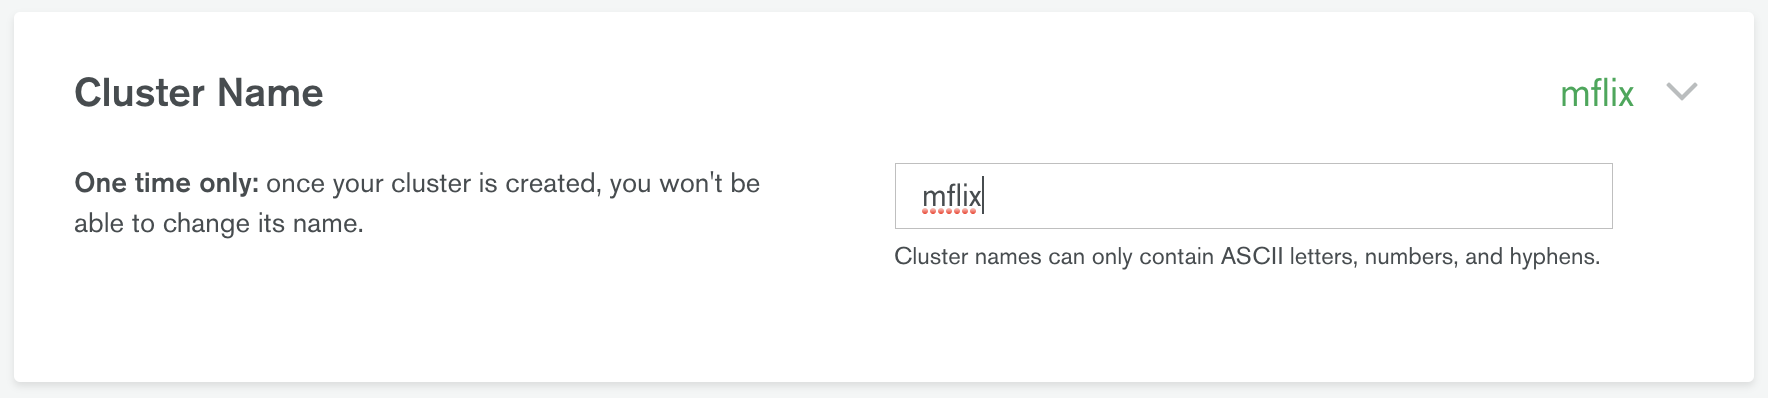
- Set Cluster Name to mflix and click "Create Cluster":
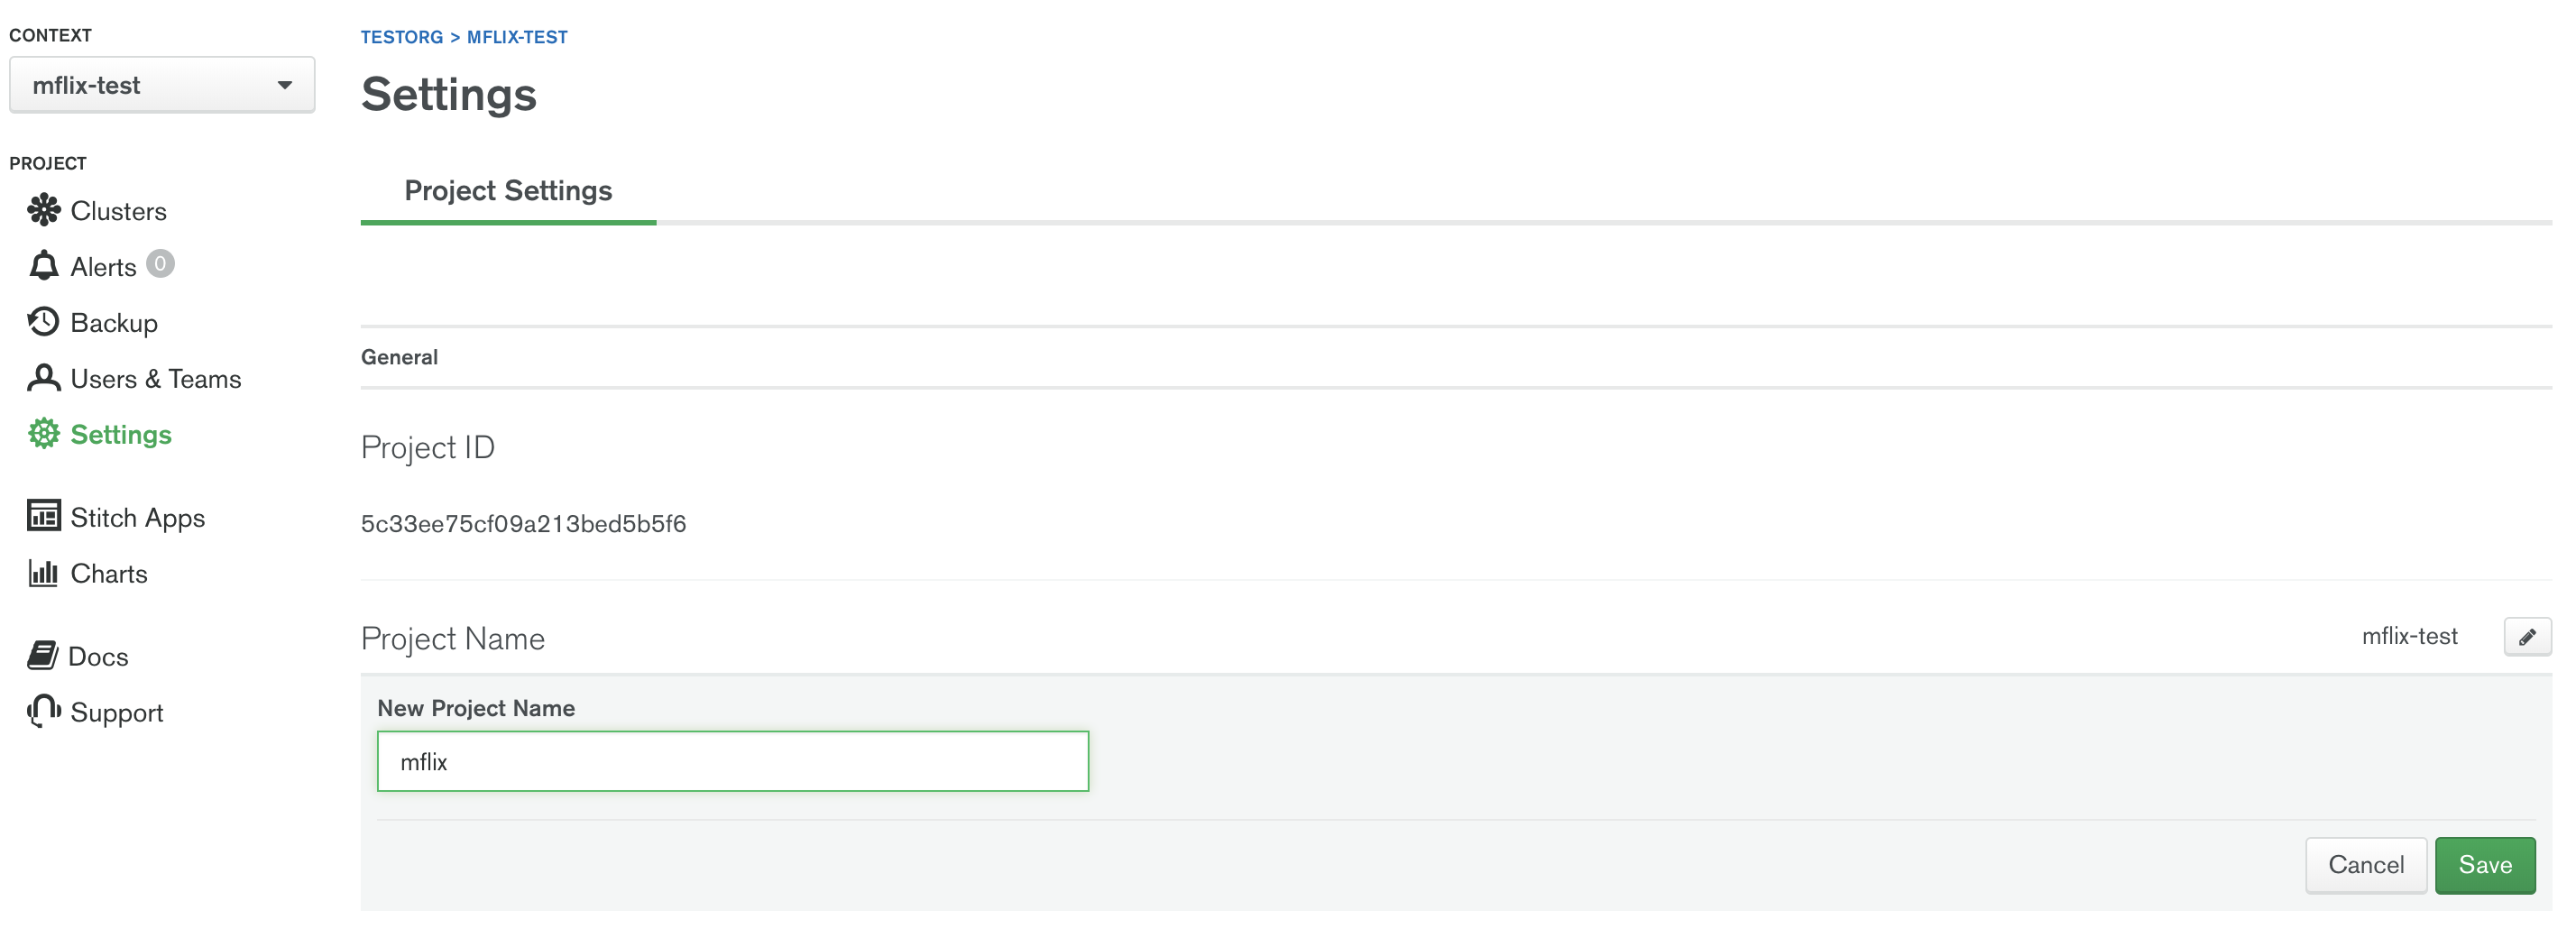
- Once you press Create Cluster, you will be redirected to the account dashboard. In this dashboard, make sure you set your project name to M220. Go to
Settingsmenu item and change the project name from the default Project 0 to M220:
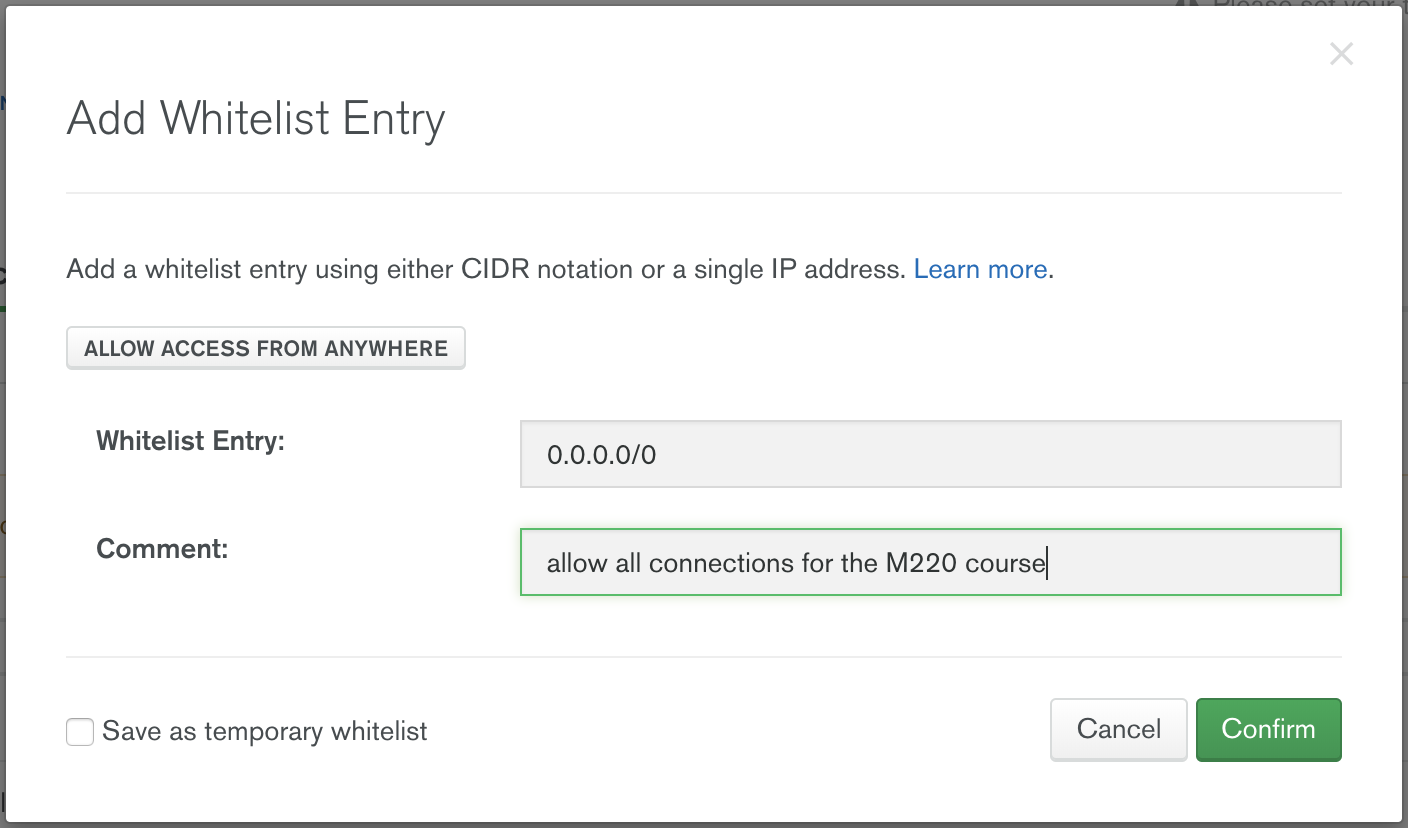
- Next, configure the security settings of this cluster, by enabling the IP Whitelist and MongoDB Users:

Update your IP Whitelist so that your app can talk to the cluster. Click the "Security" tab from the "Clusters" page. Then click "IP Whitelist" followed by "Add IP Address". Finally, click "Allow Access from Anywhere" and click "Confirm".
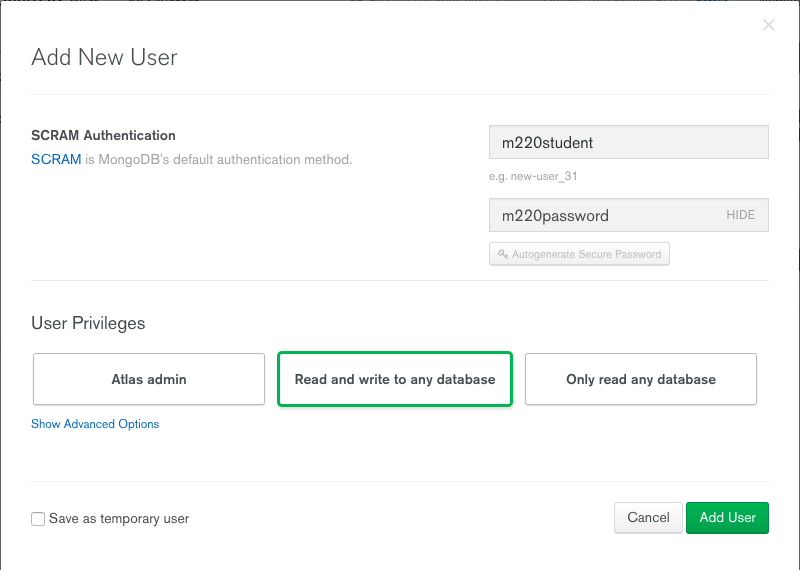
- Then create the application MongoDB database user required for this course:
- username: m220student
- password: m220password
You can create new users through Security -> Add New User.
Allow this user the privilege to Read and write to any database:
- When the user is created, and the cluster deployed, you can test the setup by connecting via
mongoshell. You can find instructions to connect in the "Connect" section of the cluster dashboard:

Go to your cluster Overview -> Connect -> Connect Your Application. Select the option corresponding to your local MongoDB version and copy the mongo connection command.
The below example connects to Atlas as the user you created before, with username m220student and password m220password. You can run this command from your command line:
mongo "mongodb+srv://m220student:m220password@<YOUR_CLUSTER_URI>"By connecting to the server from your host machine, you have validated that the cluster is configured and reachable from your local workstation.
The mongorestore command necessary to import the data is located below. Copy and paste the command, and replace <your-atlas-uri> with your Atlas SRV string:
# navigate to mflix-python directory
cd mflix-python

# import data into Atlas
mongorestore --drop --gzip --uri <your-atlas-uri> dataIn the mflix-python directory there are two files, called dotini_unix and dotini_win.
Rename this file to .ini with the following command:
mv dotini_unix .ini  # on Unix
ren dotini_win .ini # on Windows
Once the file has been renamed, open it, and enter your Atlas SRV connection string as directed in the comment. This is the information the driver will use to connect!
To start MFlix, run the following command:
python run.pyAnd then point your browser to http://localhost:5000/.
To run the unit tests for this course, you will use pytest. Each course lab contains a module of unit tests that you can call individually with a command like the following:
pytest -m LAB_UNIT_TEST_NAMEEach ticket will contain the command to run that ticket's specific unit tests.