Hello and Welcome! In this tutorial series we are going to walk through the steps of creating a new Alexa App using Strava. Let's first get some basic terminology down, introduce you to what we are going to build, and then we will dive right into building!
- Introduction to Strava
- Strava + Alexa
- Prerequisites
- Setup
- Access to Strava
- Defining Intents & Utterances
- Sending Requests
- Returning Responses
- Wrap up
If you're active, Strava was made for you. Our mobile app and website enhance the experience of sport and connect millions of athletes from around the world. We're the social network for those whoe strive. Join us.
Strava is the running/biking/swimming app that I use on a daily basis to record my activities. Through a wide range of features including activity tracking, live tracking, detailed activity data, maps, and connecting you with friends and others, Strava is "the ultimate athlete resource" for staying in shape and helping you get through your next challenge. If you've never used it before, I would highly recommend trying it out. You can find out more information here: https://www.strava.com/.
You don't have to run or ride to love our features. Strava works with many of your other favorite sports, like skiing, kiteboarding, crossfit, kayaking, inline skating, rock climbing, surfing, yoga and more. Give it a shot, you'll dig it.
![]()
In this tutorial series we are going to walk through all the steps in creating and (hopefully) publishing an Alexa app that utilizes the API provided by Strava. You may be thinking "wait, isn't Strava for during an activity like tracking a run?" Yes and no. Yes, it is definitely the best resource for tracking during an activity, but we are not going to use those features. A great part of Strava is the data analytics and social features that come with it. From pace to heart race to distance to KOM/QOM (King/Queen of the Mountain) to Course Record (CR) to Personal Records (PR) to competing against your friends and joining clubs, Strava helps you stay motivated and engaged even when you are not out doing an activity.
First off, welcome! With this tutorial I hope to walk you through all the steps of creating an Alexa app. However, I am assuming some background in programming and some familiarity with Javascript (our language of choice). If you know python, maybe in the future we can create a similar series, but for now we are sticking with Javascript.
If you've never built an Alexa app before or are wondering where to get started, check out the Amazon Developer Portal for a suite of resources to get you started. If you would like to follow a base tutorial for beginners, check out my other tutorial Build Your First Alexa App. Please note though, that tutorial is using Python but is still a good introduction.

Other things of note:
- I am using a Mac and will be working in the terminal a fair bit. The commands are not too intensive, but if you are on a Windows machine I have not tested this there.
- My editor is Atom
- At the end of every section the whole file will be posted. I would strongly recommend not copying and pasting. Spend the time, learn what each line does and understand it.
- There will also be a Github repo with all files (except the keys of course)
Well I think that's everything on the list, let's get started!
-
Step one in every tutorial, let's open up the terminal, create a new folder, and move into it..
mkdir Desktop/alexa-strava && cd Desktop/alexa-strava -
Init a new project and fill in the required responses. If you hit "enter" through them, it does the default value (i.e. uses index.js for the entry point) which is what we want.
npm init
-
With our project created, let's install the dependencies we need for this project.
Things to note: Amazon provides an awesome Node.js SDK called the Alexa Skills Kit SDK for Node.js. However, I have found that I cannot iterate as quickly with that as it required uploading a zip file to the Amazon Console everytime I make a change and want to test. Because of that, in this tutorial we are going to use Alexa-App - a framework for Alexa using Node.js that is not associated with Amazon but does all the same features. It utilizes a webserver (express) to run the app. In the future, we can work on using Amazon's provided resources, but for now, we will stick with Alexa-App
Node packages we will be using:
npm install --save alexa-app express dotenv convert-units -
Once that has been completed, let's create our
index.jsfile and open it up in Atom. -
With our packages installed, let's start structuring out our code.
var express = require("express"); var alexa = require("alexa-app"); var dotenv = require('dotenv'); var convert = require('convert-units') -
If we follow the starter installation of
alexa-app, we know we now need to start an express server and get it up and running.var app = express(); app.set("view engine", "ejs"); -
Lastly, to officially initialize our Alexa app, we need to:
-
Create a new instance of Alexa
-
Share where Alexa will live (what endpoint)
-
Start the server
var alexaApp = new alexa.app("strava");

alexaApp.express({ expressApp: app });
app.listen(process.env.port || 5000);
-
If we take a look at our code now, we will almost have all of what we need to get started, but we need to initialize Alexa to listen for that "welcome" intent to make it official. So the last part of the code for this section is just that:
alexaApp.launch(function(request, response) { response.say("Hello, welcome to Strava"); response.shouldEndSession(false); }); -
Our file should be very simple and just look like this:
var express = require("express"); var alexa = require("alexa-app"); var dotenv = require('dotenv'); var convert = require('convert-units') var app = express(); app.set("view engine", "ejs"); var alexaApp = new alexa.app("strava"); alexaApp.express({ expressApp: app }); alexaApp.launch(function(request, response) { response.say("Hello, welcome to Strava."); response.shouldEndSession(false); }); app.listen(5000); console.log('Started on port 5000'); -
Awesome, just to confirm it's working. Head back over to the terminal and run
node index.js. Hopefully it works! -
I wish I could say we were done in the terminal, but not quite yet. In order to get our express server up and running for Alexa to talk to, we need to 1) start it up 2) have a url for it to hit. If you read my last tutorial, you would know that my favorite tool for that is
ngrok.ngrokis a local tunneling service that provideshttpsurls for you to test with that come from localhost. To downloadnrgokvisit the website and download the right one for your operating system.Once it is downloaded, unzip the folder, and copy and paste the file called
ngrokinto your alexa-strava directory. Your directory should now look like this: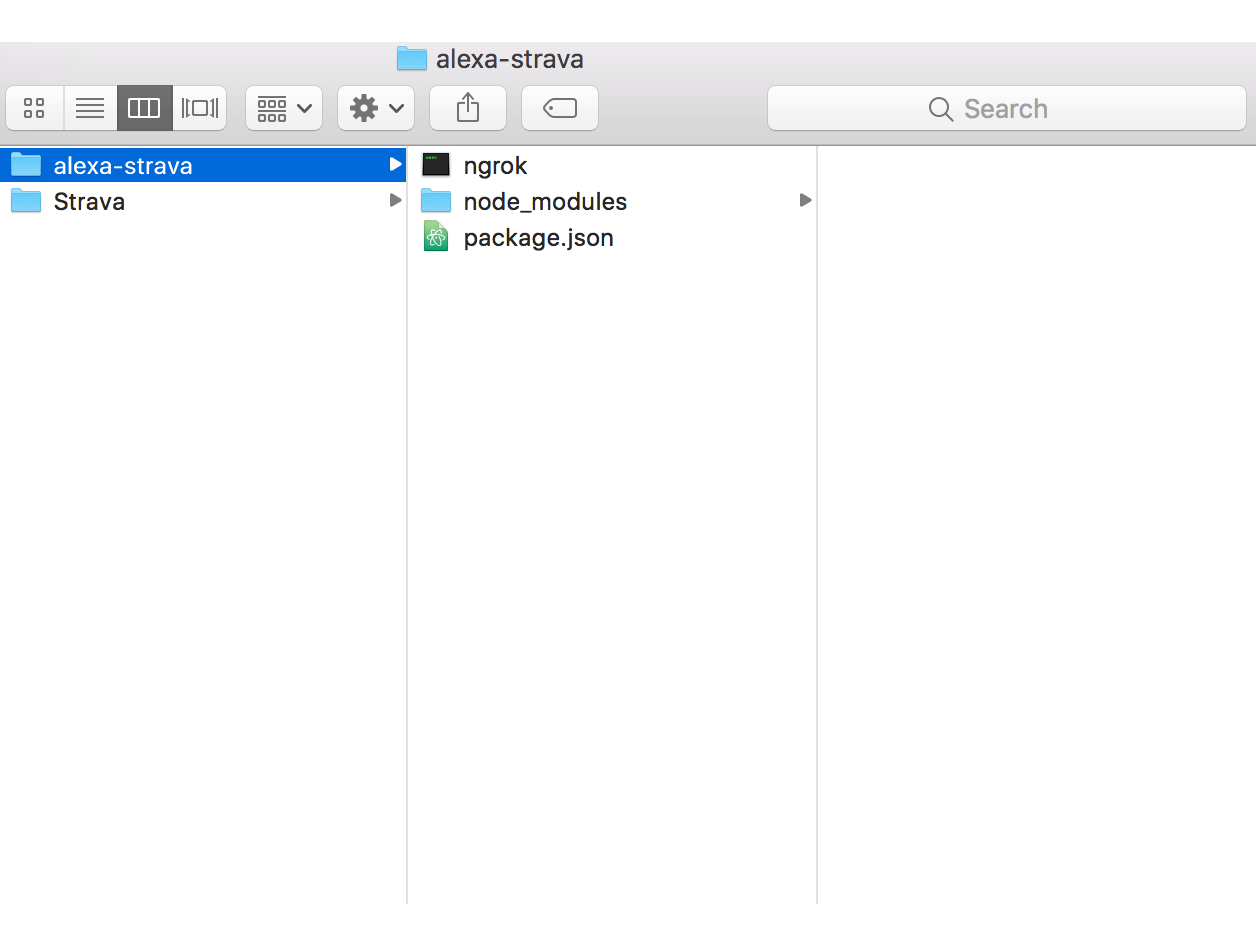
-
Now that we have
nrokdownloaded, we can work on getting the web server started and tunneling into localhost. -
To do that, open up another terminal window and make sure you are in your project folder. Go ahead and run:
./ngrok http 5000What that will do is start up an ngrok tunneling instance on port 5000. It should look something like the image below. Note: if you ever close or accidentally stop this terminal window, you will get a new url for your tunnel.

-
With our ngrok server running, we are good to go for this first section! Next up is setting up the Alexa app configuration in the Developer Portal and then getting the Strava keys.

For this section, we are going to quickly walk through the steps of getting your app up and running. If you ever get lost, refer back to my first tutorial Build Your First Alexa App for more detailed steps and some more images. The app creation is the same across all platforms.
-
Signup and/or sign in to your developer account at the Amazon Developer Services
-
Click on "Alexa" in the top, and then click on "Get Started" for Alexa Skills Kit.

-
Click on "Add a New Skill" on the following page. We are going to be doing the following things:
- Skill Type: Custom Interaction Model
- Name: Strava
- Invocation Name: Strava
-
With those fields filled out, go ahead and click on "Save". Note - if you get problems with using the word Strava as your name, it's because it's already taken. Name it however you like.
-
We are going to skip the Interaction Model section for now and come back to that later.
-
For Configuration, we are going to do the following:
- Service Endpoint Type: HTTPS
- Account Linking: No (we will do that in a later tutorial)
-
When you click on HTTPS for your endpoint, a check box will appear.
- Geographical Region: North America
-
In the text box that appears below North America, what you are going to do is grab the
ngrokurl from above and copy and paste that in there.

-
BUT WAIT We aren't quite done yet - in our code from above there are two special things we did.
Remember this:
var alexaApp = new alexa.app("strava");What this did is it created a new
alexaAppat the endpoint/strava. -
At the end of the
ngrokurl, make sure you add inngrok_url+/strava -
Go ahead and click "Next" and you'll be taken to the SSL Certificate page. Since we are using
ngrokand having it locally click the middle radio button: My development endpoint is a sub-domain of a domain that has a wildcard certificate from a certificate authority. Note this is only for development and we will clean this up later. -
Alright sounds good! Now onto setting up Strava and getting a developer account!
Now that out base application is up and running, it's time to get situated with Strava.
-
Visit Strava Labs for the developer portal access to Strava's API.
-
Under "Get Started" click on "Manage Your App"

- On the "Create Application" page, let's go ahead and fill out some basic data for out app.
- Application Name: Strava Alexa
- Website: If you have a personal website, use that! I'm just going to use mine at http://kevinguebert.com
- Application Description: Strava on Alexa
- Authorization Callback Domain: For now, we are going to use the same website as above: kevinguebert.com

- Check the box and click submit, you should be good to go! Your application should page should look something like this:

- With out application created, we are focused on two key resources here.
- Client Secret
- Access Token

- But for now, we are good to go in setting up our application. Let's move on to the next steps and try and get it connected in Alexa!
Finally. We have done all the setup and configurations for our application, it took a while, but we made it.
Now it's time to actually figure out what we want to do. Strava provides a great API for us to interact with but we need to make sure we utilize it in the best possible way while also following good Voice Design guidelines.
When a user opens up Strava on Alexa, we would like the user to hear about their latest activity they performed with all the data elements associated with it. What I've done for you is laid out the simple path that we are going to walk through today. Check out the graph below:

Seems pretty simple right? Don't worry about that "Some other path" for now, we will get there, but we want to focus on the "Stats on Last Activity" path. Here's how it will kind of go.
- A user opens up Strava on Alexa.
- Alexa asks what the user would like to do.
- User wants to know about their last activity
- Alexa fetches that information and voices it in a clean manner
- Alexa exits Strava
That's 5 steps. That's all we are doing today. 5 simple steps...that are going to be some work! But now that we know what our game plan is, we can start writing some code and making it come to life!
If we think about the steps from out game plan, we know we are working on one main intent for now - GetLastestActivity. With GetLastestActivity we are hoping to send a request to Strava, retrieve all the data about the last activity of a user, and then return that data.
That means our intents and utterances will look pretty simple:
{
  "intents": [
    {
      "intent": "GetLastestActivity"
    }
  ]
}
GetLastestActivity what is my last activity
GetLastestActivity tell me about my activity
GetLastestActivity what did I do last
GetLastestActivity stats on latest performance
As you can see - fairly simple. We have 1 intent GetLastestActivity with a couple sample utterances to help Alexa get going.
- To set these up, head on back to the Amazon Developer site where we setup our Alexa skill and go to the "Interaction Model" section. We are going to copy and past the above Intents and Utterances into the respective places.


-
Once that is done, go ahead and click "Save"
-
Woo! All done with this section. Go grab some water and next we will work on sending requests now to Strava in our Alexa application!
-
To start sending requests to Strava we need to do 2 things first.
- Authorize ourselves to be able to send requests
- Install a handy-dandy npm package to help us out in sending these requests
- Let's start with authorization
-
Strava uses oauth as it's authorization resource. We will be going into what that means and how to implement it into our Alexa app in a following tutorial, but today, we still need to authorize our Strava account to be able to be accessed by our Strava application.
What does that mean? Well you know how whenever you go and "Sign in with Facebook" on some websites, it redirects you temporarily to Facebook where you click "Allow" for that application? That's what we are doing, but in a simpler way to get started.
-
To authorize our account to for our application to use, we need a couple things:
- A personal Strava account (I hope you have one by now)
- Our Application Client ID
- Our Application Redirect URL
These can all be found on that "Manage Your Application" page in the Strava Developer Lab.
-
With those pieces of information on hand, we are going to craft a url. It should look something like this:
https://www.strava.com/oauth/authorize?client_id=CLIENTID&response_type=code&redirect_uri=REDIRECTURL&scope=public&state=mystate&approval_prompt=force#_=_1Please Note: Make sure to change the CLIENTID and REDIRECTURL to be the ones in your application!
-
With that URL created, open up your favorite web browser and copy and paste that in there. You should get something that looks like this:

-
Go ahead and click "Authorize" and it will:
- Authorize your account
- Redirect you to your REDIRECT URL
Alright perfect! Our profile and our application are now in sync.
-
Head back over to your favorite text editor. We are going to work on using our Client Secret and Client Access Tokens to send requests.
-
In the base root of your folder, create a file called
.env. If you recall from wayyyy back at the beginning, we are using a package calleddotenvwhich will hold our keys to our application. Git does not automatically commit these files so they will never get accidentally published on Github or anything! -
In the
.envfile, we will be adding three lines:STRAVA_ACCESS_TOKEN=INSERT_YOUR_TOKEN_HERE STRAVA_CLIENT_ID=INSERT_CLIENT_ID STRAVA_REDIRECT_URI=INSERT_REDIRECT_URL -
With our tokens saved and set, we now need to load them into our application. Right after
var app = express();go ahead and add:var app = express(); dotenv.load({path: '.env'});This loads our environment variables into the app for us to use.
-
Next up, we are going to install another NPM package called
node-strava-v3- a node package wrapper for the Strava API. I would highly recommend checking out some of the documentation found on Github to get a better understanding of all that it can do! Learn more about node-strava-v3npm install --save node-strava-v3 -
Make sure to add it to the top of your file with:
var strava = require('strava-v3'); -
With those two things added (environment variables and npm package) - we can work on sending a request out to Strava!
-
Right below our
alexaApp.launchcode, we are going to add in ourGetLastestActivityrequest!alexaApp.intent("GetLastestActivity", function(request, response) { }); -
What we want to do in here is:
- Send a request out to Strava
- Return the response
- Handle error scenario
- Handle success scenario
- Have Alexa respond accordingly
-
If we look at the documentation for
node-strava-v3we see there is a request forstrava.athlete.listActivitieswhich return a list of activities for a user. Exactly what we need! We are going to add a few parameters though:- We only need our last activity, so we are going to limit it to 1 page, 1 per page
-
With our parameters now, we can now craft our request to Strava:
alexaApp.intent("GetLastestActivity", function(request, response) {
  strava.athlete.listActivities({
      page: 1,
      per_page: 1
    }, function(err, activities) {
      //Handle success and errors
  });
});
Let's review the above code real quick.
- We send a request to Alexa with the intent
GetLastestActivity - Our code then handles this request which in turns sends a request to Strava for 1 activity on one page
- We have a completion function that is called when finished that has
errandactivitiesas parameters
- We send a request to Alexa with the intent
-
With this knowledge of
errandactivitieswe can move forward with returning a response. -
As good software developers that we are, let's handle the
errsituation first. But first let's think about what the error scenarios can be.- Our request fails
- The Athlete doesn't exist
- The Athlete does not have any activities
We need to think of a clean way to handle all these scenarios. Right now, we are at the top level of errors. What that means is that we are only going to encouter the first two.
But if we think about it more, at this point in the tutorial, we have already authorized our account with this application, so unless that failed way back a couple steps, we can't hit the "athlete doesn't exist at this point" error (Please note, we will come back to it at some point! Can't just skip error handling 😎)
Okay so that means our request failed. What would be the best way to handle that? Well, let's keep it simple for now. Apologize for the problem and ask the user to try again.
-
Let's code it out!
if (err) { response.say("A problem with the request has occured. We apologize for the problem. Please try again later."); } -
Now you may be looking at thinking "What is
reponse.say??" Well, that's a little handy-dandy helper function from thealexa-apppackage that sends a response back to our Alexa device and says that! Pretty nifty right! -
Okay, one error scenario down. one to go. So what happens if the request succeeds but no data is returned? Well that most likely means that there are no activities associated with that user (aka you!). We want to handle this scenario.
-
If there are not activities associated with the athlete, let's go ahead and tell them "no activities" but also provide them with a little push to get out the door!
if (activities.length === 0) { output = "I'm sorry, I was unable to find any activities for this athlete. Today's a good day to create one! Get out there and record your first activity!"; response.say(output); } -
No moving onto the success scenario with data: the success response from Strava under the parameter
activitiesthat has activities will look something like this:[ { id: 894557721, resource_state: 2, external_id: 'garmin_push_1612875533', upload_id: 993065686, athlete: { id: 9503898, resource_state: 1 }, name: 'Treadmills are tough', distance: 5129.4, moving_time: 2413, elapsed_time: 2413, total_elevation_gain: 0, type: 'Run', start_date: '2017-03-10T13:15:17Z', start_date_local: '2017-03-10T08:15:17Z', timezone: '(GMT-05:00) America/New_York', utc_offset: -18000, start_latlng: null, end_latlng: null, location_city: null, location_state: null, location_country: 'United States', start_latitude: null, start_longitude: null, achievement_count: 0, kudos_count: 11, comment_count: 1, athlete_count: 1, photo_count: 0, map: { id: 'a894557721', summary_polyline: null, resource_state: 2 }, trainer: true, commute: false, manual: false, private: false, flagged: false, gear_id: 'g1825577', average_speed: 2.126, max_speed: 2.9, average_cadence: 78.8, has_heartrate: true, average_heartrate: 155, max_heartrate: 186, pr_count: 0, total_photo_count: 0, has_kudoed: false, workout_type: 0, suffer_score: 66 } ]The response is an
arraywith one value in it (remember, we only asked for one!) -
Okay we have data now! Woo! But wow, look at all that data we have! For one activity, we have a fair amount of data associated with it. Now we just need to make sure we display (voice) it in a meaningful manner.
-
Here's what we should be looking like at the end of this section
With our new found data and successful, it is now time to think about what we would like to return to the user. Do we want to return all the data? Some of the data? How would we like Alexa to say it?
After working on this a little, I've come up with two possible solutions:
- Make it simple by just outputting what the data is and what the results are.
- "Name: Run. Distance: 2.4 miles" etc.
- Try and craft a story around the activity and make it more natural language
- "On Tuesday March 28th you Ran 2.4 miles" etc.
Which one are we going to do? Well, if we look at it, number 1 looks easier while number 2 looks more intensive... but also more of what a user would want. In saying that though, this is part 1 of a long series, so we are going to continue with the first one and then iterate on top of it to produce a story in later parts.
Next question is how much data will a user want to hear? All of the data? Some of the data? Only the most important?
My answer: Some of the most important!
Why's that? Well I have the benefit of working on this before so I know a couple of key things already.
Alexa takes a long time to say all the data. If you want to know Cadence, Avg. HR, Max. HR, Avg. Speed, Max Speed, Elevation, Suffer Score, etc. etc. it takes Alexa almost 30 seconds to a minute to share that information. I was getting lost in it all. Something to revist in the future! 🎉
With that knowledge, we can move forward!
-
With our data, let's go ahead and set our activity to be a friendlier variable we can work with. Remember, this is inside an else block after the "no activities" check.
else { var activity = activities[0]; } -
Okay,
activityset. Now let's look at the response a little. more. What are the most important pieces that a person would want to hear?Here's the list I came up with, you can chose your own.
- Date
- Type (Swim, Bike, Run, etc.)
- Name
- Distance
- Elapsed Time
- Avg. Pace
- Avg. HR
What's that phrase again, keep it stupid simple? Or is it keep it simple, stupid? Whatever that is, we want to keep it simple for this first round.
-
Let's go ahead for code understanding, grab these values and set them to be variables in our code.
var activity_name = activities[0].name; var activity_type = activities[0].type; var activity_date = activities[0].start_date_local; var activity_distance = activities[0].distance; var activity_avg_hr = activities[0].average_heartrate; var activity_avg_speed = activities[0].average_speed; var activity_elapsed_time = activities[0].elapsed_time; -
Next, we need to do some Math and conversions! Yes Math! Here's why.
- Date: UTC time
- Distance: Meters
- Speed: Meters per Second
- Elapsed Time: Seconds
I guess I should have prefaced everything with I am an Imperial units user, so I will be setting all of this up for that. 🙃
-
To convert the
activity_dateto a human readable format, we are actually going to use some helper code here to help us out. I am not trying to come up with the hot new solution to outputting dates or try and do it here in this tutorial - many resources already exist out there that do that. One such is by Steven Levithan from StackOverflow. Check out the code here and add it to the bottom of your file. Or, alternatively, create a new file, add it to that, and import it intoapp.jsboth work! -
The date formatter takes in a new Date object and you pass in how you would like it outputted. i.e. If you would Thursday March 30th, 2017 you would pass in
dddd, mmmm, dS, yyyyactivity_date = "Date: " + dateFormat(new Date(activity.start_date_local).toString(), "dddd, mmmm dS, yyyy") + ". ";Note: You can see above that I appended a period at the end of the string. Alexa pauses at punctuation so we want to make sure at the end of every data entry, she takes a "breath"
-
Okay perfect! Part one down. Next up, distance! So distance is in meters to convert that to miles we are going to use one of the packages that we installed at the very beginning of the project! Remember the
convert-unitspackage we installed, well it has some pretty awesome built in functions to help us out.activity_distance = "Distance: " truncate(convert(activity.distance).from("m").to("mi"), 3) + " miles. ";Note:
convert-unitsleaves in a fair amount of decimal places. Thetruncatefunction you see above leaves it at 3 digits. If you are an active cyclist, this may cause some problems once you pass the 100 mile marker. We will revisit it later! Here's the simple code for it below!function truncate (num, places) { return Math.trunc(num * Math.pow(10, places)) / Math.pow(10, places); } -
Let's move on to elapsed time. If we do it like we did above with distance and use the
from().to()method, that would get us almost there. Think about it more, if we have 1000 seconds, convert that from seconds to minutes, it'll say "16.4 minutes" which is not what we are looking for. We are looking for the "16 minutes and 40 seconds" type of speech. Well, thank goodness for date formatters in Javascript! Another handy-dandy function here --
Pass the time in as milliseconds and it outputs a human understandable time.
function timeToHuman (milliseconds) {
  var elapsed = "";
  milliseconds = new Date(milliseconds);
  var days = milliseconds.getUTCDate()-1;
  var hours = milliseconds.getUTCHours();
  var minutes = milliseconds.getUTCMinutes();
  var seconds = milliseconds.getUTCSeconds();
  if(days > 0) {
    elapsed += milliseconds.getUTCDate()-1 + " days, ";
  }

  if(hours > 0) {
    elapsed += milliseconds.getUTCHours() + " hours, ";
  }

  if(minutes > 0) {
    elapsed += milliseconds.getUTCMinutes() + " minutes, ";
  }
  elapsed += milliseconds.getUTCSeconds() + " seconds";
  return elapsed;
}
-
-
If you inspect the code above, you can see it is checking for days, hours, minutes, and seconds, and adding it to a string to output it nicely. Thanks function!
Now all we need to do is convert the seconds we have to milliseconds and we will be good to go.
activity_elapsed_time = "Time: " + timeToHuman(convert(activity.elapsed_time).from('s').to('ms')) + ". ";
-
Alright, last math conversion....pace! This one actually has some math in it. So what we get back from Strava is meters per second. Cool, however, we want to output it in a more well known format of pace - "8 minutes and 8 seconds per mile" so you know what your pace was. How do we do that?
-
To convert from meters per second to seconds per mile the formula goes as follows.
1 meters per second = 1609.344 seconds per mile
-
Cool! Seconds per mile we can work with. With seconds per mile, we can then again use that
timetoHumanfunction to convert that to a human understandable format! Below is it in all it's glory!
activity_avg_speed = "Average pace: " + timeToHuman(convert(truncate((1609.344 / activity.average_speed), 3)).from('s').to('ms')) + " per mile."; -
-
Lastly, the ones we didn't have to convert.
activity_name = "Name: " + activity_name + ". "; activity_type = "Type: " + activity_type+ ". "; activity_avg_hr = "Heartrate: " + activity_avg_hr + " beats per minute. "; -
Now at this point I would say "Oh look, we are almost done!" but that would be a sad sad lie. You may have thought to yourself along the way "Wait Kevin, I don't use a heart rate strap or have a way to measure that, what happens if that data is not there?" Well that is a good question! What would happen? It would say something really sad like "Heartrate: null beats per minute". We don't want that.
So what does that mean we need to do? We need to restructure a little bit!
-
To restructure our code, we are going to do two things.
- Add in a variable to handle what we want to output
- Add checks in to determine if values exist or not.
-
Right after we did
var activity = activities[0];I want you to addvar output = "Name: " + activity.name + ". ";. Output is going to be our variable that holds all of our data for Alexa to say. Now we are going to iterate over all the data we have, check if it exists, and then add it to the string.Note: Some things will always exist (or so I understand). These include Name, Date, Type. Maybe Elapsed Time, but we will check anyways.
-
Now the code below will have changed a little bit from above. If you take a look at it, what I've done is removed the variable instantiations and tried to keep them in sweet, short, one-liners. Take a look, read over it and I'm sure you will understand it.
//Get most recent activity var activity = activities[0]; // Activity name output = "Name: " + activity.name+ "."; //Last activity date output += " Date: " + dateFormat(new Date(activity.start_date_local).toString(), "dddd, mmmm, dS, yyyy")+ ". "; // Activity Type (Run, Bike, Swim, Hike, etc.) if(activity.type) output += " Type: " + activity.type + "."; // Activity Average HR if(activity.average_heartrate) output += " Average Heartrate: " + activity.average_heartrate + " beats per minute. "; // Activity Pace - convert meters per second to pace if(activity.average_speed) output += "Average pace: " + timeToHuman(convert(truncate((1609.344 / activity.average_speed), 3)).from('s').to('ms')) + " per mile. "; // Activity Distance - convert meters to miles if(activity.distance) output += " Distance: " + truncate(convert(activity.distance).from("m").to("mi"), 2) + " miles."; // Activity Time - convert seconds to time if(activity.elapsed_time) output += " Total time: " + timeToHuman(convert(activity.elapsed_time).from("s").to("ms")) + "."; -
We are so close to being done! We have output string of what Alexa is going to say, now all we need to do is return it:
response.say(output); return response.send(); -
If you have tried this out with Alexa at this point, you will get it failing. Let me tell you why - with the
alexa-sdkwe have and with creating Alexa apps, sending requests is something we need to think about. Why? Because they take time. Alexa wants a quick response and doesn't like waiting. That means we have to tell Alexa "Hey, I have a request I want to say and I don't want you to say anything until we get a response back." That way, Alexa responds with what we want! -
To do that with
alexa-sdkwhat we have to do isreturn false;outside of out Strava API call. This sends a message through thealexa-sdkto Alexa to say "wait" and will wait for thereturn response.send();function before saying anything. So that means our whole intent should look like this.alexaApp.intent("GetLastestActivity", function(request, response) { strava.athlete.listActivities({ page: 1, per_page: 1 }, function(err, activities) { if (err) { response.say("A problem with the request has occured. We apologize for the problem. Please try again later.") } if (activities.length === 0) { var output = "I'm sorry, I was unable to find any activities for this athlete. Today's a good day to create one! Get out there and record your first activity!"; response.say(output); } else { var activity = activities[0]; //Get most recent activity var activity = activities[0]; // Activity name var output = "Name: " + activity.name+ "."; //Last activity date output += " Date: " + dateFormat(new Date(activity.start_date_local).toString(), "dddd, mmmm, dS, yyyy")+ ". "; if(activity.type) output += " Type: " + activity.type + "."; if(activity.average_heartrate) output += " Average Heartrate: " + activity.average_heartrate + " beats per minute."; if(activity.average_speed) output += " Average pace: " + timeToHuman(convert(truncate((1609.344 / activity.average_speed), 3)).from('s').to('ms')) + " per mile."; // Activity Distance (in meters) if(activity.distance) output += " Distance: " + truncate(convert(activity.distance).from("m").to("mi"), 2) + " miles."; // Activity Time (elapsed, in seconds) if(activity.elapsed_time) output += " Total time: " + timeToHuman(convert(activity.elapsed_time).from("s").to("ms")) + "."; response.say(output); return response.send(); } }); return false; }); -
Yay! Look as us go! It looks like we are good to go, let's go ahead and test it out in our simulator! Restart your terminal instance of
node index.jswith a quick Ctrl/Cmd-C. -
Head back over to the Developer Amazon site and go to the "Test" tab on the left hand side. Scroll on down to "Service Simulator" and we are going to type in a sample phrase. "Latest Activity." When you hit "Ask Strava" hopefully you should get a successful Service Response! Go ahead and click the "Listen" button to actually hear Alexa!

- Congratulations! You're finished! 🎉 🎉 Double check your code to make sure it matches mine and you've got it rolling!
We finally made it to the end of the first tutorial! It took a while, we may have run into some issues, but we figured it out and have out first version ready to go!
Here are some things that we missed and will be covering later:
- Voice Design Best Practices and Requirements: Amazon has required intents we did not touch such as the AMAZON.HelpIntent and AMAZON.StopIntent. These help direct the user in both those instances - if they need help or they want to exit
- We only have on path! What about that diagram from above, motivational text? This tutorial was getting pretty lengthy, now that we have the setup done, we can iterate faster next time!
Be on the lookout for the next step soon! In the mean time, feel free to raise an issue, ask question to me on Twitter, or drop me an email at kevin.guebert@gmail.com. Until then!