Smart Parking Lot IoT Simulation created using PubNub and Soracom. For more details on how to create this demo, check out this tutorial.
Sign up for PubNub click here:

To Build this, You Need
- Raspberry Pi (Any Version)
- Breadboard
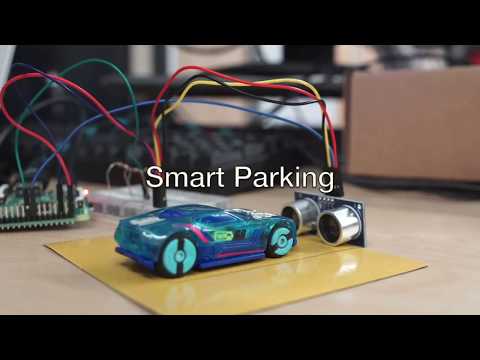
- HC-SR04 Ultrasonic Sensor
- 1 Female-female + 6 male-female jumper wires
- 1 1k Ω resistor and 1 2k Ω resistor
- MicroSD card + MicroSD to SD Adapter
- Huawei USB Stick Modem
- Soracom Air Sim Card
Raspberry Pi Setup
- Install Raspbian OS and flash disk image using Etcher onto a microSD card.
- Insert microSD card into Raspberry Pi.
- Plug 3 of your male-female jumper wires into the HC-SR04 ultrasonic sensor in the VCC, Echo, and GND slots. Plug one of your female-female jumper wires into the Trig slot of the sensor.
- Plug the VCC wire into the positive rail of our breadboard and the GND wire into the negative rail.
- Plug GPIO 5V on the Raspberry Pi to the positive rail of our breadboard and GPIO GND to the negative rail.
- Plug the Trig wire into GPIO 23.
- Plug the Echo wire into a blank rail on the breadboard.
- Link another blank rail using a 1k Ω resistor. (The reason, we need resistors is so we can lower the voltage output to ensure that our Raspberry Pi is not damaged by the sensor configuration).
- Then link a blank rail using a 2k Ω resistor to the negative rail of our breadboard leaving a space. If you do not have a 2k Ω resistor, you could create a series of 2 1k Ω resistors.
- In the space you have left, you will use a male-female jumper wire to link to GPIO 24. Follow these instructions, if you get lost in configuring the sensor.
PubNub Setup
- create your app in the PubNub Admin Console (It's free). After creating the app in the console, you will see the publish and subscribe keys, which we will need later.
Soracom Setup
- Head on over to the Soracom Admin Console. Here you will click Register SIM and input the ICCID and PUK digits, which you can find on the back of your Soracom Air Sim Card.
- After registering our SIM card, you will remove the SIM chip. Then insert it into Huawei USB Stick Modem. Make sure that you have slid the SIM card all the way in, the right way facing up.
- In order to have your Raspberry Pi running on cellular data, you will simply plug the Huawei USB Stick Modem into the USB port of the Raspberry Pi. A solid blue light (not blinking) shows that the modem is successfully picking up 3g data. If it is blinking it means it is still attempting to connect.
- Install the Network Manager onto the Raspberry Pi. In your Raspberry Pi's terminal type the following:
sudo apt-get update && sudo apt-get install network-manager
- Then to connect your USB Stick Modem to your Soracom Account you must type the following command from our Raspberry Pi terminal. Substitute <ENTER_USERNAME> and <ENTER_PASSWORD> with your respective account credentials.
sudo nmcli con add type gsm ifname "*" con-name soracom apn soracom.io user <ENTER_USERNAME> password <ENTER_PASSWORD>
- To make this configuration go into effect, we must reboot our Raspberry Pi.
sudo reboot
- Download Soracom's ppp route metric script and ensure that the script is run every time the USB modem is plugged in or restarted.
sudo curl -o /etc/NetworkManager/dispatcher.d/90.set_ppp_route_metric https://soracom-files.s3.amazonaws.com/handson/90.set_ppp_route_metric
sudo chmod +x /etc/NetworkManager/dispatcher.d/90.set_ppp_route_metric
sudo /etc/NetworkManager/dispatcher.d/90.set_ppp_route_metric ppp0 up
- To set up MQTT connection in Soracom, add a new group called Beam-Soracom. Under basic settings select Soracom Beam and then add a MQTT entry point. Choose destination type as PubNub and then add your PubNub credentials, Publish and Subscribe Key.
- Install Mosquitto-clients package onto Raspberry Pi with following terminal command.
sudo apt-get update && sudo apt-get install mosquitto-clients
- Ensure that you have activated your Soracom Air Sim Card! Code
- Copy and paste the contents of sensor_publish.py into a new file saved in the Raspberry Pi.
- Import Android App source files onto Android Studio and then run app.
- In order to activate sensor go into directory with sensor_publish.py in Raspberry Pi terminal. Execute this command.
python sensor_publish.py